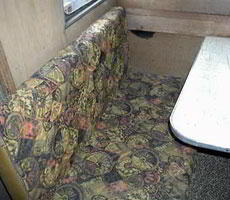
 Our motorhomes, campers, and trailers get old. Frankly everything does. That may be because you have owned your RV for years or maybe you just picked up a new weekend project. Upholstery tends to show its age more so than the rest. It either goes out of style or starts to wear from use. So unless you spent your kids inheritance on a fancy RV dinette upgrade, it might be time to refurbish your RV dinette cushions. For the guys, messing with the upholstery isn’t usually the top of the list of concerns. But, you can bet that at some point it will get done if your better half gets involved. Being that most people aren’t talented with a sewing machine nor professional upholsterers, we were hoping to help a reader named Jamie who was looking for simple way to spruce up her dated RV dinette cushions.
To get RV dinette cushions you are looking at spending $150 for pre-made replacements and perhaps double that for custom cushions. You haven’t made it this far because you don’t know how to save a buck doing it yourself right? This RV dinette cushions mod from LittleVintageTrailer.com is just the kind of DIY low cost project we were seeking. The die hard DIY folks get use an industrial stapler and cut a piece of wood and everyone else gets the satisfaction of making their old RV dinette cushions look brand new for a fraction of the price.
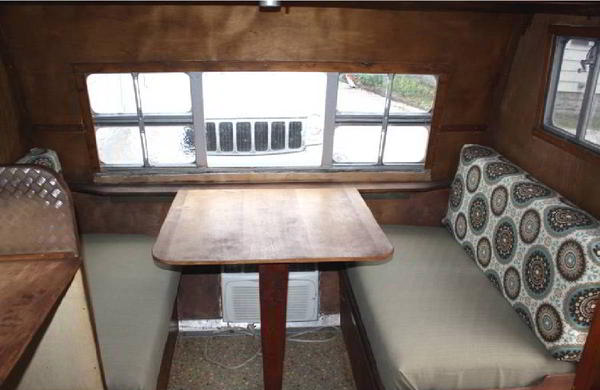
RV Dinette Cushions Examples

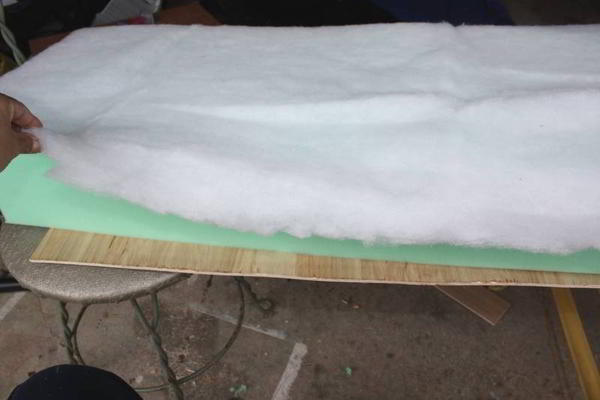

This design couldn’t be any simpler. There is no sewing or zippers. Just a piece of plywood, some foam, fabric of your choice, and some staples.
RV Dinette Cushions Supplies:
- 1/4” Plywood Sheet for Rigid Backing (To Staple Fabric)
- 5” Foam (Resuse Old Cushions or Purchase New)
- Fabric for Coverings
- Polyester Batting
[asa]B000I4D64U[/asa]
Tools Needed:
- Staple Gun and Staples
- Circular Saw
- Scissors
- Knife for Cutting the Foam
As you see the photos you cant start to see how it goes together. Cut the plywood, layout the foam padding, place the batting on top, and wrap the whole pile in fabric. Then neatly fold the edges over and throw staples on it from underneath. Finally a fabric job that nearly any RV owner can handle. Best part is, it doesn’t look half bad.
For the complete 4 easy steps to complete your new RV dinette cushions and more photos of the project please head over to LittleVintageTrailer.com. For a more robust and professional looking RV dinette cushion you should have a look at the work they did at OutLikeBandits.com.