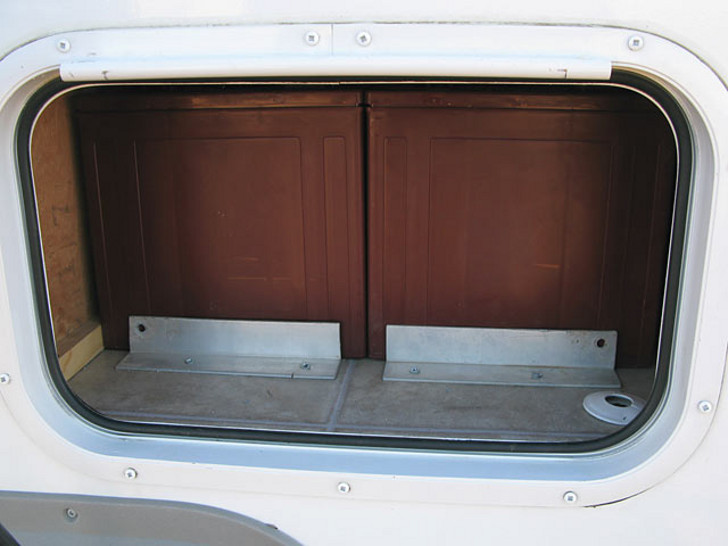
It’s a good idea to provide adequate ventilation for your RV’s lead acid batteries. When upgrading to a larger RV solar power system, we needed to put four new 6 V Trojan batteries on board, but our 27′ Arctic Fox fifth wheel battery compartment was only built for two. The solution? Turn a nearby compartment into battery storage.
Lead acid RV batteries need ventilation to prevent the build up of potentially hazardous hydrogen gas.
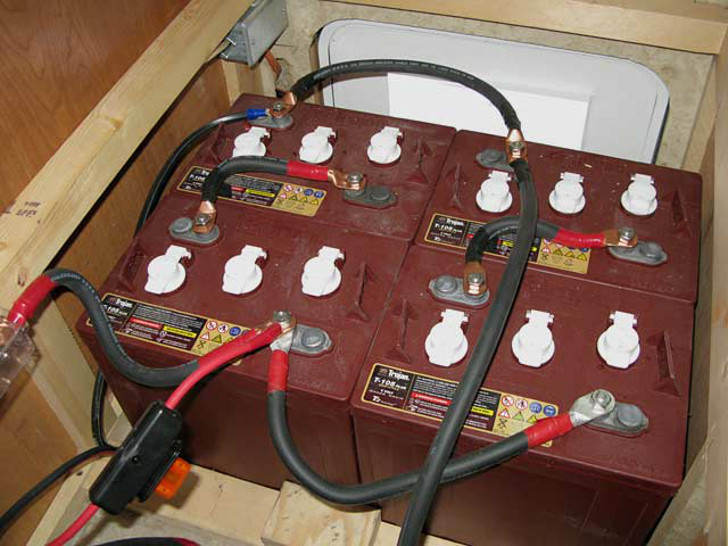
While we found enough room for our batteries, we needed a way to add ventilation to the new storage area. Here’s how we added ventilated RV cabinet doors after our solar upgrade.
Make Your Own Ventilated RV Cabinet Doors
A vented battery compartment facilitates good airflow, which keeps the batteries cool, and prevents the build-up of potentially dangerous hydrogen gas. With just some basic tools, we made this RV cabinet door upgrade while boondocking:
Things You’ll Need:
- Louvered Exterior RV Cabinet Vent
- Silicone or Dicor Sealant
- Power Drill with Small Bit
- Jig Saw, RotoZip or Dremel with Cut-off Wheel and Cutting Bit
- Screw Driver & Small Screws
- Pliers or Side Cutters
- Rubber Mallet or Hammer and Block (Optional)
- Measuring Tape or Ruler
- Pencil or Marker
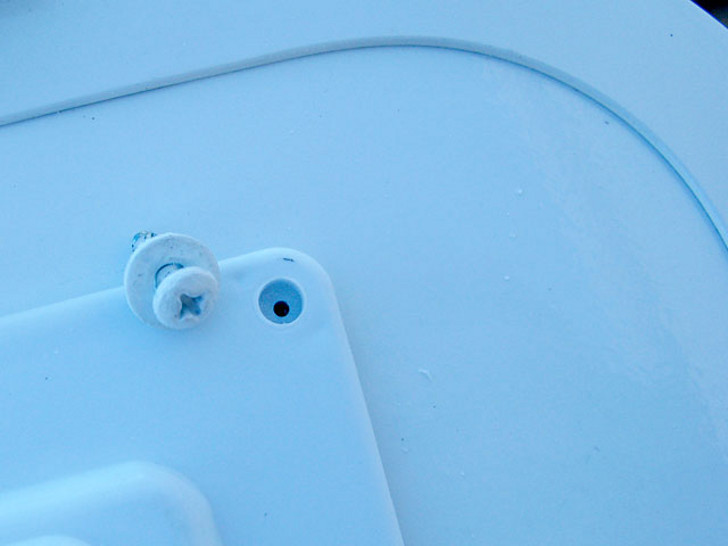
1. Remove Existing RV Cabinet Door
This could be the hardest part, depending on how your RV cabinets are constructed and the age of your rig. Use care when removing the rivet holding the retainer plug in place.
Use care when taking this rivet out.
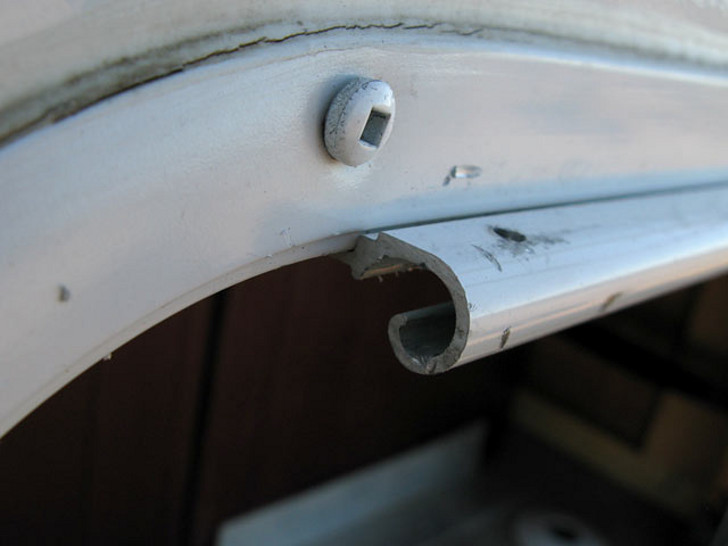
Take your side cutters or pliers and remove the rivet, then slide the door out of the hinge. You might need to use some gentle pressure to dislodge the plug that keeps the door in place. If it won’t come free, take a rubber a mallet and tap it loose. Be sure to place a block on the edge of the door to prevent any damage.
Removing the door might take some elbow grease.
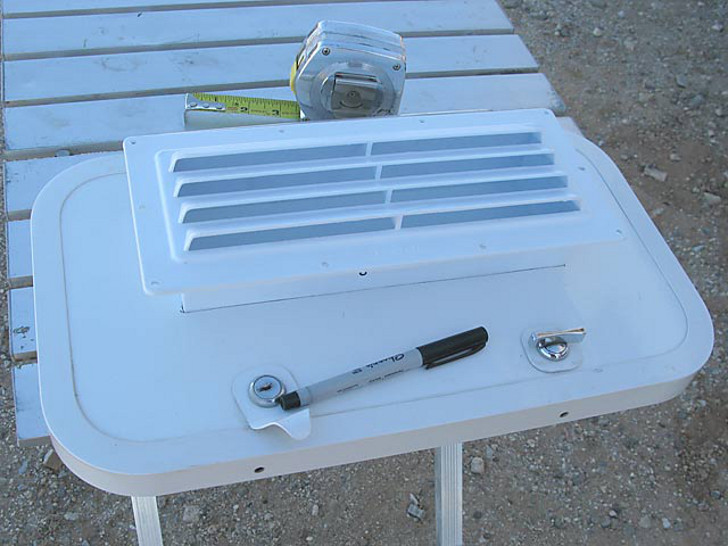
2. Mark Location of Louvered Vent
Lay the door on a flat surface. Center your exterior RV replacement vent in the desired location on top of the door, then use a pencil to trace the part that will insert into the cabinet.
Put your louver into position.
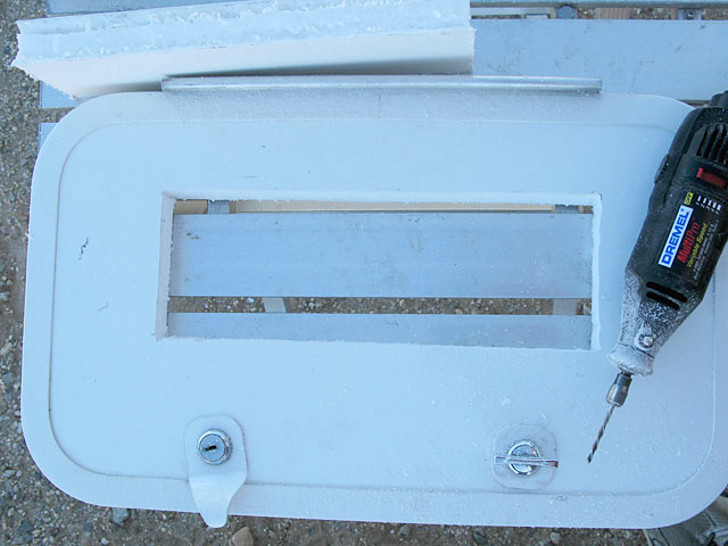
3. Cut Hole in Door
This is where it gets a little scary. Most RV cabinet doors are constructed of high density foam sandwiched between rigid vinyl or aluminum. You can use a jig saw or Dremel cut-off wheel attachment to drill pilot holes in each of the four corners, then cut straight lines through the full door.
Hold steady and cut.
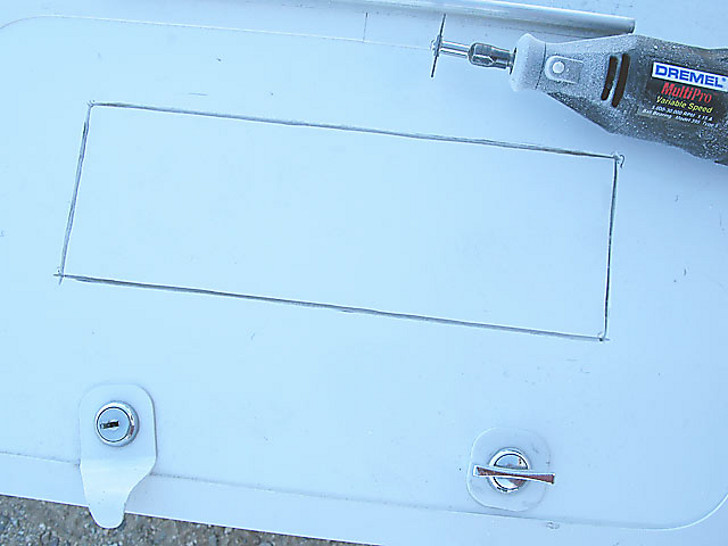
We used the cut-off wheel attachment on our Dremel to cut through one side first. This groove served as a straight guide for our next step, using the Dremel’s multi-purpose cutting bit to cut all the way through.
The Dremel was our tool of choice to cut through the door.
4. Insert & Secure Vent
Place your louvered vent in hole you’ve cut. Make sure the louvers of the vent are pointing down before sealing it in place. It must fit snugly, with its flange resting flush with the door surface. Mark spots on door at center of all holes in vent. Remove the vent then drill small pilot holes for screws you will use to secure the vent in place.
Drill pilot holes for the screws.
Next, add a thin bead of Dicor sealant under vent flange, and a small drop in each hole you drilled. Insert the vent back in the hole and secure it to the door with the screws. Do not over-tighten. You may also want to add small washers to prevent the screws from cracking the plastic vent, and paint them white with exterior enamel paint if you want them to match your rig.
Seal the vent with Dicor.

Add more Dicor or caulk around the crack on the inside to seal the vent.
5. Re-attach Cabinet Door
Slide the door back into the hinge profile, and secure it in place by inserting a small screw into the hole where you removed the rivet.
A job well done.
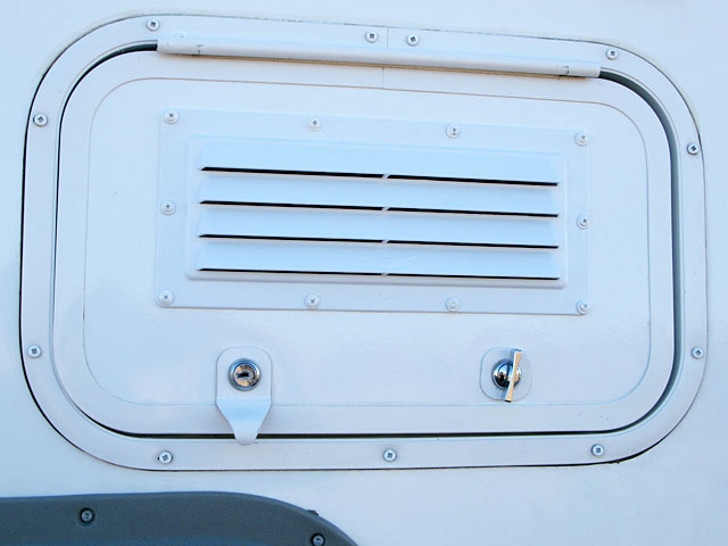
Now you can rest easy knowing that your RV batteries aren’t emitting noxious fumes inside the rig. Good job!