When you become an RVer, you’ll be surprised to learn that sometimes it’s the simple, inexpensive RV fixes that go a long way toward peace of mind. This 7-Pin trailer cord plug repair job is a great example.
Ever hitched up and noticed a brake controller warning like this?
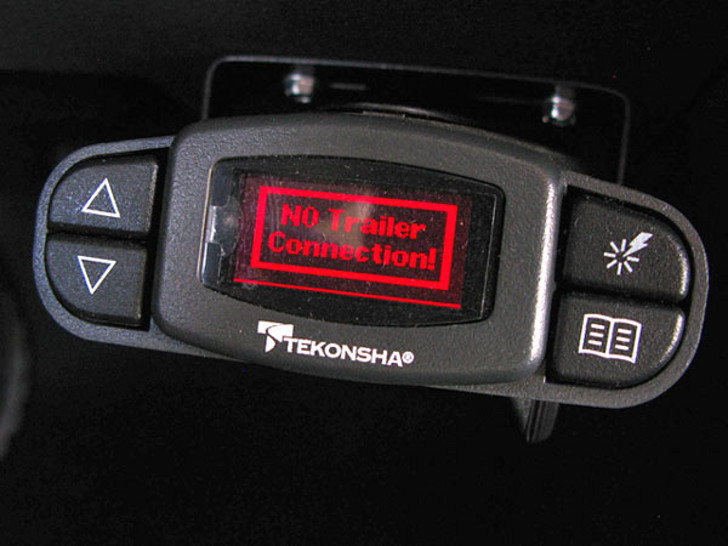
Whether you tow a fifth wheel or trailer, your brake controller is your lifeline for stopping safely. If you encounter issues with it, don’t be so quick to blame the controller.
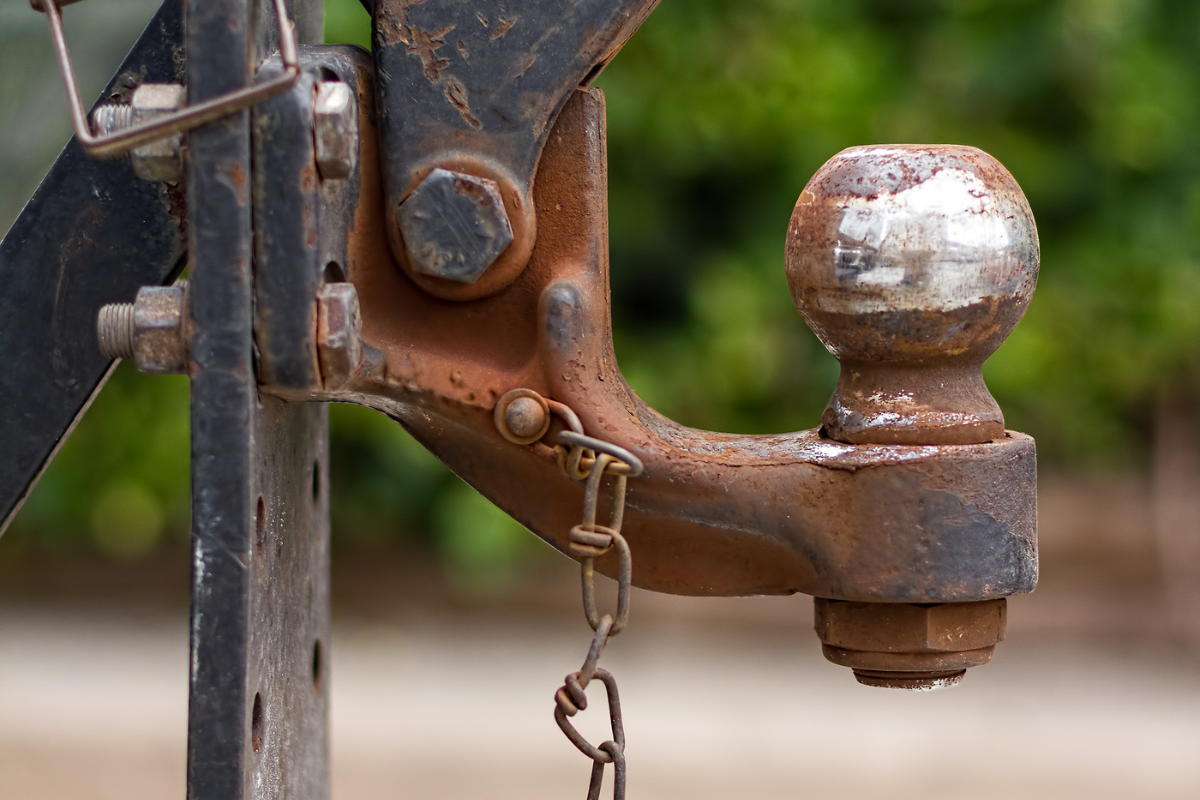
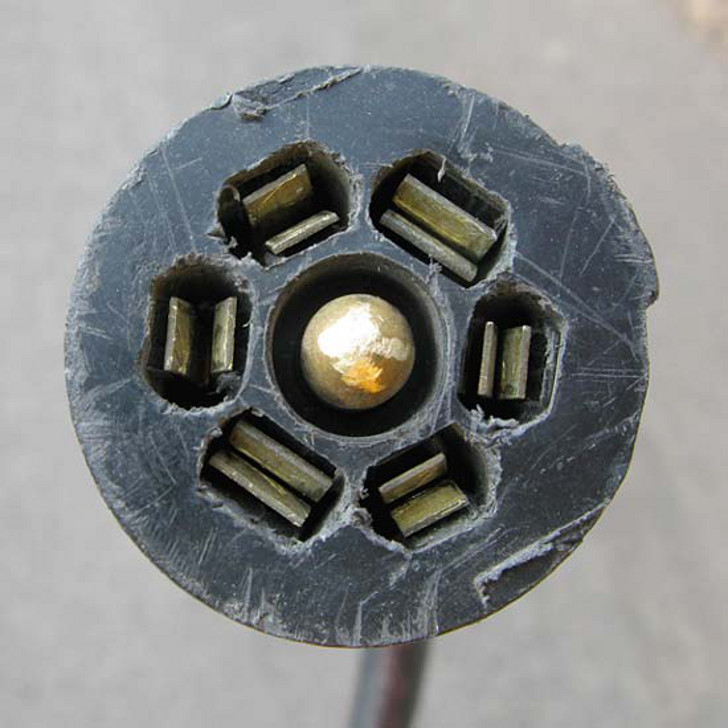
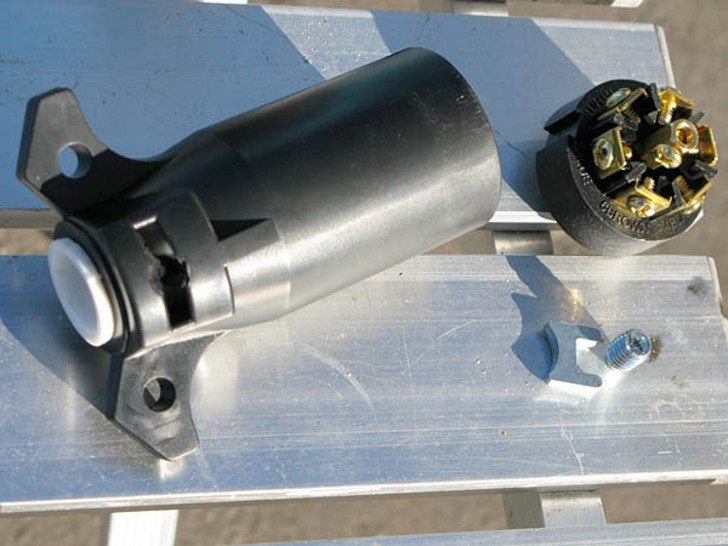
Instead, begin by checking the connection at the trailer cord plug and outlet. If the connectors in your 7-pin plug look bent and damaged like this, they’re probably not making a tight connection when plugged into the socket.
Loose 7-pin plug connections could be the problem.
If you’re camping in the outback, don’t worry. The short-term solution is to pry the connectors inside the plug together so they seat more firmly onto the terminals inside the socket.
When you get back to civilization, head to your nearest RV supply store or shop on Amazon to find a new plug.
Don’t worry about the plug installation job – it’s easy! Here are seven simple steps to an easy 7-pin trailer cord plug repair.
Repair A 7-pin Trailer Cord Plug This Way
- Step 1: Cut off the old plug
- Step 2: Replace with a new plug
It’s really that easy! Of course you’ll want more details for a successful fix, so read on.
First, buy a high quality 7-pin trailer plug.
We like the Curt 7 Pole Connector, because Curt Manufacturing makes great towing products. This plug uses flat blade pole terminal connectors instead of the common squeeze type that clearly have a tendency to bend over time.
Tools you’ll need to get started:
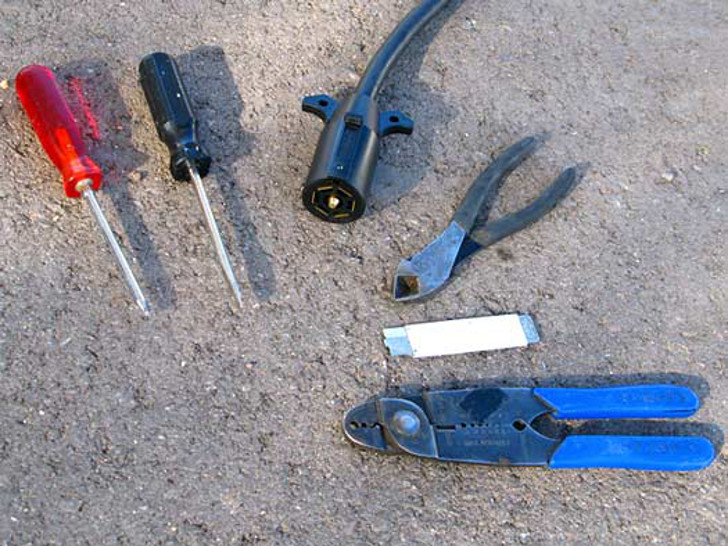
- Wire Cutters
- Box Cutter*
- Wire Stripper*
- Flat Head Screwdriver
- Phillips Screwdriver
*Optional. You might get away with replacing all of the above with a decent Leatherman multitool.
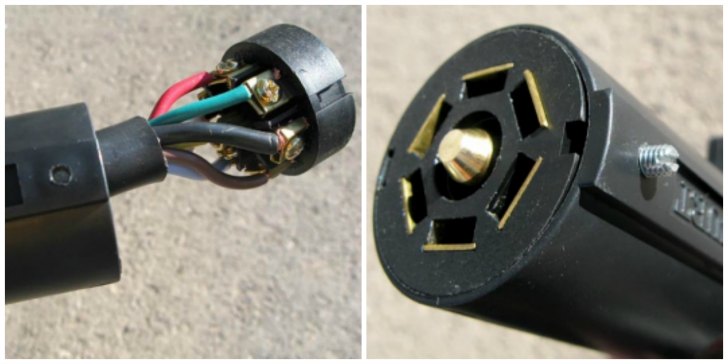
Step 1. Cut off the old plug and expose wires.
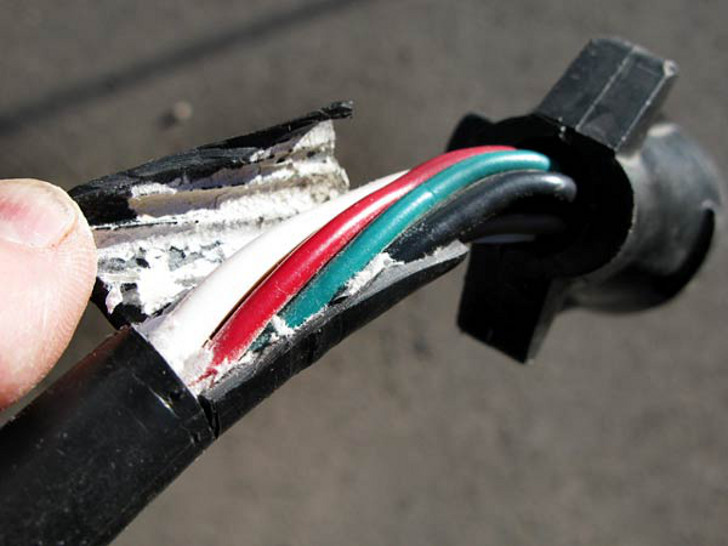
Take your wire cutters and snip through all wires in the cord close to the plug. Now grab the box cutter and use it to gently slice through the outer rubber shielding.
Use care not to damage the inner wires. Make one slice lengthwise, and another around the cord a couple inches from the exposed end.
Just don’t go all the way through so you can tear off the rubber without cutting into any of the 7 wires inside.
You can cut the plug off before or after you expose the wires. It’s a smart idea to identify the colors first to make sure they are all different.
Step 2. Remove shielding from all wires.

Use your wire strippers to remove the shielding from each wire. The length of copper to expose may differ depending upon your replacement plug.
In our case, we trimmed back approximately 1″ off each wire, then removed enough rubber shielding to allow us to easily manipulate each colored wire into the new plug.
Step 3. Insert the cord into the plug and attach center wire.
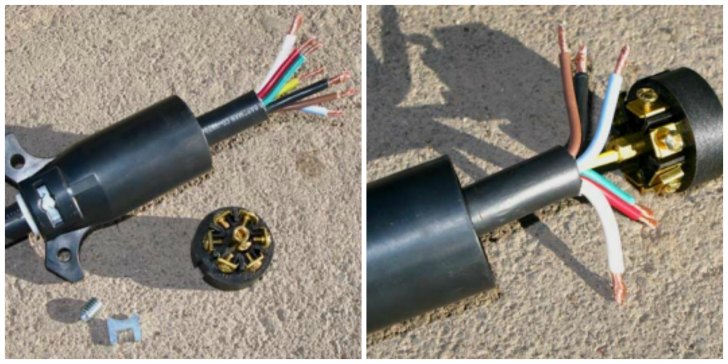
Carefully slide the whole cord through the narrow end of the plug housing so the colored wires come out the wide end.
Attach the center wire to the middle terminal connector on the plug assembly. On our cord, the center wire was yellow. Yours may be different.
WARNING! Refer to your trailer service manual and plug installation instructions to avoid wiring problems that may damage your trailer, brake controller or vehicle!
Step 4. Connect cord wires to plug terminals.
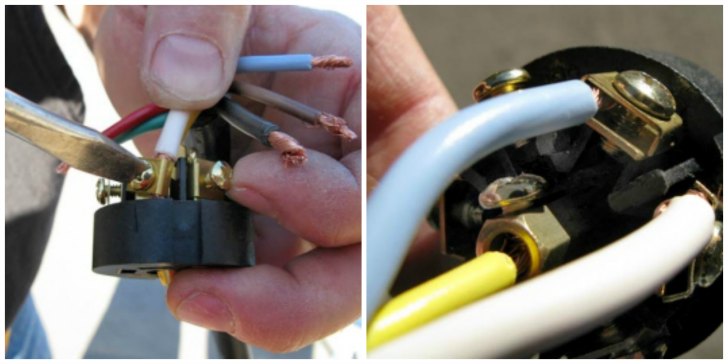
Another reason we like the Curt 7-pin plug is that it has the color for each wire molded into the plastic under each corresponding terminal.
Most good plugs do but if not, be careful. Next, attach each of the seven colored wires. Make sure the connections are tight, but don’t torque the screws so much you bend the terminal clamps.
Step 5. Now seal the plug assembly.
Slide the plug housing up the cord toward the terminal assembly you just wired together.
Remember to align the slot in the cover with the groove in the plug, then tighten the set screw to attach the two parts. It will likely only fit together one way. This will ensure all wires in the cord connect to the correct terminals in the outlet.
Step 6. Secure the plug housing.
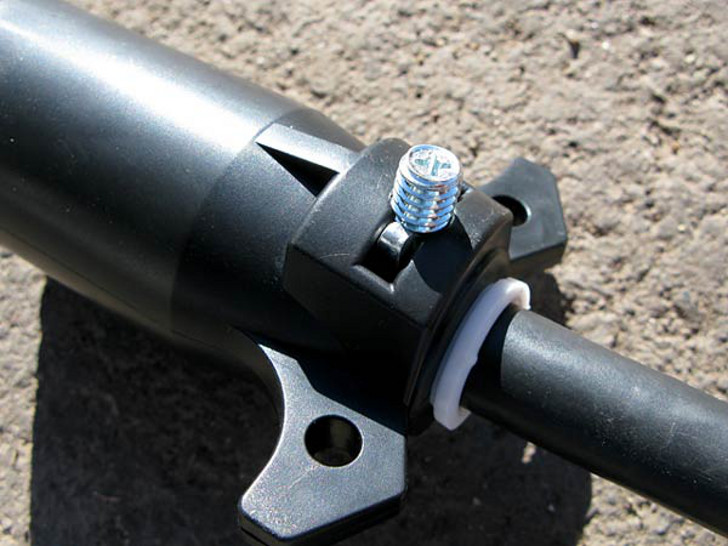
Just insert the crimp connector into the slot in the plug cover. Tighten it in place with the larger set screw.
Step 7. Test the new plug.
Take the plug and your newly re-wired cord and stick it into your 7-pin trailer outlet. Work with a partner to test all your lights, including hazards and reverse.
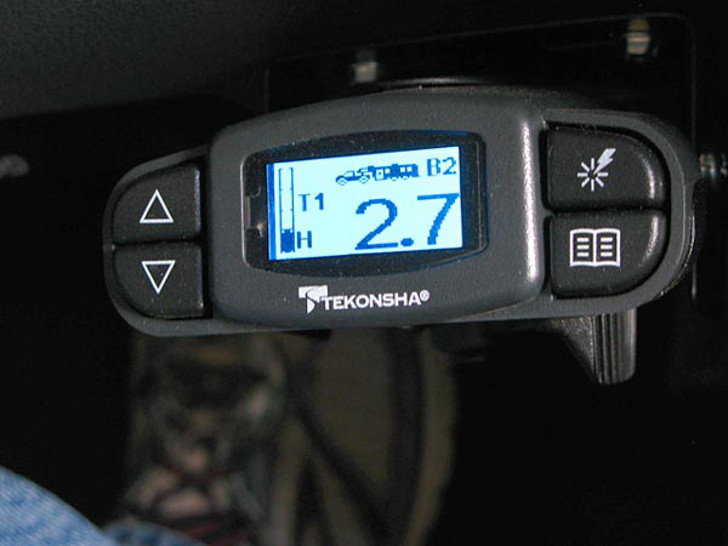
Watch the brake controller to ensure those scary warning messages don’t pop up. If your controller doesn’t have such a display function, do yourself a big favor and purchase one like the a Tekonsha P3. You’ll find brake controller models for all tucks. Your 7-pin trailer cord repair job is now complete.
Whether you have high performance hydraulic disc brakes on your trailer, or traditional electric drum brakes, your RV brake controller, 7-pin trailer cord plug and trailer cord outlet always need to be in top shape.
Regular inspections and maintenance like this can save you and your RV from a braking disaster.