
Water leaking is one of the worst things to hear or see when RVing. Unfortunately, it happens more often than any of us RVers would like. When the leak occurs due to a crack in your fresh water tank it can especially be a cause for alarm, as being able to store fresh water in your tank is crucial to most RVer’s day-to-day operations.
But don’t run to the RV repair guy or worry about needing to buy a new tank just yet. There are multiple effective ways to fix a cracked tank.
Whether it’s caused by a leaking roof, loose fittings, or a cracked water tank, leaking water is something that needs to be addressed as soon as possible before any additional damage can occur. Being able to repair the leak quickly and with materials you probably have on hand or can buy at any hardware store can be extremely helpful.
In this situation, we’ll be repairing a crack that occurred in a vulnerable spot on a fresh water tank using nylon twine and silicone.
This unique repair method is specific to a cracked outlet on a water tank. When discovering this type of crack, many people may think the only sure-fire solution is to bring the tank into an RV repair shop and have them install a new plastic welded outlet or maybe even buy a whole new tank. That can be expensive! But don’t worry—we have another way.
Although those solutions would work, we want to save you some time and money by giving you a nice and easy DIY solution that can be done in an afternoon with two basic materials: nylon thread and silicone.
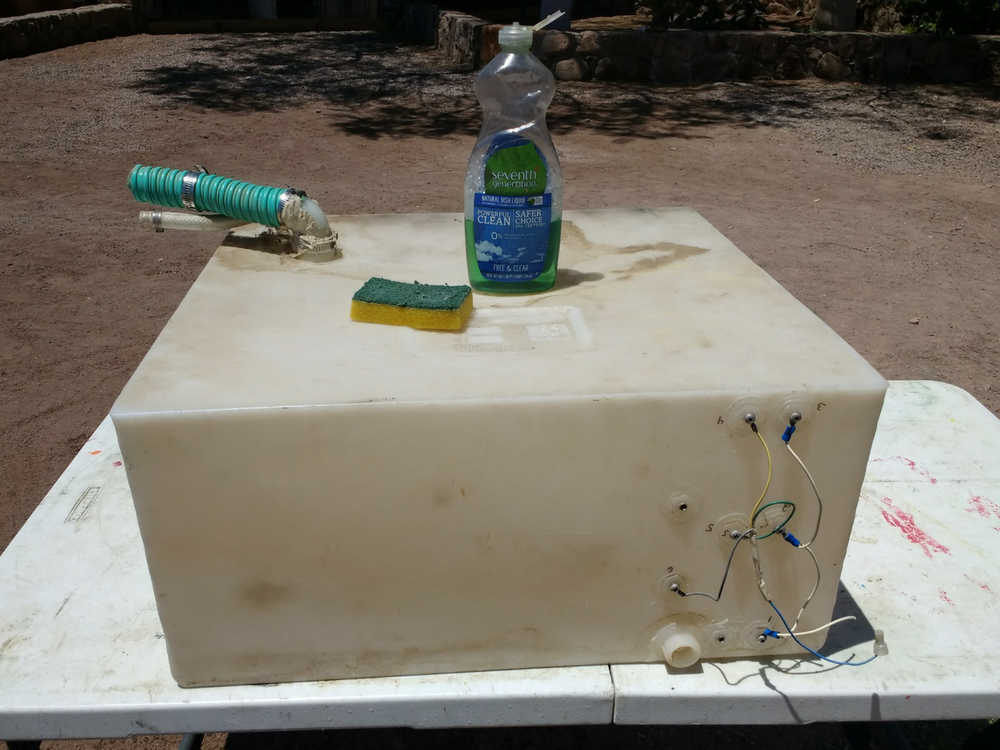
Step 1. Removing the fresh water tank
Not all RV water tanks are easily accessible, but if yours is, removing the tank to make this repair is recommended. First, be sure to drain any water left in the tank before removing it.
Next, label all electrical wires (water level sensors) and plumbing line configurations for an easier and smoother re-installation later on. Now disconnect the sensor wires and disconnect your water supply inlet and overflow tube and water outlet tubing.
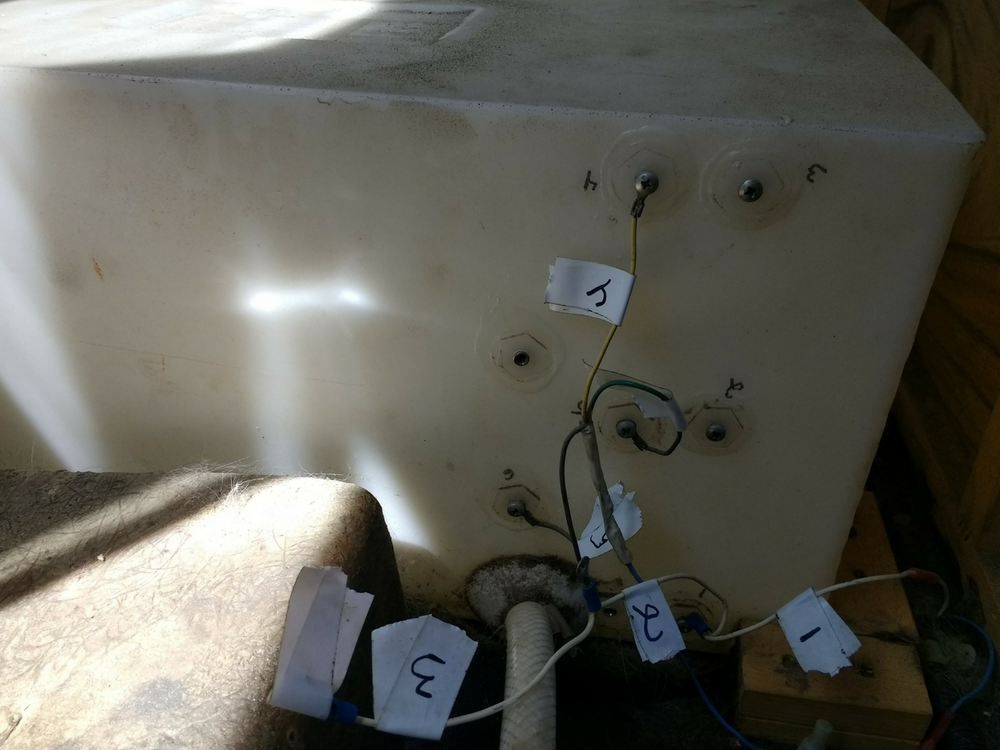
If removing the sensors from the tank is causing a problem, you can always just cut the wire and then use an electrical connector to re-connect the wire later.
With all the electrical and plumbing lines disconnected, the tank can now be removed and carried outside to be prepped for the repair.
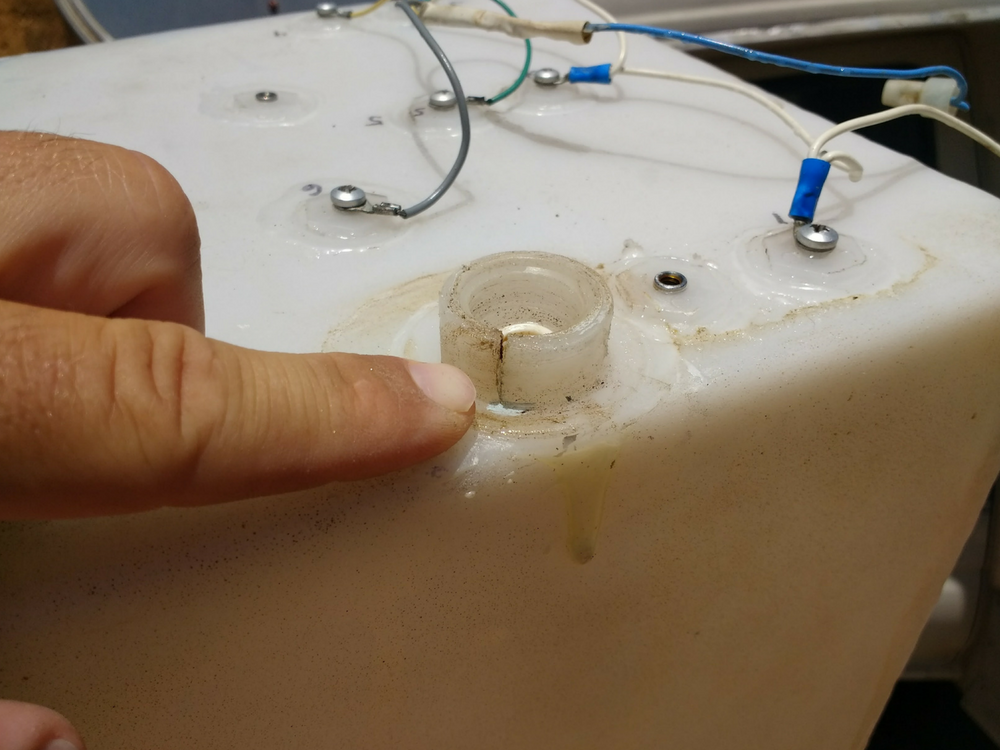
Step 2. Prepping the area of the crack
If there were any previous repairs made with tape or water weld, be sure to remove any residue with a putty knife and wire brush.
Now wipe down the area and the threads to ensure that it is clean of any grime, grit or residue. It is essential that the area is 100% clean. As with all repairs, it’s all in the prep.
This is a great time to wash and inspect your entire tank. You don’t want to fix one leak and reinstall just to discover an additional leak or problem.
Step 3. Repairing the crack
There are multiple ways to repair a crack in a water tank, the most popular being with water weld which can work just fine. However, here I’m going to show you a different method using nylon twine and some silicone. It’s a sweet and simple solution that gives you a strong and lasting fix.
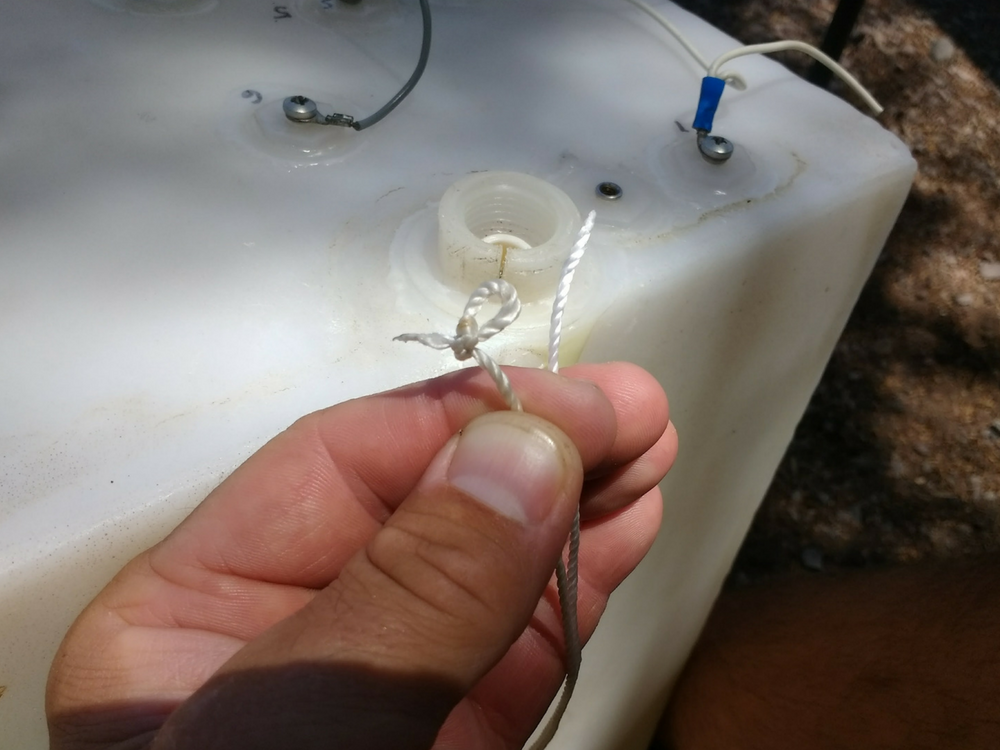
Begin by tying a knot with a loop into the end of the nylon twine and then start to wrap the twine around the plastic threads of the water tank. Be sure to keep the looped end out and free while wrapping as you’ll use that later to secure the twine.
Pay close attention to wrapping the twine tightly and neatly around the fitting, beginning at the base of the outlet and moving up toward the opening and then back down toward the base.
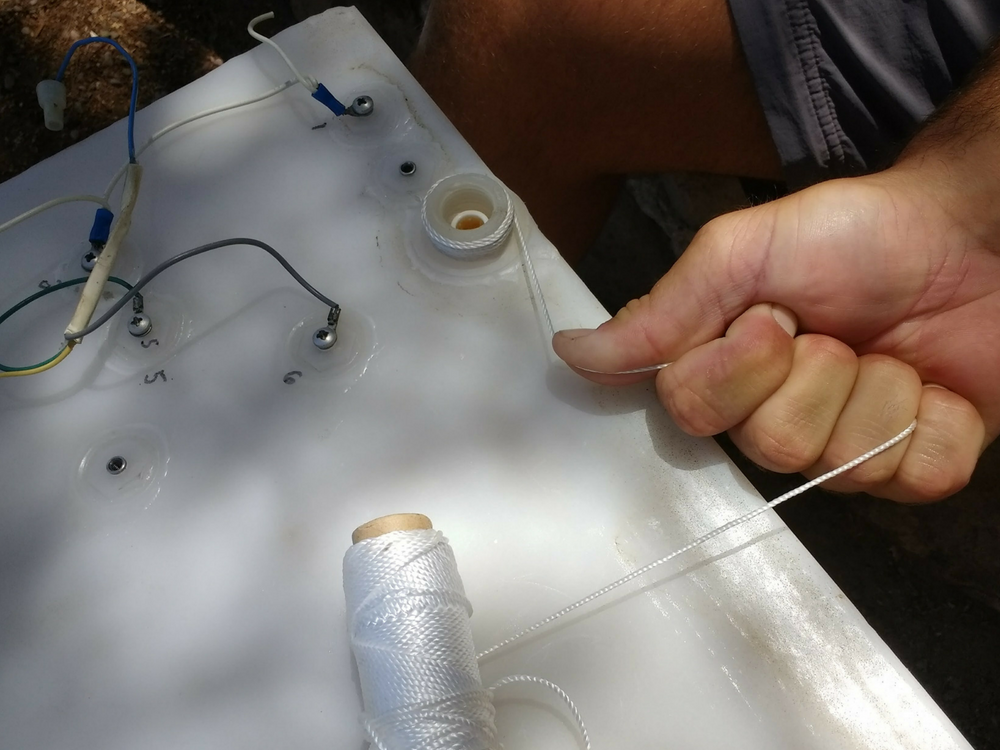
You will begin to see the crack tightening back together. The more you wrap the twine, the tighter the crack will get. Until after about three or four layers of twine, the crack should be closed and as if it were never there.
Now thread the nylon twine through the loop and tie a knot to hold it.
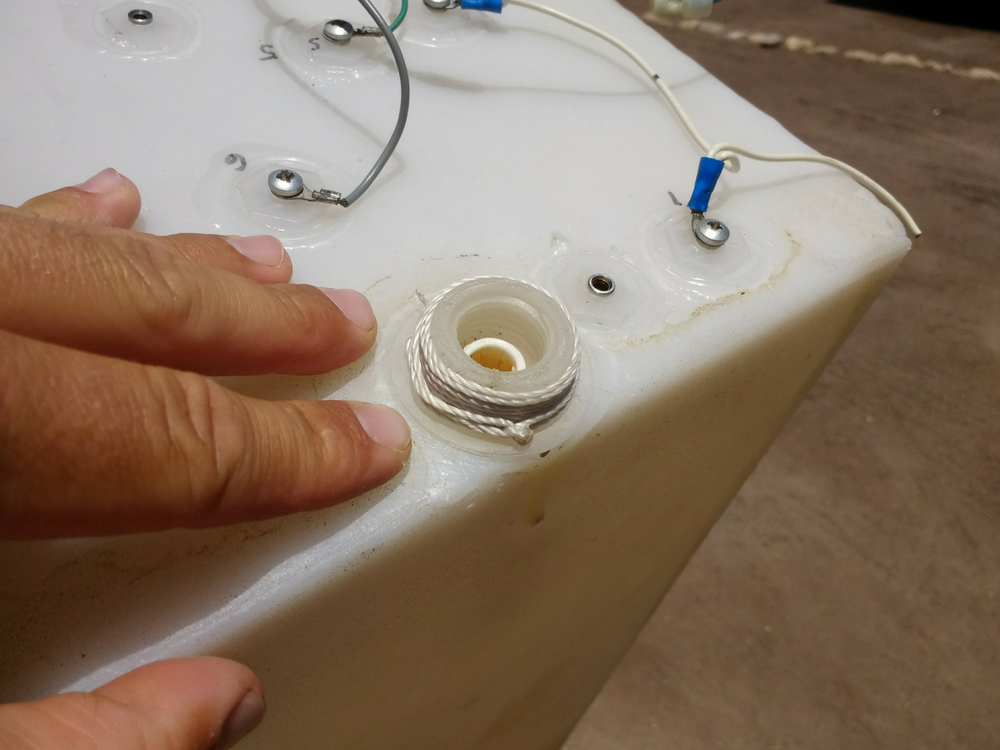
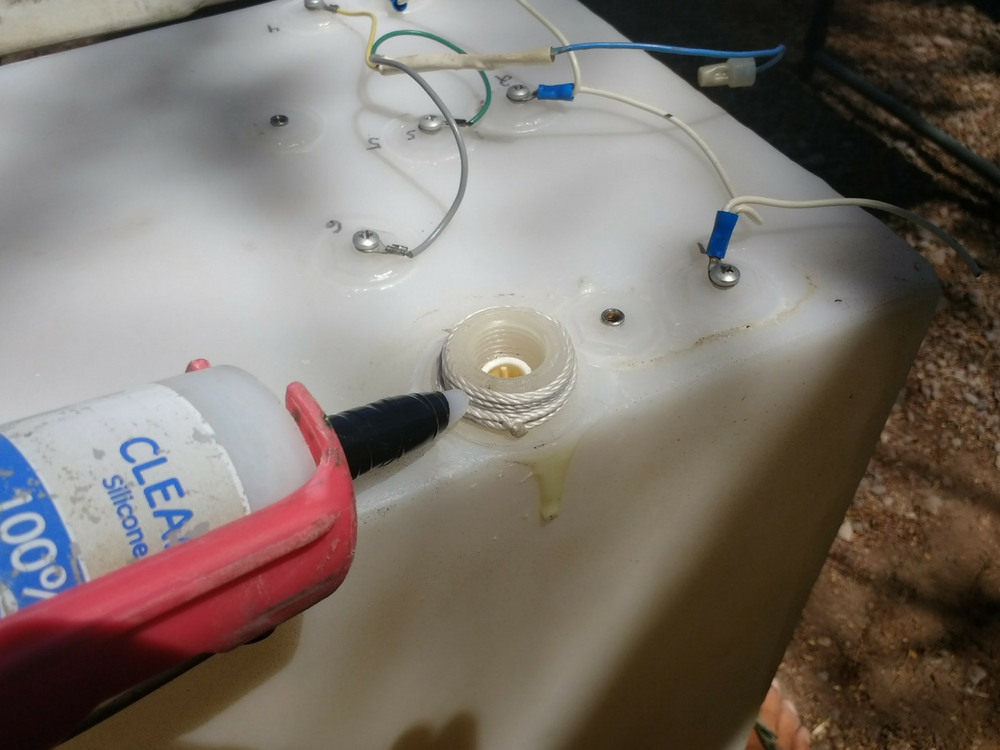
Once your twine is knotted and secured, take some silicon and smear a thin layer over all the nylon twine to permanently hold the twine so it won’t slip off or loosen.
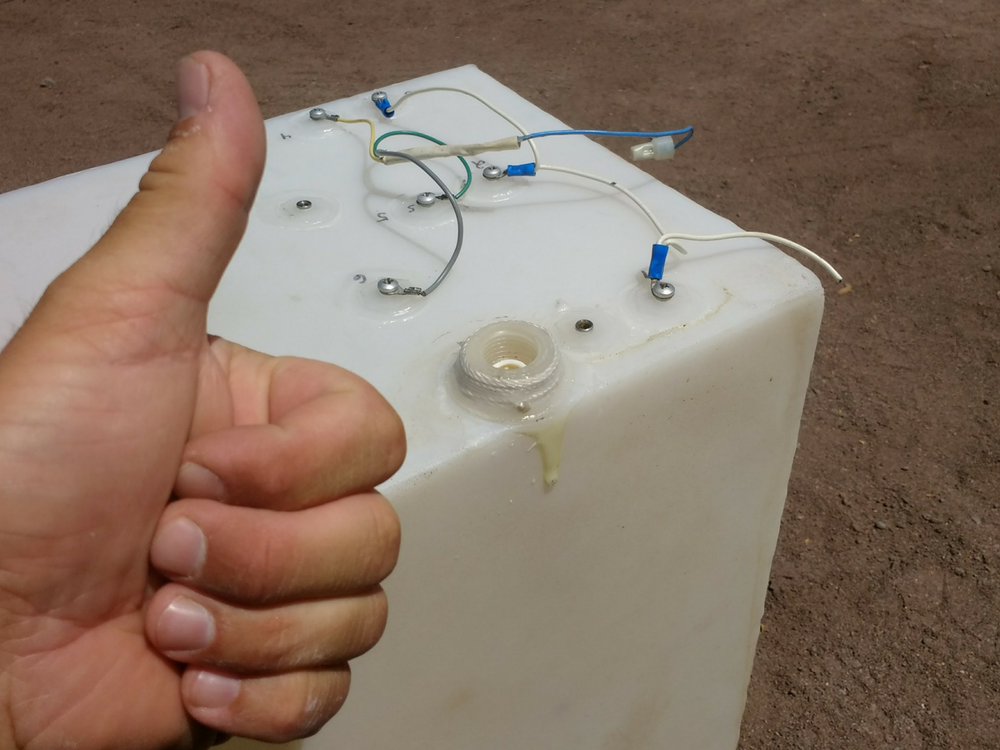
That’s it, sweet and simple. Time to re-install the plumbing, electrical connections, and tank back into the RV.
Step 4. Re-installation
With the crack repaired it is now time to put the tank back in place. Before re-installing the plumbing fitting that connects the tank to the water pump, take advantage of having the tank out and install some pipe dope and Teflon tape. I like to do a layer of pipe dope, then a layer of Teflon tape, then another layer of pipe dope. This acts as extra insurance for the crack not to leak again.
Now reconnect the fill and overflow tube back onto the tank. Next, finish up by making the electrical connections.
Step 5. Test for leaks
Partially fill the tank with water to check your repair for any leaks. I like to use a colored paper towel to wipe around the fitting as this makes any wetness easier to spot. Also be sure to keep an eye on the tank over the next couple weeks. That’s it!
This repair can save you money and time by avoiding the need to find an RV repair shop or buy a new tank. It’s a handy DIY method that works. So next time you have a crack in your tank, don’t feel like all is lost. Just remember with some elbow grease and ingenuity, you can fix almost anything.


NYLON AND SILICONE ARE NOT COMPATIBLE WITH A POLYETHYLENE FRESH WATER TANK. SIMPLY USE A HOSE CLAMP ON THE OUTLET FITTING, SEAL THE THREADS AND REINSTALL THE OUTLET FITTING. IF THE LEAK IS ELSWHERE, MARK THE LEAK, DRAIN THE TANK REMOVE IT AND FIND SOMEONE TO WELD THE POLY TANK PROPERLY AND TEST BEFORE REINSTALLING. WATER WEIGHT, STRESS, VIBRATION, BAD DESIGN OR INSTALLATION, POORLY BUILT PRODUCT, AND AGE CAUSE LEAKS. FIND OUT WHAT IS THE ROOT CAUSE AND JUST FIX IT PROPERLY. GIT ‘ER DONE RIGHT. AS AN ASIDE, SILICONE HAS NO PLACE FOR USE ON AN RV. NEVER USE IT ON ROOFING FIXTURES, EVETROUGH, BATH OR MASONRY BECAUSE IT DOES NOT ADHERE IN THE LONG TERM, RETAINS MOLD AND INTERFERES WITH PAINT.
Silicone caulking is probably the worst thing you could use. There are plenty of great adhesives out there that are better.