These pictures come from Larry Nutt Noe, one of our friends on Facebook.
We had the privilege of speaking with Larry about his project over the telephone.
Teardrop Trailer Inspiration
After looking at Little Guy trailers, Larry decided that he didn’t need all the bells and whistles of a professionally-built trailer, and wanted to try his hand at building his own teardrop camper.
He figured that if the brand name teardrop campers retailed for $10,00 to $15,000 he could build his own for half of that.
As an avid camper, Larry enjoyed the outdoors – but only with a tent and and air mattress. He wanted more.
Larry said he watched YouTube videos and visited online message boards for design inspiration.
Since he recently purchased a like-new trailer to haul his 4 wheeler, he figured that he could use it as a base for his teardrop concept.
Larry’s DIY Teardrop Design
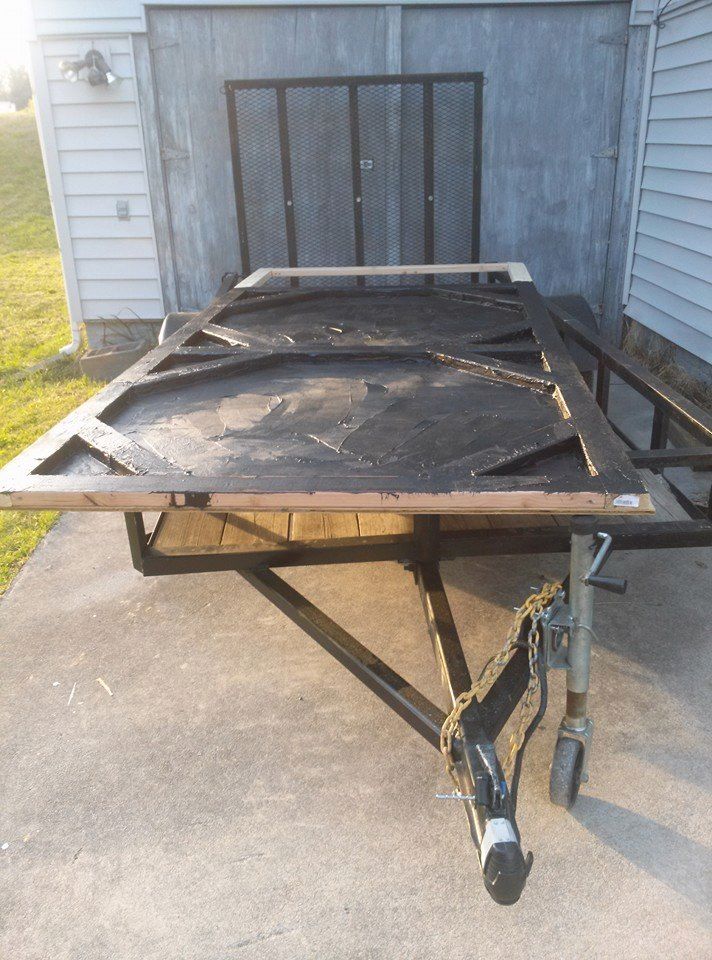
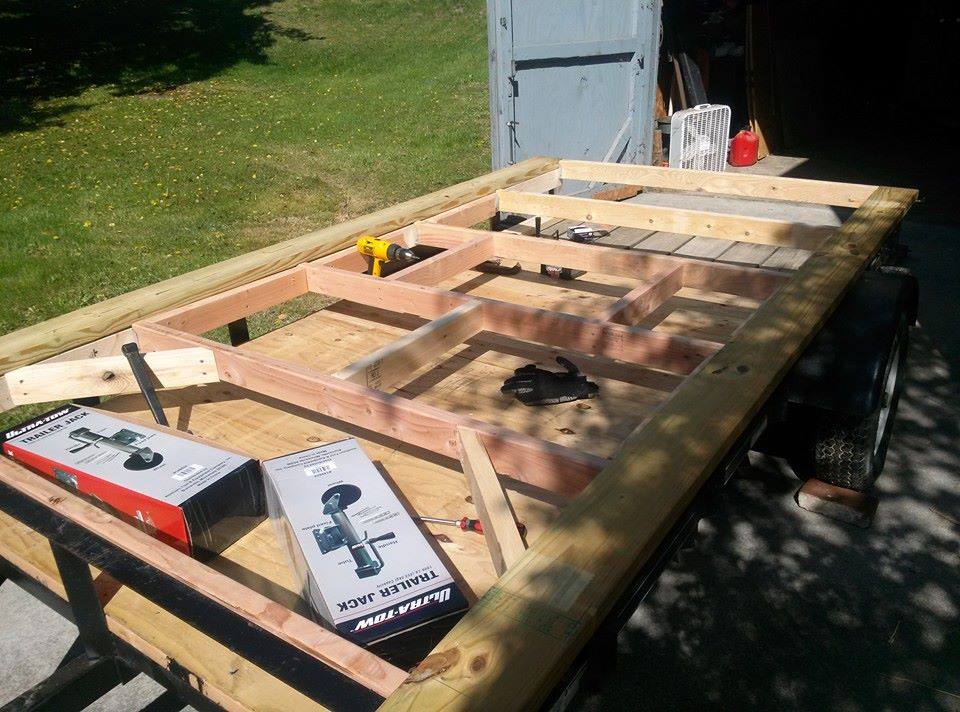
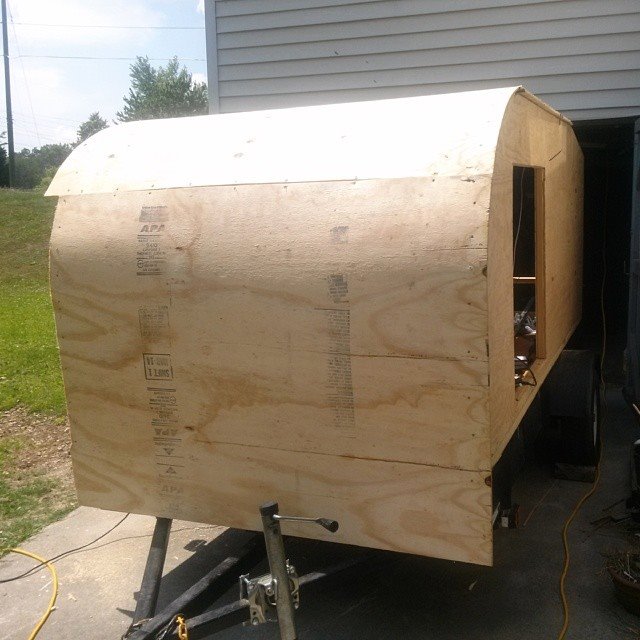
Starting with a standard 5 foot by 10 foot utility trailer, Larry set to work readying the frame for his camper.
He noticed that the Little Guy trailers had limited storage space between the frame of the trailer and the living area.
Since he wanted more storage space for his fishing rods and hunting supplies, Larry realized that he could modify the design to create a large storage space in between the trailer and camper floor.
Trailer Bed Preparation
Larry said he readied the utility trailer by welding on an A-frame assembly to make it pull straight and true without swaying. After the A-frame was fitted, he sealed up the existing trailer floor by adding a thin plywood sheet sealed with rubber roof coating.
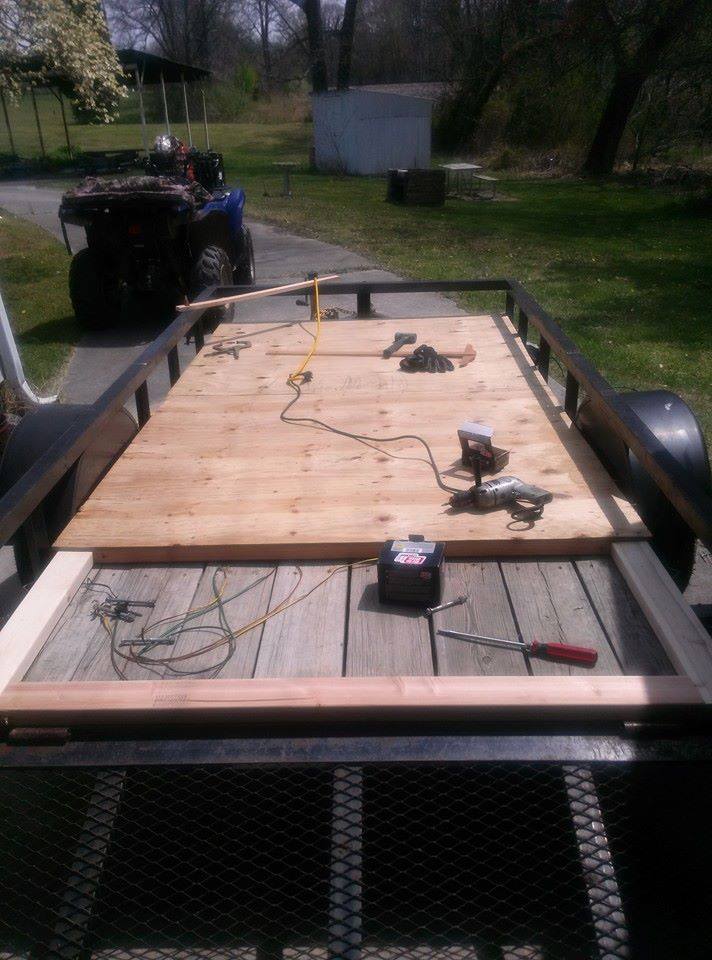
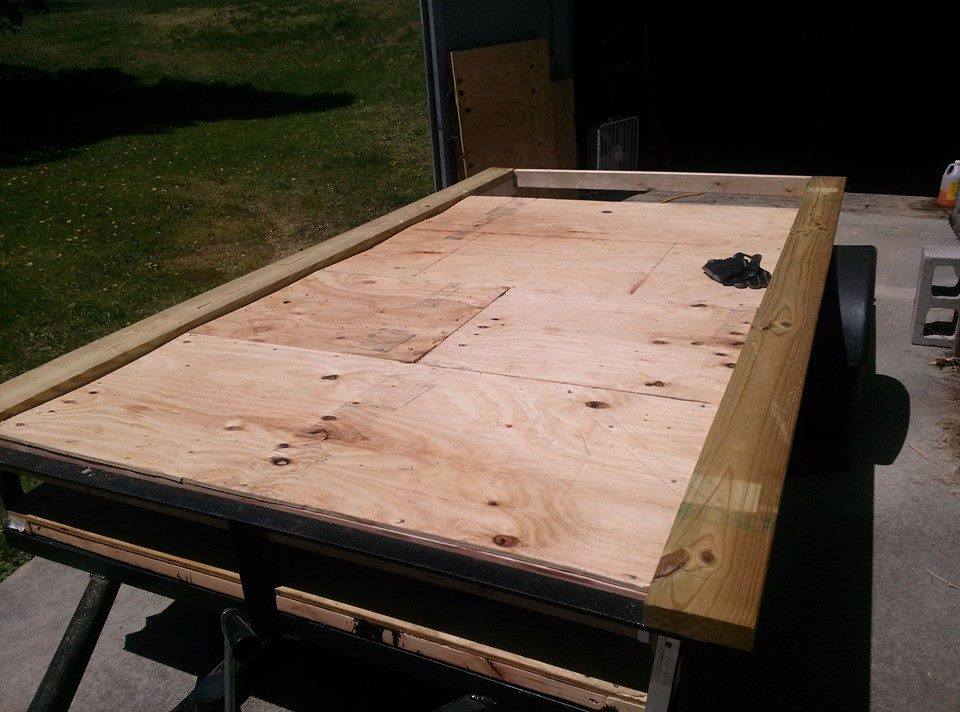
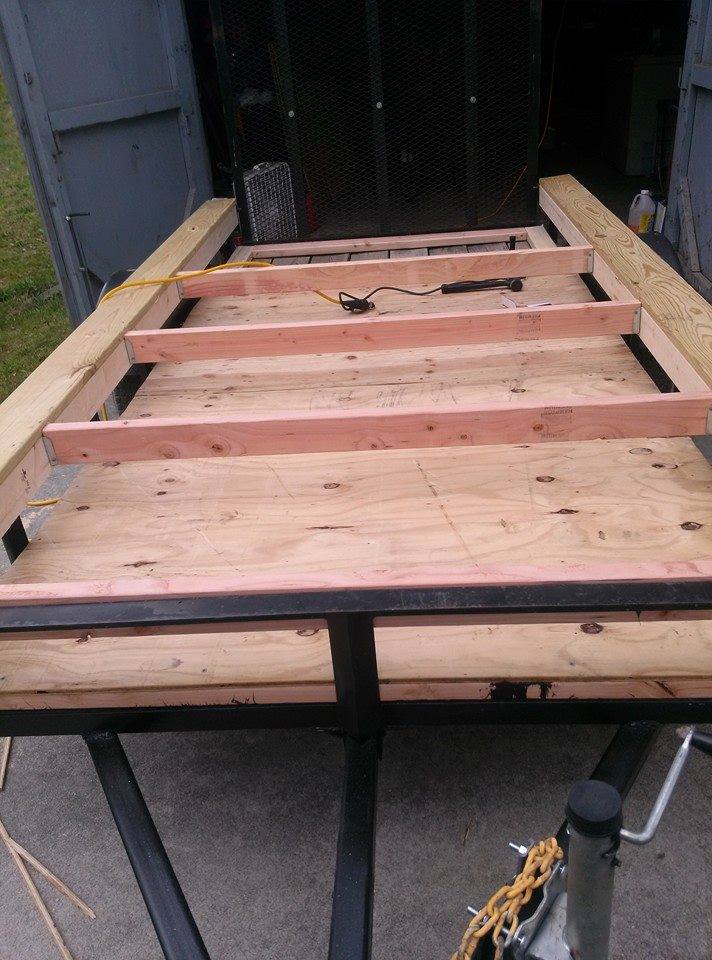
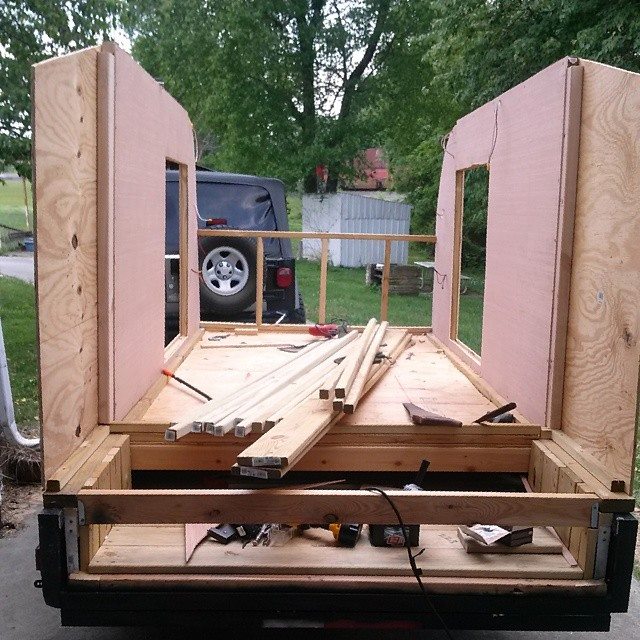
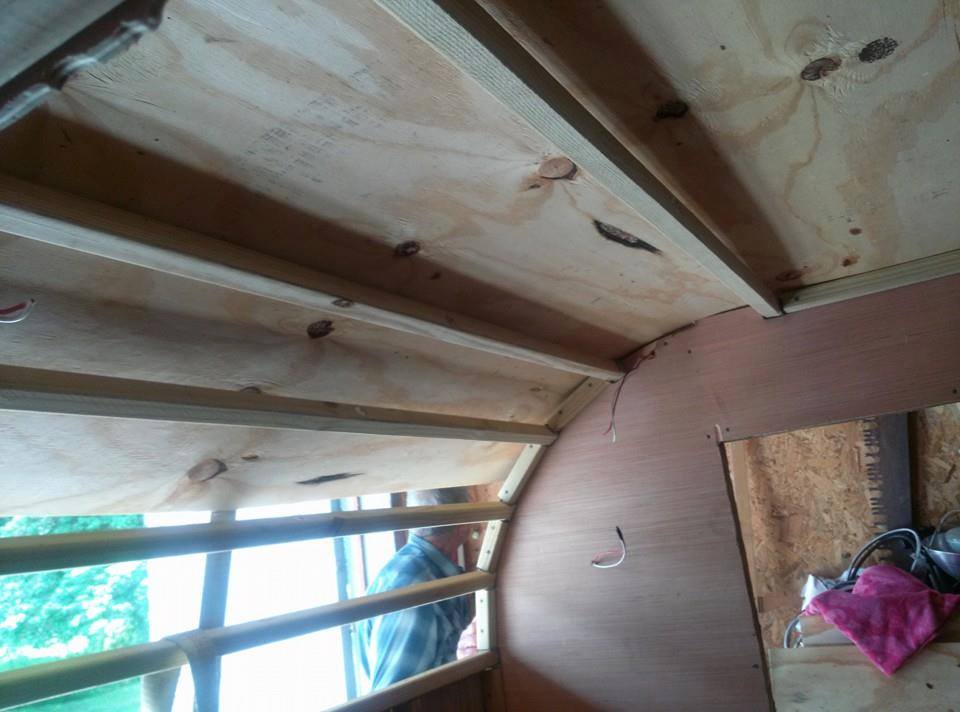
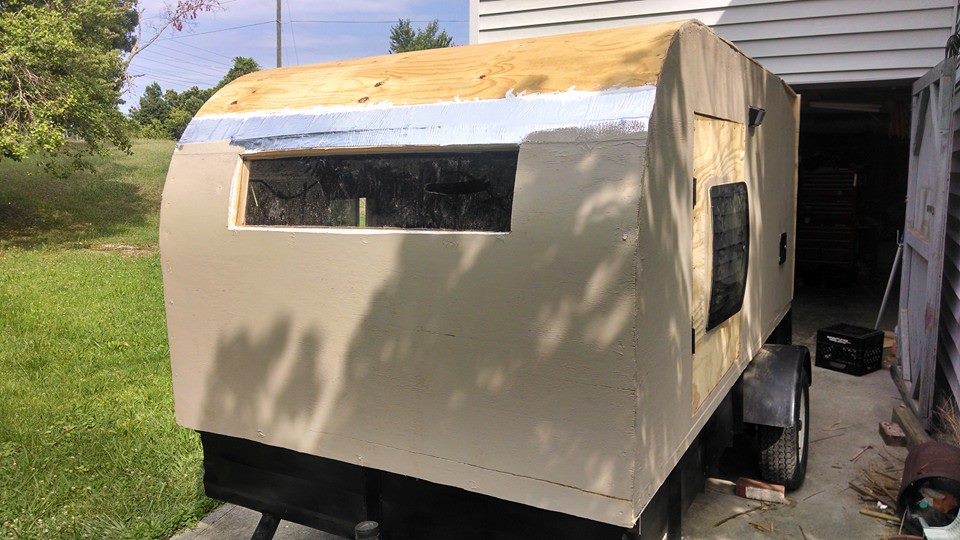
Sidewall and Frame Construction
The sidewalls were made from 3/8″ plywood panels and 2″ by 2″ framing. Insulation was added in between the supports.
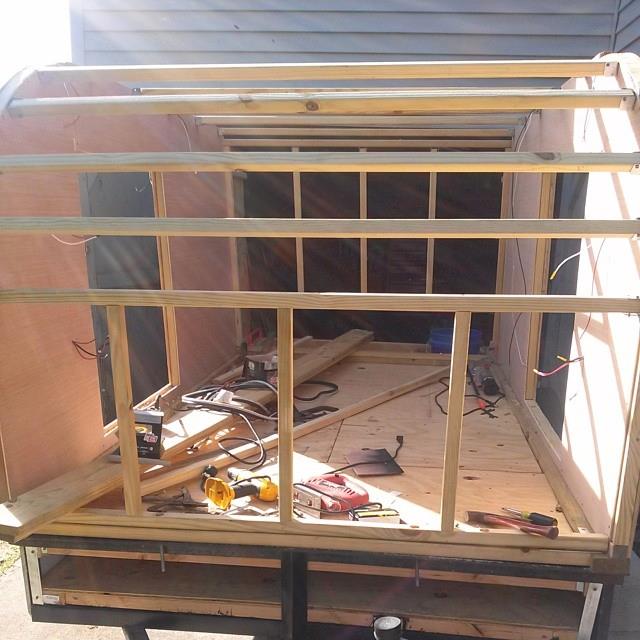
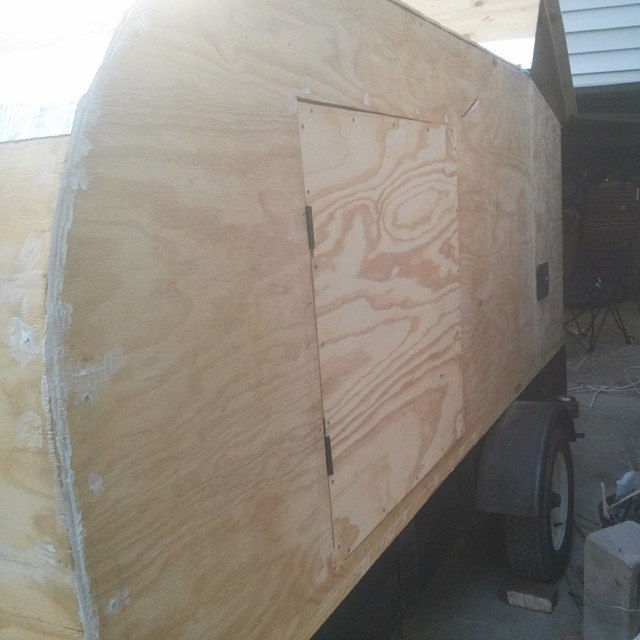
Wooden Skin Saved Money
Many teardrop trailers have a metal outer skin, but Larry decided to use plywood instead.
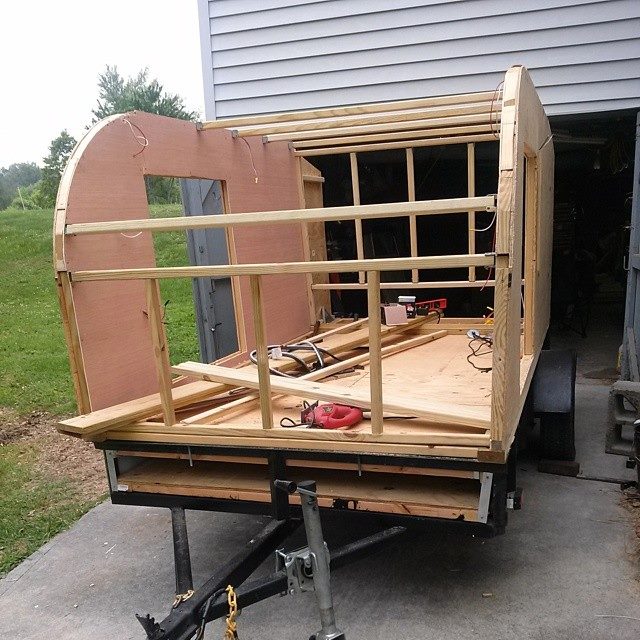
He used 1/8″ sheets of exterior-grade treated plywood on the ceiling and 3/8″ on the walls, all held up by 2″ x 2″ framing.
Once the frame was up and the plywood sheets attached, Larry applied deck stain to seal the wood against the elements.
The seams were covered with some left over flashing from a roofing project.
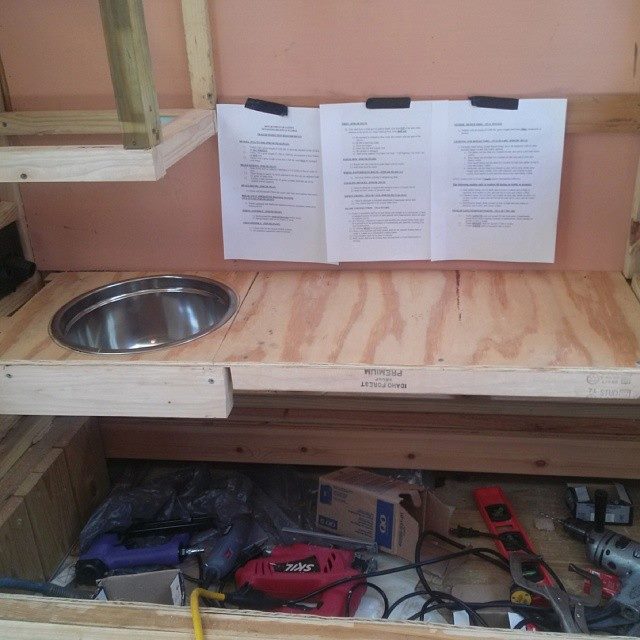
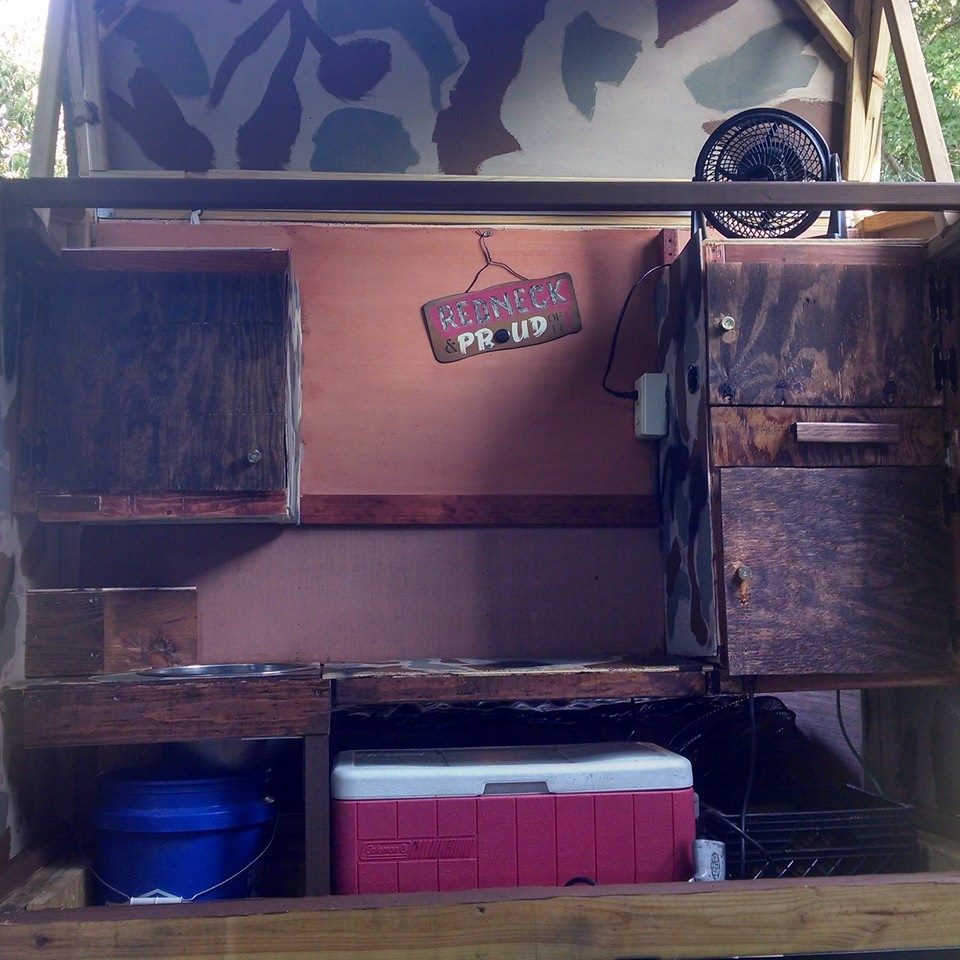
Unique Galley
To save money, Larry bought a large stainless steel mixing bowl at Walmart to serve as the sink.
He simply cut a hole in the bottom for the plumbing. This compromise saved about $75.
Although a gravity-fed water run could be added in the future, for right now Larry depends on the water supply at area campgrounds to meet his needs.
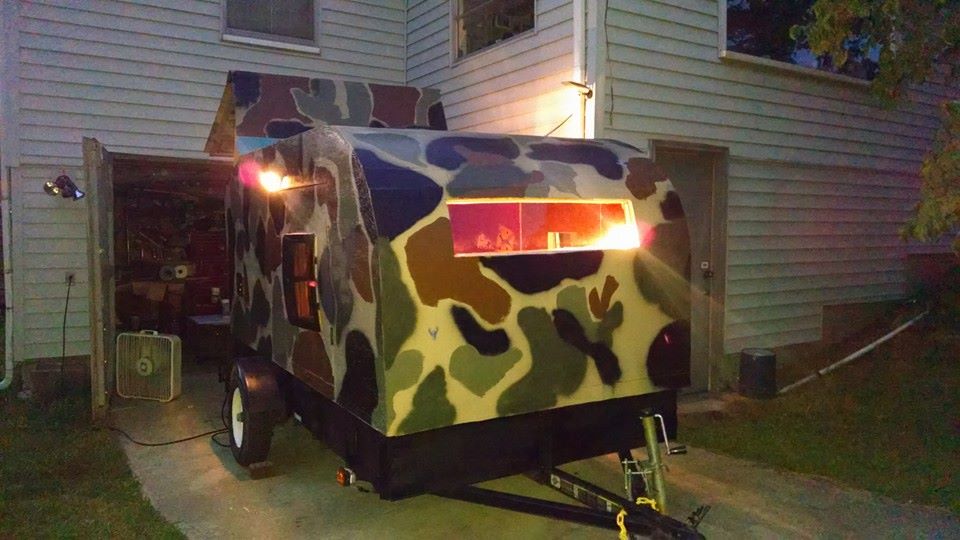
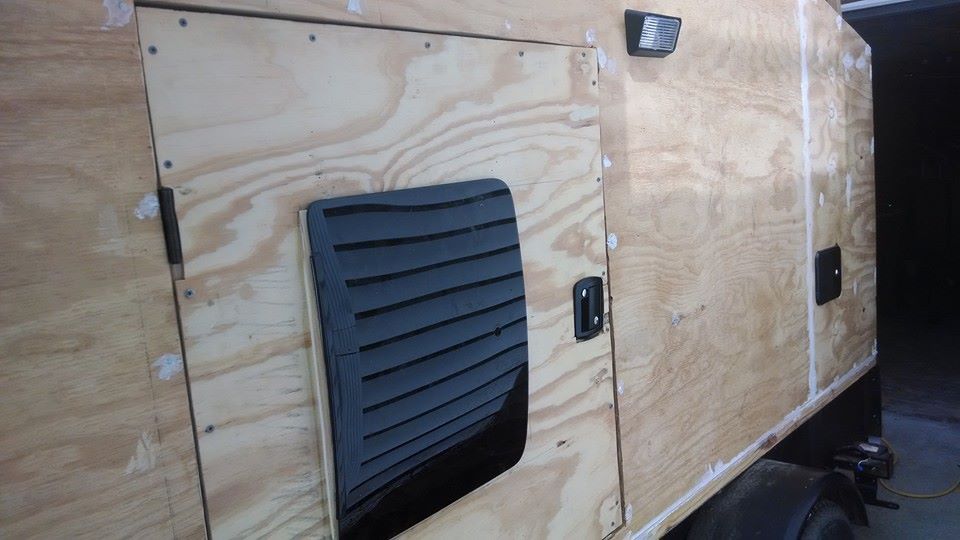
Unique Windows
The windows he got from a friend’s junkyard. They’re originally from a 1996 Dodge Dakota Extended Cab pickup.
Larry said he used a band saw to cut the opening just right.
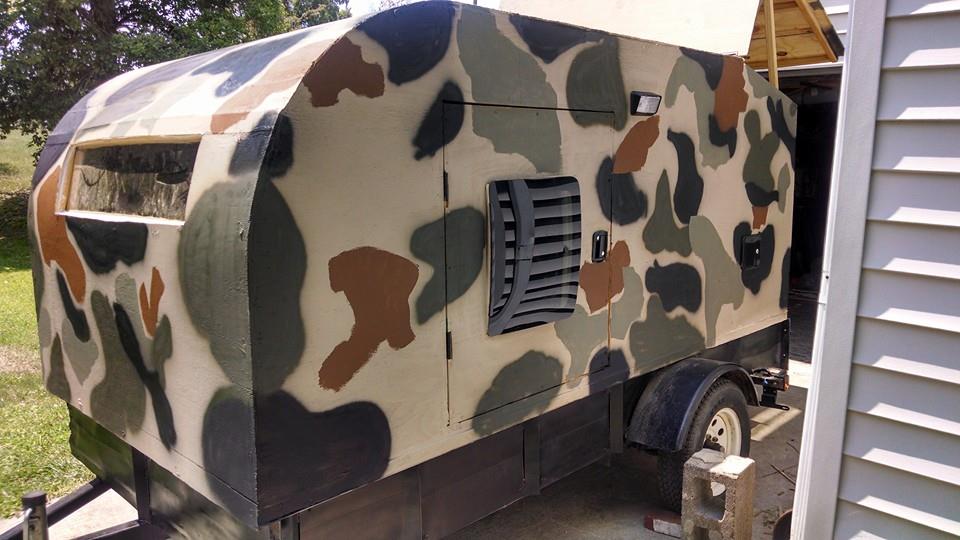
Paint Scheme
Before painting, Larry applied caulk to all the screw holes and into gaps in the sidewalls.
He made his own camouflage paint job and used black spray paint to cover up any areas he missed.
Once finished, he applied a coat of Olympic brand clear deck sealant for added protection.

Larry’s Advice For You
Larry said that the best advice he would give to a wannabe DIY teardrop builder is to save money by using recycled materials and looking for lightly used fixtures.
A lot of the materials you need to build a teardrop can be found for very cheap he said, either at a junk yard or a local hardware store.
Larry mentioned that recycling old or lightly used items kept the total cost of the project to around $2,500.
That’s about 1/5 the cost of a brand new teardrop camper!