
Window awnings keep your RV cooler and they’re easy to install, too! We’ll show you EVERY step needed to perform this simple DIY task with confidence.
Factory-Supplied Awnings Aren’t Enough
Like many RVs, ours came from the factory with some awnings already in place.
Of course we have a large main patio awning, one over the door, one over the bedroom window on the curb side, and a long one covering both living room windows on the driver’s side.
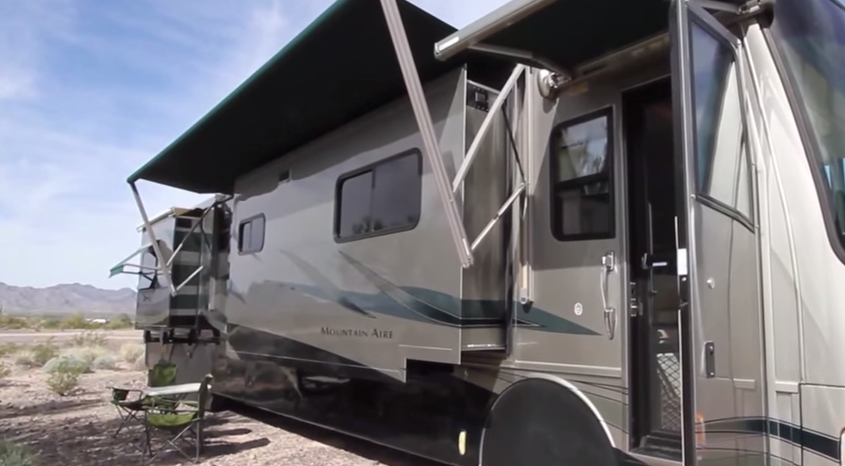
The only large window without a dedicated awning is in the living room on the curb side.
Obviously, the manufacturer assumed that the patio awning would do the job of blocking the sun from that window.
There are times when it’s imprudent to have our main awning out, like on really windy days, or when we’re away from the RV and don’t want to risk damage in the event of a sudden weather change (considering the consequences, we’d rather not rely on our awning’s wind sensor).
Best Way to Stay Cool? Block Those Rays
The worst scenario is a hot, windy day while we’re dry camping, as we generally try to avoid running the generator for A/C unless it’s absolutely needed.
Blocking direct sun by using windshield screens and awnings makes a major difference in the comfort level inside the RV.
As we always want the option of blocking the sun from the right-side living room window (especially since we often face that side of the rig to the south when we’re boondocking), we need an awning specifically for that window.
Make Sure to Match Your Colors
Before placing our order for a matching A&E / Dometic awning, we noted the color code of the fabric and hardware from our original awnings and measured the window to determine what size we’d need.
We’re taking advantage of the extra space on each side to order one that’s wider than usual, extending 9 inches out on each side of the window.
That will keep more sun off the side of the RV and prevent it from raining in if we leave the window open on wet days.
Learn How to Install Your Awning Here
We’ve had our rig for over 9 years, and we’re finally installing that awning that we’ve always talked about.
It’s the perfect DIY project and we’ll show you exactly how it’s done.
It’s such an easy job that we’re not sure what took us so long to finally get around to it!
httpv://youtu.be/cPh0dqtEIPo


Thanks for the great video, glad you’re staying cool through your own ingenuity 😉
Your timing in posting this couldn’t be better, Eric. We are literally, right this moment, in one of the exact situations we described in the video: parked facing East on a hot, sunny afternoon, with gusty winds preventing us from extending the main awning. Our right side is facing South, but the afternoon sun is blocked by our new window awning. We’re not boondocking, but it sure helps keep us cooler without using AC.