
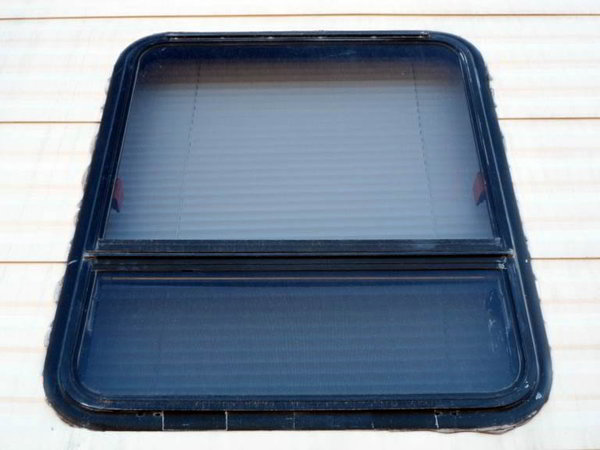
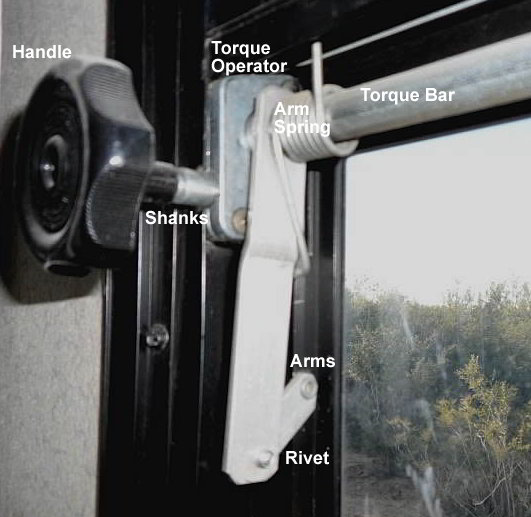
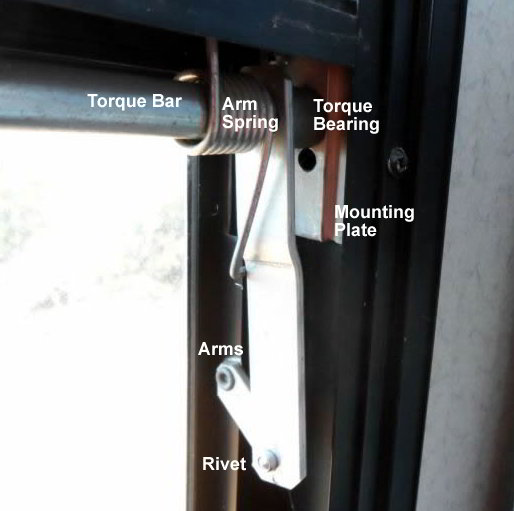
 If you have a crank open awning window in your RV, sooner or later you will need to repair it as they tend to break after years of use or even momentary rough use. An RV awning window consists of a torque operator (crank box), crank handle or knob, a notched torque bar, torque arm springs, a torque bar bearing, mounting plates, and two connected torque arms on each side. Any of these can go bad but the most common issues are a stripped handle or broken fins inside either the torque operator or the bearing. This walkthrough will outline the steps I took performing my RV window repair.
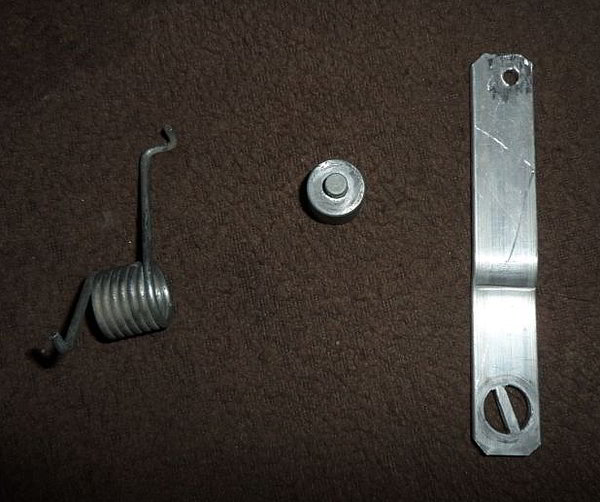
Various Parts for a RV Window Repair
Replacing the handle is very easy since it is only attached by one screw down the center. However, you will need to purchase a replacement with the same size shank since they do come in different lengths. You can use a different length shank but be sure it clears the window screen and does not interfere with window blinds.
If you need to replace any of the other parts, you will need to disassemble the window. This will require a long, skinny philips screwdriver, pliers, a drill with bits, and a rivet gun. You may also need a metal saw for the RV window repair.
[asa]B0027XGFUW[/asa]
RV Window Repair Disassembly
- Remove window screen.
- Unscrew and remove crank handle.
- Disengage arm springs.
- With the window open, drill out the rivets holding the two arms together on both sides of the window. Remove the remainder of the rivets.
- Remove the screws holding the torque operator on one side and the bearing plate on the other. You may want to mark “L”eft and “R”ight on the arms connected to the bar at this point to make reassembly easier as they are not identical. Also note how they are mounted if they are offset.
- Jiggle the full bar assembly and tilt the bearing end down to allow the mounting plates to slide down out of the way. The entire assembly should now come out.
Pull the bar assembly apart and inspect each piece. You are looking for broken fins inside the bushing or toque operator, failure of the fins to turn in the torque operator when turning the handle connector, broken bar ends, or broken arm slots. Once you locate the problem, you will need to get the info to purchase a new piece to complete the RV window repair.
RV Window Repair Component Guides
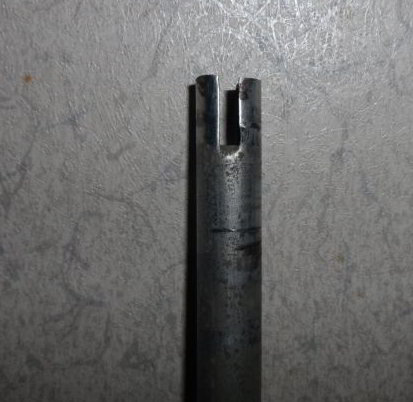
Torque Bar – exact replacements are not made though you may find a good used one at an RV salvage store or possibly eBay. They sell 36 inch and 48 inch new bars with a single end notched. You will need to cut it to the correct length which should include any missing end length on a broken bar. You can measure the length of a bar in a similar window but remember the bar extends about 1/2 inch on each end into the torque operator and the torque bearing. Once you have the right length, you will need to notch the one end to exactly match the position on the other end.
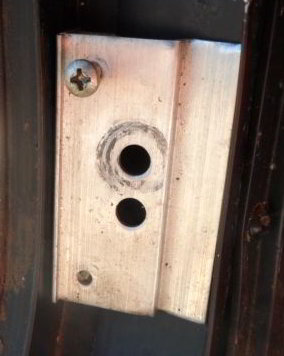
Torque Bar Bearing – current replacements are plastic, not metal, and there are several different styles. Look for one similar to yours.
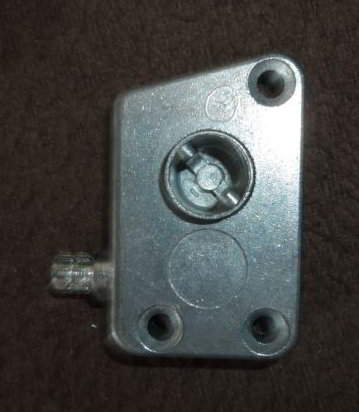
Torque Bar Operators – these come in many different shapes with different screw hole spacing, round or square holes, left hand and right hand, long handle shank and short handle shank.. You will need to be sure to get the exact same replacement part. You should either take the part with you to the store or draw or take a picture of it to take with you.
[asa]B001D9E41I[/asa]
When looking for replacement parts for the RV window repair, be aware that RV stores are not the only places that carry them. You may find them in a hardware store, eBay, or an online store such as Amazon. If you are not able to get the part right away after taking the window mechanism apart, be sure to replace the window screen in the window and tape or block the window shut to keep nasty little no-seeums and other pests out. Bag all loose parts so as not to lose them while waiting.
RV Window Repair Reinstallation of the Window Mechanism:
- Once you have all needed parts, re-assemble the window mechanism on a counter. Pay attention to which way offsets on the arms should face per your notes or markings, which way springs on the bars should face (short end in the window frame and long end bending over the arm), which way the arms and torque operator should be placed so that arms on both sides are exactly opposite each other and crank open correctly.
- Insert assembly into window at an angle. Put torque bearing end into it’s plate and push torque operator’s plate up behind it then tilt assembly up into position. Be sure the short ends of springs are inside the window frame.
- Verify window operation again gently to be sure all parts are situated on the torque bar correctly then screw in torque operator and torque bearing plate.
- If all appears well, rivet arms on each side together again.
- Lift long ends of springs up over the arms.
- Place knob on torque operator and reinstall screw.
- Reinstall window screen.
With any luck you should have completed your RV window repair!

