
The exterior of an RV takes a beating over time.
Sun, rain, wind, and dust all take their toll on exterior finishes. Perhaps some of the most obviously affected areas of your RV are the hatches, trim pieces, and other random plastic inserts that dot the outside.
These pieces start out white and begin to slowly turn yellow – and even brown – over time.
You could start the process of removing and replacing every piece with a shiny new one at a considerable cost OR you could use this cost-effective method.
All you’ll need is elbow grease, sandpaper, tape, and some specialty paint.
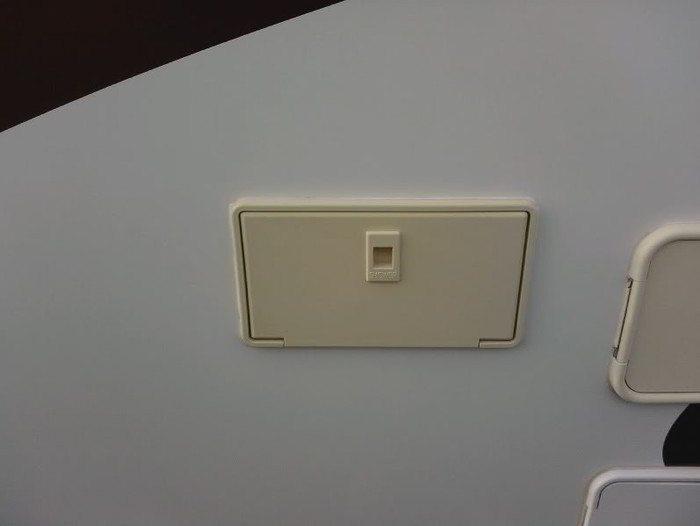
An RV owner who goes by the name Quicksilver at the GlamisDunes Forum shared this method. He was annoyed with the yellowing RV hatches and trim that housed his dump hose, outside shower, and other similar connections.
Materials Needed for Painting RV Hatches and Trim
- Spray Paint (Krylon Fusion was used in this case. But there are many colors to choose from.)
- Painter’s Tape
- Sand Paper (320 grit was used here)
- Caulk Sealant (optional)
[asa]B0021WBAE0[/asa]
Steps for a Painting RV Hatches and Trim
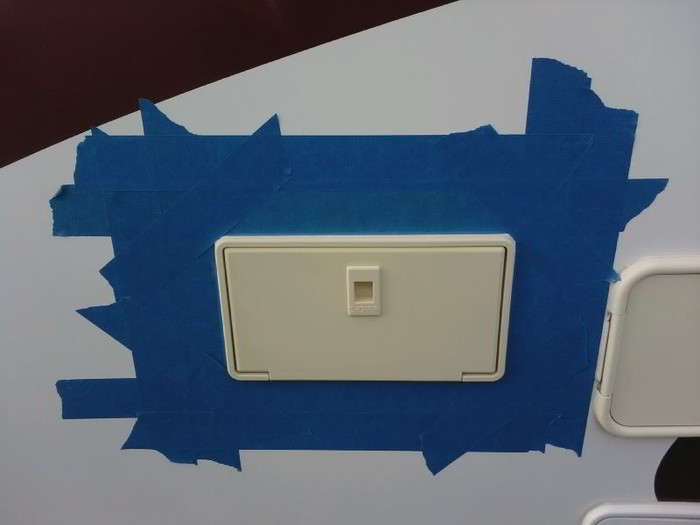
- Sand each piece that you intend to paint – scoring the surface so the paint will stick.
- Tape off the the pieces to avoid over spray of the paint.
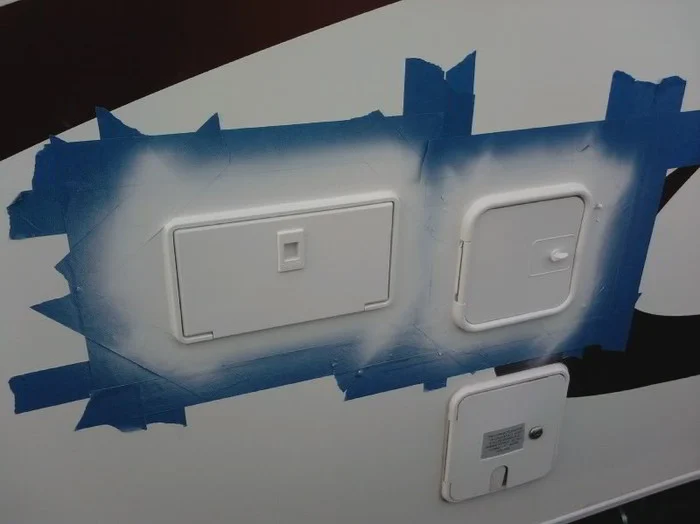
- Start the painting.
- Repeat coats as needed. In this example there were 3 coats.
- Run a new bead of caulk sealant around each piece after paint dries – if necessary.

This simple method can be used for other surfaces on your RV as well. Roof vents and coverings can also be painted.
You could fix up all sorts of plastic pieces on your RV, including side mirror housings, tire well trim, and door handles.


How do I get the black trim around my windows and wheels black again they are turning grey and ugly?
Thanks for the handy advice John.
If you paint years before the yellow appears you can help prevent brittleness and cracking plastic that sunshine causes.
Did you notice there was one hatch that did not need to be repainted? That hatch was manufactured with a resin that is formulated to allow minimal color change when exposed to the elements. In other words, it won’t fade like the 2 that needed to be repainted when exposed to harsh UV rays. It is made right here in the USA by B&B Molders.
Tesaje, thanks for your comment and recommendations.
A report on how well the paint holds up over time and use would be interesting.
I’ve been using bronze and copper paint to refurbish and coordinate the interior items in my camper to very good effect. Key is to make sure all rust is gone and to let the paint fully cure before use. At least a week to cure. I’ve also sprayed a few coats of urethane varnish over the more used pieces like the pressed tin backsplash. I’ve sprayed plastic items like waste cans just get the color coordination I want. It is quite durable if I let it fully cure.