

How To Replace Your RV Kitchen Faucet In 4 Easy Steps
Just like in a sticks-and-bricks home, the kitchen faucet in your RV is likely one of the most used and abused fixtures in your camper. For this reason, it’s handy to know how to replace one if it breaks.
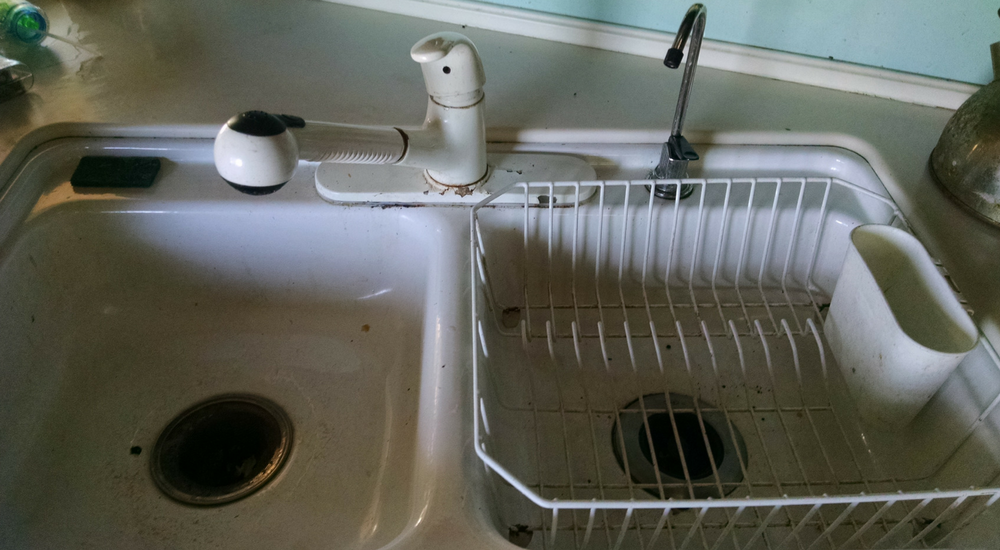
Or maybe your RV came with one of those short neck faucets. This is great for preventing splashing but combined with your typical shallow RV sink, you are lucky if you can fit a pot under the faucet. Another great reason to know how to replace it with a new higher neck faucet.
Whatever the reason may be for wanting to install a new faucet, don’t worry, it’s a fairly easy DIY project. Read below for steps and tips to performing a straightforward, efficient RV kitchen faucet replacement with a bonus step that will significantly decrease the amount of water you use.
Step 1. Remove the old faucet
First, you will have to clear out the contents under your sink and turn off the water supply. You can turn off the water a couple of ways, the first and the easiest would be to turn off the water supply from the RV park to your RV, but you can also close the shut-off valves under the sink.
If you are using your water pump for water pressure, be sure to turn off the pump. Now with the water off, relieve the water pressure by opening the hot and cold water on the faucet, there should be no pressure.
Time to get under the sink to loosen and remove the hot and cold plumbing lines connected to the faucet. This is done by using an adjustable wrench and channel locks.
A headlamp can really help you see much easier under the sink for a less stressful installation. Also, have a bucket on hand to catch any residual water from the plumbing lines.
With the plumbing lines disconnected, remove the nuts that secure the faucet base to the sink. They’re usually two nuts that are brass or plastic, and when unscrewed the faucet should be able to be pulled off the sink.
Step 2. Sink and faucet prep
With the old faucet out, you will now have to clean and prep the sink and plumbing lines and fittings before installing the new faucet. Clean off any silicon or Plumbers Putty from the sink to make sure it is clean and dry. Now apply pipe dope and Teflon tape to all threads on the new faucet.
Apply the pipe dope and Teflon tape BEFORE putting the faucet in place. It is much easier to do now than waiting until you’ve put it in and then need to do it while you are on your back under the sink.
Apply the first coat of pipe dope and a second coat of Teflon tape and then a third and final coat of pipe dope to ensure a leak-free plumbing connection.
Install a small bead of silicon or plumbers putty on the sink where the base of the faucet will rest on the sink. This will prevent water from leaking under the sink and it also helps in securing the faucet to the sink. With all this prep done, it is now ready for the next step of installing the faucet and connecting the plumbing lines.
Step 3. Installing the new faucet
With all the prep work done, the faucet is now ready to be installed. Place the faucet on the sink setting it into the silicon or Plumbers Putty and crawl back under the sink to permanently connect it to the sink. With the nuts provided in the kit, connect the faucet to the sink and tighten. Now connect the plumbing lines to the faucet.
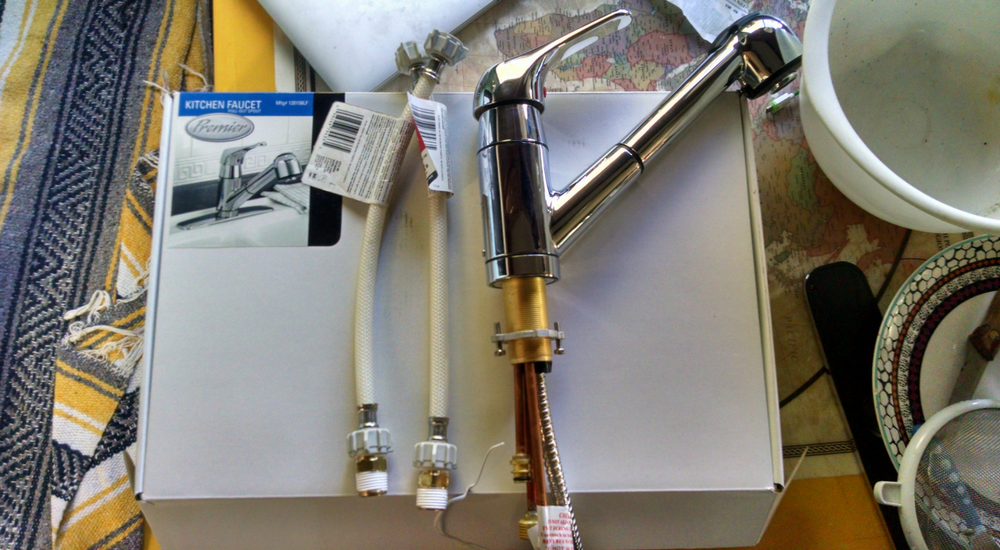
If it applies to your installation, I would buy all new flexible connection lines and new rubber washers for all connection points. This will usually be another guarantee for a leak-free plumbing connection. Old plumbing has a tendency to leak if you reinstall the same lines or fittings.
Connect the plumbing lines and tighten. Be sure not to over tighten for this could cause a leak or damage to the fittings or faucet. It is always easier to snug something up afterward to stop a leak or drip versus needing to buy another new part or fitting because it broke. With everything connected, it is now time to turn the water supply back on to confirm that there are no leaks.
Before you turn on the faucet, remove the sink aerator so that no foreign objects or materials from the install plug the aerator.
Open your new faucet to run water through it for a minute to flush out any air and foreign matter. Now reinstall the aerator.
Step 4. Checking for leaks
With everything connected and pressurized with water pressure, it is now time to check for leaks. With your headlamp and paper towel, check all fittings and connections by wiping it with the paper towel to check for water.
I like to use a blue or brown paper towel to check if I have water leaks because it is easier to see water with colored paper towel versus a white towel or rag.
With no leaks, you can now sleep tight knowing that you do not have any water leaks which would cause future water damage to your RV.
Bonus step: Install a low flow aerator
This is a great final step to perform if you are looking to significantly decrease your water usage. This has been crucial to increasing the amount of time we’ve been able to be off-grid or boondocking as we can only carry in so much water at a time and the less we use, the longer we can stay in the wild, camping for free.
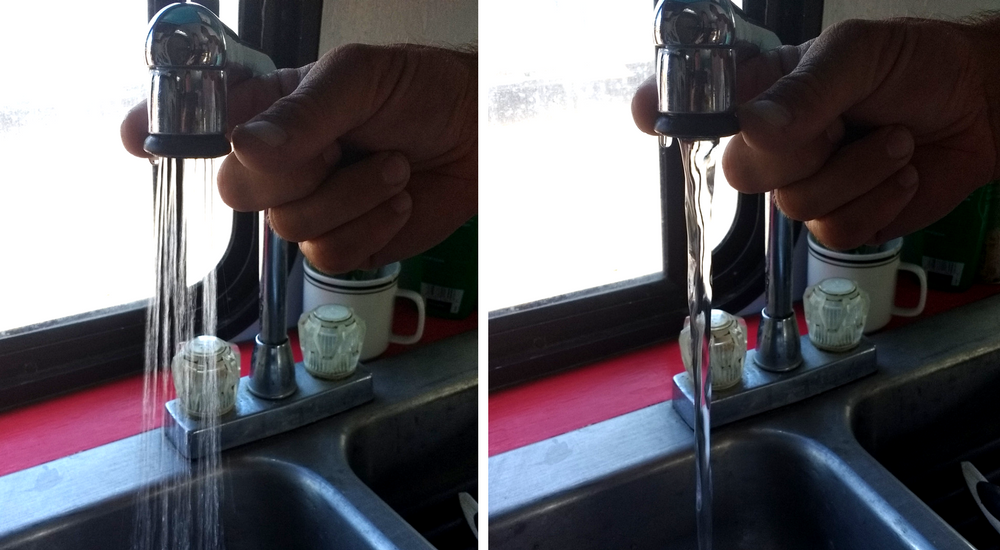
You can perform this step on your new faucet or your existing faucet. Simply buy a low-flow aerator. They come in several flows, labeled as gallons per minute, so choose one that works for you. We chose the lowest flow option, but it also has an option to change to a full flow by simply pulling gently down on the spout.
Now that you have your new aerator, gently screw off your old one and screw on the new one. It’s as easy as that!
That’s it! Knowing how to do this simple DIY project efficiently and correctly will mean that you will have a new kitchen faucet that won’t leak. Now go wash your dishes!


I’ve never heard of using pipe dope AND Teflon tape together. Seems redundant to me. Except for large diameter pipe, I’ve just about stopped using pipe dope opting for Teflon tape instead. Much quicker, neater, cheaper.