
There’s nothing worse than having to wrestle with cramped space in your RV. (Okay, so the whole grey-water / sewer smell thing might be pretty bad too!)
Imagine meeting a few new people at your current campground and inviting them over for a tasty meal and perhaps an after-dinner drink.
Not more than thirty minutes prior to their arrival the skies open up and the rains descend.
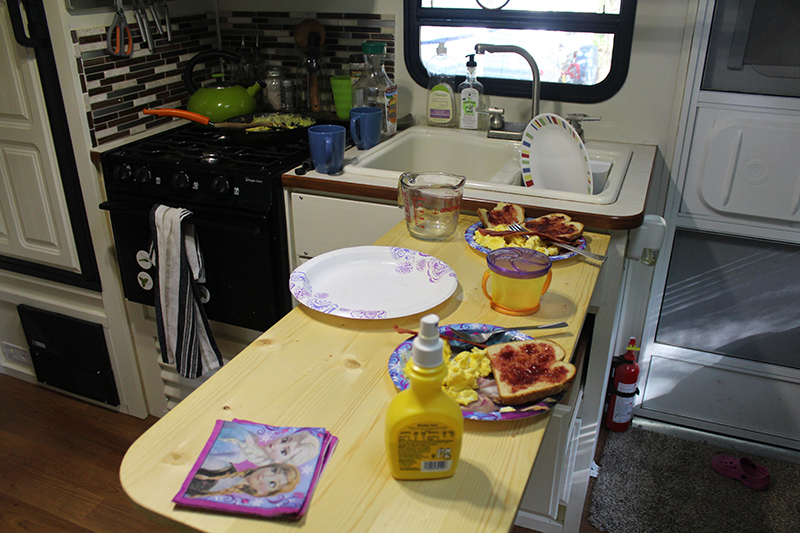
While most other RVers would fret over where to put all the plates and dishes brought in from outside, you’ll hardly be breaking a sweat because your kitchen has a newly appointed, collapsible, and service-ready countertop.
Dinner my friends, is served!
It’s (Amazon) Prime Time
For people like me who have an idea a minute and oftentimes want to start them immediately, there is nothing better than Amazon Prime.
Free 2nd day delivery on millions of products is a beautiful thing.
Finding what you need on random websites, copy/pasting the product name into Amazon, and then having it delivered with zero shipping costs is perhaps the most satisfying part of any DIY project.
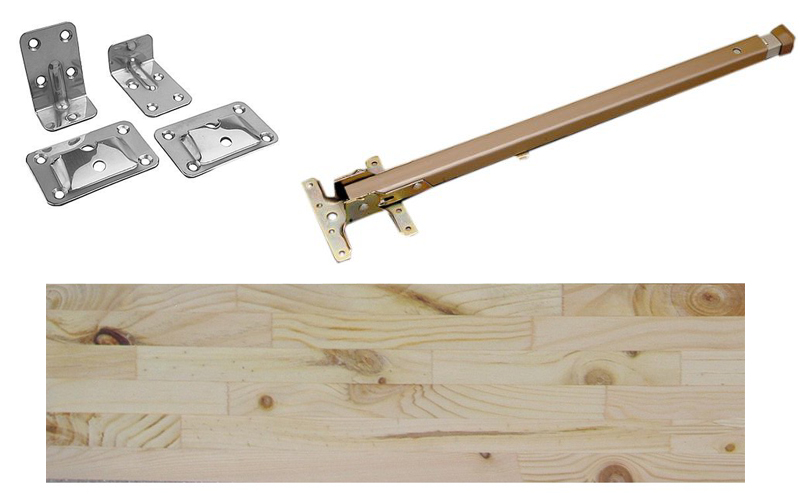
And for this particular one the items needed are quite specific:
- 1 – Sea Dog Line Stainless Table Brackets (set)
- 1 – AP Products 013-070 Adjustable Folding Table Leg
- 16 – Stainless Steel, Phillips head screws
- 6 – Drywall screws
- 1 –Kiln-Dried Elliotis Pine Panel (1” x 16” x 48”)
- 1 – quart General Finishes Salad Bowl Finish
- 1 – drill with Phillips bit
- 1 – soft rag
- 1 – 2’ level
- 1 – circular saw
- 1 – pencil
- 1 – measuring tape
- 1 – small drill bit
Drill Some Holes, Insert Some Screws, Get a Counter Tonight
I promise it will take me longer to write out these steps than it will for you to build your own collapsible countertop.
Step 1: This first step is optional. You can either round off your outer countertop corners as we did (to keep you from impaling yourself when trying to walk around) or you can lightly sand them and leave them square.
Whichever you choose, cut your Pine board 16” wide and 36” long.
If you go longer than 36” you may start to see some bowing over time.
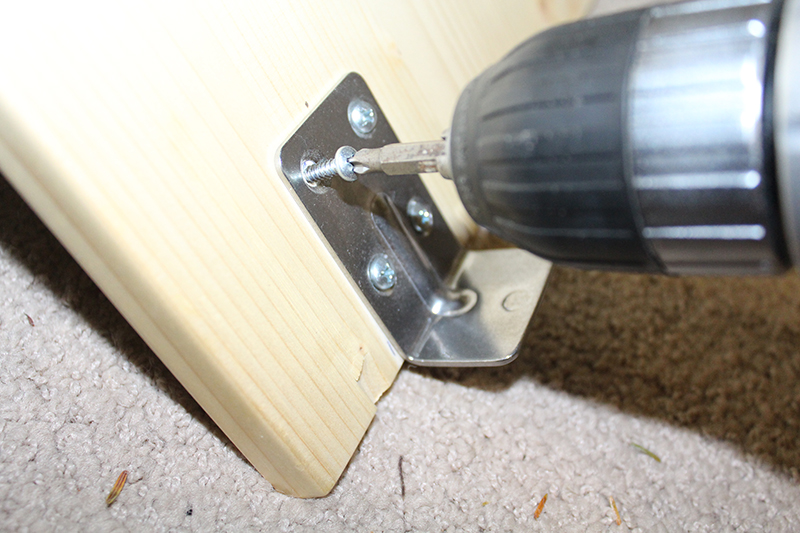
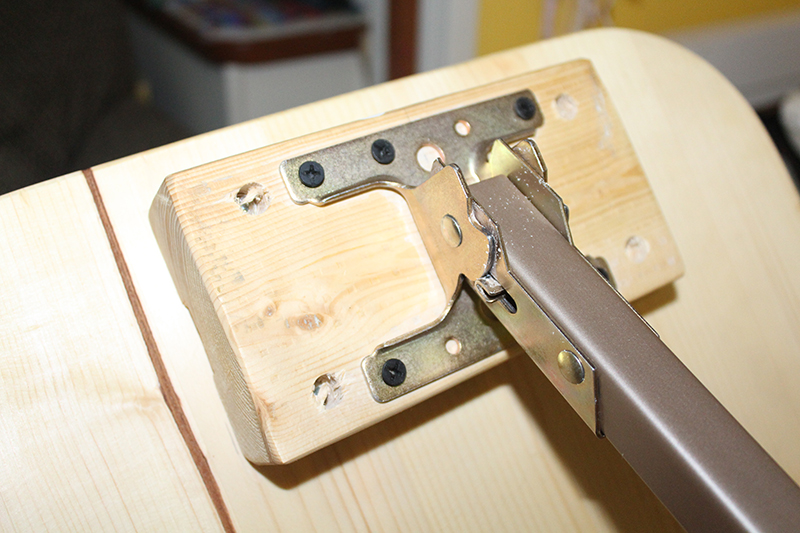
Step 2: Using 8 of the stainless steel screws, fasten the male table brackets to one end of the table.
Step 3: While holding the board at a comfortable countertop height, measure the distance from the floor to the top of the board.
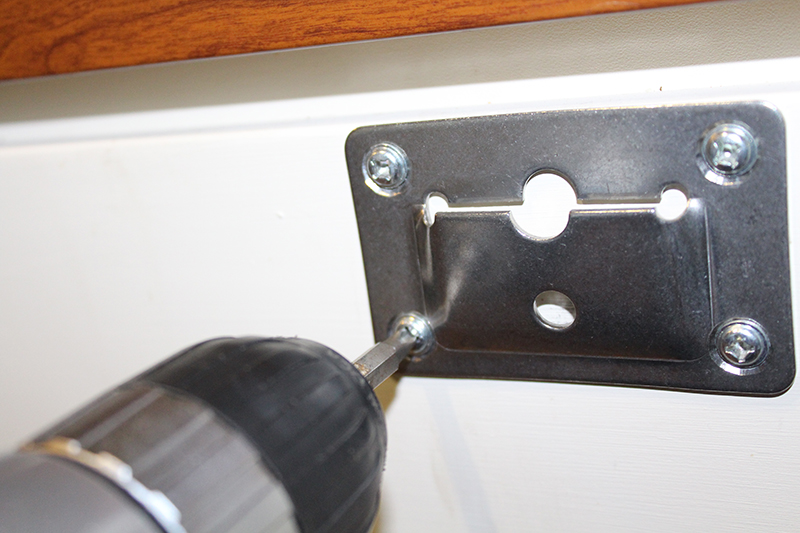
Step 4: Hold the female table bracket against your existing kitchen counter. The distance from the floor to the top of the female bracket should be the same as what you measured in Step 3.
Using a pencil, mark the holes for the screws against the pre-existing counter. Pre-drill your holes.
Step 5: Insert male table brackets (now attached to the new countertop) into the female table brackets (now affixed to the pre-existing cabinet face).
Hold your level on top of counter and – with a steady hand and a little nimbleness – prop the other end of the table up with the extended folding table leg until it’s plumb and square.
Step 6: When the new countertop is level – and the folding table leg is between 4” and 6” from the counter end – mark your screw holes.
Take the countertop down and pre-drill the holes.
Step 7: Use standard drywall screws to fasten the adjustable folding table leg to the bottom side of the new countertop.
Make sure the folding table leg folds into the table (it’s easy to get this backwards).
Step 8: Using a soft rag, apply two to three liberal coats of non-toxic Salad Bowl Finish to the new countertop per the instructions on the can.
Step 9: Once the countertop is dry, extend the folding table leg, insert the male table brackets into the female brackets, position the leg (including the adjustable height) and enjoy the first look at your new kitchen counter.
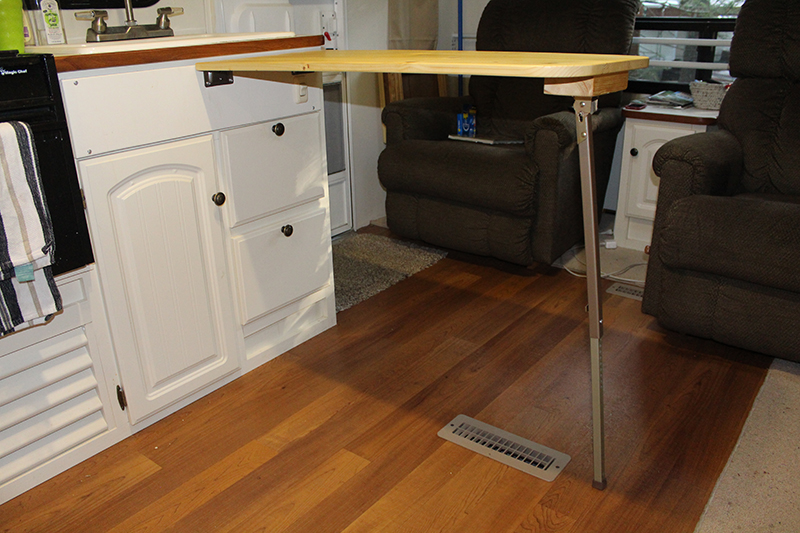
Let’s Eat!
You may notice in the photo above that we had to add a small riser block on the bottom side of our countertop to make the surface a comfortable height.
Because this is such an easy DIY project it will be equally easy to further customize.
You can even consider using different materials for the actual counter or covering it with a sheet of laminate to match your RV decor.
Over to You
How would you describe the layout in your RV kitchen? Have you tried to increase the surface area of your countertop?
Let me know in the comment section below.


Thanks Doug, glad you enjoyed your visit!
first time viewing this site. very nice-very helpful-thanks to all who shared ideas