How Easy Is It To Install A SoftStartRV A/C Soft Starter?
I installed a SoftStartRV unit on my travel trailer’s air conditioner last summer. Despite cutting and splicing wires, the installation process was easy and the SoftStartRV performed as promised, allowing me to keep my RV cool via a 2,200-watt generator under varying summer conditions.
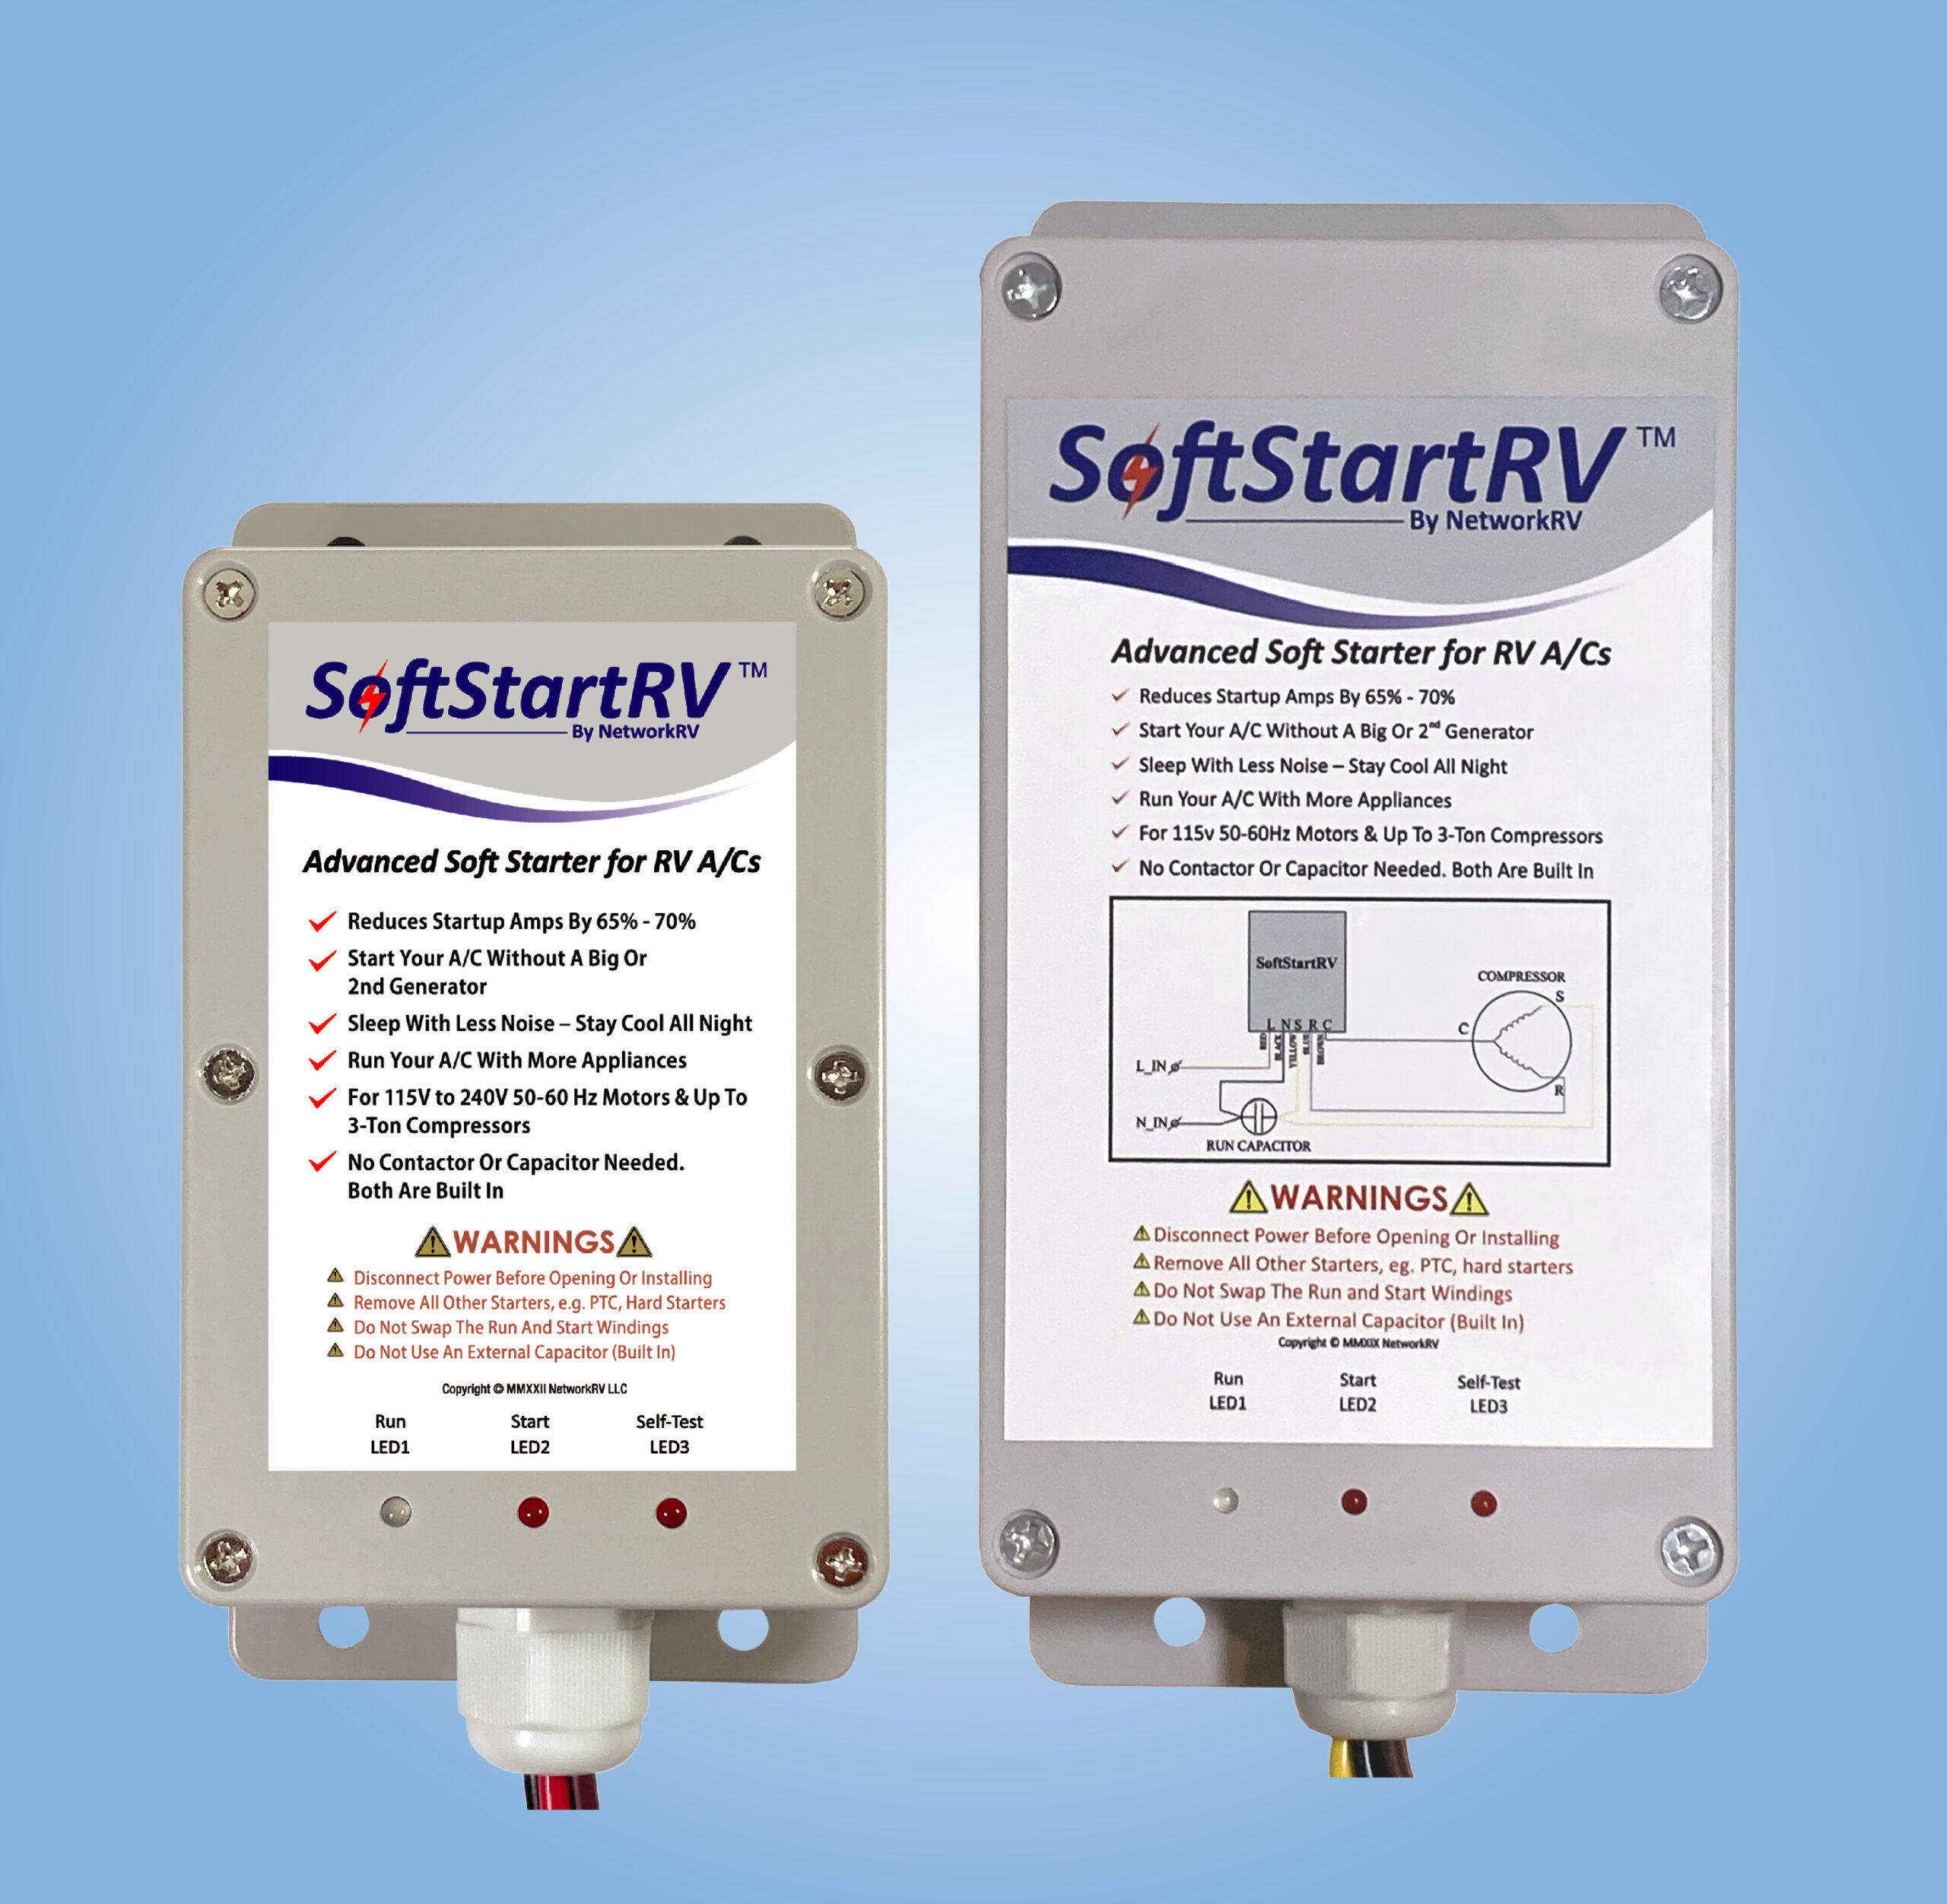
In my mind, this was the perfect product, though some others found the installation intimidating as it required cutting and splicing some wires. The folks at SoftStartRV heard the concerns of their customers and recently announced a new 6-step, No-Cut/No-Splice installation procedure.
My interest was piqued when I read about the new installation process. Could it really be that much easier? I soon had a chance to find out when my son mentioned he was tired of lugging around his large generator to power the air conditioner on his travel trailer. I jumped at the opportunity to install another SoftStartRV unit using the new installation process.
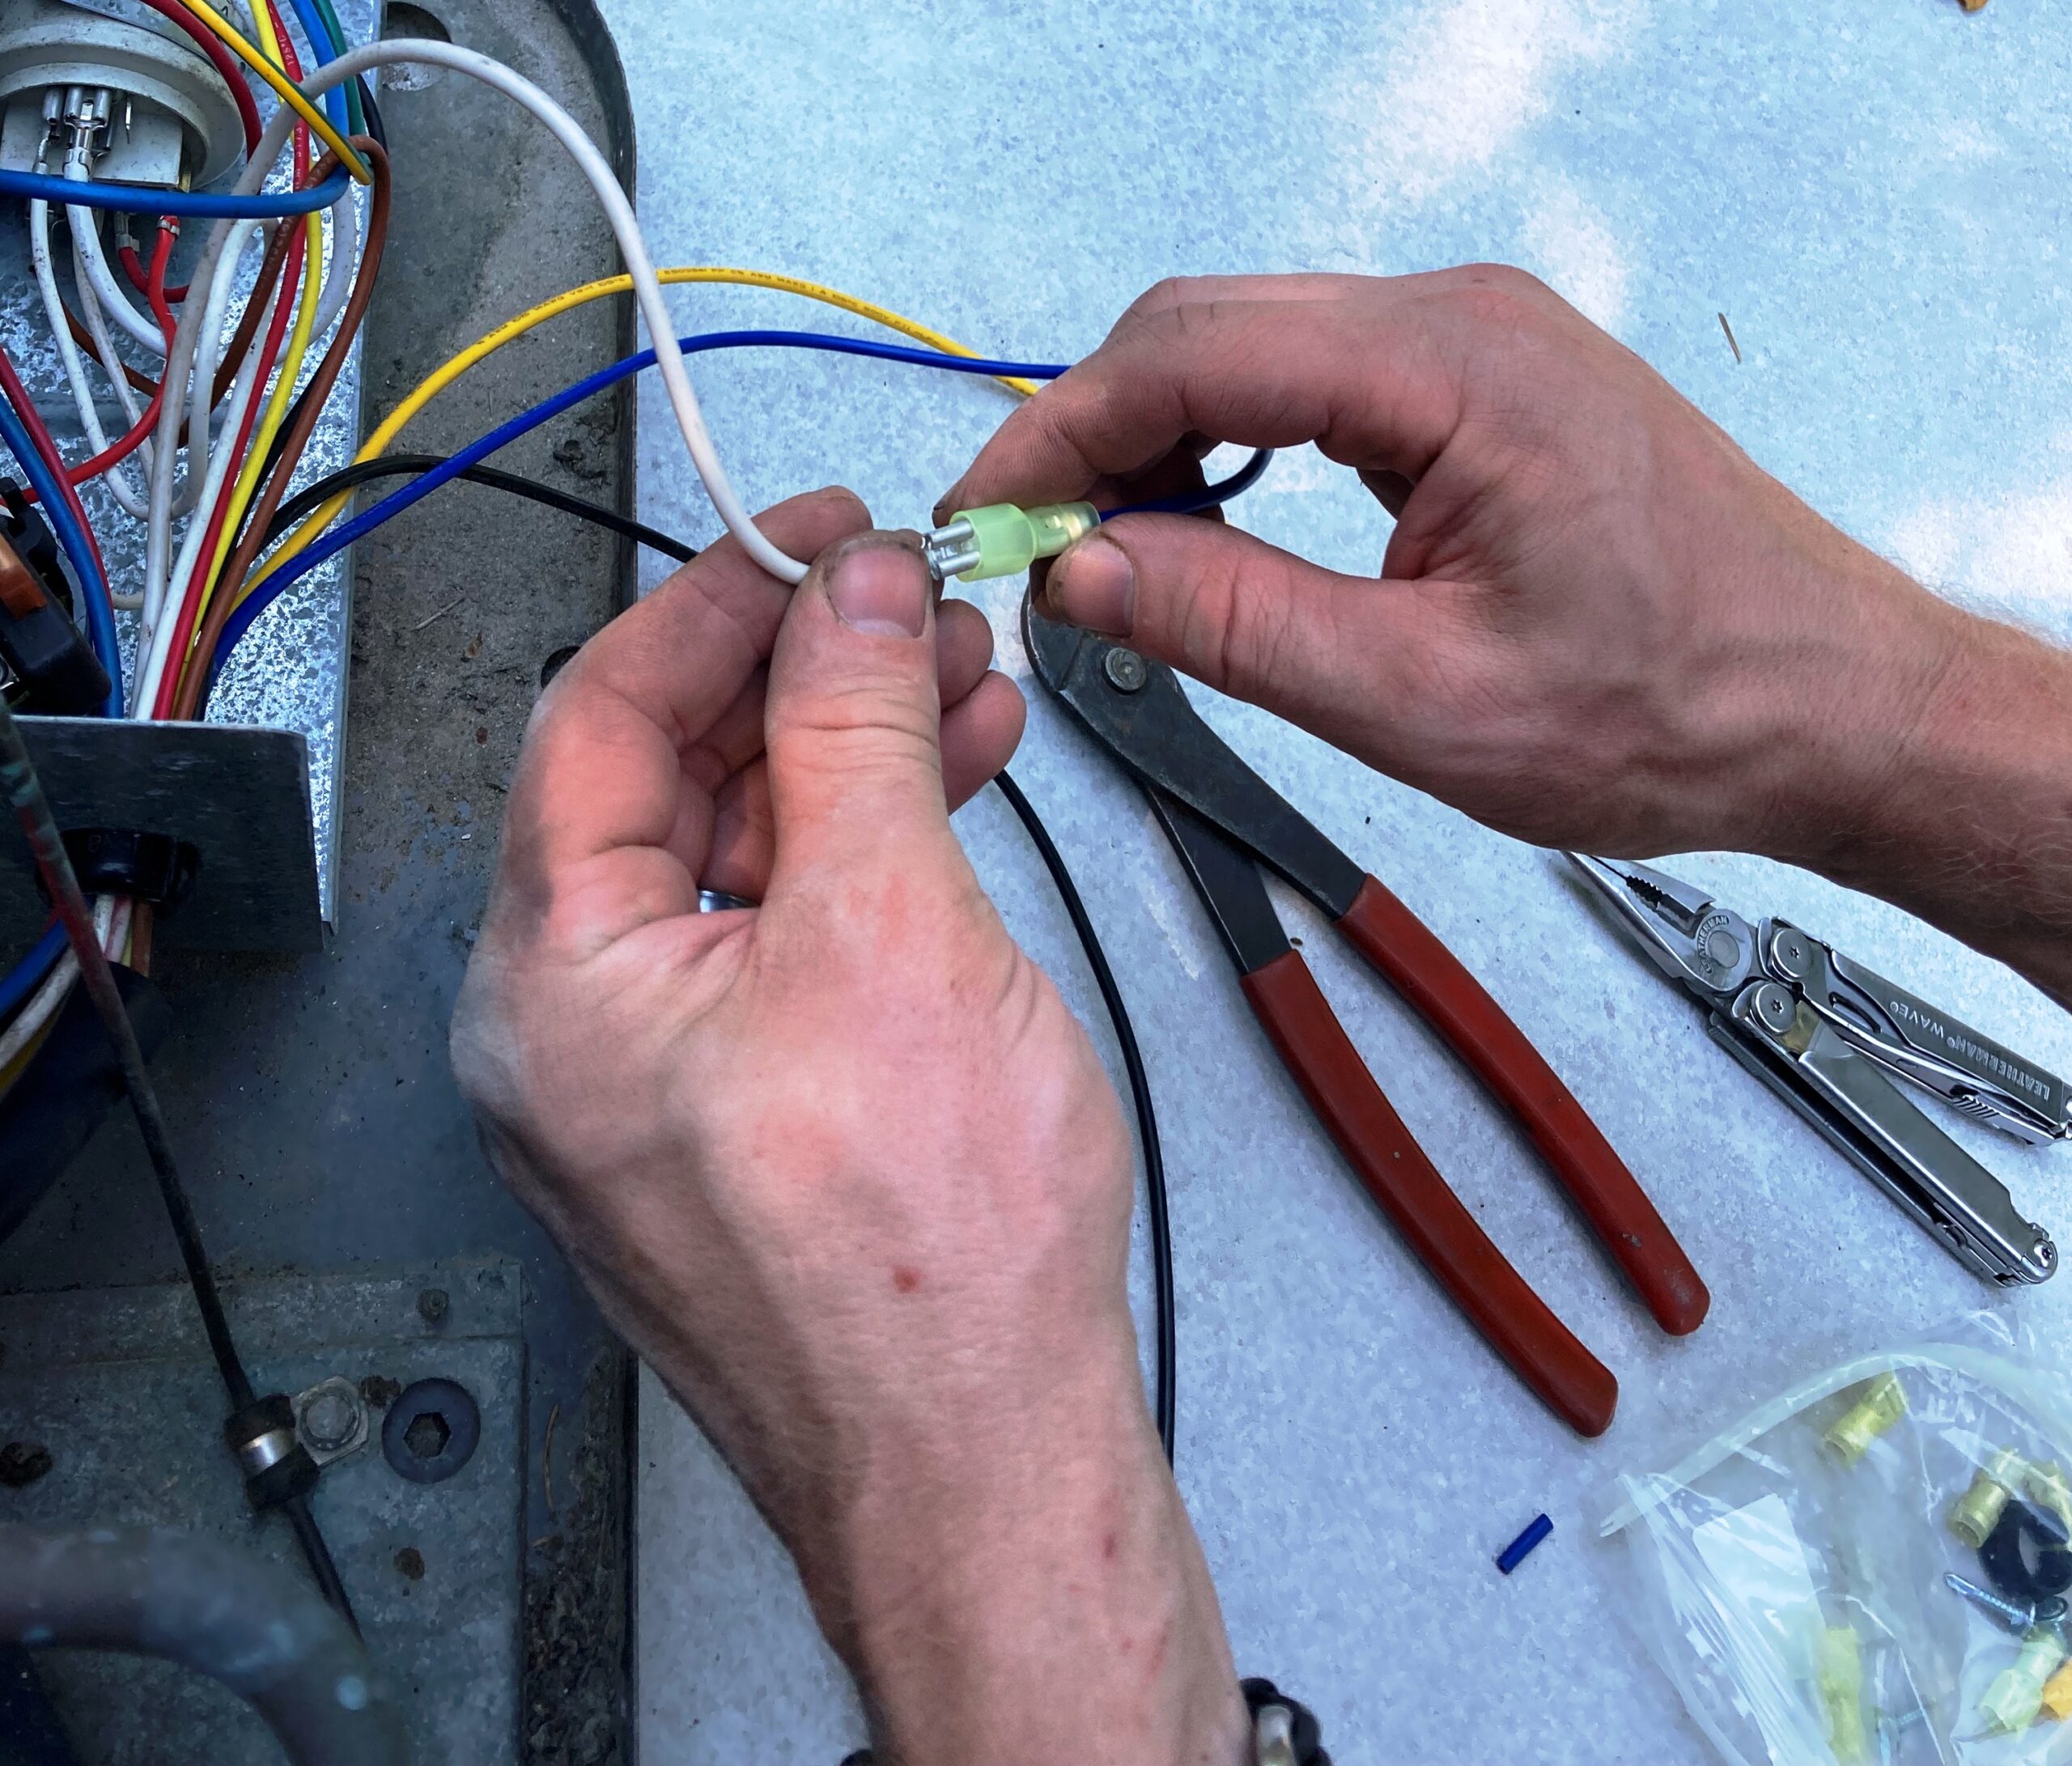
The unit was ordered and quickly delivered to my son’s house. Since I was not able to “preview” the installation, I packed all the supplies and equipment I thought I might need based on my previous installation. This included a soldering gun, spade terminals, wire cutters, butt connectors, extra zip ties, etc.
SoftStartRV Installation
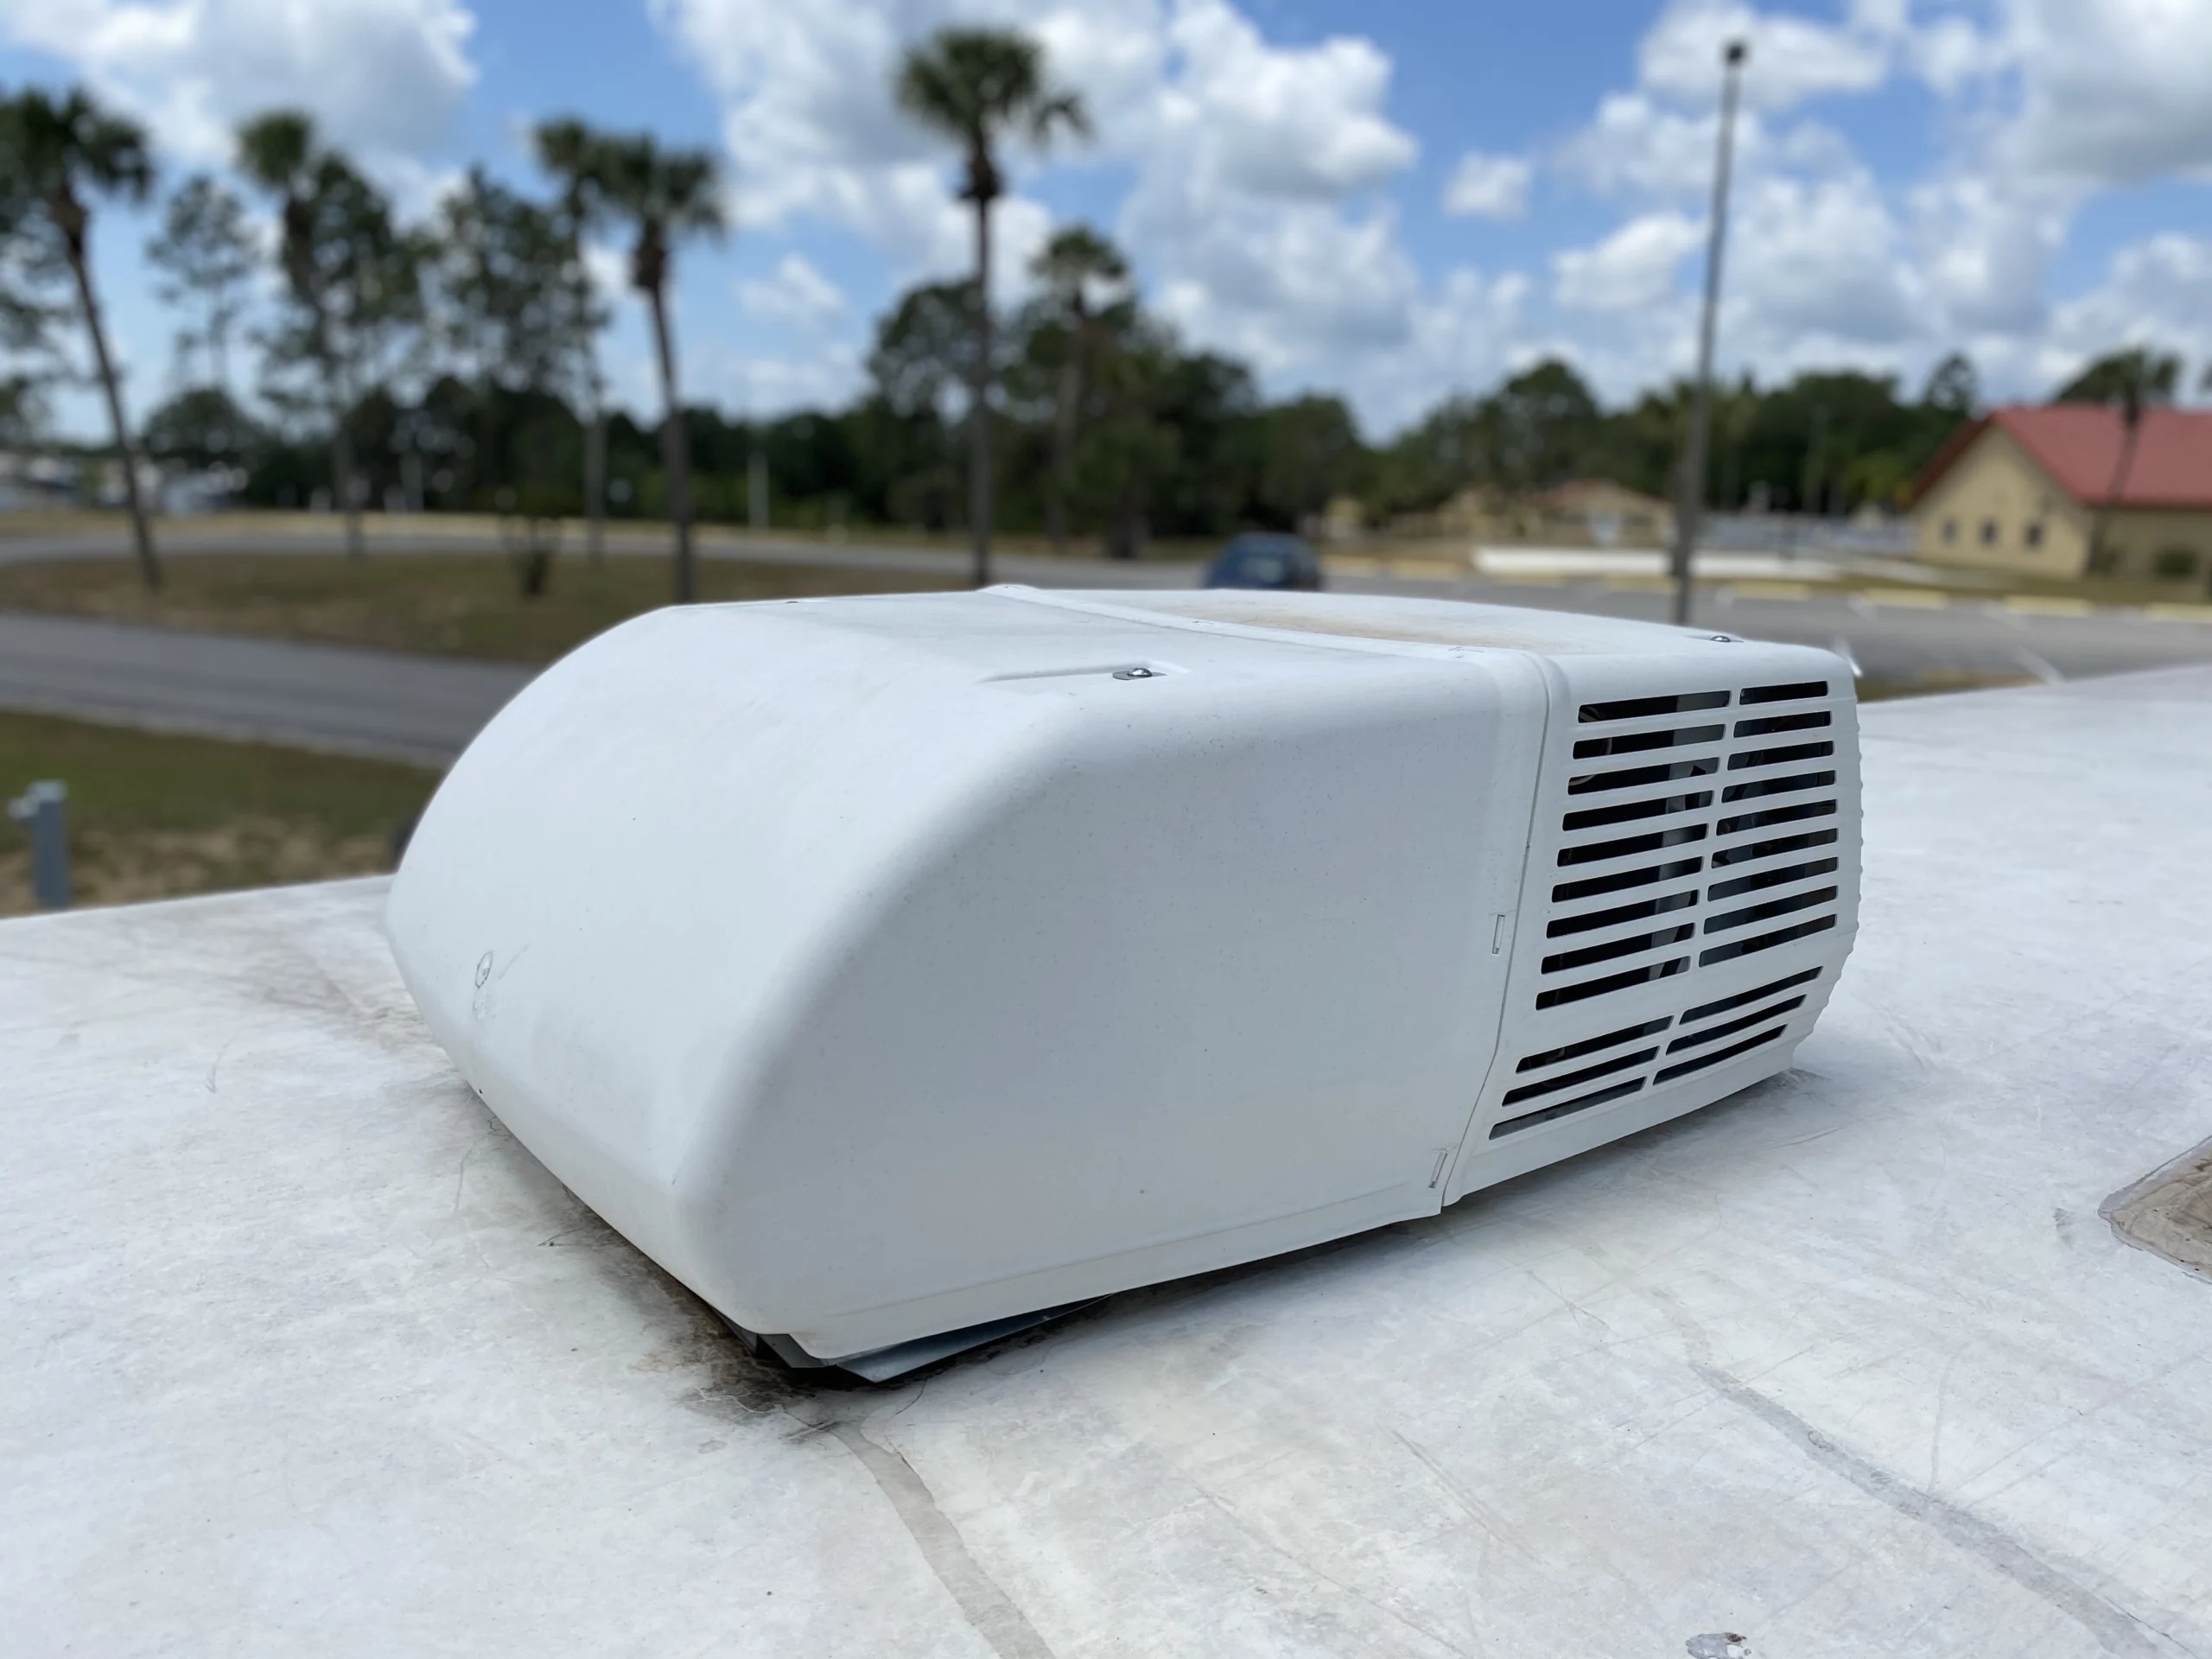
After removing the shroud from the air conditioner and pulling up the installation instructions online, I thought, wow, this is going to be easier.
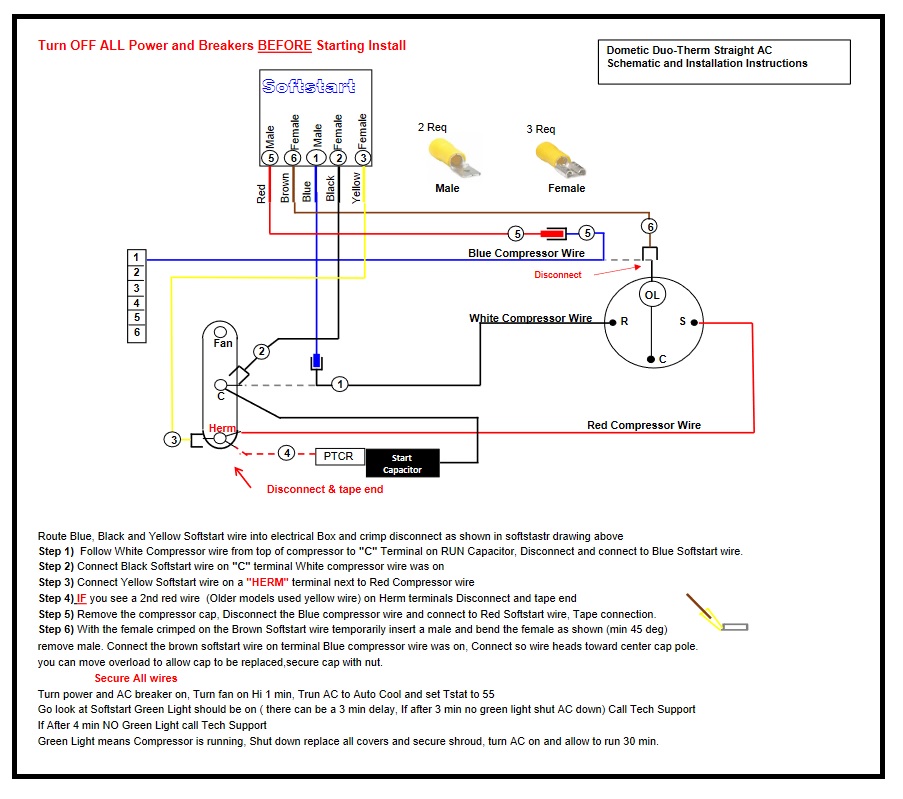
The six-step instructions were short and concise. The first five steps only contained one line of text! The instructions included a colored schematic of the air conditioner, which was easy to interpret and clearly showed the location of the wiring connections for each step of the installation.
The wires were also numbered on the schematic to match each numbered step of the written instruction. As advertised, there was no cutting or splicing of wires, basically it was “plug and play.” Yes, it was that easy!
My thoughts
If you count turning the power on and off and Step 6 as containing two full length sentences, you could argue the installation is a 9-step process, but either way, it is a fast, easy, and nearly foolproof installation.
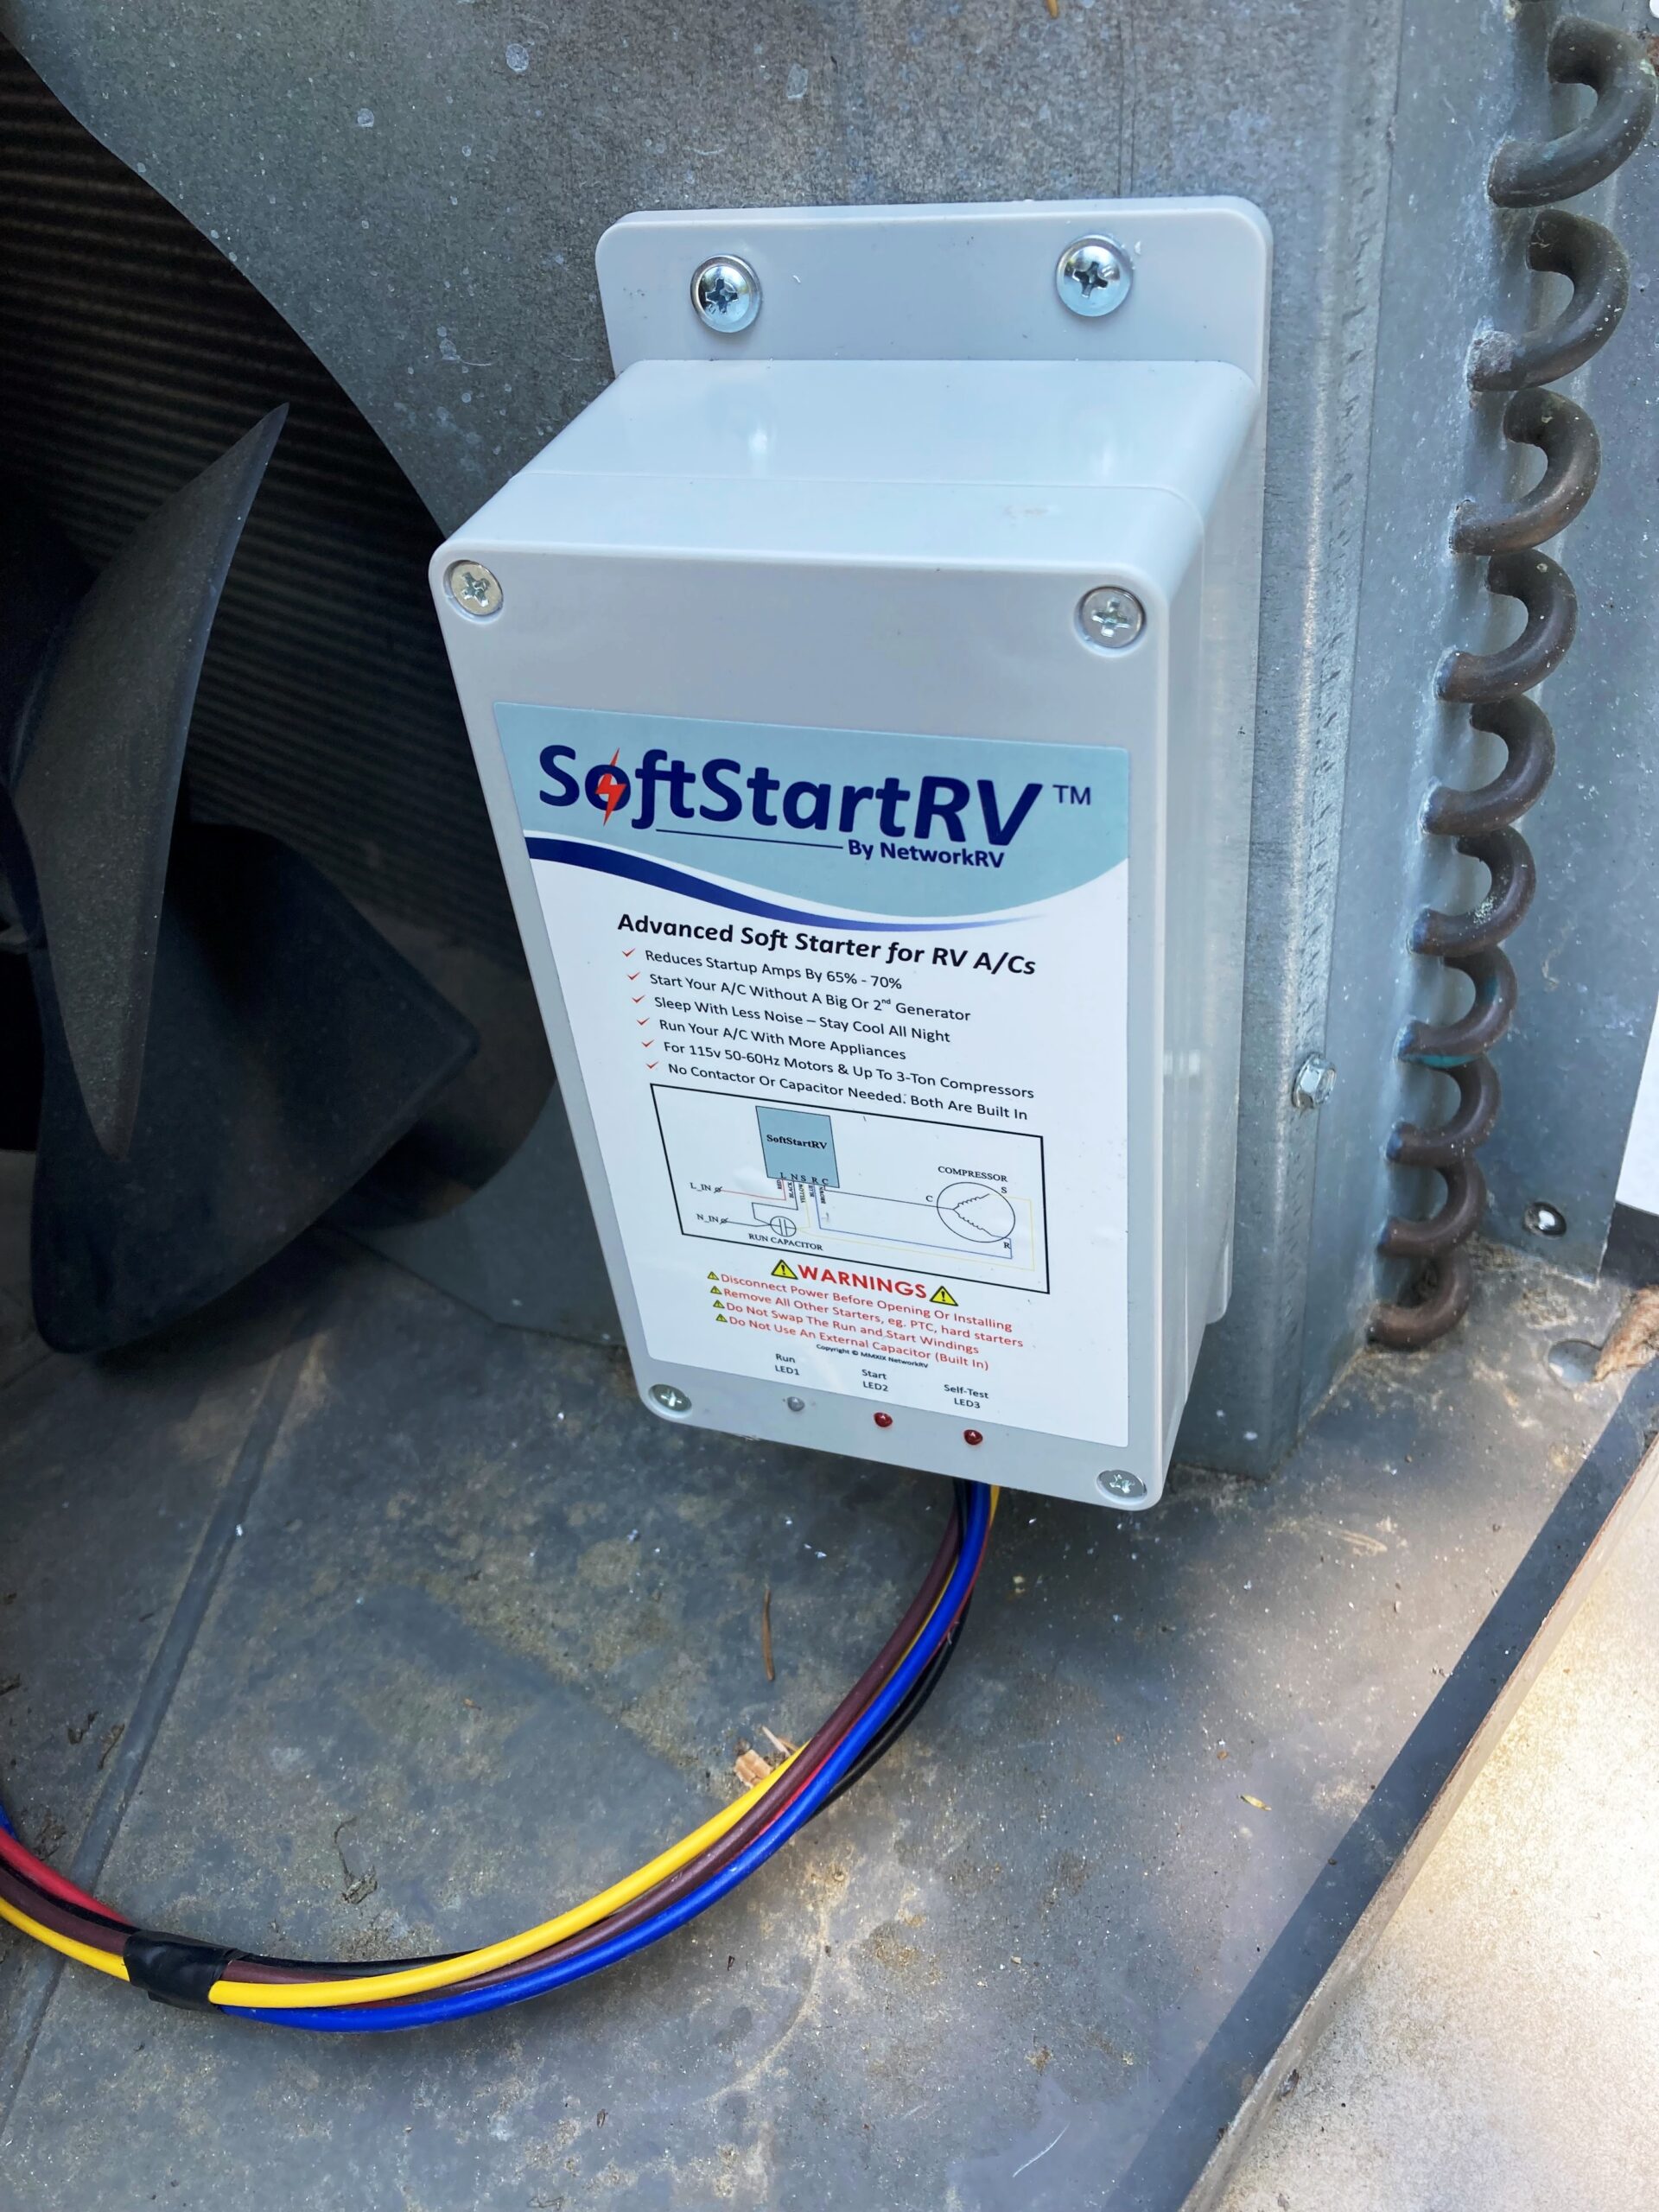
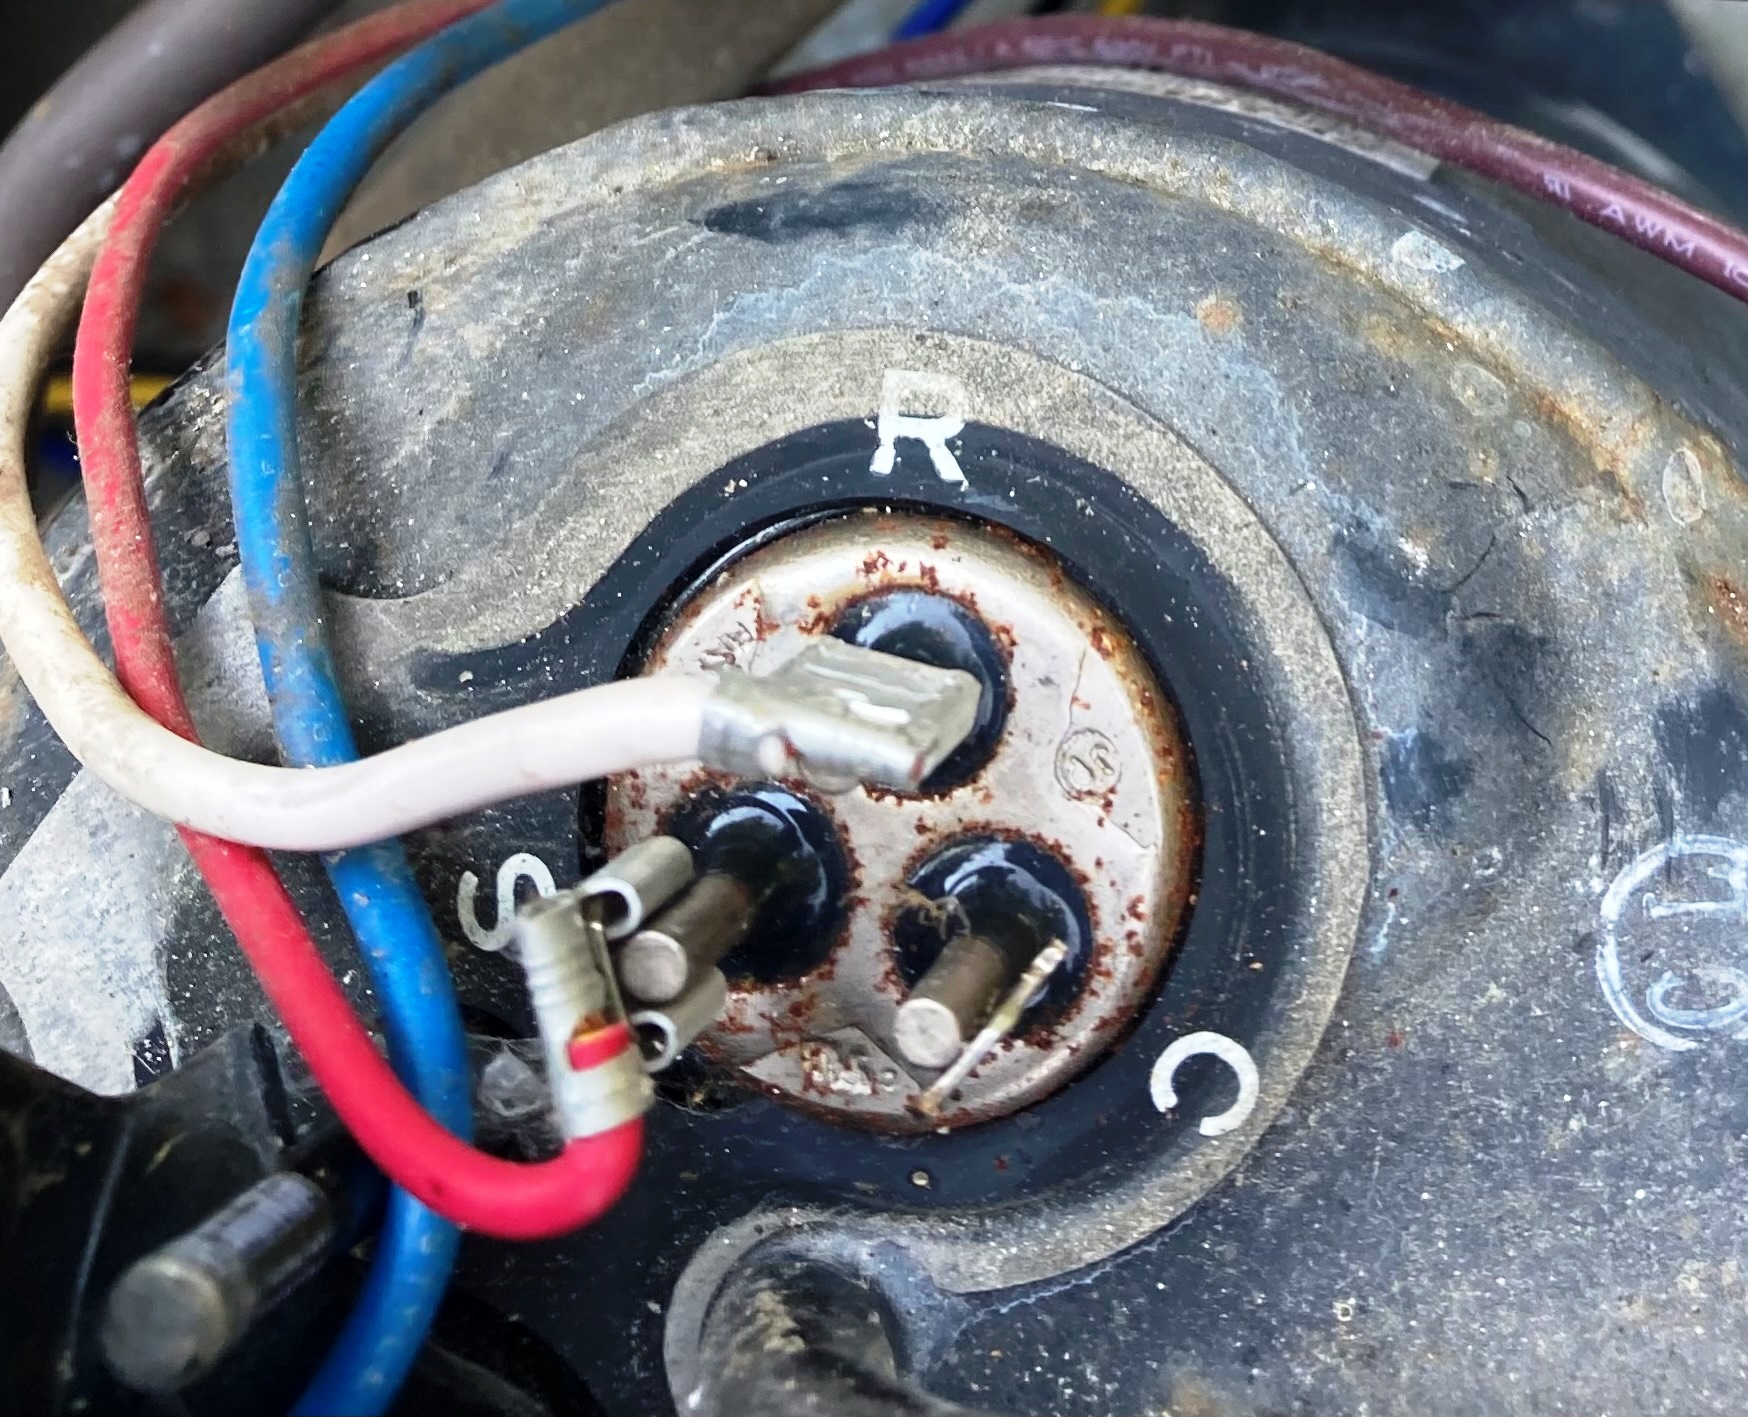
The only “tough” part was in Step 6, where the instructions request you to bend a female spade connector at a 45° angle. We were installing the SoftStartRV on an older Duo Therm air conditioner, and it appears Step 6 is different for some other makes and models.
The female spade can only be slipped on the male spade in one direction as there is a metal pin from the compressor attached (welded/soldered) to one side of the male spade. You need to install the open side of the female spade to the pin side to get it to slip on.
Of course, we bent the spade in the wrong direction to accommodate it sliding on the pin while allowing clearance for the compressor cap to be reinstalled. We also cut the insulation jacket off the spade terminal to allow more room for the wires under the compressor cap, applying electrical tape in its place as an added safety measure.
As for all the extra items I brought with me? They stayed in the truck, as the installation kit had everything I needed with the exception of electrical tape.
Tools you will need for installation:
- Screw gun to remove the shroud screws and screw the SoftstartRV into place
- Wire crimpers
- Needle nose pliers can come in handy removing and installing spade terminals
- Electrical tape as noted above
Note: You don’t even need wire strippers, as the insulation of the wires on the SoftStartRV unit are already scored. Just slip off the insulation after routing the wire and crimp on the appropriate connector.
Check out the video below of a no-cut/no-splice installation. Note: On a Duo Therm air conditioner, you are instructed to route the wires first, then install and crimp the connector which were included.
Learn more about SoftStartRV
If you have put off buying a SoftStartRV unit fearing the installation process, fear no more as the new installation procedure is practically foolproof! Get one today and start enjoying the benefits.
Related articles: