
How To Make Your Camping Stove Work Like New
There is one thing that brings families together whether they are full-time RVing, part-time RVing, or on a weekend camping trip, and that is cooking and eating together. Although most RVs have a functional kitchen, and that is one of the great things about them, there’s nothing as good as cooking outside in the fresh air on a camping stove.
Cooking outside is a great way to appreciate the views and each other’s company, and it also keeps your rig cool by not cooking every meal inside. But when your camping stove isn’t functioning properly, cooking outside can turn from a relaxing and fun experience into a very frustrating one.
We’ve actually had times where we’ve thrown in the towel in the middle of cooking and lugged everything back inside to our RV stove. That is why we were so happy when we figured out this simple and easy fix that has our camping stove working like new again!
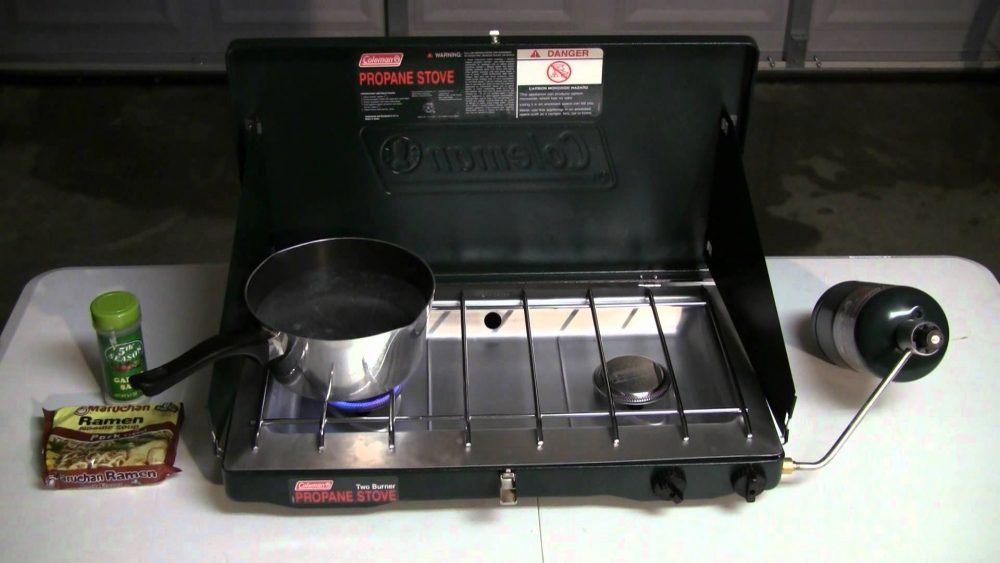
We have owned two Coleman stoves over the past years and have found them to be the right price with decent performance, but I noticed recently that the flame on our camping stove was very touchy. When the camping stove was on, it would be tough to get it to a low enough flame so it wouldn’t burn everything that I tried to cook. It seemed like it was always on high flame. Sound familiar!? Read on.
I decided one day to do a little maintenance on the gas valve to try and fix the high flame problem, and I found that it made a big difference and was an easy project that anyone can do. An hour of my time, some basic hand tools, and a few supplies made my camping stove like new again, and if you follow these steps it can work on yours too.
Step 1: Remove the burners and cooktop
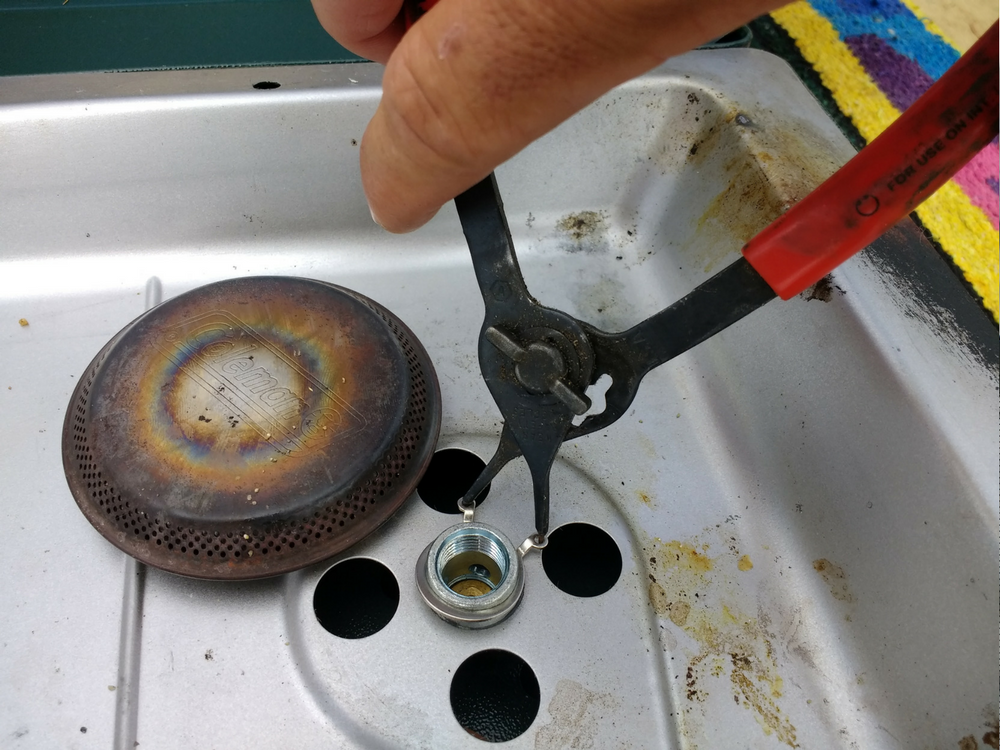
The first thing that needs to be done in this process is the removal of the burners. You will need to unscrew the burners on the stove by simply unscrewing to the left with your hand. You should now see the two retaining rings that need to be removed.
Grab your retaining ring pliers and open them so you can remove the two retaining rings, but be careful to not lose them as they can spring off of the pliers. With the burners off and retaining rings removed you now should be able to remove the cooktop to access the gas valve assembly.
Step 2: Disconnecting the gas valve assembly
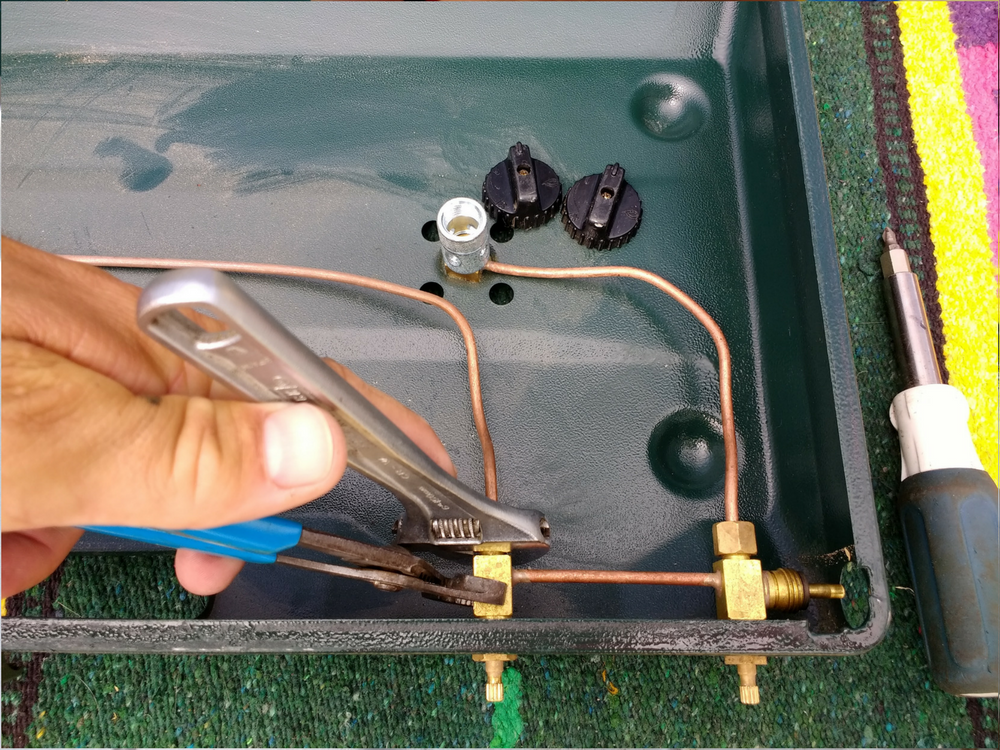
With the cooktop removed you will see the gas valve assembly and the gas tubing that connects the valves to the burners. For this next step, you will need a small adjustable pliers and a small adjustable wrench to loosen the brass nuts.
Put the adjustable pliers onto the gas valve body and the adjustable wrench onto the brass nut and loosen the nut that connects the gas tubing to the gas valve body. Be careful on this step not to kink the copper tubing for it is small and supple. With both brass nuts loose, simply unscrew with your fingers.
Next, take a Phillips screwdriver and remove the two small screws that connect the knobs to the gas valve stems, pull the knobs off, and set them aside. You should now be able to completely remove the gas valve assembly.
Step 3: Remove the gas valve stems and clean
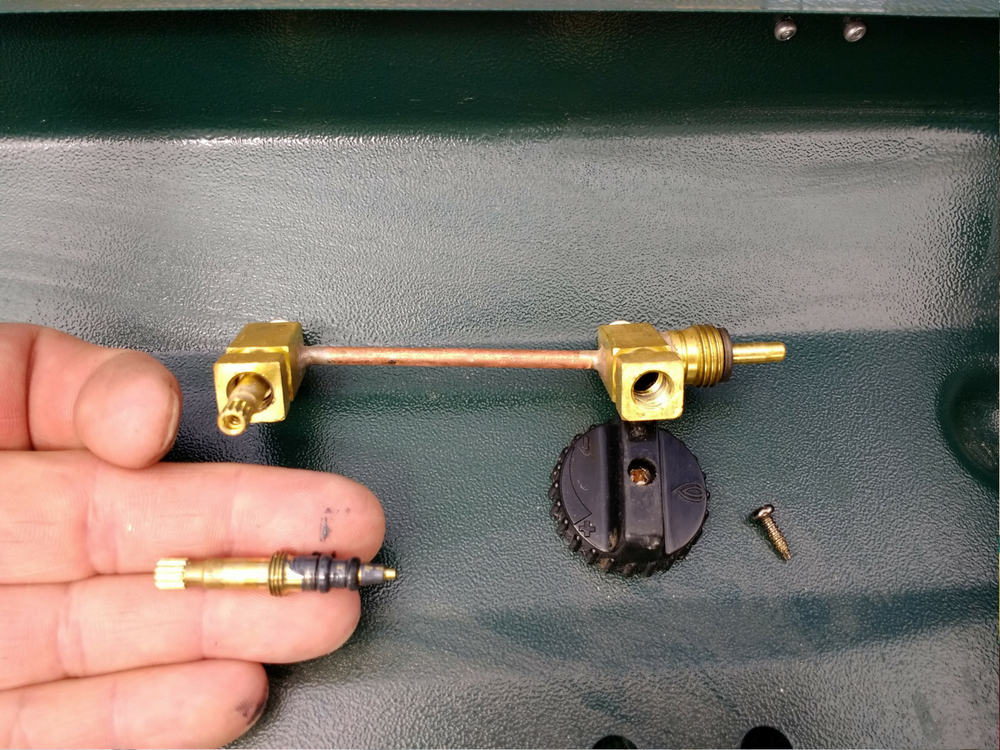
Take the gas valve assembly and one of the black knobs that you removed in the previous step and put it back onto the valve stem. Turn the knob as if you were turning the gas valve to the open position and then unscrew completely with your fingers.
The valve stem should come out completely and now you will be able to clean all parts completely with a degreaser spray and Q-tips. I used electrical contact cleaner so I wouldn’t damage the rubber o-rings on the valve stems.
Step 4: Apply new valve stem grease
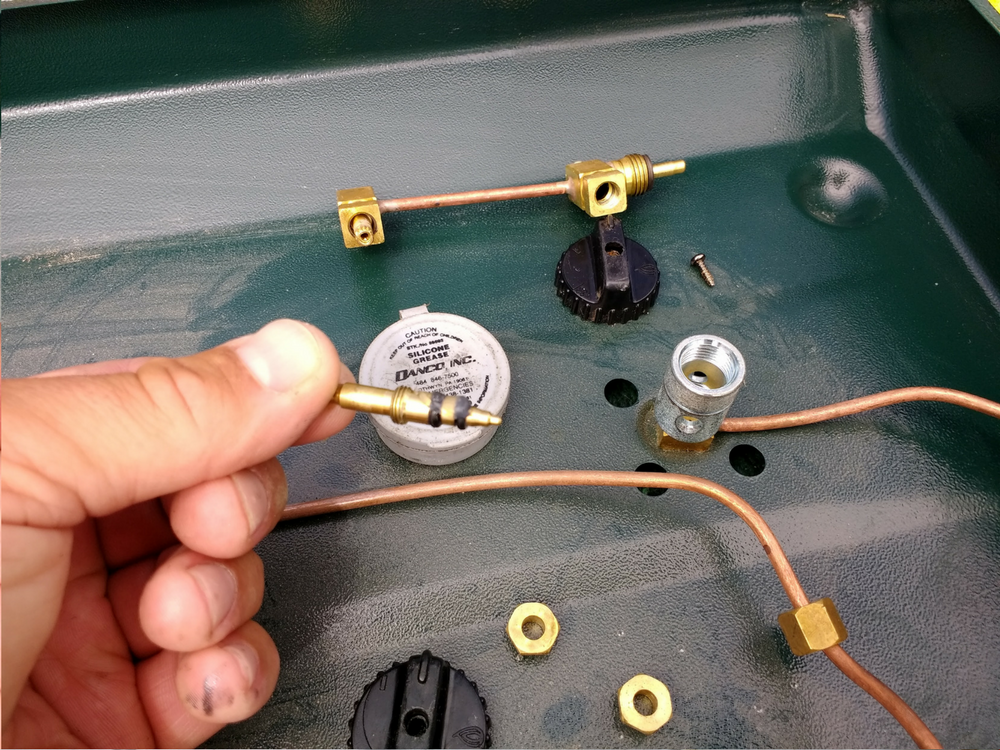
With the valve stems and gas valve bodies all clean, they are now ready for some new grease. This is the simplest step in making your camping stove super efficient and it’s super easy.
I apply a little plumbers grease to the o-rings of the valve stems. This grease is what makes the valves have a smooth operation for precise flame control.
Step 5: Cleaning and reassembly
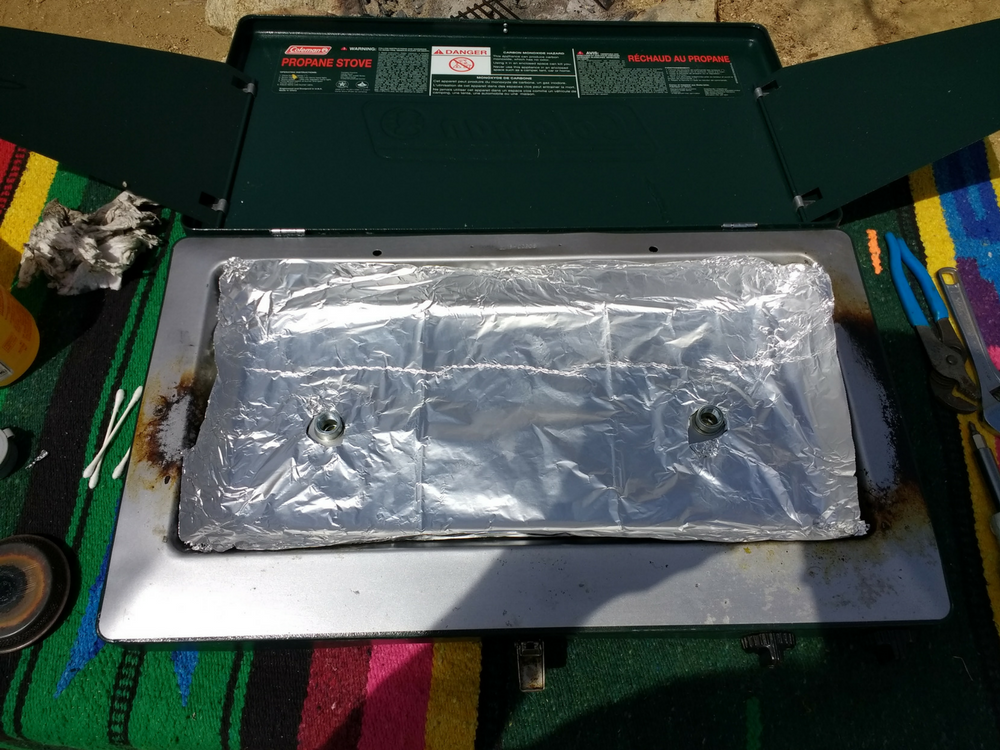
The final step is cleaning the stove while you have it all apart. I use a kitchen degreaser cleaning spray and spray the entire stove and wipe down with paper towel to remove all food and grease splatter from cooking. Once the cleaning is done reassemble all the pieces of the stove, and one final thing that I like to do is put tinfoil onto the cooktop so it can catch any spills making future clean up easier. That’s it, folks.
We have done a lot of cooking over the years inside our rig, outside over a fire, outside on a grill, and we’ve found that for basic everyday meals a properly working camping stove is the best balance between ease of preparation and still being able to be outside while cooking. Plus, if everyone is outside hanging out, who wants to be stuck inside cooking!?
Now that our camping stove is working properly again, we’re cooking outside more than ever and we’re not getting complaints about burnt grilled cheeses anymore.
If you find that you are not able to properly control the flame on your camping stove, give this little maintenance trick a try before cursing and condemning the stove. Hope this can help someone out there. Cook on my friends.


I really liked this. It was something I hadn’t thought about doing, but probably does need to be done.