
This is the second article in a series about making your own stealth RV from a conversion van.
In the first article I talked about some need-to-know tips on buying and prepping your commercial van. (You can read the first article here)
In the following article you’ll learn how to transform your empty cargo van into a comfortable, useful living space.
I’ll show you how to install flooring, insulation, paneling, and a light-blocking curtain between the cab and living area.
Installing a Subfloor in the Van
Here’s the method I used when installing a subfloor in my van.
1. Refine your wiring plan and double-check wire runs
Before you lay down insulation and flooring, revisit your wiring layout and make sure that you have all the wiring you want in place.
Note: If you’re unsure about powering electrical devices in an RV you can read more here and here. The next post in the ‘How to Build an RV Camper Van’ series will teach you all you need to know about the wiring for your van – stay tuned!
Now is the time to run your wiring to the general areas where you plan to install such things as lighting, a water pump, a microwave or even a TV. (I’ll talk more about placement of these items in a future article).
Who said living in a van had to be Spartan?
Might as well include the amenities that make life more comfortable.
2. Cut and install foam board insulation
For the floor 4′ x 8′ sheets of 1” rigid foam insulation works best. You can find these sheets at your local hardware store.
Rigid foam insulation is not the white stuff that crumbles into small beads, but the pink sheets that will support some weight.
You can run wiring in the gaps between sheets or along the wall depending on your needs.
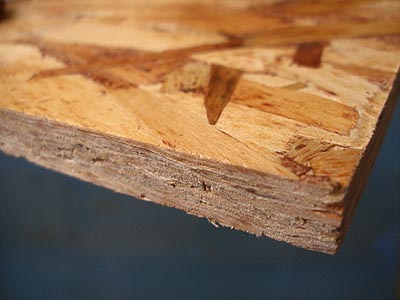
3. Place Oriented Strand Board over the foam insulation
Lay 4′ x 8′ sheets of ½” OSB (oriented strand board) on top of the 1″ rigid foam insulation.
Although OSB doesn’t have a natural grain, look at the way the wood chips are aligned and make the longest side run from the front of the van to the back.
You’ll install the finished floor layer crosswise later on. Running them perpendicular to each other will make the floor more rigid.
OSB is similar to plywood, but costs less and has more strength. It’s usually used in housing construction for load-bearing applications.
There is no real need to fasten this floor to the steel ribbed floor of the van.
Drilling holes or running screws through the metal could increase the chances of rust forming later on.
Gravity and friction will keep everything in place just fine.
Installing Insulation in the Ceiling and Adding Paneling
Once your subfloor is in place, you’re ready to tackle the ceiling and walls.
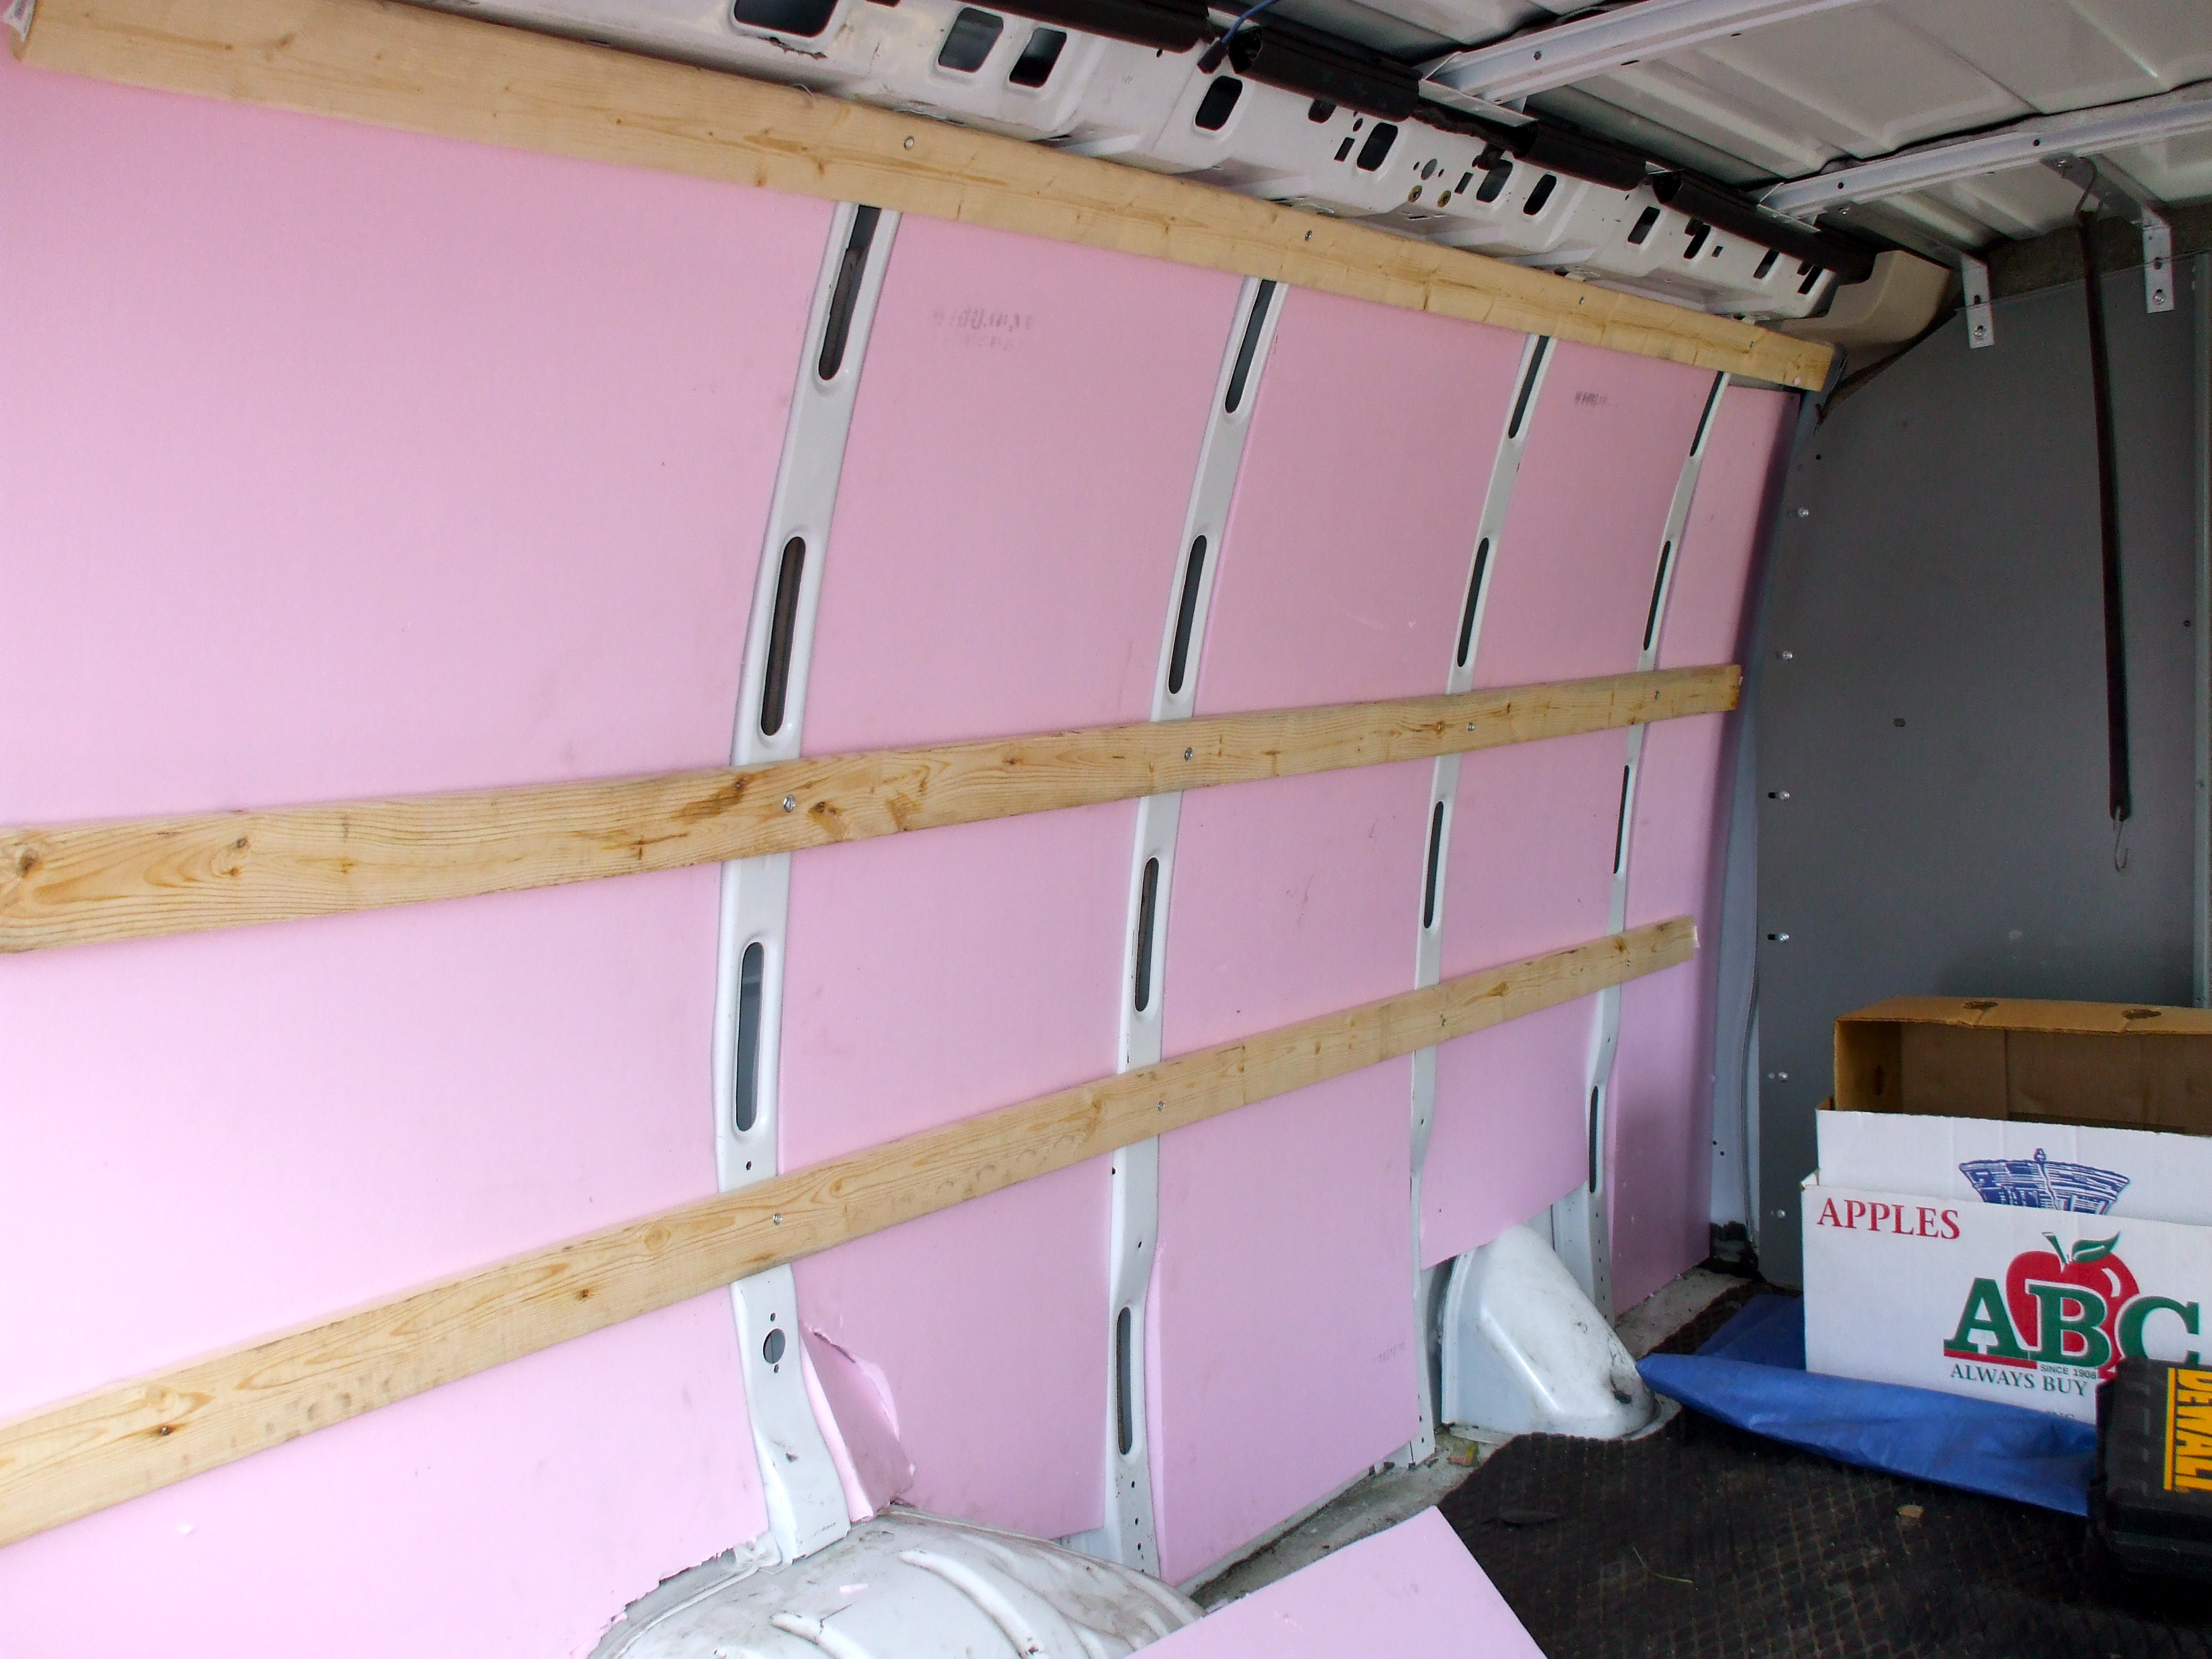
1. Install some furring strips for the wall paneling
The steel walls of the van have vertical, formed beams running down their interior side.
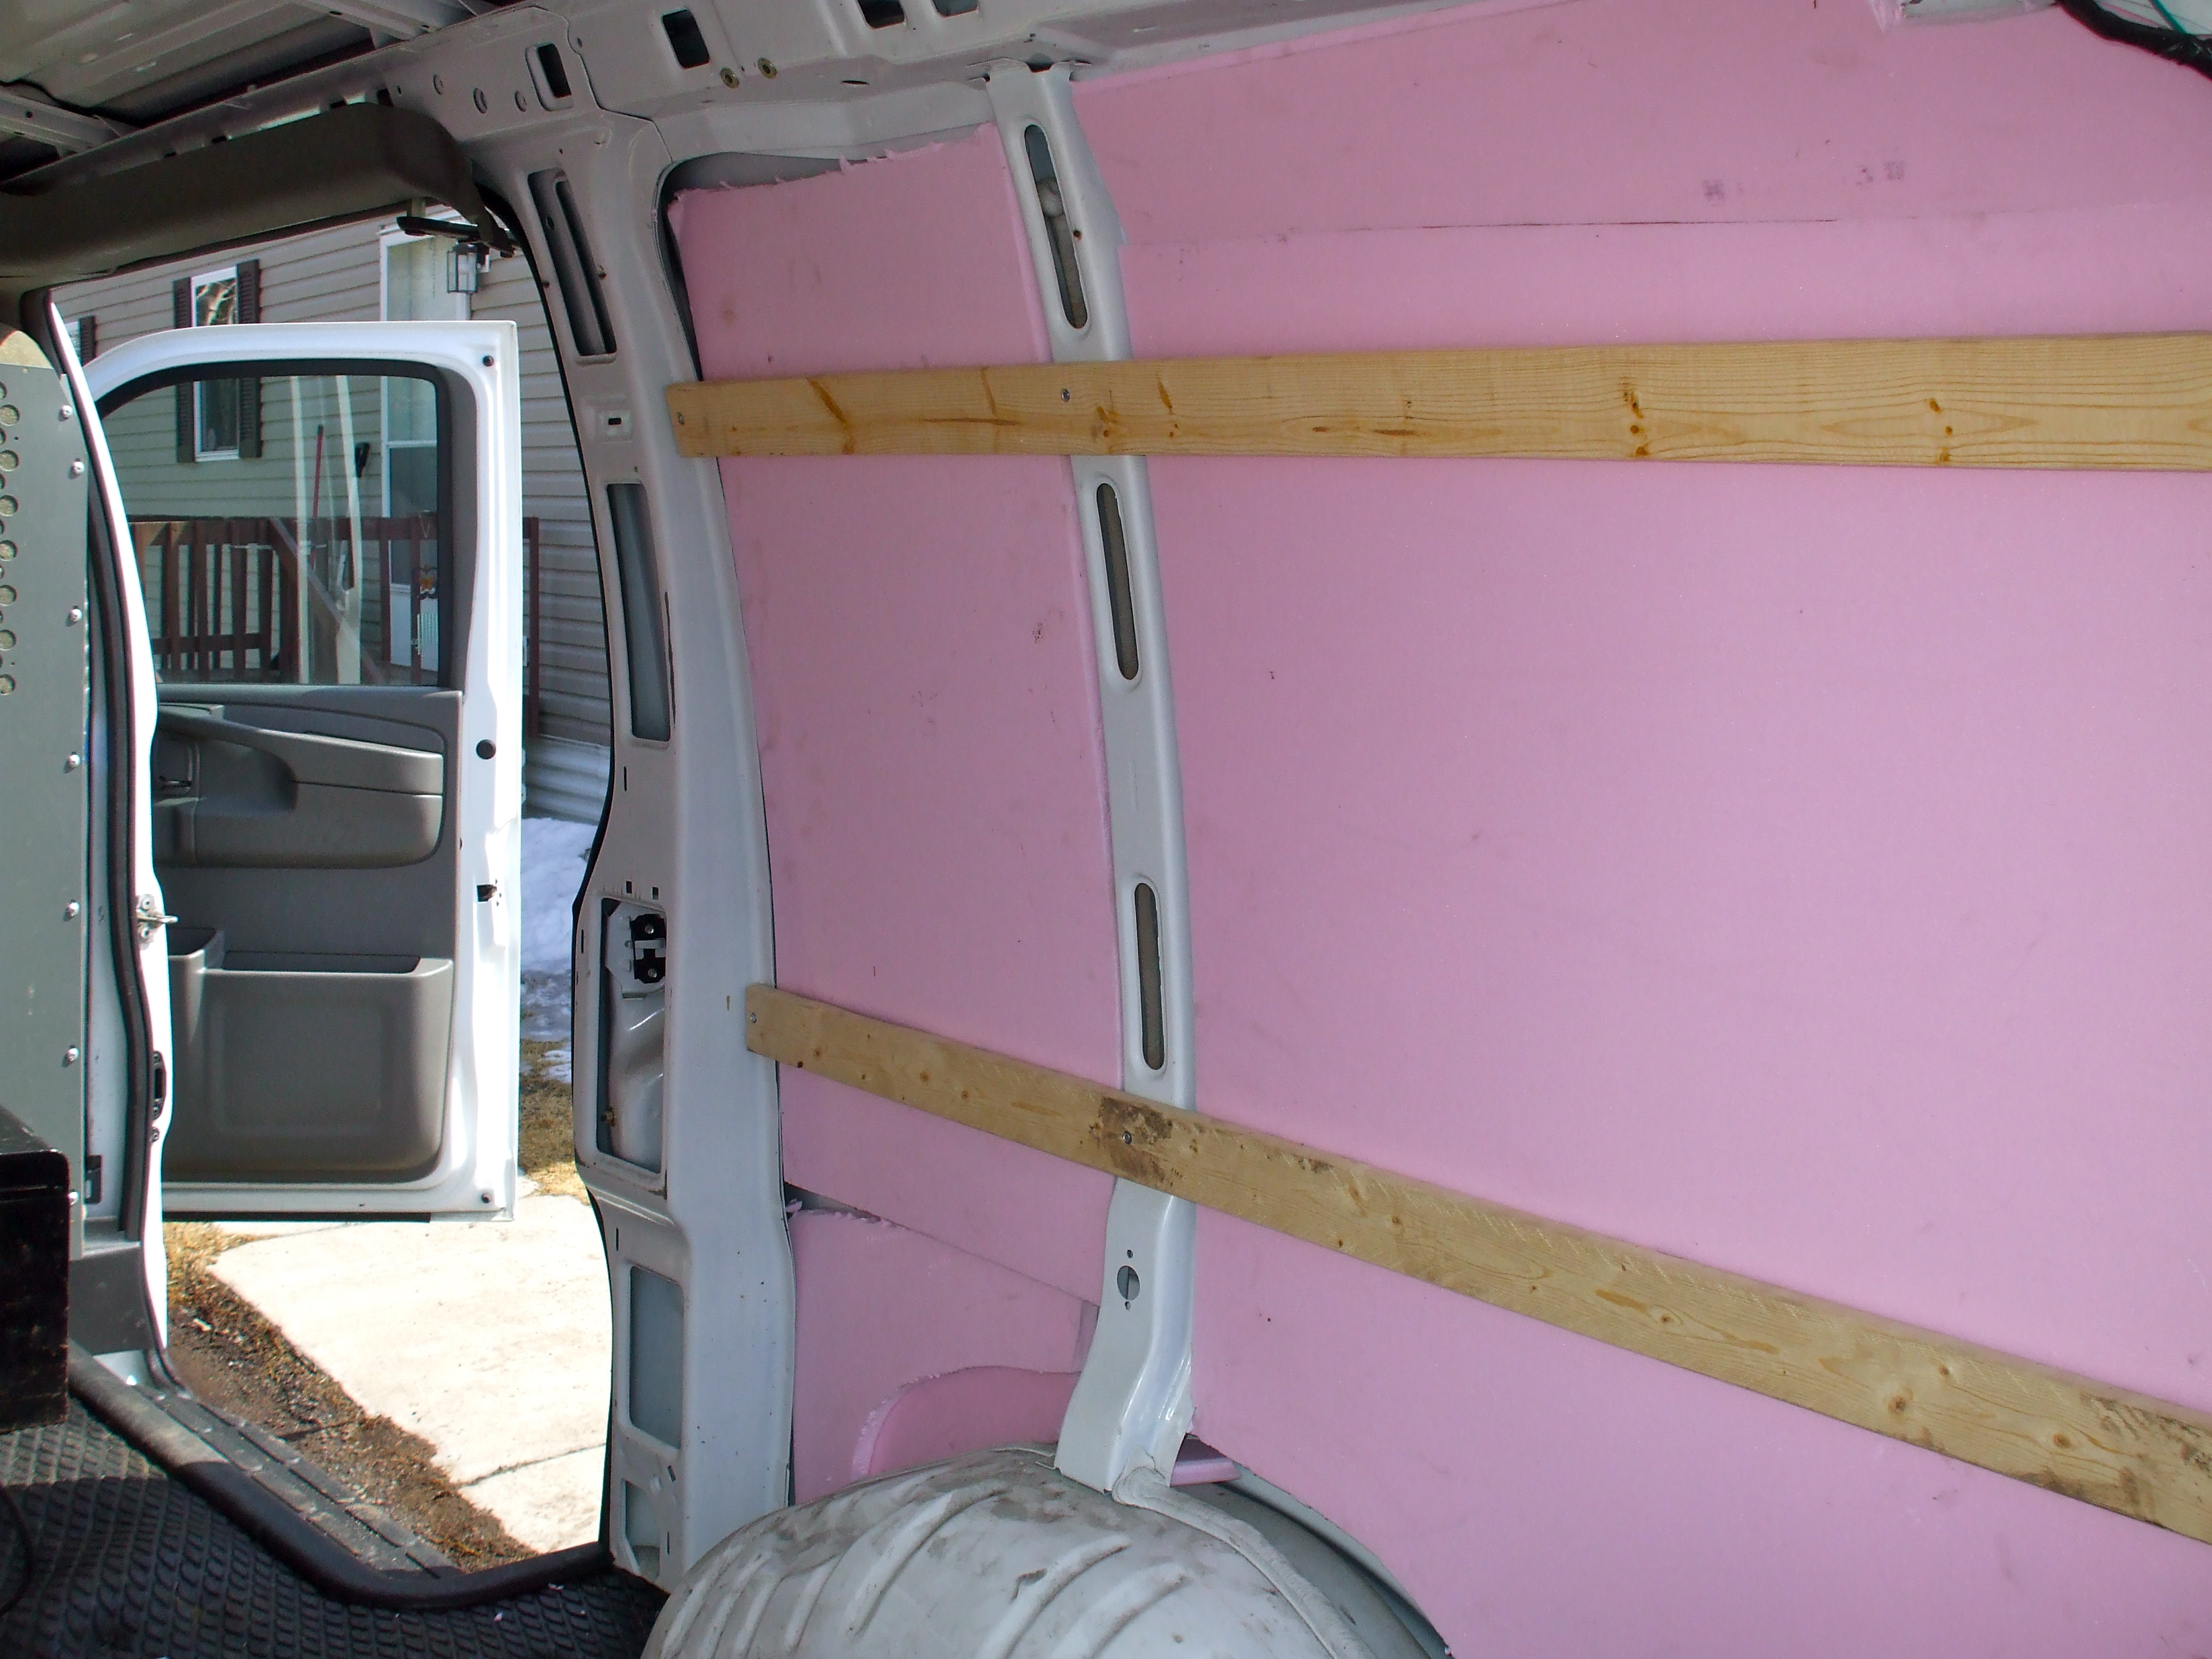
Using the correct length of self-drilling screws, fasten 1″ x 3″ furring strips the length of the van.
Note: Be sure the screws are not so long that they puncture the outer skin of the van.
Install two rows of furring strips, one each about 1/3 and 2/3 up the wall.
2. More rigid foam goes behind the furring strips
Cut pieces of 1” thick rigid foam insulation and lay them behind the furring strips.
Install the insulation behind the two lower firing strips, and when the wall is insulated install a third row of furring strips closer to the ceiling to keep everything snug.
3. Don’t worry about the curved sides
You will find the wall will have a slight curve to it. Don’t worry about making everything fit perfectly – it won’t.
The paneling will easily follow the curves.
4. Same goes for the ceiling
Use this same method to attach furring strips – and insulation – to the ceiling.
5. Luan plywood works well for paneling
For paneling I use ¼” Luan plywood.
It’s the least expensive true plywood you can buy.
Cheap paneling is often made of hardboard or pressed sawdust board. Neither will hold up to regular van living.
You need to use a plywood material.
Unfinished plywood can be painted, and when it gets scuffed up – repainted.
This will keep your stealth RV van looking fresh and clean for years.
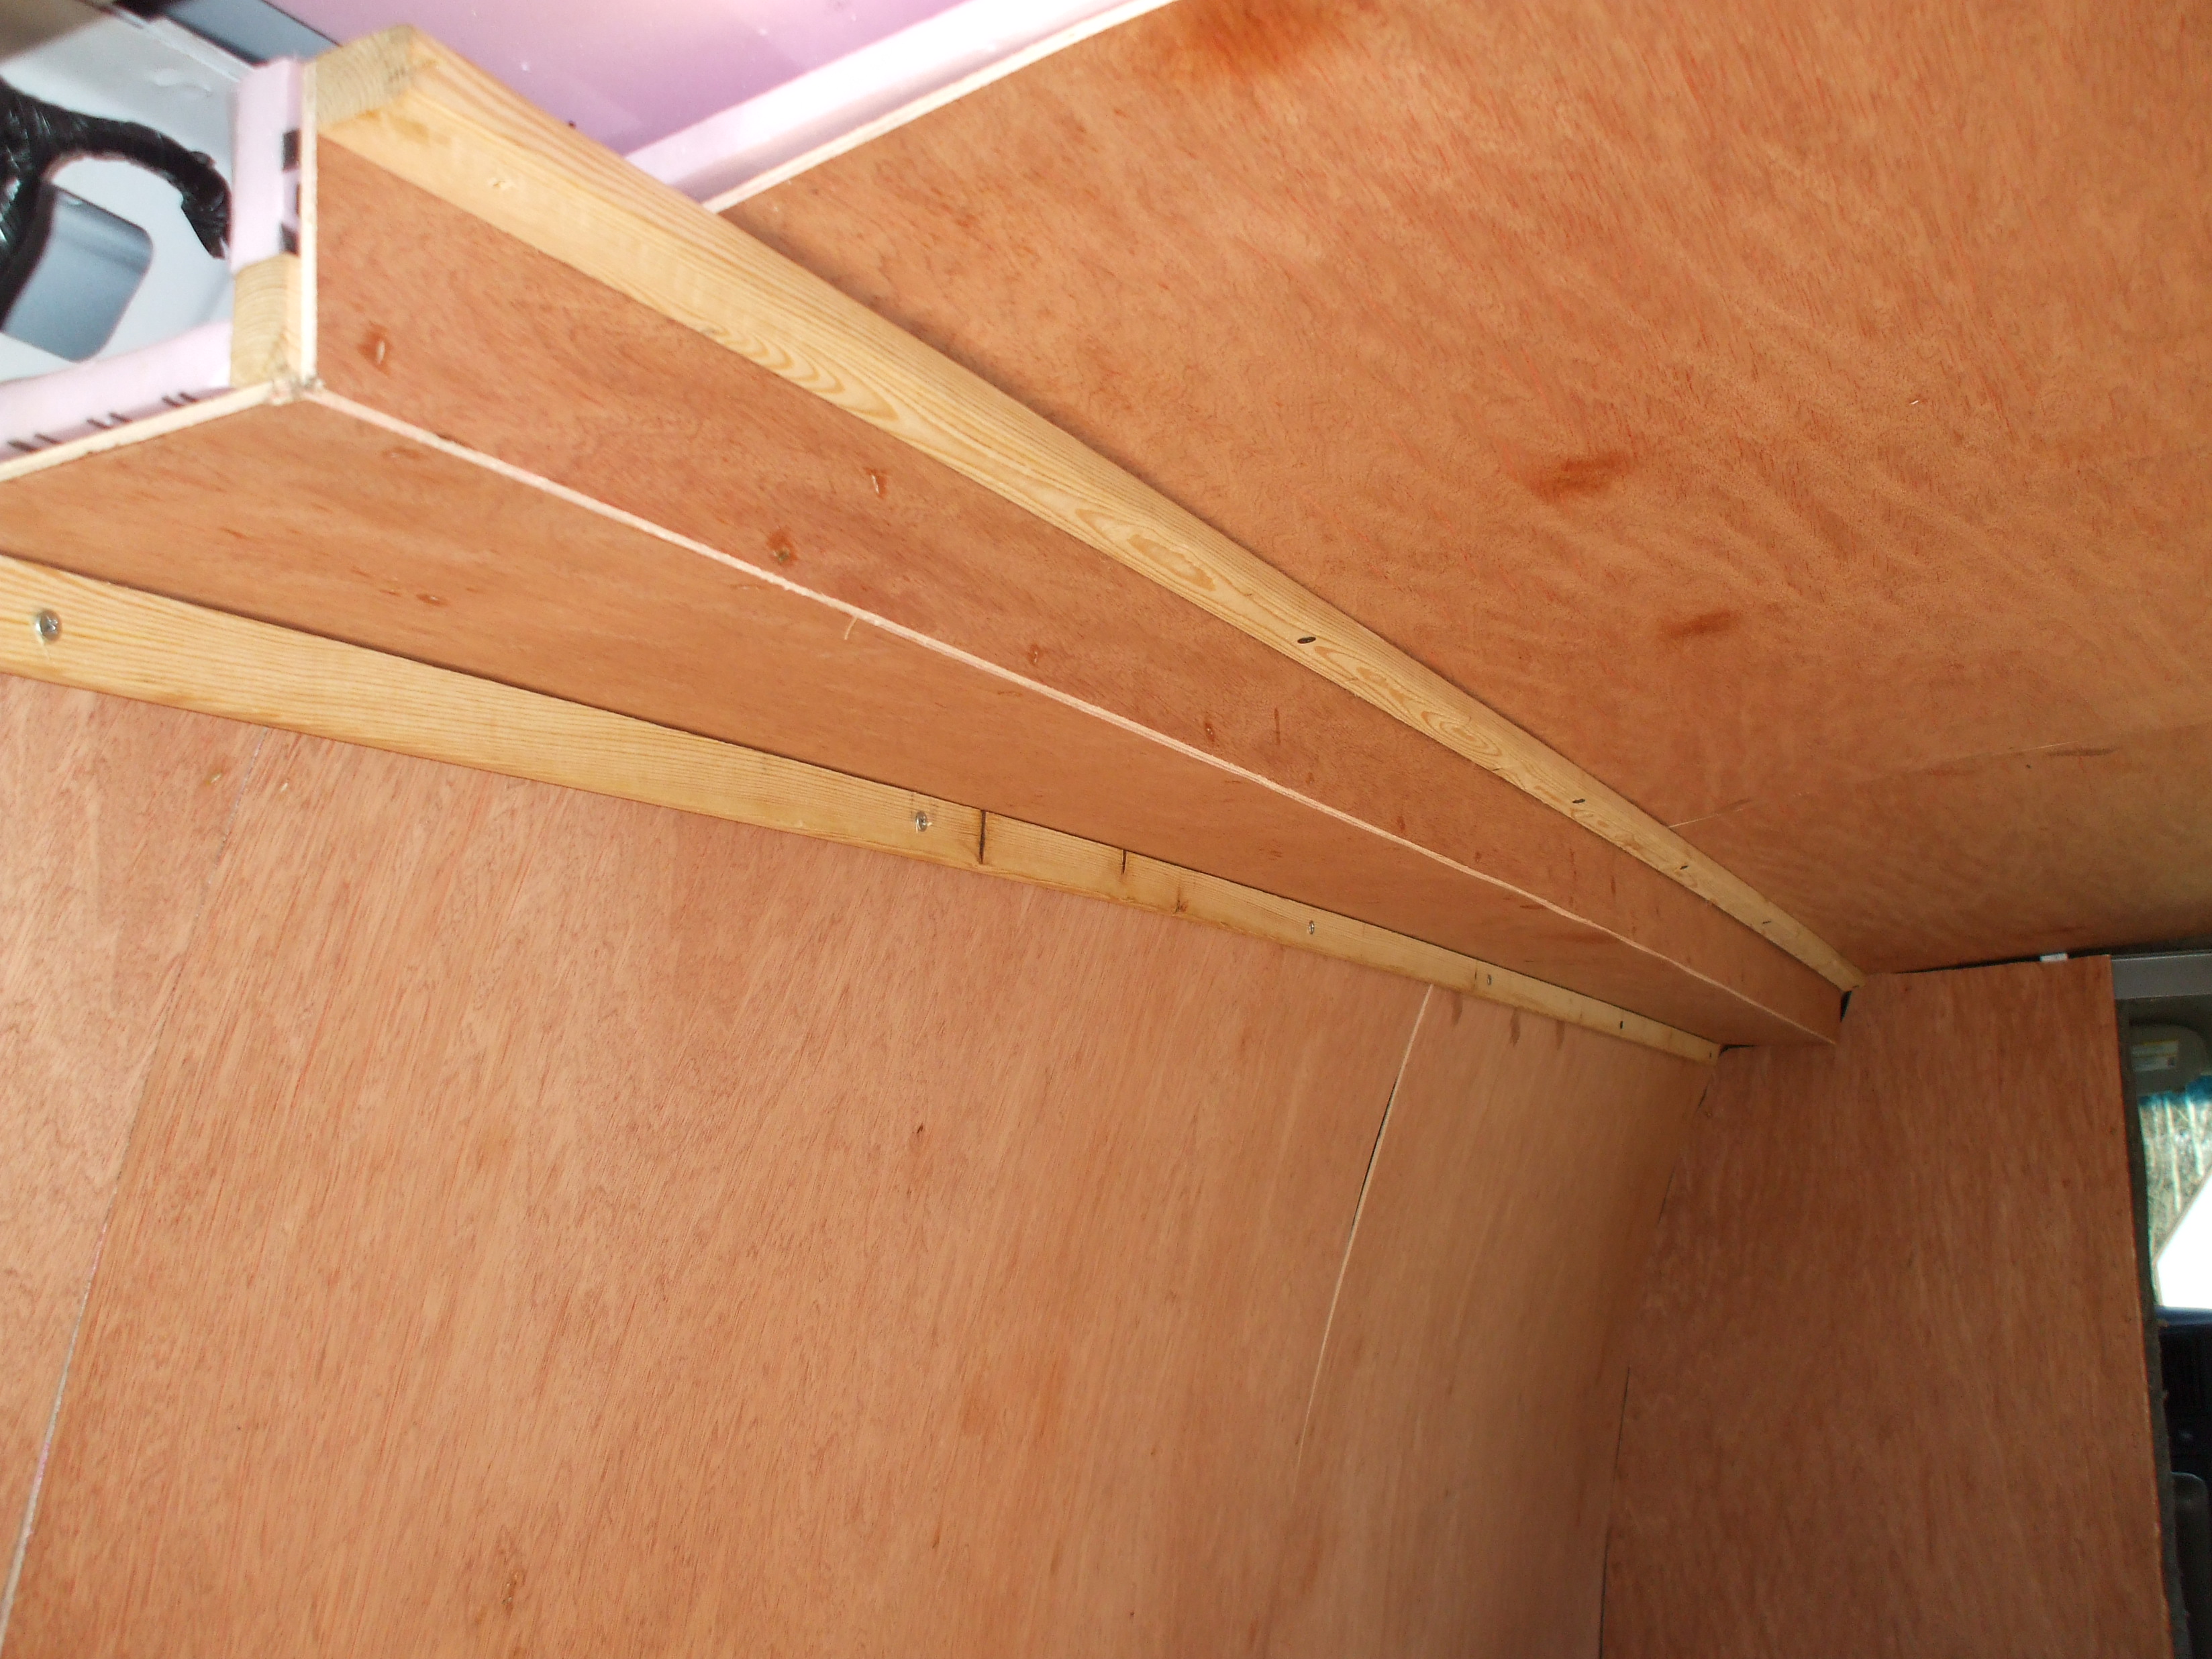
6. Optional: Make soffits for wiring or improved appearance
The area where the wall paneling meets the ceiling paneling can be boxed in. Having the wall and ceiling meet together perfectly isn’t necessary.
7. Add more insulation to make your van ‘energy efficient’
Stuff all crevices with fiberglass insulation.
8. Finish off the paneling with some molding
Once you have the walls and ceiling done, install some inexpensive quarter-round molding along corners to give a professional finished appearance.
Paint and trim will easily hide any minor flaws.
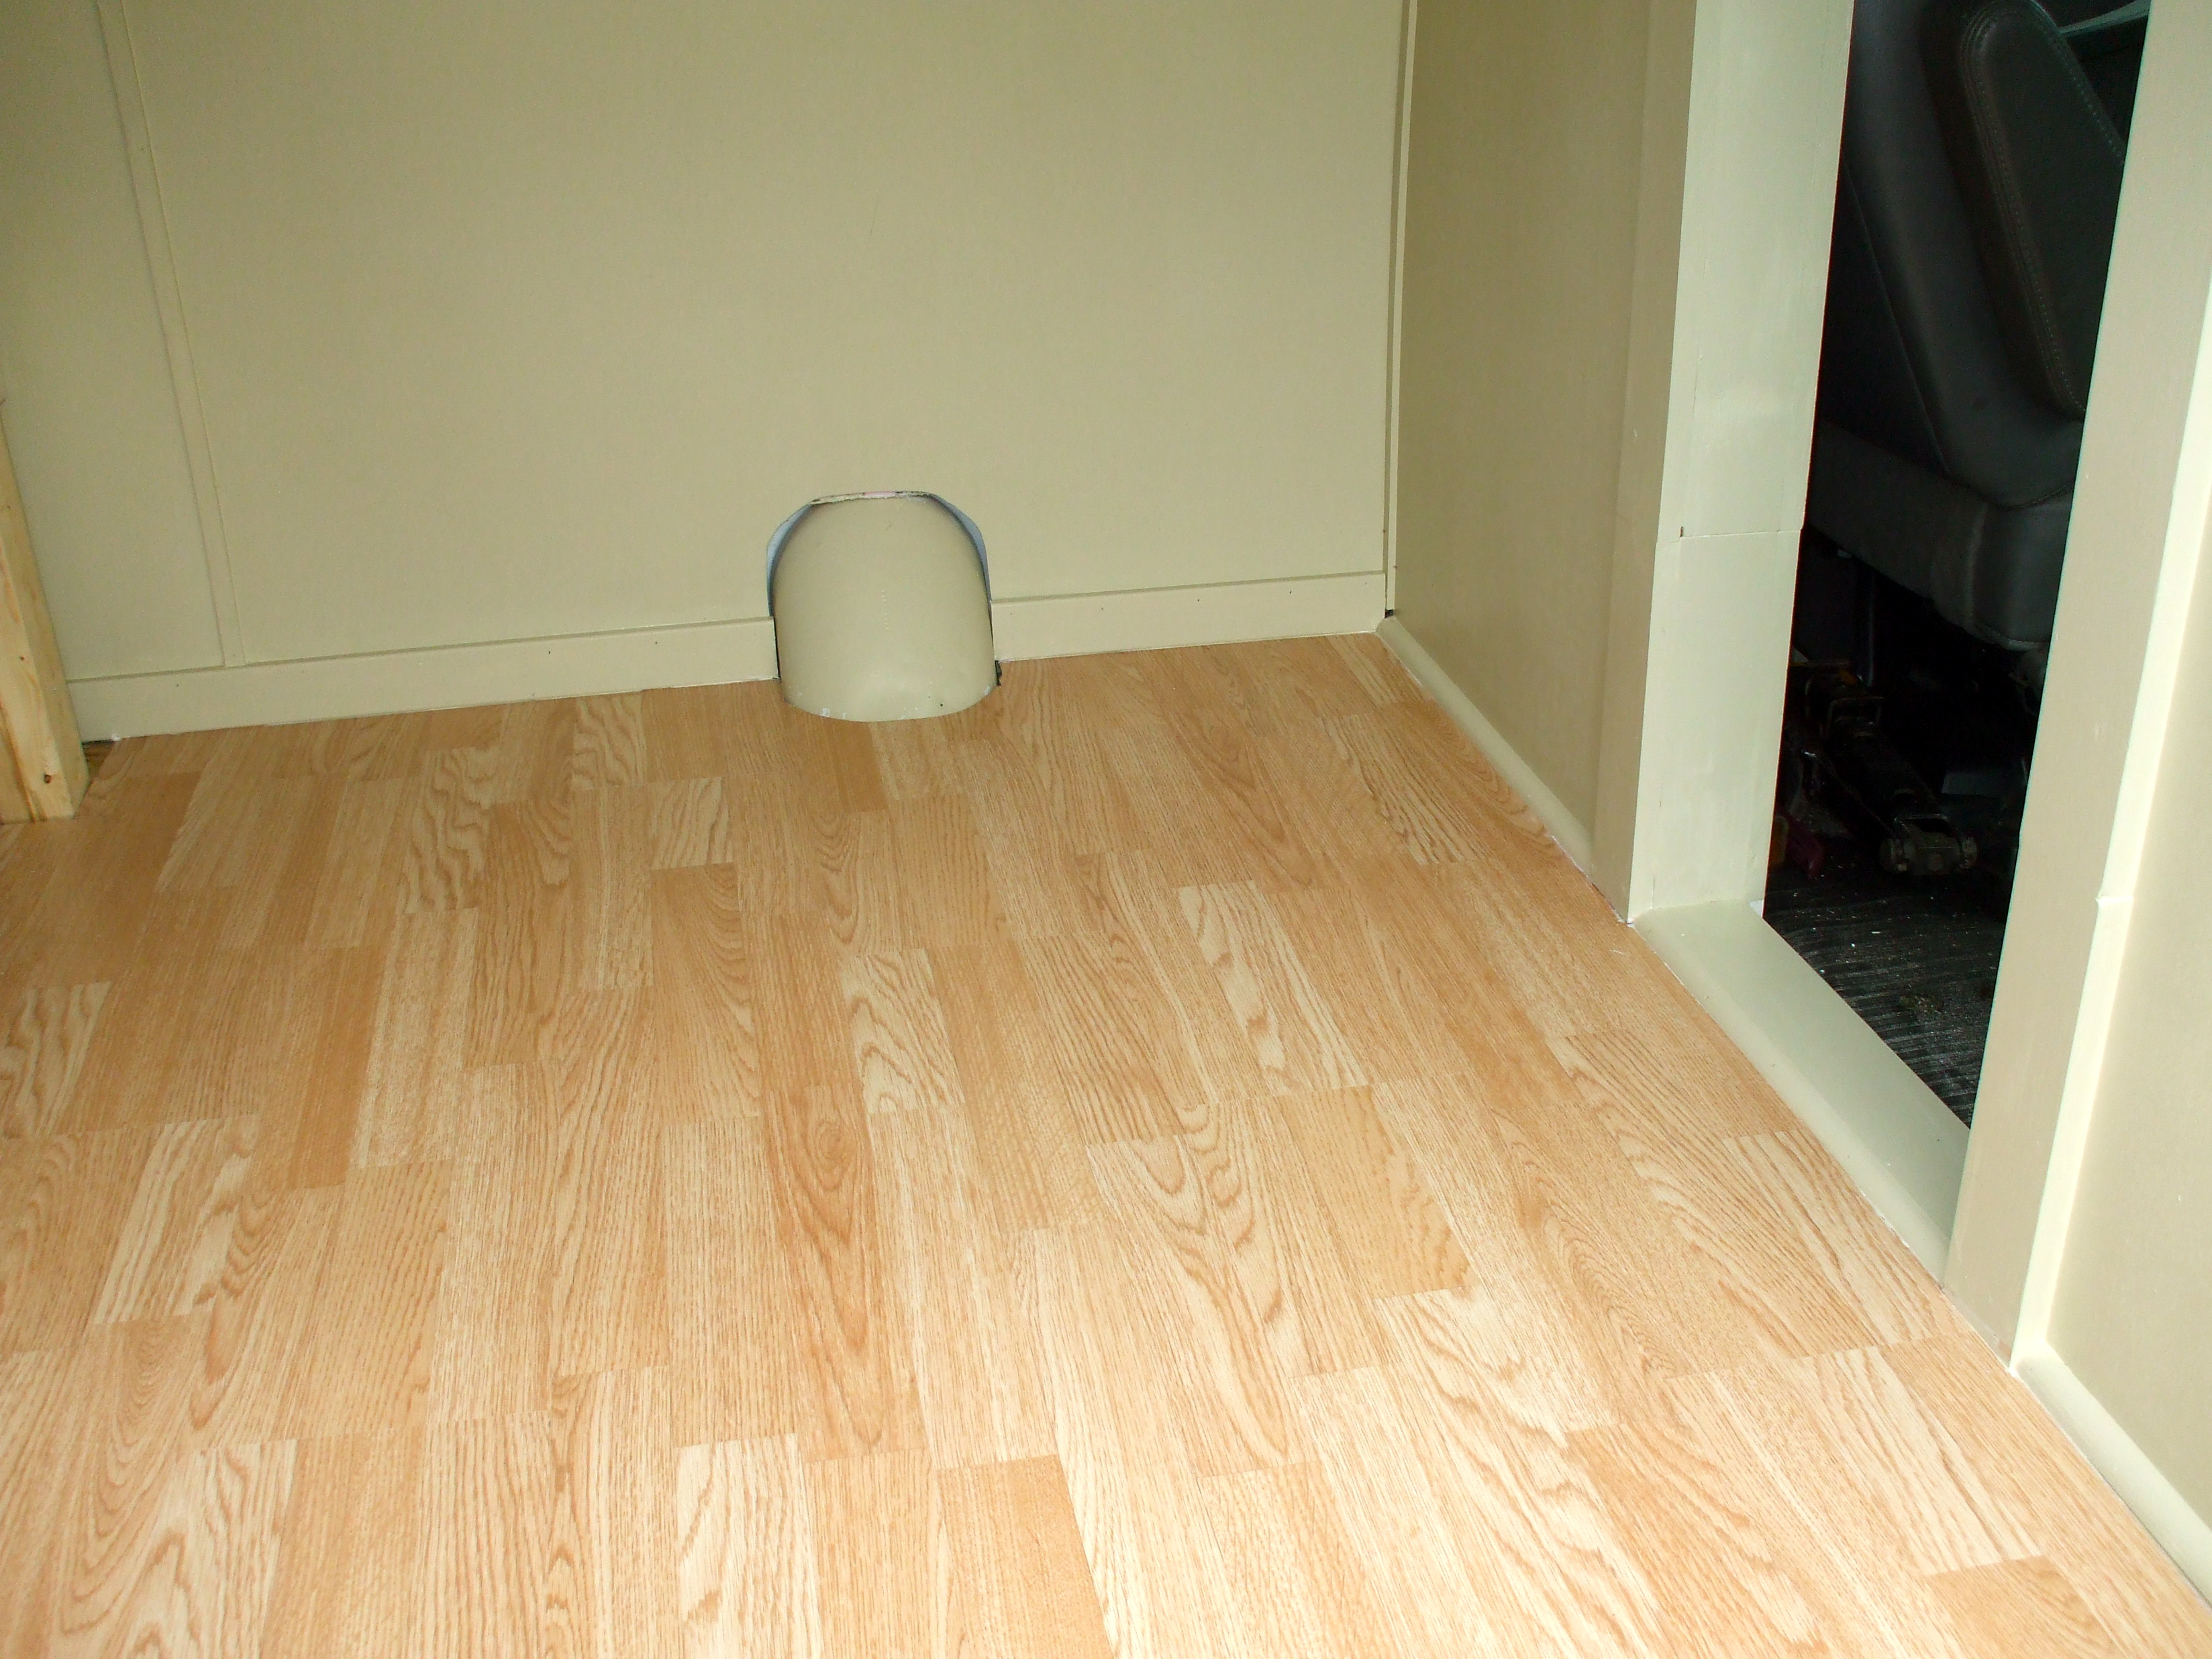
Finish the Floor Surface
Make your van user friendly with a finished floor surface.
1. Lay down laminate flooring over the subfloor
For the finished floor, inexpensive laminate flooring is a good choice.
Most brands come with a 20 year or longer warranty.
You’ll be happily surprised with the amount of scuffing laminate can take and still look good.
For this van I chose light colors to brighten the interior of the van. You’ll have to use every trick in the book to make up for the lack of natural lighting.
2. No need to bolt down the laminate
Laminate is designed to be a loose-floating floor so there is no need to fasten the finished floor to the van.
Even if you intend to install cabinets and a bed, cover the whole floor space with laminate flooring first.
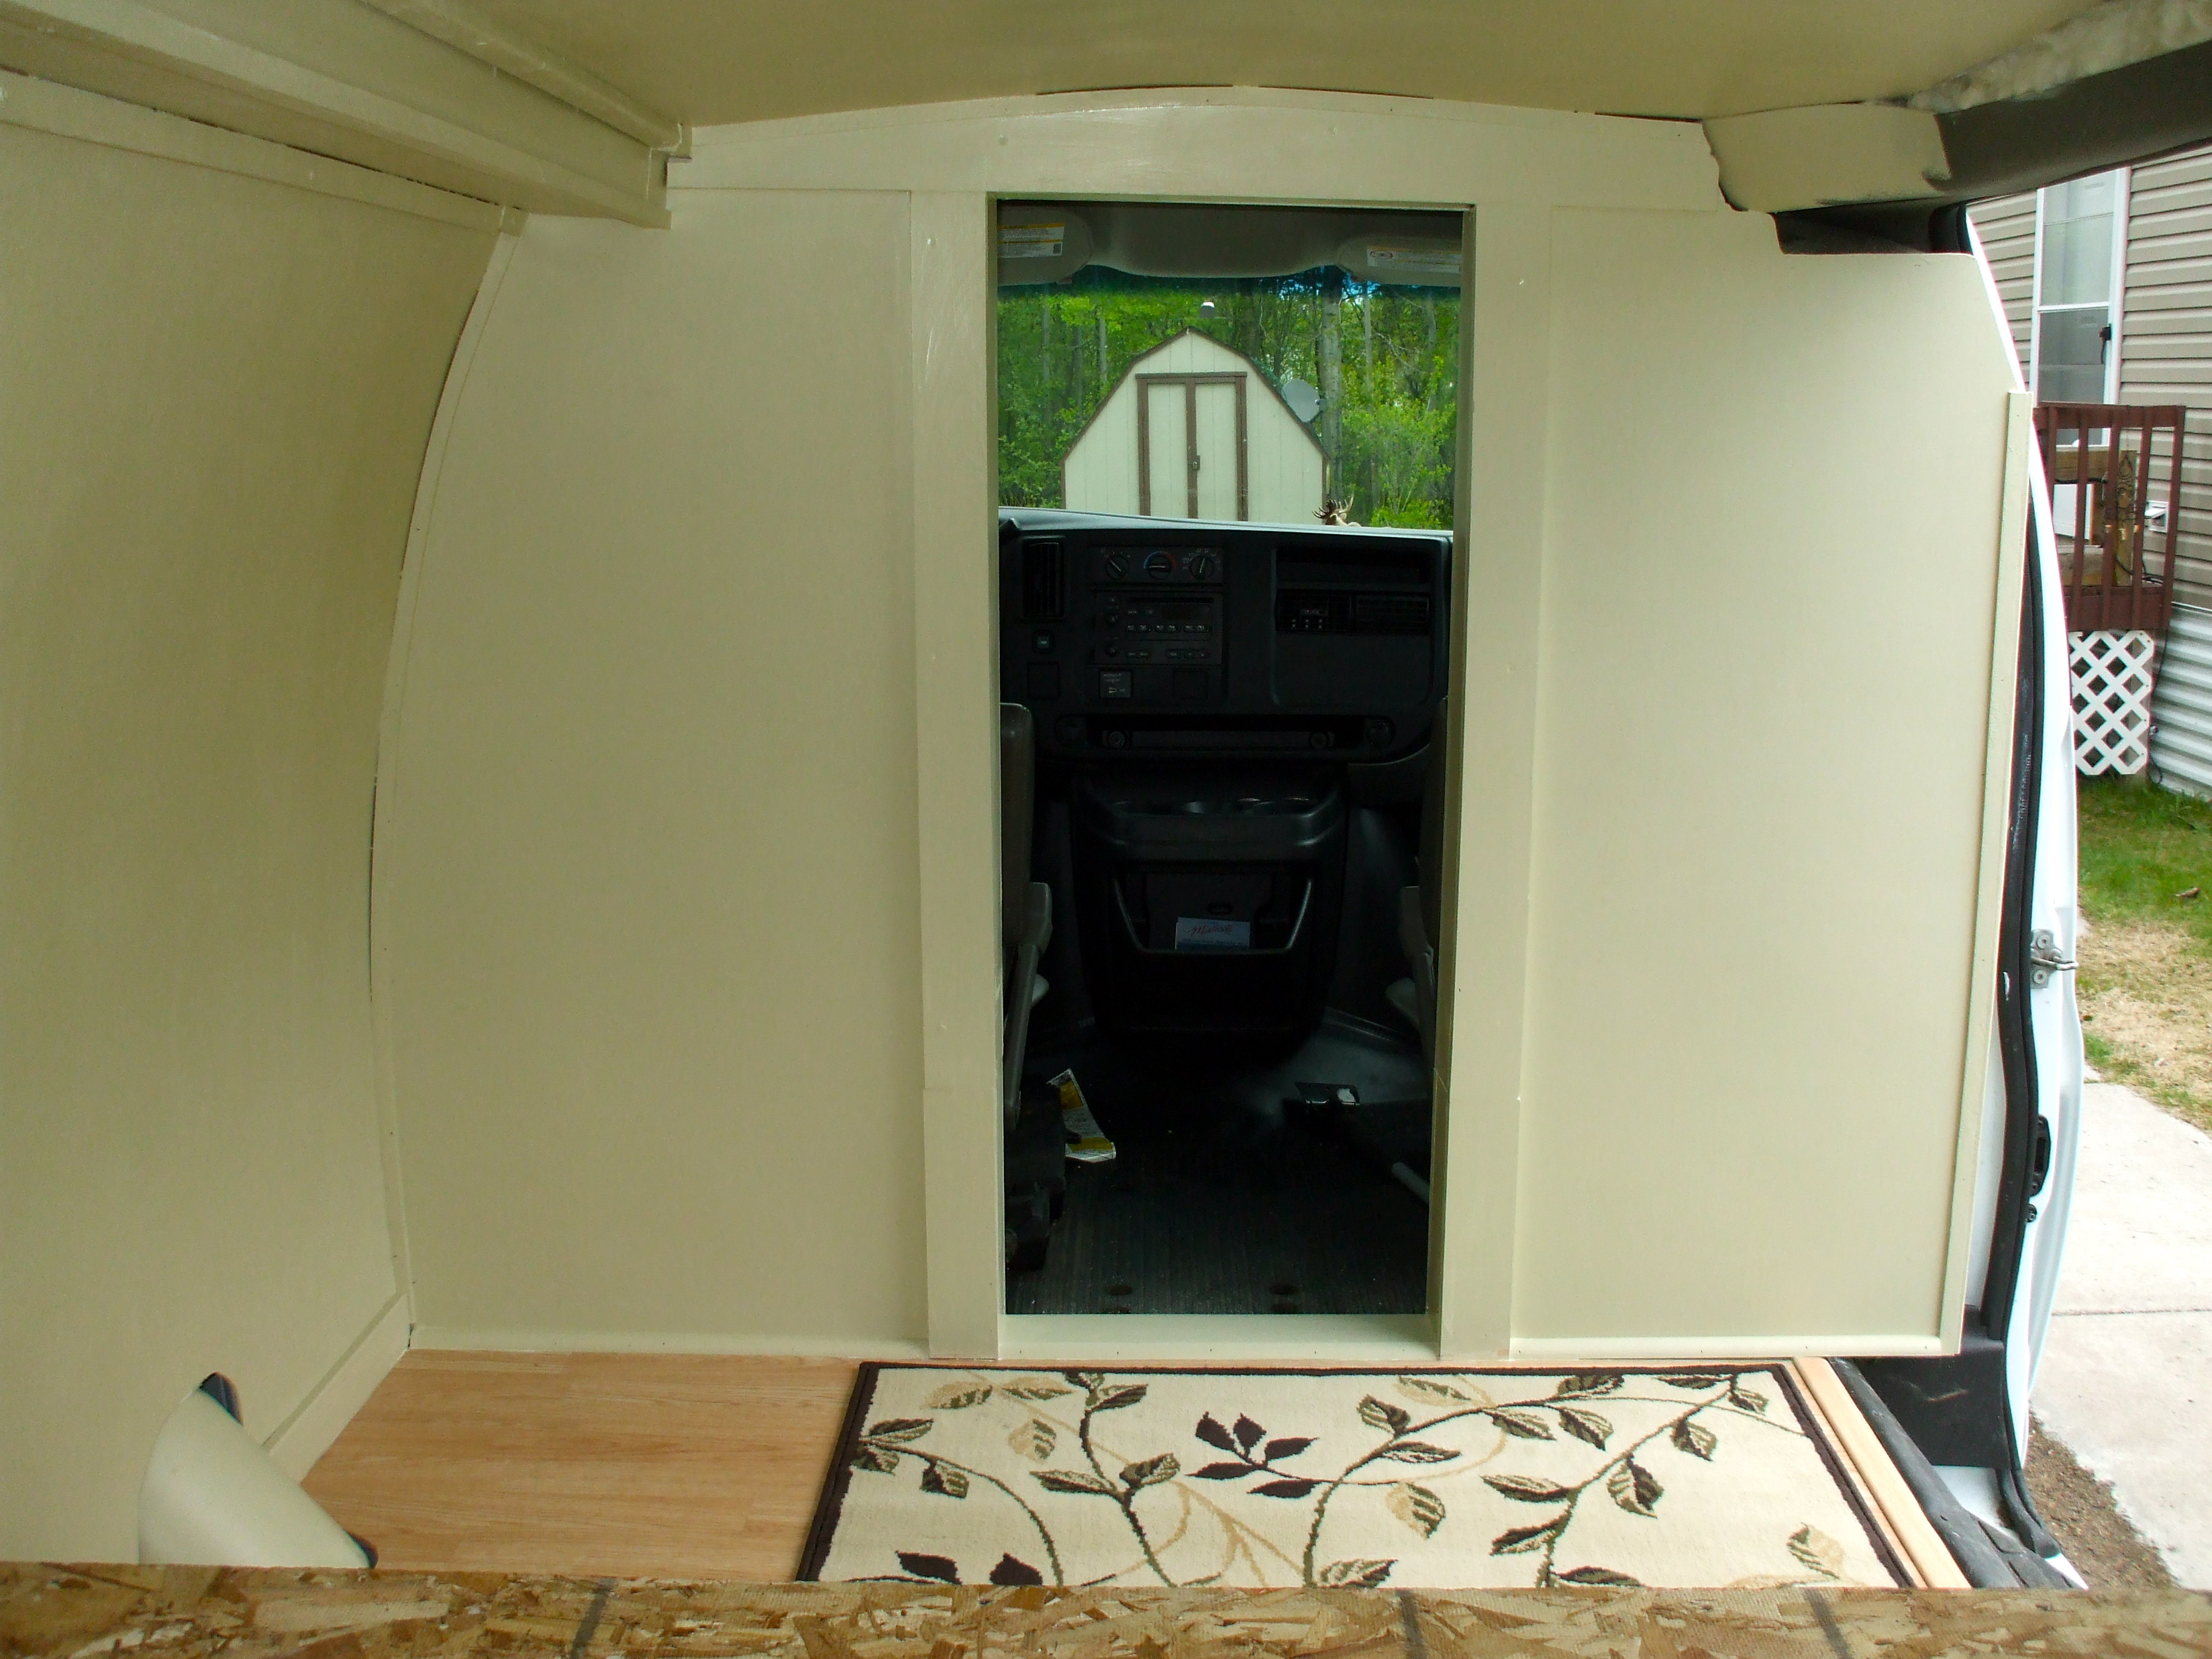
Use the Partition Between the Cab and Storage Area to Your Advantage
If your van didn’t come with a partition, you can always buy one yourself and install it before proceeding with your conversion.
1. Use black-out drapes or make your own privacy curtain
The passageway between the cab area and the living space needs to be addressed too.
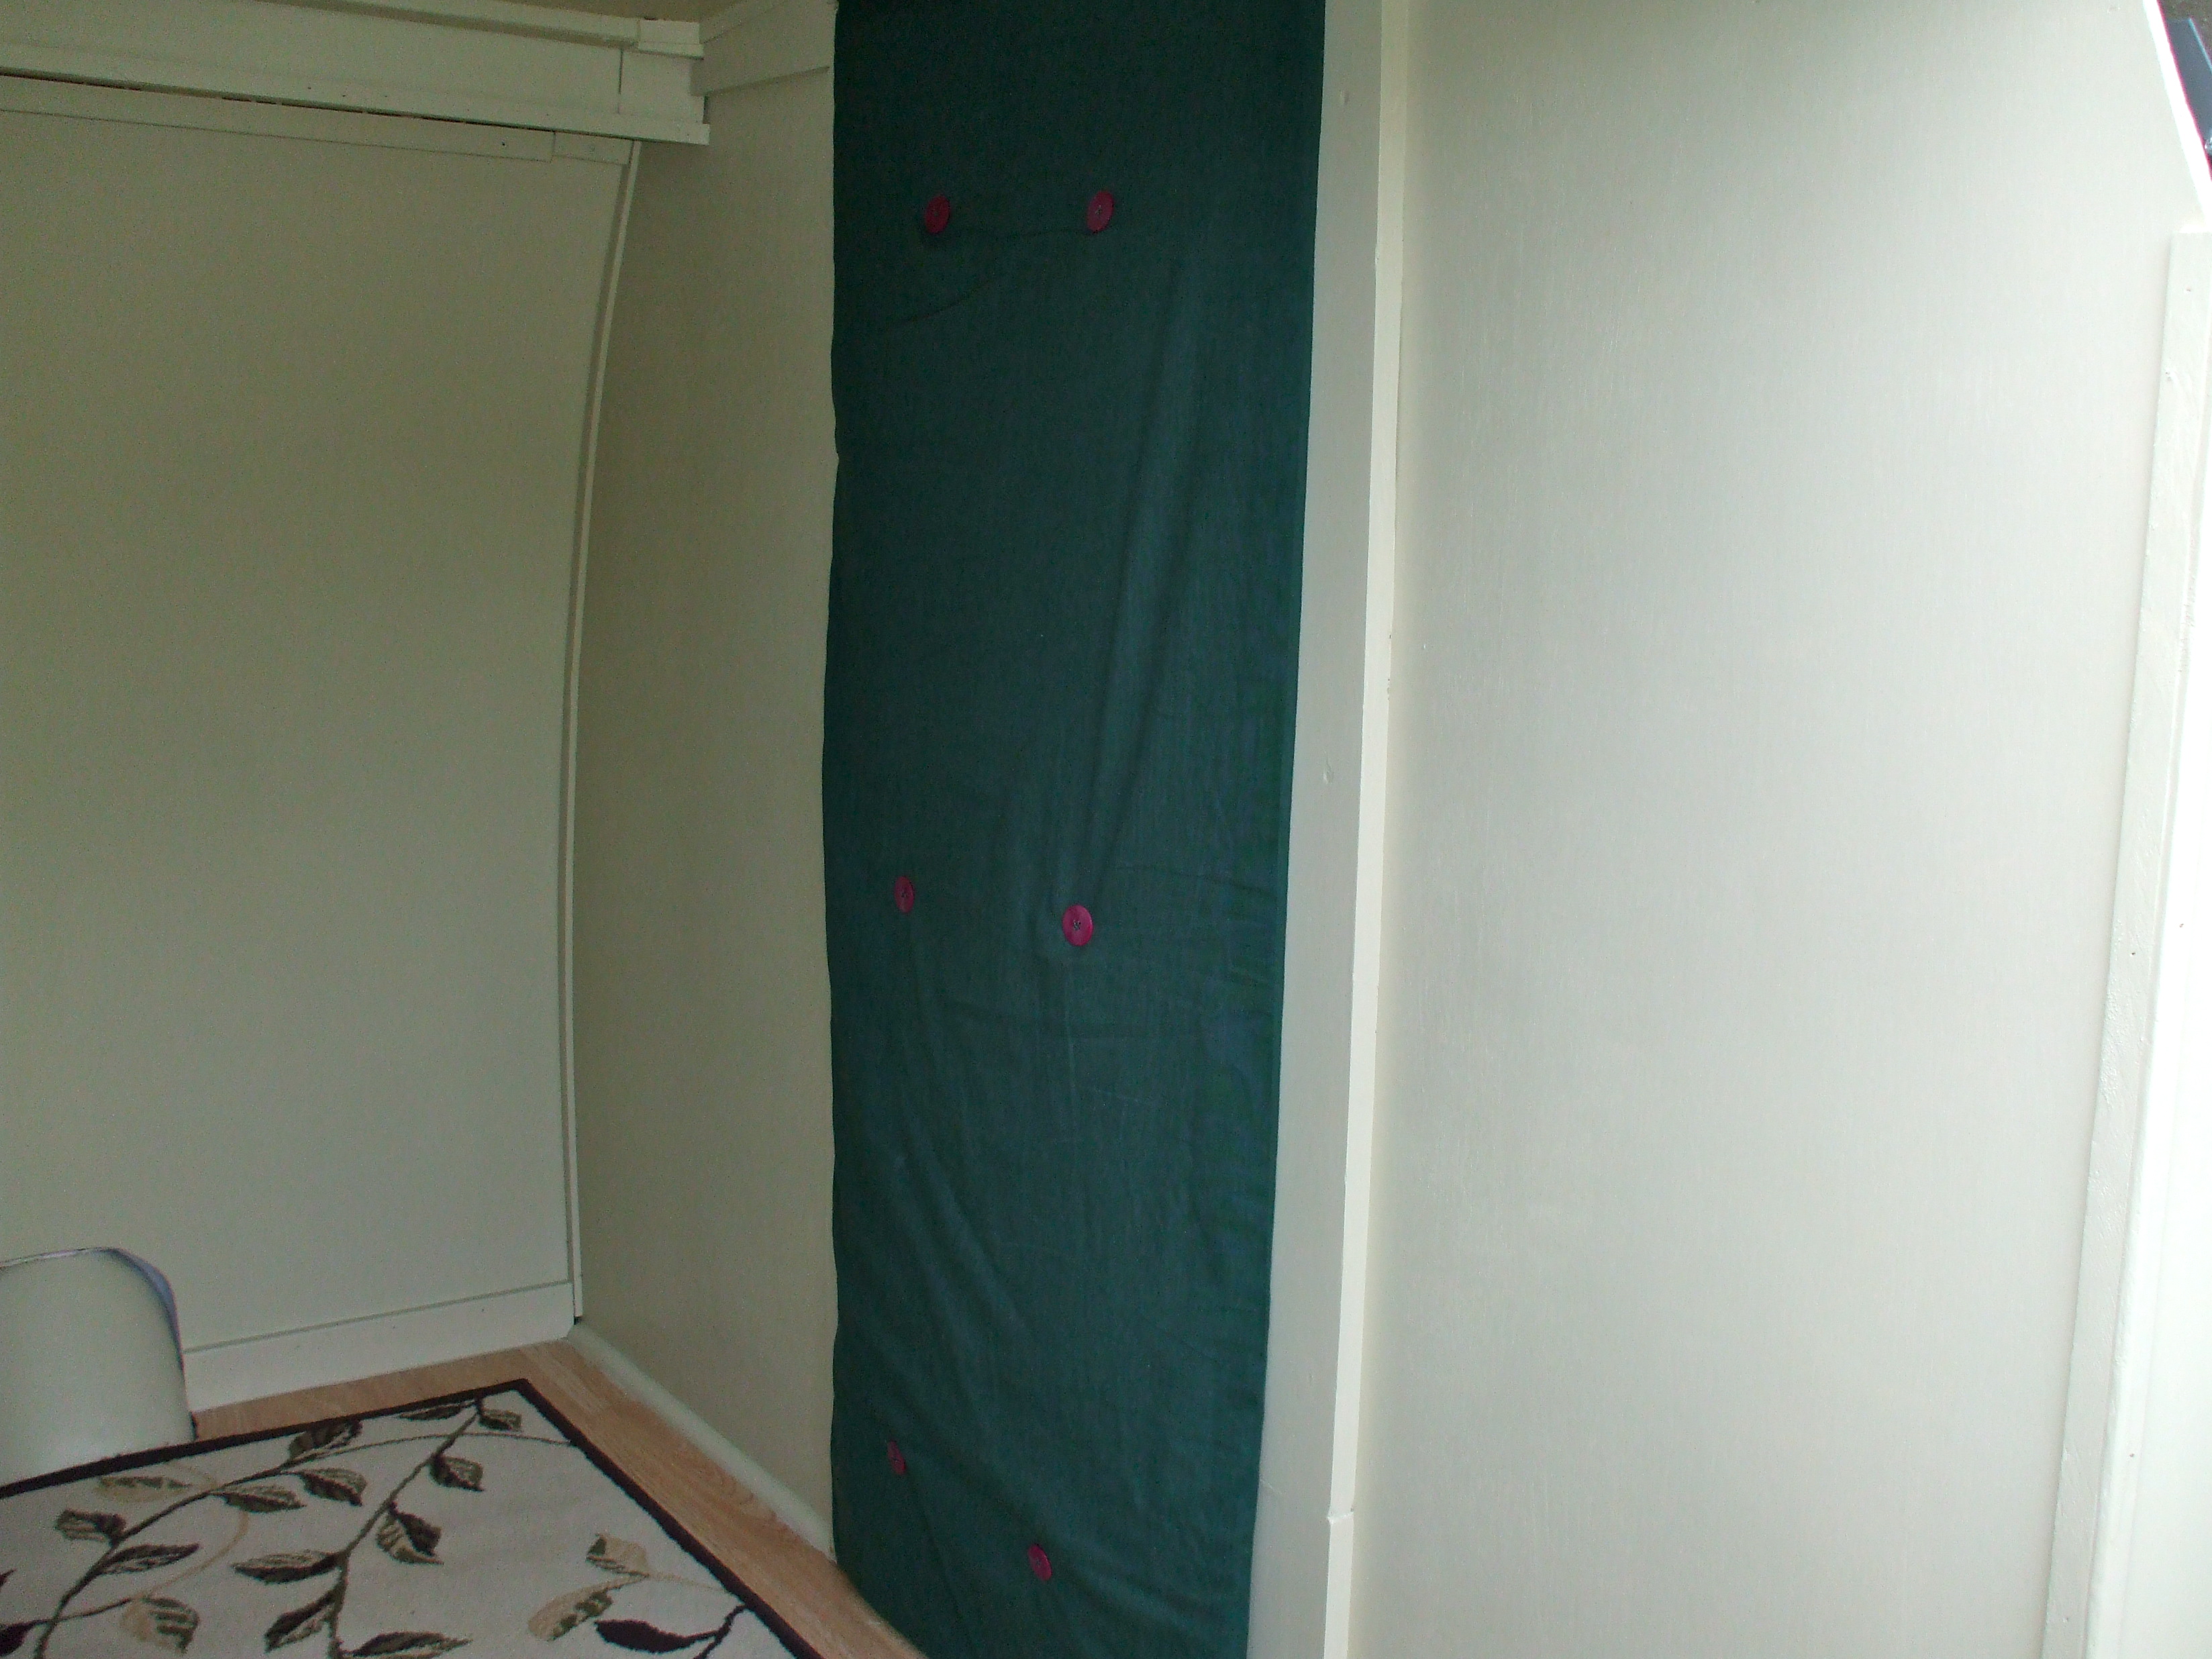
I chose a dark green material and had it sewn into a pillow case shape large enough to cover the opening.
I filled the inside with a layer of ¾” floor carpet padding.
This provided both insulation value and stopped light inside the living space from escaping to the cab area.
I attached the top of the curtain with sections of Velcro so it can be easily removed when privacy or warmth are not a concern.
If you’re looking to stay hidden from public eyes, interior light can give you away.
Blackout curtains will conceal your presence while still allowing you to keep the lights on inside.
Conclusion
Now you know how to make a finished van interior that is clean, neat, and ready for the addition of your favorite amenities.
Once you see how nice the laminate floor looks it will be hard to decide how much of it you want to cover up with a bed and cabinets.
In future articles I’ll show you how to wire your van for electric and also how to install a comfortable bed.
One note on your RV van bed
It took me three tries to make a suitable bed.
Once you insulate and panel your van, you’ll have less than 6’ of length crosswise at the rear end.
You’ll save space by installing a bed perpendicular to the run of the van, but if you’re taller than about 5’10” you might need to reconsider the orientation.
When you travel in the small space of a simple cargo van, you should make your sleeping quarters the highest priority.
If you think you can sleep with your knees bent a good amount, try it for a night or two at home.
You’ll quickly see what I mean!
Stay tuned for future articles in this series. It’s probably a good idea to read all the articles first before beginning construction.
Once the series is finished, I’ll put all the articles in one location so you can easily reference key points.


I LIKE THIS INFO. I JUST BOUGHT A USED 2004 CHEV. GOING TO FINISH THE INSIDE.
Oh I wish my Mr would have read, and listened to YOU before we got the truck and travel trailer. ( I’m not allowed to use the camper word) lol. He’s a snob I’m guessing. Bless his heart. This is the way I wanted to go, but couldn’t get the idea across to him. Thank You so very much for putting it in “man” language with pictures. He finally can see what I wanted, Thank you thank you He’s listening to a Man, funny how that’s working. Lol
Thaks for your info Curtis! I recently purchased a 1997 Dodge B250 van, and I’m really wanting to set it up for camping/living in it. I was not sure how to go about it, so finding your info means a lot. Looking forward to learning all I can from your articles.
Glad you found it helpful, look forward to seeing your build!
Great article, been looking everywhere for a good how to guide and yours answered my questions. I just got a Ford E150 from a church that I’m going to turn into my fishing rig. I’ll post pictures at columbiabasinoutdoor.com when it’s done.
Thanks
How well will the laminate hold up to the occasional water that might not get noticed right away?
Yes the square cut plywood will work fine, it doesn’t matter if it shifts around a little. No the styrofoam panels are not glued down, they too can shift a little without it being a problem. The laminate flooring snaps together a provides a one piece floor that floats on top of everything. None of the floor is attached to the van, it all can float and expand or contract with the weather and you will never have a gap open up. The snap together laminate flooring is the key.
The square edge plywood is working out OK? Don’t they usually recommend T&G to keep the edges from curling or something? How long ago did you build this? Did you glue the foam down, & the ply & laminate are floating? I’m asking because I’m going to use the same method if that worked out. Any lessons learned you can share?
It should hold up just fine, especially with the plywood over top. Many types of rigid foam can be used under concrete slabs, and can support a heavier load than an equivalent square foot of soil. Here’s an interesting article on the densities and crush strength of rigid foam.
Will that foam board under plywood hold up to heavy use?
Thanks for your site Curtis. It’s answering a lot of questions I’ve had about making it work without looking like a vagrant! LOL (Now to convince my wifie! You don’t have any instructional blogs on that do you? HA HA! She’s a “Hyatt Regency Baby”)
Glad you liked the post Jerry
Awesome! I have been looking at info to convert my 1988 dodge b250, and yours has been the best so far. all your time effort and experience is greatly appreciated.