As many RVers are aware, the mattress setup in an RV is different than in a house. Instead of a raised platform with a box-spring topped by a mattress, most RVs only have a flat wooden platform with a single mattress on top.
This is what we have in our Airstream. A simple wooden platform topped with a memory foam mattress. While we find our mattress incredibly comfortable, there’s no room for air to flow under it. Down the road, moisture could cause mildew and mold to take hold.
I don’t know about you, but the last thing I want growing under my mattress is mold!
For the first few years of our full-time RVing adventure, we traveled around the dry, western mountains – and even drier southwest deserts. With low humidity levels and very little rain, we didn’t worry about mold growth.
All that changed however, when we decided to spend a year RVing around the eastern half of the country. As soon as we reached the middle of Texas, we were bathed in a blanket of moist, warm air – the perfect conditions for mold growth. So we did some research and adapted a product from the marine industry for use in our RV’s bedroom.
Mold is a Common Problem in RVs, and HyperVent Can Help Prevent It
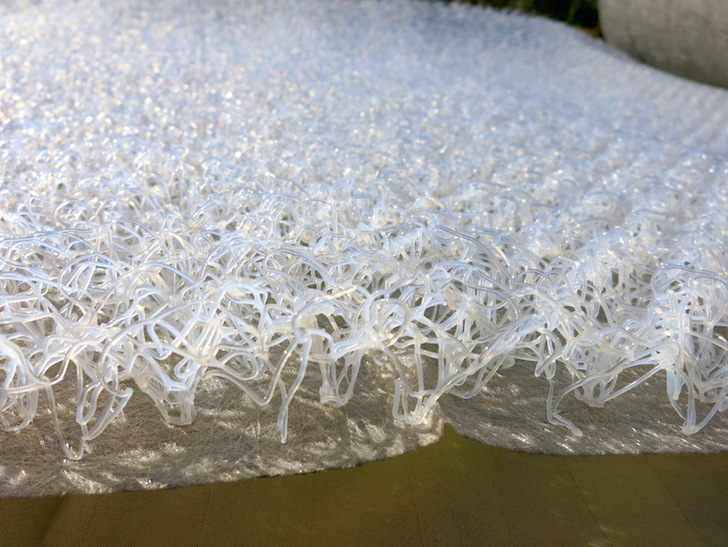
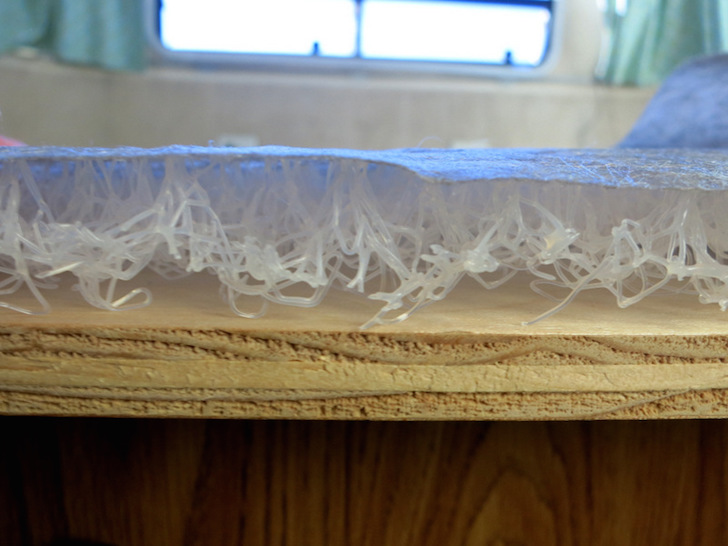
Originally designed for use in boats, the HyperVent uses a white, spun polymer woven into a larger, open, 3/4″ thick mesh that creates a small space for air to circulate under your mattress.
It’s both stiff and flexible. Best of all? The company that makes it claims you won’t feel a thing through even the thinnest of mattresses.
HyperVent close up showing the spun polymer bonded to its fabric backing.
At $12 per foot + shipping and tax, the HyperVent material isn’t cheap. But then again, neither is buying a new mattress (or trailer) because your old one is infested with mold.
How to Install the HyperVent Material:
1. Unpack the roll.
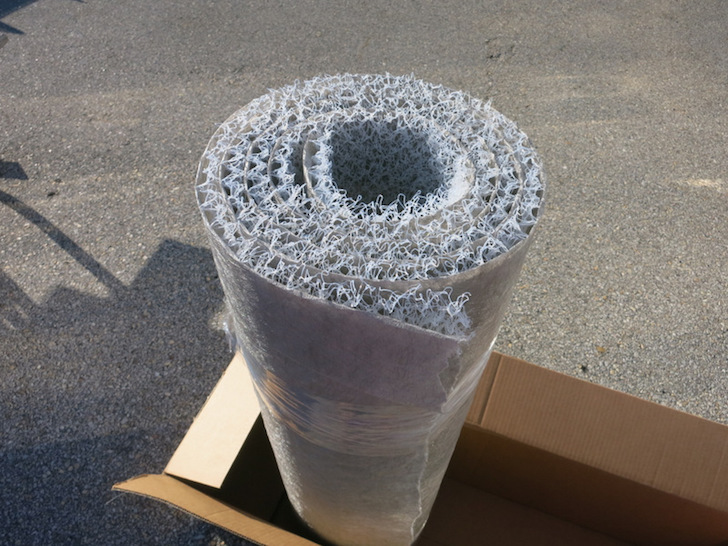
HyperVent comes in a 39-inch wide roll that you can order in any length. For our 60” x 80” standard queen mattress, I ordered 10 feet with the intention of cutting the roll in half and laying it under our mattress in a horizontal fashion.
2. Lay the spongy material on a flat surface before cutting.
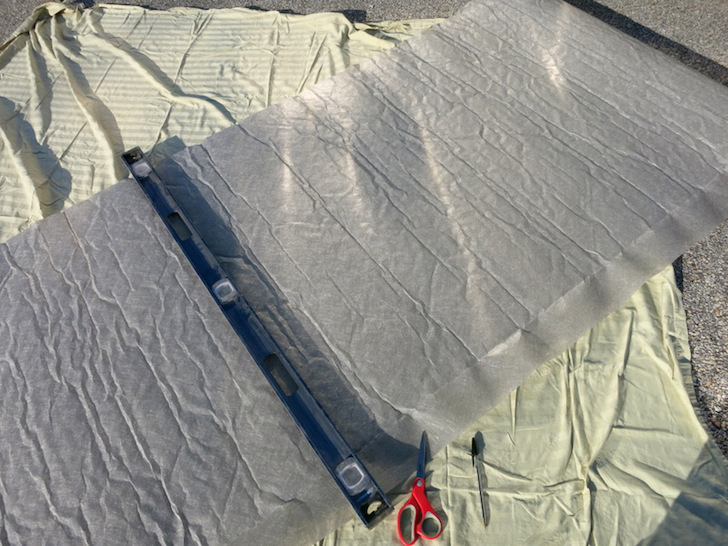
The Hypervent will arrive rolled up into a large tube. Take it out and lay it on a flat surface. Mark where you need to cut to fit under your mattress. Regular kitchen shears will do the job.
At first we thought a few inches of overhang would be good for air flow, but we quickly learned that the spun plastic is very sharp on bare legs! I would suggest learning from our mistake and cutting it an inch or two shorter on the sides so it doesn’t stick out from under the mattress.
3. Move or tilt your mattress.
Move the mattress out of the way – not that easy in a small RV! We ended up turning ours on its side and sliding it into the kitchen temporarily. TIP: Memory Foam mattresses are surprisingly heavy!
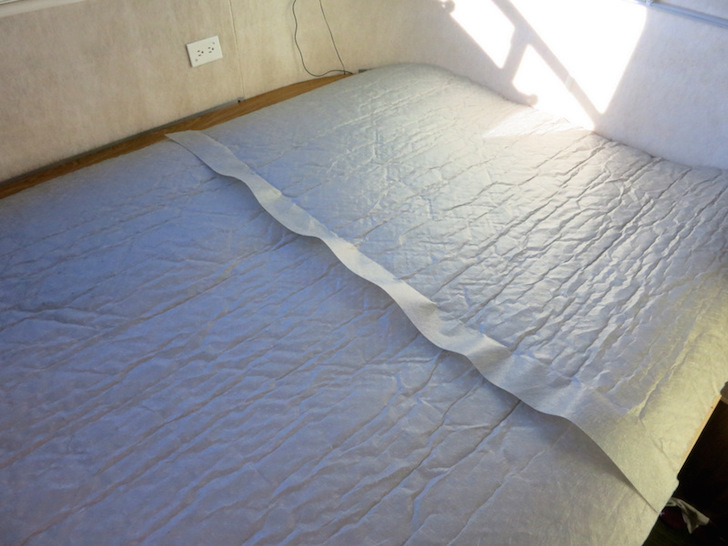
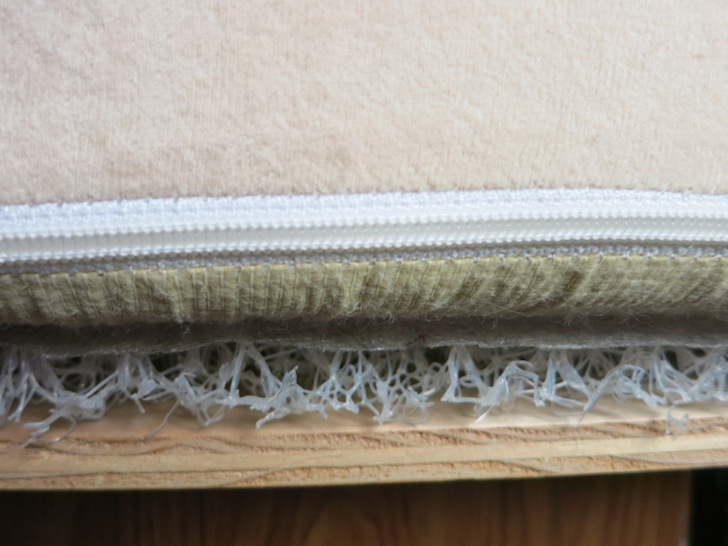
4. Position the HyperVent on your bed frame.
Lay the HyperVent on your bed platform with the fabric side up. The end of the roll has an extra 3” flap of mesh fabric. Use this flap to overlap the cut seam. You can tape it together if you wish, but in reality the weight of the mattress should keep in place.
5. Reposition your RV mattress.
Retrieve your mattress from the kitchen (or wherever you stored it) and place it on top of your new HyperVent pad.
Final Thoughts on the HyperVent
For the product to work properly, you need to ensure you allow air to flow in the newly created space underneath your mattress. If the mattress is pushed up against a wall, or the sides are covered with a heavy blanket, air won’t be able to flow through the HyperVent.
Like many RVs, our bedroom is on the small side. The head of the mattress pushes up against the wall. In an effort to increase airflow we have gotten in the habit of pulling the mattress away from the wall by just a few inches. We also fold the covers up and away from the sides of mattress to allow air to flow under the mattress and through the HyperVent.
RELATED: How To Reduce Condensation And Prevent Mold From Forming In Your RV
While the battle with mold and mildew never stops, we found no evidence of either underneath our mattress after spending nearly six months RVing in warm, humid conditions. This stuff really works!