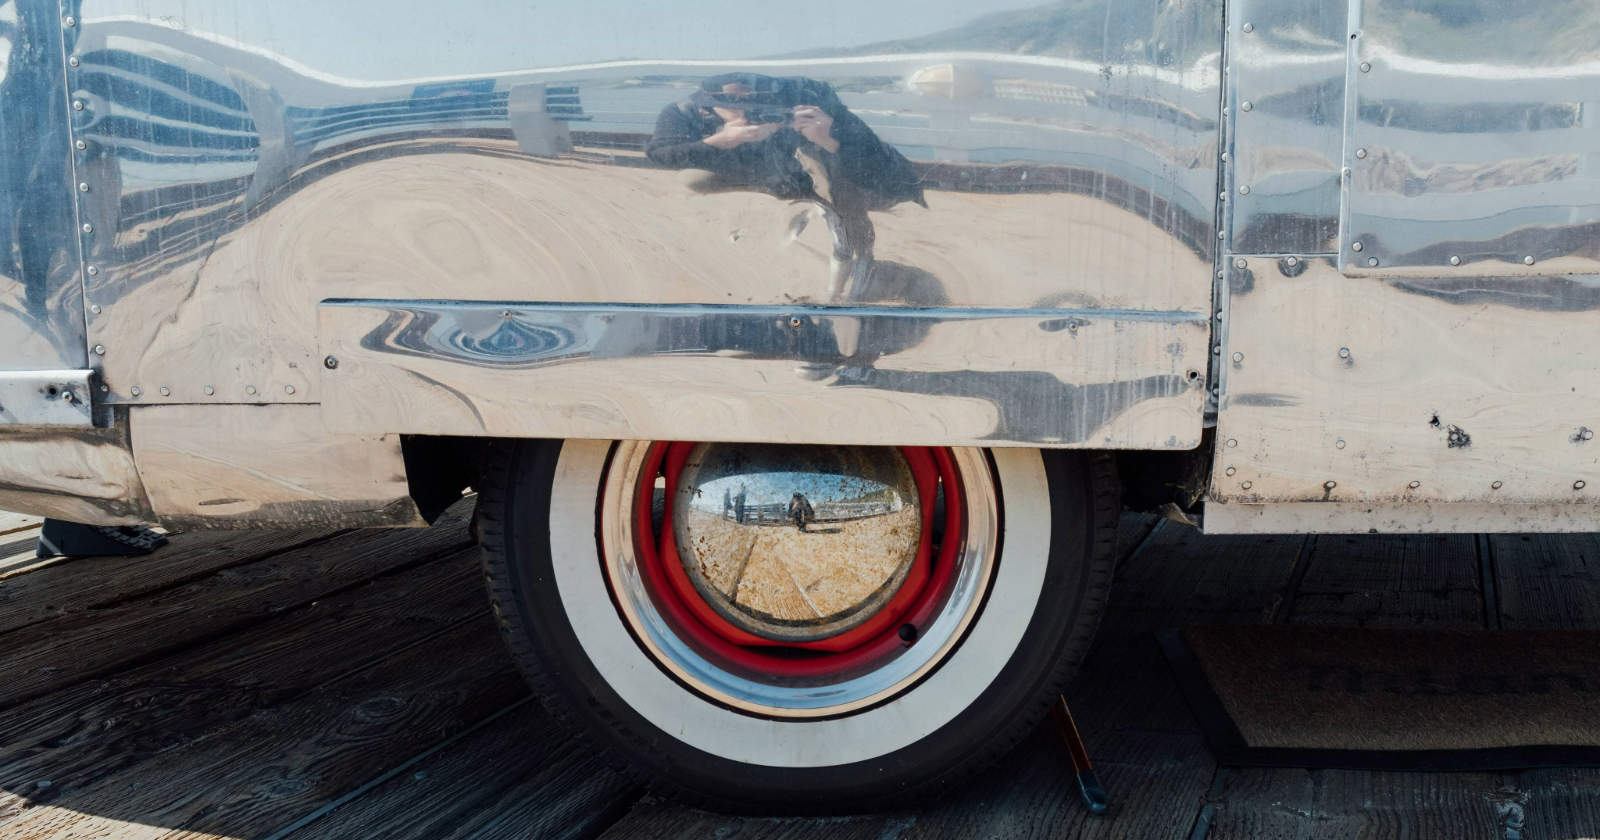
It may seem silly to think of making covers for the tires on your RV. After all, they’re designed to be outside – right? Well as we discussed in a tire maintenance post recently, there’s good reason for keeping your RV tires wrapped up when not in use.
Sunlight and ozone damage tires over time. Covering your tires will help keep them in good, serviceable condition for longer.
Make these great custom covers for your RV tires.
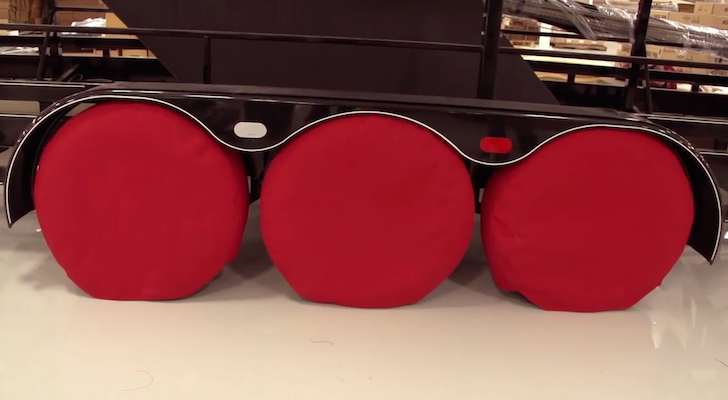
While you can purchase inexpensive RV tire covers, why not make your own? Sailrite made a video tutorial on how to use their incredible Sunbrella UV resistant fabrics to craft homemade tire covers for your camper. Let’s look at how they did it.
Get accurate measurements for a custom fit.
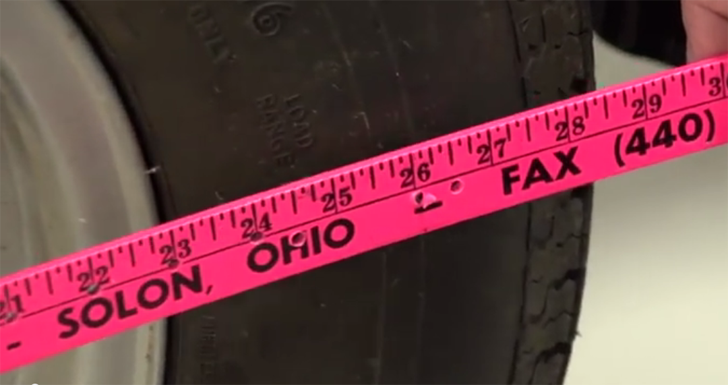
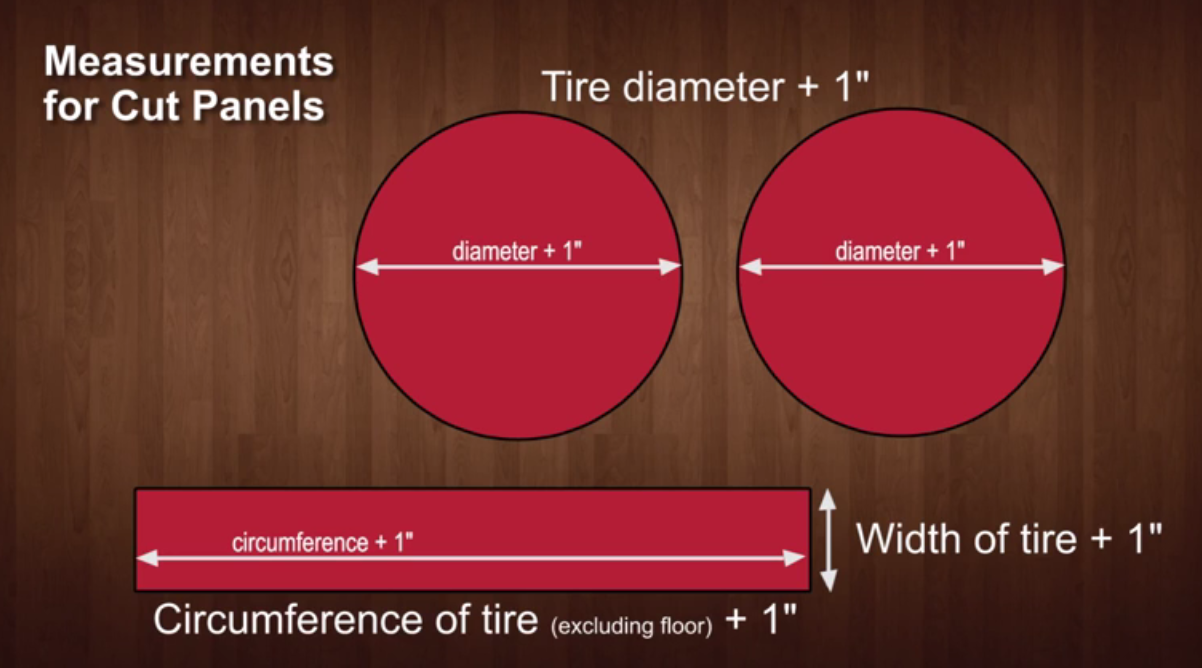
You’ll need a few measurements to start, so get out a yardstick or tape measure out and:
- Measure the diameter of each tire, running directly through the center hub
- Measure the width of the center hub
- Measure the tread width of the tire
- Finally, measure the circumference of the tire. The tire will not need to be off the ground for this. Just measure to the point where you want the fabric to stop a few inches from the ground.
The covers are made from three fabric panels sewn together.
Lay out your fabric panels, starting with the two circular pieces.
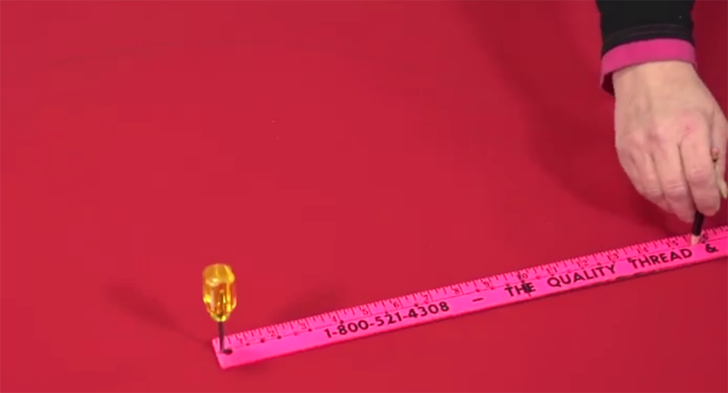
- Drill two holes in a yard stick to create a giant compass, one at the end, the other at half the width of your diameter.
- Place your fabric over a cardboard or plywood surface and tap an awl through the hole at the end of the yardstick to mark your center point.
- String will also work. Simply tie a pencil to a string and the other end to the awl. Adjust the string to half the diameter of your wheel.
- Draw your two circles. Use the same technique to mark a smaller circle the size of the wheel hub in the center of the back panel.
- Use your yardstick to make a line about one inch up from the bottom of each circle. This flat line is where you will cut to keep the fabric off the ground.
A yardstick with holes drilled in it makes a good DIY compass.
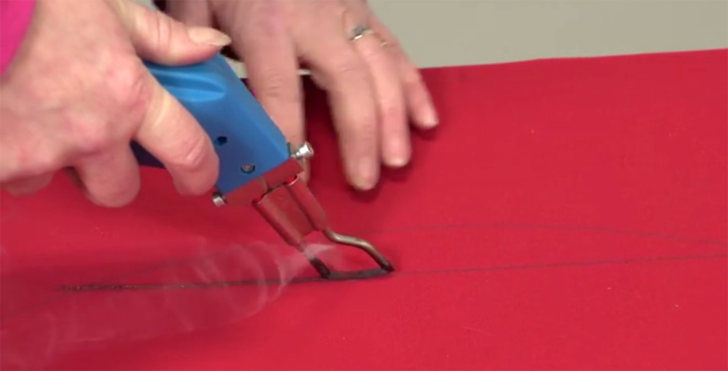
The best way to cut the marine grade fabric is with a hot knife. The hot knife prevents unnecessary fraying along the edges. A soldering iron will also work.
You’ll need to cut out the hub hole and a slit leading up to it in the back panel.
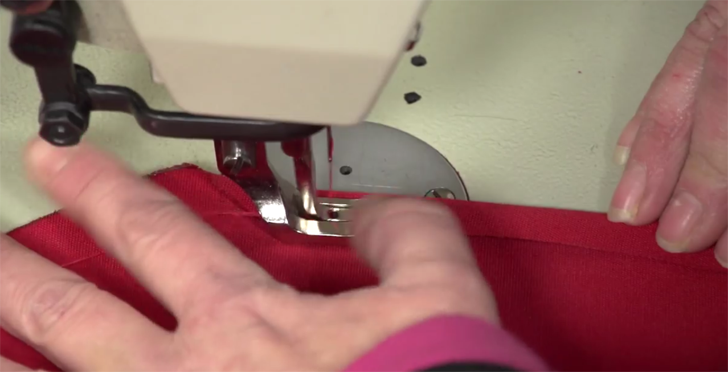
Measure and cut the rectangular panel the same way, then stitch a half inch hem around its edges.You need to use heavy synthetic thread and a heavy duty upholstery needle.
A hot knife will ensure no fraying at the fabric edges.
The back panel also gets an overlapping Velcro closure for a tight fit. Use binding around the edges of the hub hole and slit in the back panel for reinforcement.
If you are an accomplished sewing machine operator, this project should be simple. If your sewing skills could use a little improvement, don’t worry. The video has a lot of detail on sewing techniques that will walk you through the process step-by-step.
Allow 1/2 inch for all seams and hems.
Once the back panel is complete, you can assemble the panels into a full wheel cover. If you fold your circular panels in half and mark the center along both edges, it makes it simple to see where the pieces fit together.
Make sure you stitch the three pieces together inside out!
This heavy fabric requires patience in feeding it through your machine. Don’t stress out if it folds over on you the first time through.
Sailrite also sells sewing machines, trim and everything else you’ll need to complete these great looking covers!
SEE ALSO: These DIY Solar Panels Provide Enough Power For A 3 Day Off Grid Trek