
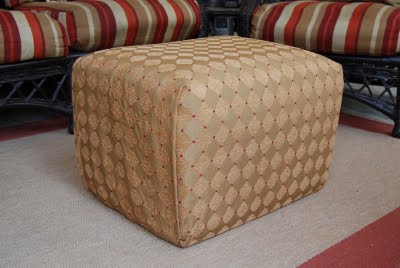
We have always talked about getting RV ottoman that we see at all the big box stores. But either the size, color, or some other factor didn’t fit what I wanted or what the boss wanted. Building my own wasn’t really an option given the fact it would require sophisticated upholstery (I thought) and a custom built internal structure which seemed tedious at best. It wasn’t till I saw a design idea from ImpartingGrace.com that I had renewed faith in this DIY RV ottoman idea.
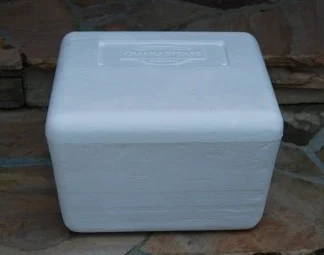
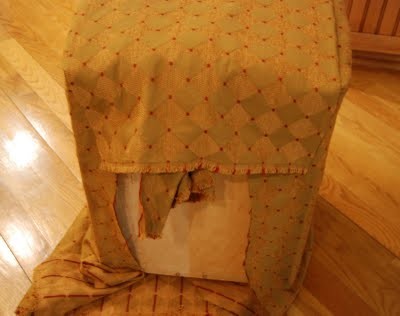
Doing it myself would allow me to build it the right width, height, and color to appease the decorating committee! This ingenious design starts with a simple heavy duty styrofoam cooler either store bought or in their design they used a leftover shipping cooler from Omaha Steaks. The only requirement is it hold your weight when you sit on it.
DIY RV Ottoman Photos
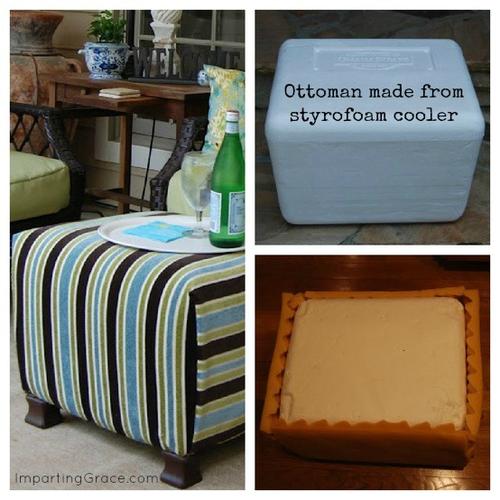
In general, the ImpartingGrace.com design follows these steps:
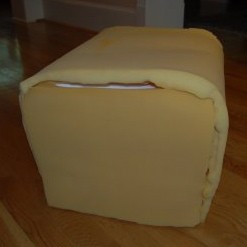
- Add something heavy to give the it weight (magazines, a brick, etc)
- Add padding to the outside of the cooler (memory foam, furniture foam, etc)
- Leave the bottom of the cooler unpadded
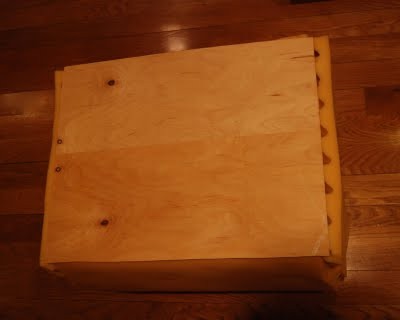
- Attach wood to the bottom of the ottoman/cooler (for a sturdy base to attached fabric and feet to)
- Wrap a large piece of heavyweight fabric to wrap your DIY RV ottoman like a birthday present
- Staple the fabric to the underside wood that you installed
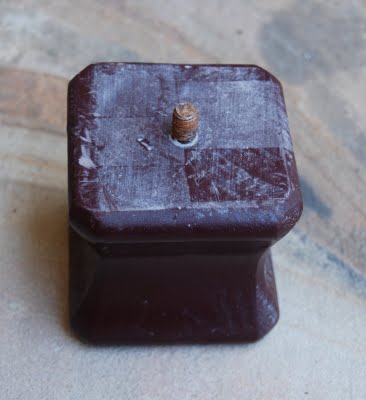
- Install ottoman feet if needed
Complete list of instructions and additional photos at ImpartingGrace.com
Though a great project and welcome addition to many RV’s, we would like to see it modified a little to include storage access. Perhaps upholstering the lid independently from the base. Who doesn’t love a spot to store more stuff, right? In that case a cooler like the Huskee may be more effective as the lid could be modified to accommodate upholstery and still seat on the base. We would also consider water proof upholstery so we could use it outdoors as well as bring it inside for lounging and watching TV.
What to do you think? Is it worth a shot to make your own DIY RV ottoman?


