
In the vibrant world of DIY, certain projects not only test our skills but also push forward the boundaries of sustainability. We’re excited to spotlight such a project with a recent submission to our Submit Your Do It Yourself Project initiative.
Following Bruce Gordon’s unique truck camper, we turn our focus to a green teardrop camper by Judie and Loyal, a creative pair from Newfoundland known online as Missus & Buddy Who Does Stuff. Their DIY build, a Utility Trailer Slide-in Prototype, is quite fascinating, showcasing both creativity and environmental stewardship.
The Inspiration Behind the Camper Pod
Faced with a market void of affordable, VOC-free campers, Judie and Loyal embarked on a mission to create their own. Their goal was a lightweight, eco-friendly teardrop camper that embodied health and sustainability akin to LEED certification standards.
Designing the Dream
The couple faced the challenge head-on. They opted for materials that were not only lightweight and durable but also non-toxic and free from volatile organic compounds (VOCs).
As the CamperPod architect, Judie’s design incorporated a wooden frame complemented by aluminum composite, aluminum jacketing, and Foamlight. Foamlight is a new, non-toxic polypropylene plastic product that is VOC-free, waterproof, mold-resistant, and can be used like plywood.
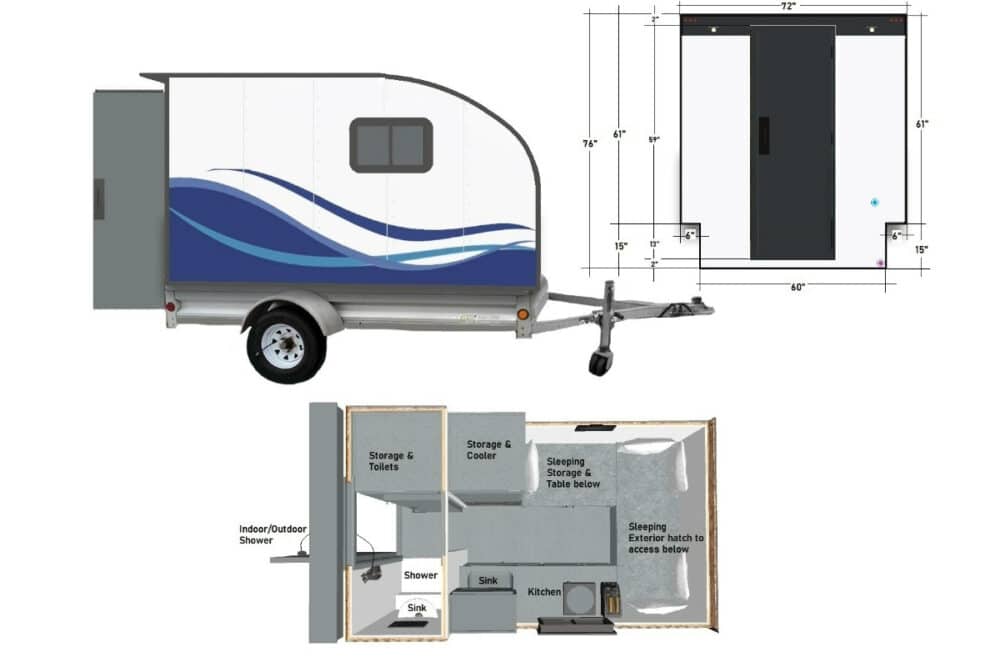
A notable aspect of their design is a full-height pod with an innovative wet room/porch area at the rear. This feature, built on the foundation of a utility trailer, marks a significant departure from traditional teardrop designs, adding a unique flair to their custom camper module.
“I also wanted an area to wash up before entering the main living area of the pod. Most teardrop-style campers are very low, and you can’t stand up inside, but we wanted to have a full-height pod that was lightweight so that we could tow it with our SUV. I created a unique plan that incorporates an entry area at the back (wetroom/porch) with an indoor/outdoor shower, a sink, as well as a storage area.”
Judie (a.k.a. Missus Who Does Stuff)
Constructing the Green Teardrop CampeR Build
The construction narrative unfolds through a series of detailed milestones:
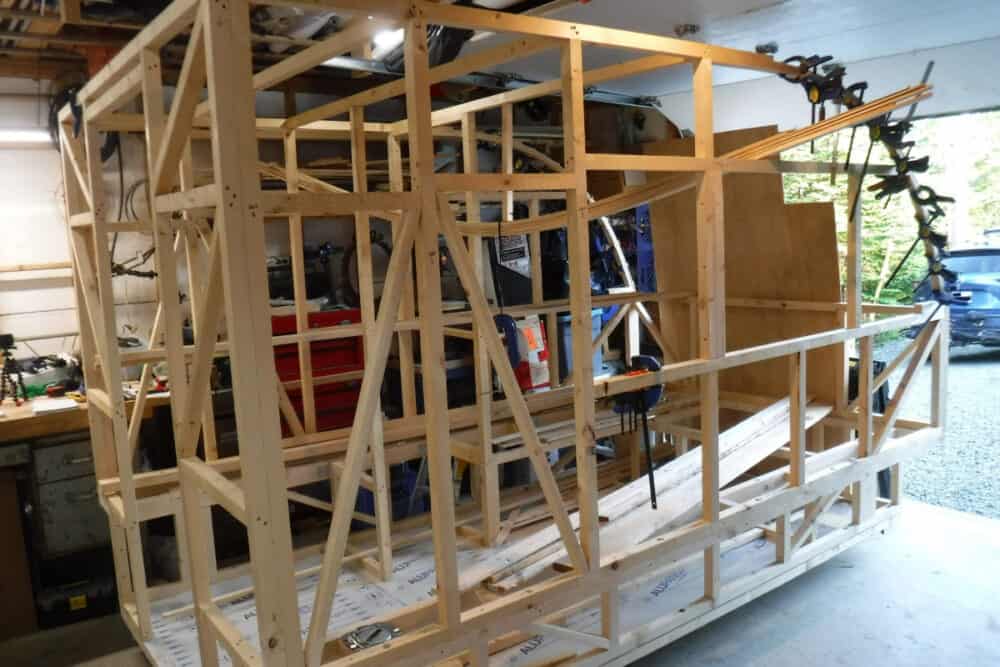
Framing
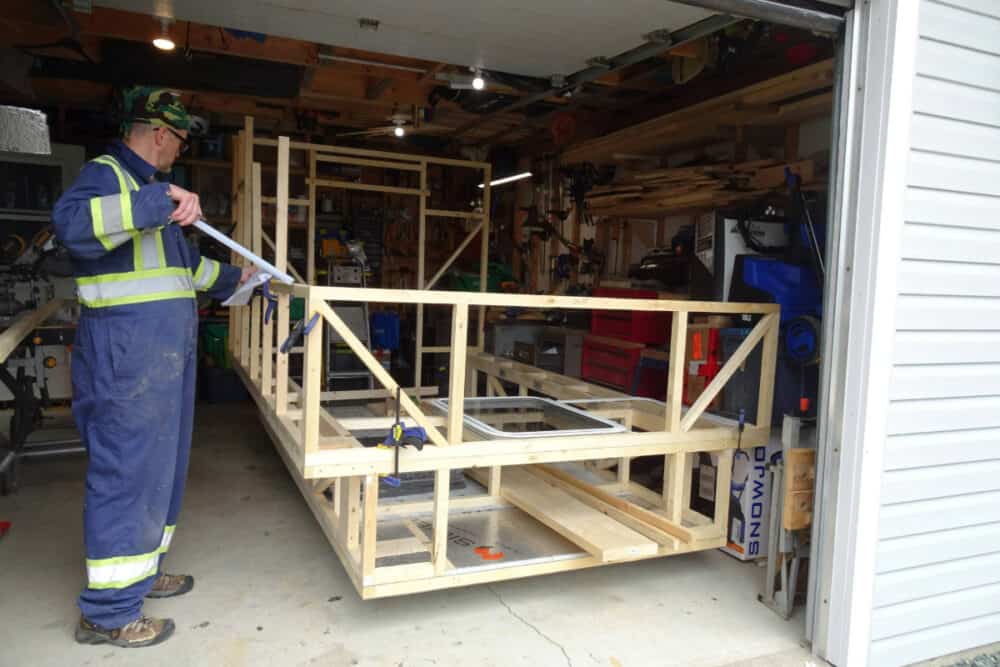
The foundation for the CamperPod began with a 6×10 utility trailer. They cut construction-grade spruce into 1 ½ x 1 ½ sticks of varying lengths. Using butt joints, they secured the frame together with PL Premium adhesive and 2 ½ inch construction-grade screws in pre-drilled holes, forming the structural backbone of the CamperPod.
Creating the Curved Wall of the Green Teardrop CampeR Build
Creating the camper’s distinctive curved wall required innovation.
“[We] landed on laminating strips of 1 ½ wide by ¼ thick pieces of spruce using PL Premium and staples. It took a little time but was a 100% success.”
Loyal (a.k.a. Buddy Who Does Stuff)
Exterior Shell
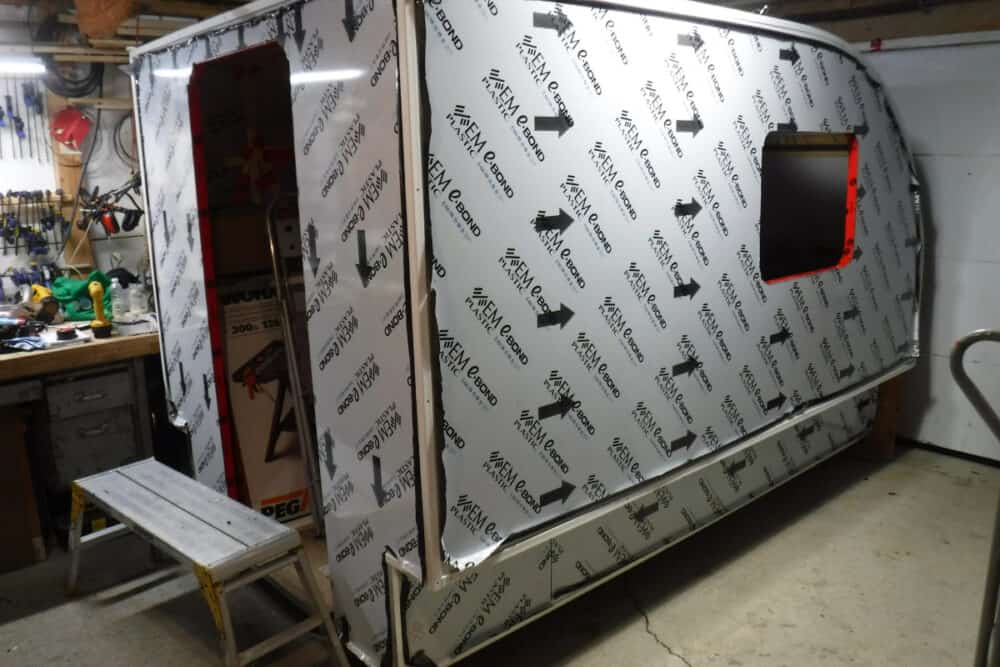
To ensure the CamperPod was both waterproof and easy to maintain, Judie and Loyal selected Aluminum Composite Material (ACM) for the exterior cladding. They used sheets in sizes of 5 x 10 and 4 x 8 to minimize joins and potential water entry points in the design.
They meticulously waterproofed all critical areas where ACM sections met—such as corners, the roof, soffit, and knee wall—with layers of tape, silicone caulk, butyl tape, followed by more silicone and aluminum tape.
Interior Setup of the Green Teardrop CampeR Build
Still in progress, the interior plans include installing solar-powered electrical systems, plumbing, windows and a door, exterior wrap, and more.
“Everything in the pod will be powered by solar. So we also had to carefully choose appliances and plumbing that won’t draw too much energy. The sinks and shower will be USB-powered. And if hot water is needed, we will pre-heat it with a 12V immersion heater.”
Judie
Solving Challenges with Innovation
From sourcing materials on an island to bending RV corner trim and installing a curved roof, their journey has been filled with hurdles.
Challenge 1: Sourcing Materials
Facing significant challenges in sourcing materials due to their island location, Judie and Loyal are navigating limitations in availability and budget constraints.
“We decided on wood framing because it was inexpensive, available and I’m quite familiar with woodworking.”
Loyal
Additionally, the need for non-toxic, mold-resistant, and VOC-free materials adds complexity to their selection process.
“Many glues, fiberboard products and finishes contain products that affect the air quality, and inside such a tiny space, air quality is important.”
Judie
Challenge 2: Bending the Corner Trim of the Green Teardrop CampeR Build
Addressing the challenge of bending RV corner trim without any real-time YouTube guides, Loyal ventured into uncharted territory.
“[We] could not find a real-time video of someone bending RV corner trim. Lots of before and afters. But no real time. So, I decided to make one.”
Loyal
The experience taught them a nuanced approach:
“One thing I realized after doing one side. You don’t have to attack each kink like whack-a-mole. Once the kink is there, it’s not going to disappear. Time, patience, and the delicate tap tap of a dead blow hammer.”
Loyal
Challenge 3: Installing the Curved Roof
The installation of the curved roof brought its share of restless nights. The Aluminum Composite Material (ACM) required precise joins due to its dimensions and characteristics. After nearly a week of trial and error, a viable solution emerged, documented thoroughly in their video series. Check it out!
Challenge 4: Embracing VHB Tape
Adopting Very High Bond (VHB) tape for exterior sheathing was a decision met with initial skepticism. After extensive research and experimental tests—like suspending 4L water bottles from a 1” tape strip until failure—its remarkable strength was proven. The lesson learned was clear: placement must be precise on the first attempt, as the bond is incredibly strong and unforgiving.
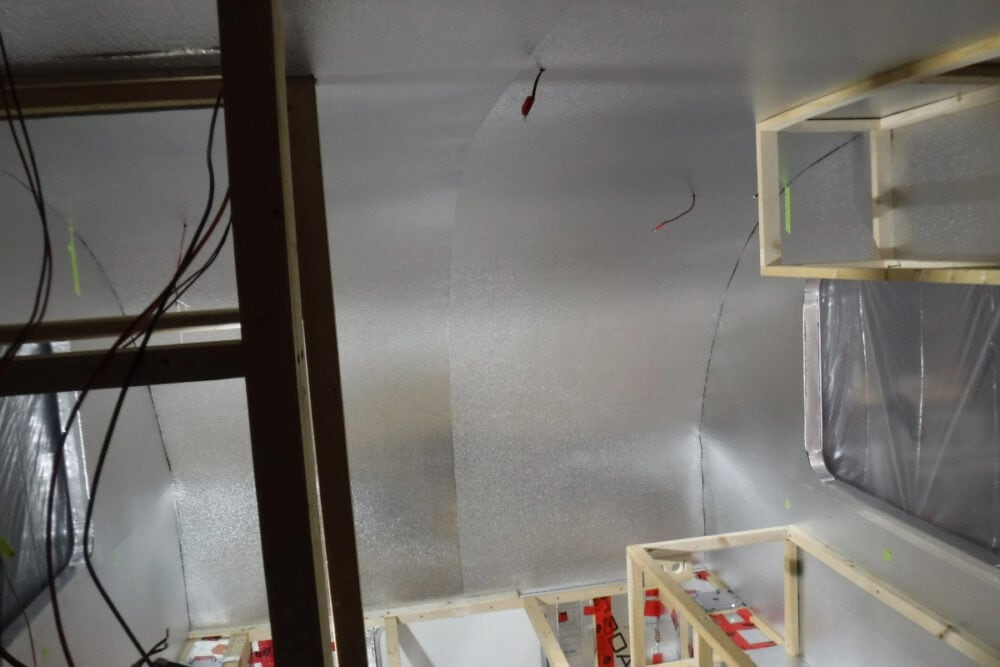
Challenge 5: Handling Thin Aluminum
The interior walls, made of thin aluminum, posed a challenge due to their propensity to bend and dent easily. This aspect of the project remains under careful consideration as they work towards a solution.
Challenge 6: Maneuvering the CamperPod into the Utility Trailer
Currently, the CamperPod rests on three 1000 lb dollies in the garage, offering mobility within a confined space. The tight clearance between the garage door and the CamperPod’s roof—a mere ¾ inch—necessitates careful planning for its eventual move into the utility trailer, with several strategies in mind to address this hurdle.
Challenge 7: Working in A Small Space Over the Winter
Working through the winter in a cramped space means prioritizing tasks one at a time. This limitation becomes particularly evident when switching from aluminum work to woodwork, requiring a complete tool swap.
Challenge 8: Solar Integration
The approach to integrating solar power remains fluid, with considerations for roof-mounted panels, portable briefcase solar panels, or even attaching them to the tow vehicle. They have also considered hydropower as an alternative for overnight energy generation.
The Toolbox for Success
Judie and Loyal shared the essential tools that made their project possible:
Cutting Tools:
Table Saw: Essential for cutting spruce into framing strips.
Miter, Circular, and Jigsaw: These saws addressed various cutting needs throughout the project
Drilling Tools for the Teardrop Camper:
Multiple units, with a special nod to the lightweight Milwaukee M12 drill driver, allowed for efficient work without the hassle of frequent bit changes.
Precision Tools:
¼ HP Hand Router and Flush Cut Bit: This combination was key for trimming the Aluminum Composite Material (ACM) to perfect alignment.
Measurement and Cleanup:
Measuring Tape: A reminder that accurate measurements are critical
Shop Vac: A clean workspace is vital for safety and efficiency
Assembly Tools for the Camper Build:
An 18g air nailer proved indispensable, especially for constructing the curved wall and other framing tasks.
Support Tools:
Clamps and Work Tables: Dozens of clamps acted as extra hands, while two Worx Pegasus work tables, complemented by a piece of 3/8 plywood, provided a mobile and collapsible work surface that was indispensable for the project.
The Essentials:
Patience and Organic Coffee: Beyond the physical tools, a substantial supply of patience and organic coffee was crucial.
“Patience is key in any custom build. Reacting and adapting to unexpected challenges is what keeps the project moving.”
Loyal
Personal Protective Equipment (PPE):
Safety gear for the ears, eyes, respiratory system, feet, and hands was non-negotiable to prevent injuries during the build.
Engaging with the Green Teardrop CampeR Build
For those captivated by Judie and Loyal’s commitment and ingenuity, the story doesn’t end here. The couple is actively documenting their journey on their YouTube channel, BuddyWhoDoesStuff, providing a real-time view of their challenges, solutions, and the creative process behind the green teardrop camper. This ongoing series is not just a showcase of their project but an open invitation for viewers to engage, learn, and perhaps even start their DIY projects.
Wrapping Up

As we conclude the journey of Judie and Loyal’s green teardrop camper, Loyal offers some parting wisdom for those inspired to embark on their massive, comprehensive DIY projects.
“Patience is needed in this type of build. Patience and resourcefulness. Thinking outside the box is so important. You have to be willing to try things and not be afraid to fail. People learn from failure. All too often, videos on the internet only show the successes and how easy ‘X’ was to complete, and how cheap it was, and how it was done so quickly…My thoughts on keeping the project on track: any progress, no matter how minor, is more progress than when you started.”
Loyal
Loyal’s candid thoughts remind us that behind every successful project is a series of trials, errors, and, most importantly, perseverance. He urges the DIY community to maintain a realistic perspective on the effort and time investments required for such undertakings.
Your Turn
Remember that your projects, too, can inspire and motivate others. We invite you to share your experiences, challenges, and triumphs with us at Do It Yourself RV. Whether you’re a seasoned DIYer or just beginning, your journey contributes to a rich tapestry of creativity and innovation.


