
From Awkward to Awesome: How to Create the Ultimate Outdoor RV Shower
An outdoor RV shower is one of the most useful tools a motorhome or trailer has. That said, many campers never touch their RV outdoor shower. While this is somewhat understandable—they can be a bit of a pain to use, after all—it is an unfortunate truth because an RV outdoor shower can be a wonderful experience when the correct steps are taken.
The good news is you can make some quick and easy changes to your outdoor RV shower to make it a breeze to use. We’re betting that after you make these simple fixes, you’re going to fall in love with this often-forgotten feature of your rig!
Change the showerHead
To enhance your outdoor RV shower, start by replacing the factory-installed showerhead. These showerheads are typically inefficient, with poor pressure and high water consumption. Upgrade to an Oxygenics showerhead for improved pressure, water conservation, and a superior showering experience. We highly recommend this product.
Ensure that the new showerhead you select is of an appropriate size for your outdoor shower. Be mindful that certain showerheads may not fit within the allocated space on your rig’s side box.
Mount the showerhead
Once you have a better showerhead, the next step is to mount it. After all, nobody wants to be stuck holding the showerhead while they try to wash their hair. Fortunately, there are options.
To install a showerhead mount in your RV, you can either securely attach it to the RV’s side with screws and sealant, which does not usually cause any issues when driving, or opt for a suction cup showerhead mount such as this, which eliminates the need for screwing anything in place and enables effortless removal on travel days.
Create some privacy
Outdoor showering in public can be uncomfortable. Even with a bathing suit, the presence of other people can be disconcerting. Therefore, we highly recommend incorporating some privacy into your RV outdoor shower arrangement.
Consider using a suction cup U-shaped rod to install a privacy curtain. However, note that wind may cause the curtain to move, compromising your privacy and sticking to you during your wash.
For this reason, we believe that utilizing a shower tent is a much better approach. However, it is imperative to secure the tent firmly to the ground to prevent it from being swept away by strong winds.
Put Down a Floor
Showering outdoors poses a major challenge: inevitably, one ends up standing in a pool of mud, rendering the entire experience unpleasant and leaving one’s feet dirtier than before. The solution to this problem is simple: a shower floor.
This bamboo shower mat is an ideal outdoor RV shower floor option. Its raised design prevents mud from seeping over the top, and it can be conveniently folded for effortless storage.
Add Some Shelving
Finally, if you don’t want to keep your soap and shampoo on your newly laid RV outdoor shower floor, you will need to add some sort of shelving to your setup. You could use a shelving unit that stands on the floor like this one, but they tend to take up a lot of shower space. For this reason, we actually prefer suction cup soap dishes and shower caddies for holding toiletries in the outdoor shower area.
You might also want to add some suction cup hooks or Command hooks to hold towels just outside of your shower spot so you can dry off right after your shower.
Creative ways to use your upgraded outdoor RV shower
After renovating and ensuring the functionality of your outdoor RV shower, maximize its potential by incorporating it into your routine. Utilize the shower for various purposes, including those that we outline below.
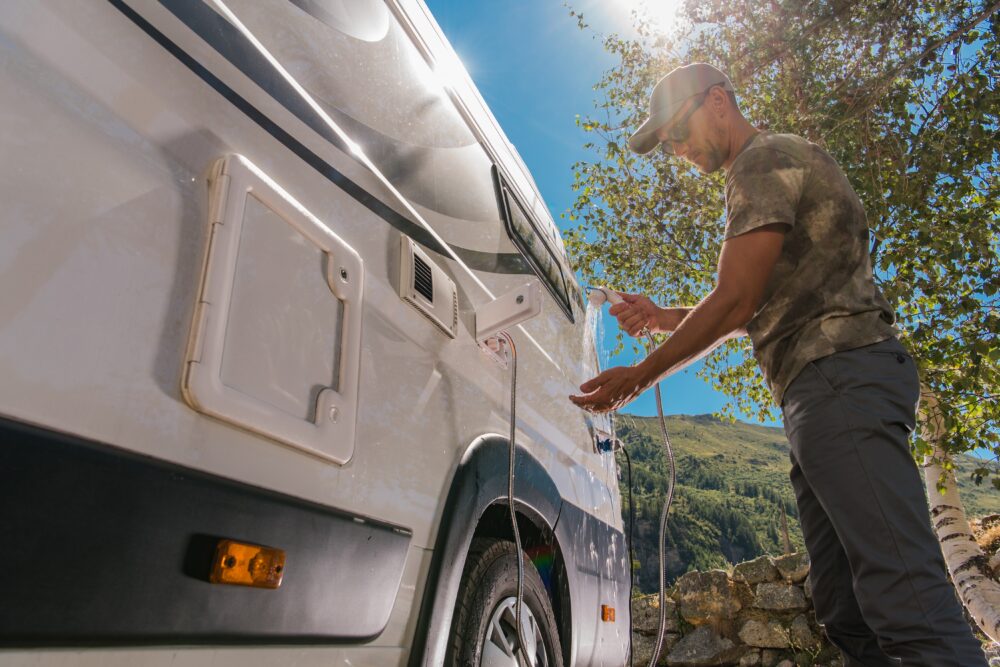
Rinsing feet
Outdoor RV showers are ideal for cleaning dirty feet and hands before entering your RV. They are typically connected to the hot water tank, which allows for the use of warm water even in colder temperatures.
The main issue is that numerous outdoor showers are situated on the RV’s side opposite the front entrance. Therefore, you must ensure a clear path to the door or have accessible slip-on shoes to preserve the cleanliness of your feet until you arrive at the entrance.
An off-grid shower
Sometimes you really need to conserve space in your gray tank. This is especially true while out boondocking when there’s no great way to dump the tanks without breaking camp. In these cases, using the outdoor RV shower to clean up is a great way to go.
Using the outdoor shower will use some of your fresh water reserves, but your used water won’t take up valuable gray tank space, and you can always fill up water jugs in town to replenish the fresh tank.
Bathing a pet
Using the outdoor shower to bathe pets is also worth considering. Washing dogs in an RV can be a messy endeavor. However, cleaning them outdoors eliminates the potential of having dog hair in the indoor shower and wet paw prints on the floor.
Get tips from other RVers
An outdoor shower for your RV is an excellent addition. By following the straightforward process outlined above to enhance your shower, you will have a charming and functional washing space.
Forums such as iRV2.com and blog sites like RV LIFE, Do It Yourself RV, and Camper Report provide all the information you need to enjoy your RV. You’ll also find brand-specific information on additional forums like Air Forums, Forest River Forums, and Jayco Owners Forum.

I have no idea why you would take on extra gear and weight and time for a bamboo shower mat and a privacy shower tent. Why would I shower outside when I have a perfectly good shower inside??? Am I missing something? It’s just weird. Showering the pets, and the beach sand off the grandkids, yes, I am all for it. And the comment about saving space in the gray tank by showering outside, that also brings up another issue. To dump the gray or not dump the gray. Since probably 80% or more of my gray tank is from showering, why not just dump the gray tank? Essentially its the same thing. But showering outside somehow makes that not as controversial? Very odd indeed
Great idea! I am going to work on implementing this!
Not my cuppa. To me it is along the lines of an outhouse. Besides how many people want to take an outdoor shower if they are winter camping? I prefer it simple, and inside. I am designing a full top, long wheelbase van, into a custom camper, all done by myself. Shower will be a 2 to 5 gallon container, squeeze handle at the end of a hose. Either put the water outside to heat in the sun, or heat water inside and fill it with hot and cold water to make it just warm. A wash tub or similar to stand in, a shower curtain to hang from the ceiling, and a hook to hang the water from. Than a sailer shower, gallon pf water to soap up, gallon of water to rinse. Simple, easy to put together, not costly. And you can shower no matter what the weather is outside, if you are in bear country, or whatever. And when you put the whole rig away, that space is now available for other use.