How We Did Our Prowler Travel Trailer Renovation
When we purchased our new-to-us 2015 Prowler travel trailer, it was technically our first home together. Our dreams for our first RV renovation were big!
The goal for this RV renovation was to create a super functional space in this travel trailer. We wanted to create a mid-century modern and minimalist aesthetic. Our color palette was neutral with white and gray scale, browns, and accents of green.
Beyond the visual aesthetic of the RV, we wanted to be conscious of our footprint (and budget) and reuse as many elements as possible. We really focused on only splurging on big ticket items that had a large impact throughout the entire trailer.
RV model specifications
Our RV is a 2015 Prowler by Heartland 285LX unit. This unit features one slide-out that runs about 14 feet.
RV renovations throughout the trailer
Let’s jump into the good stuff – the before and after pictures! Plus, I will share some tips, tricks, and details about each renovation.
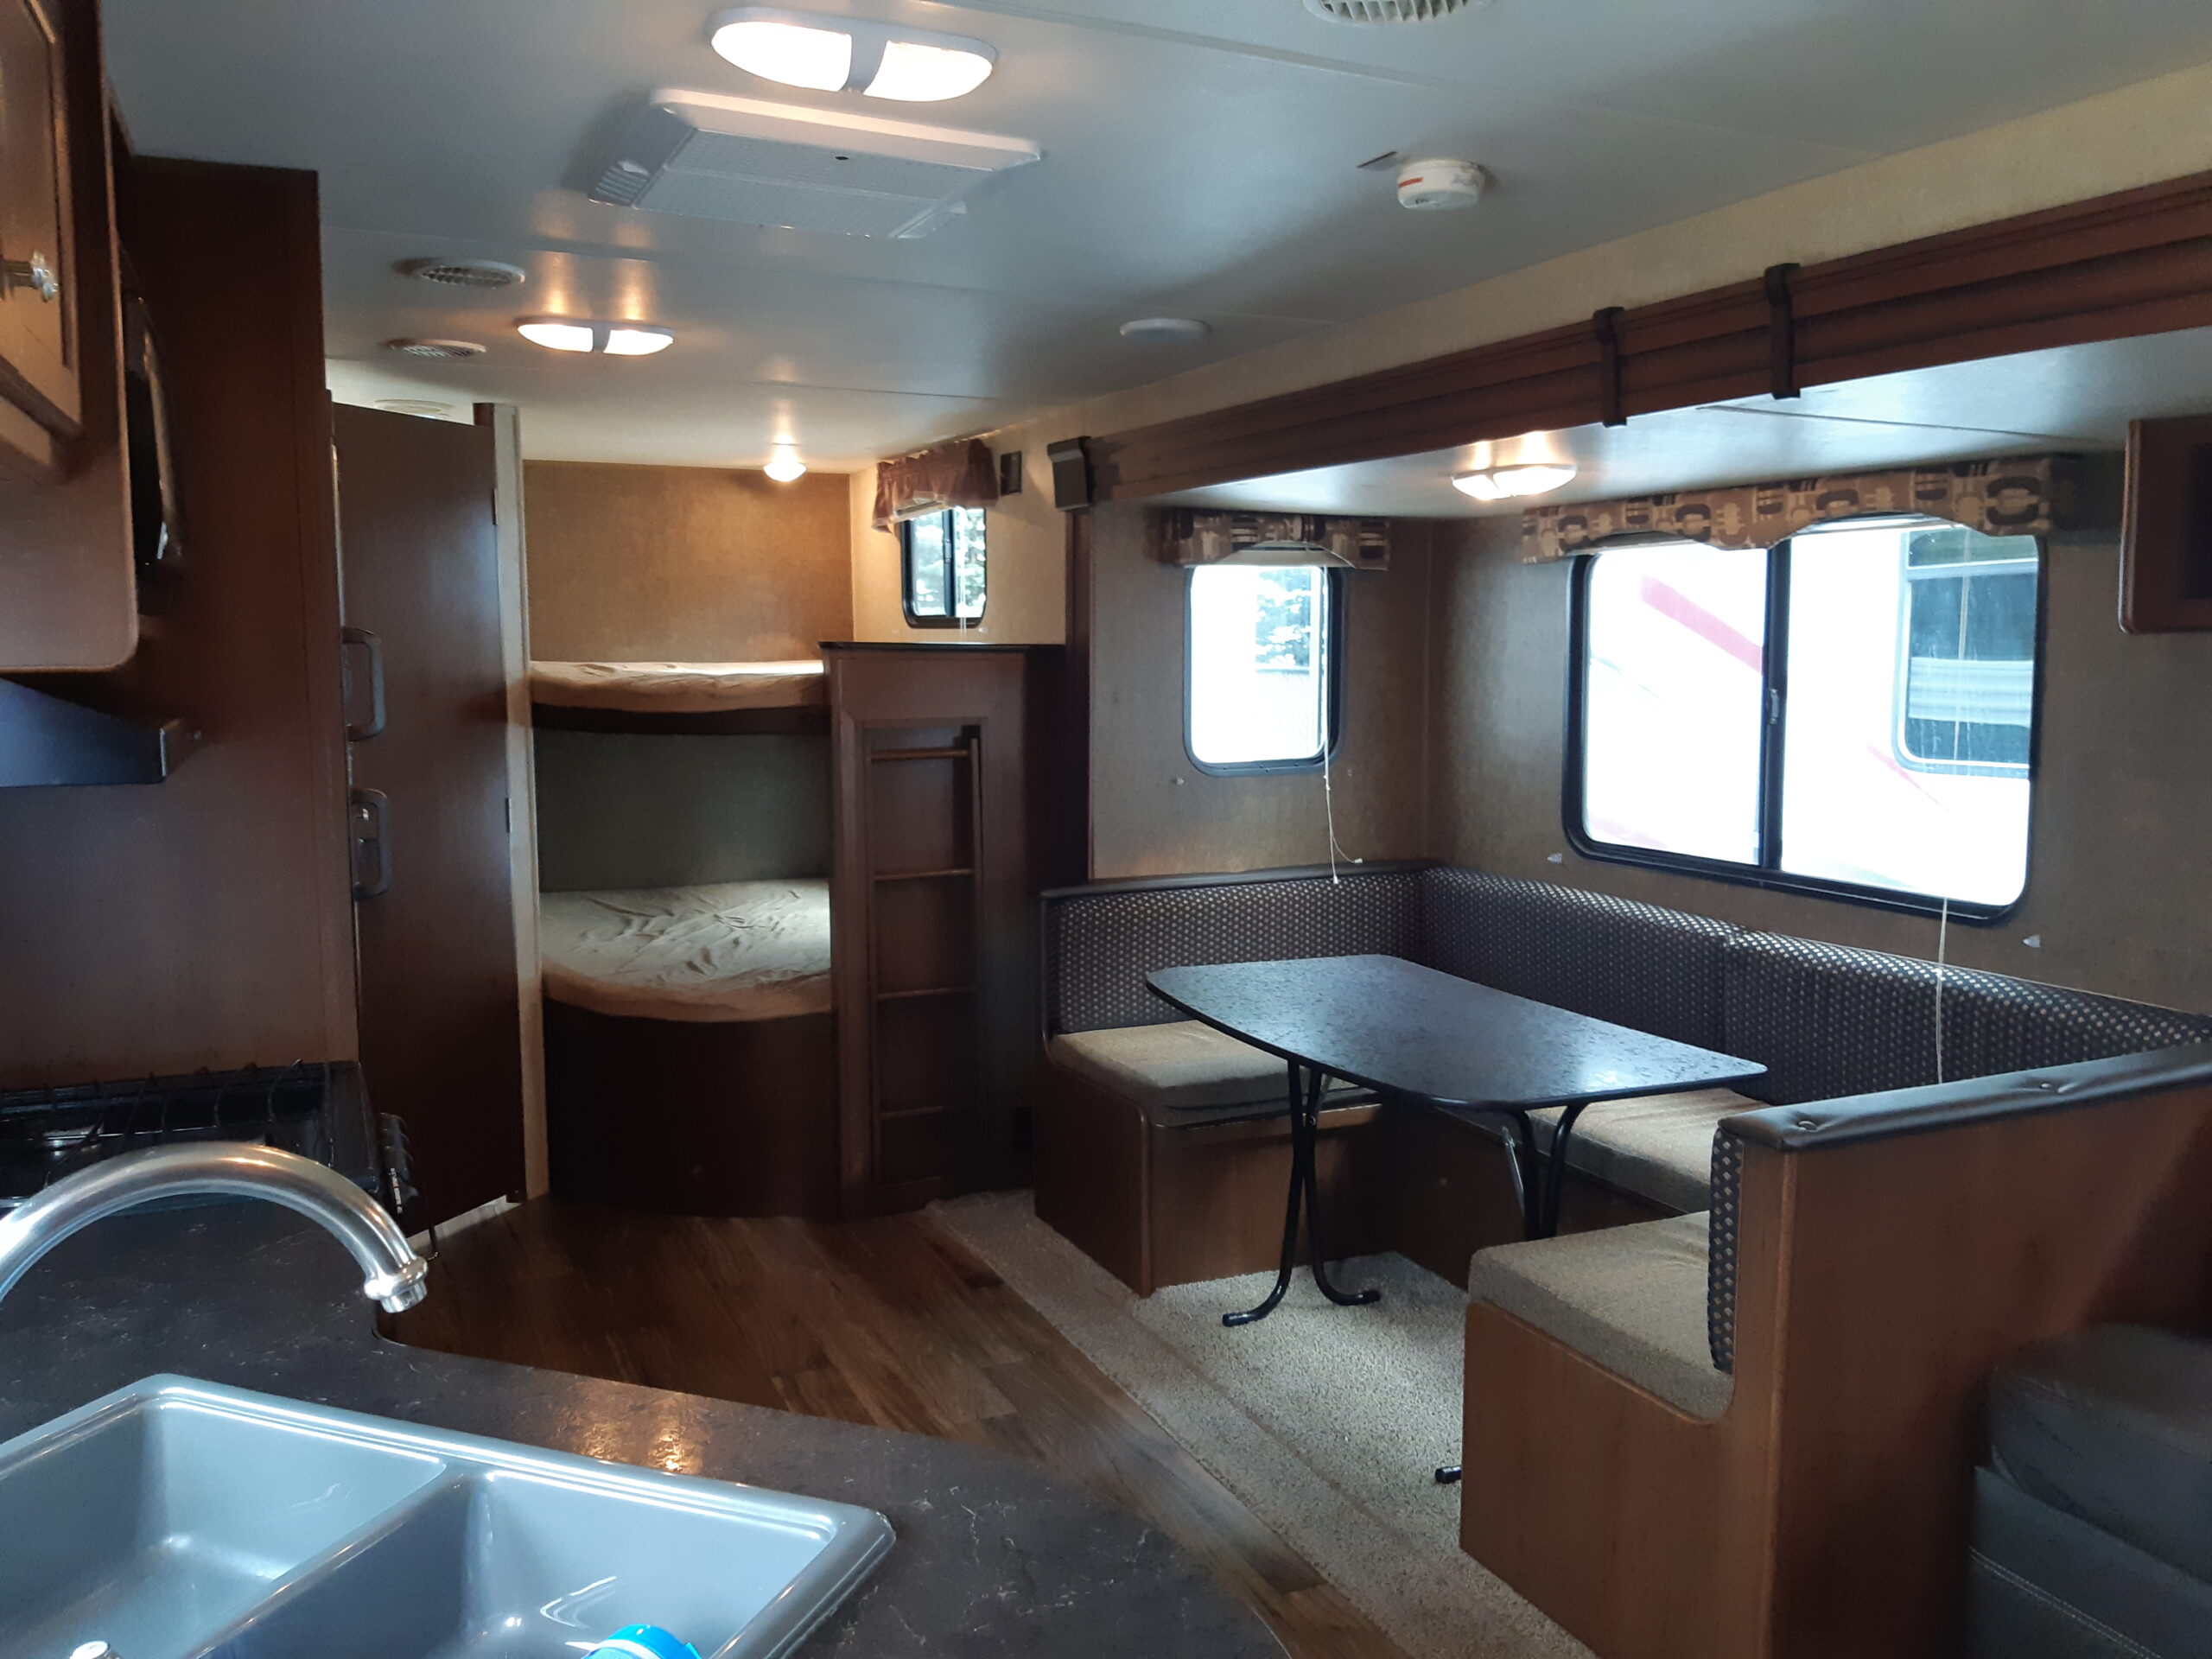
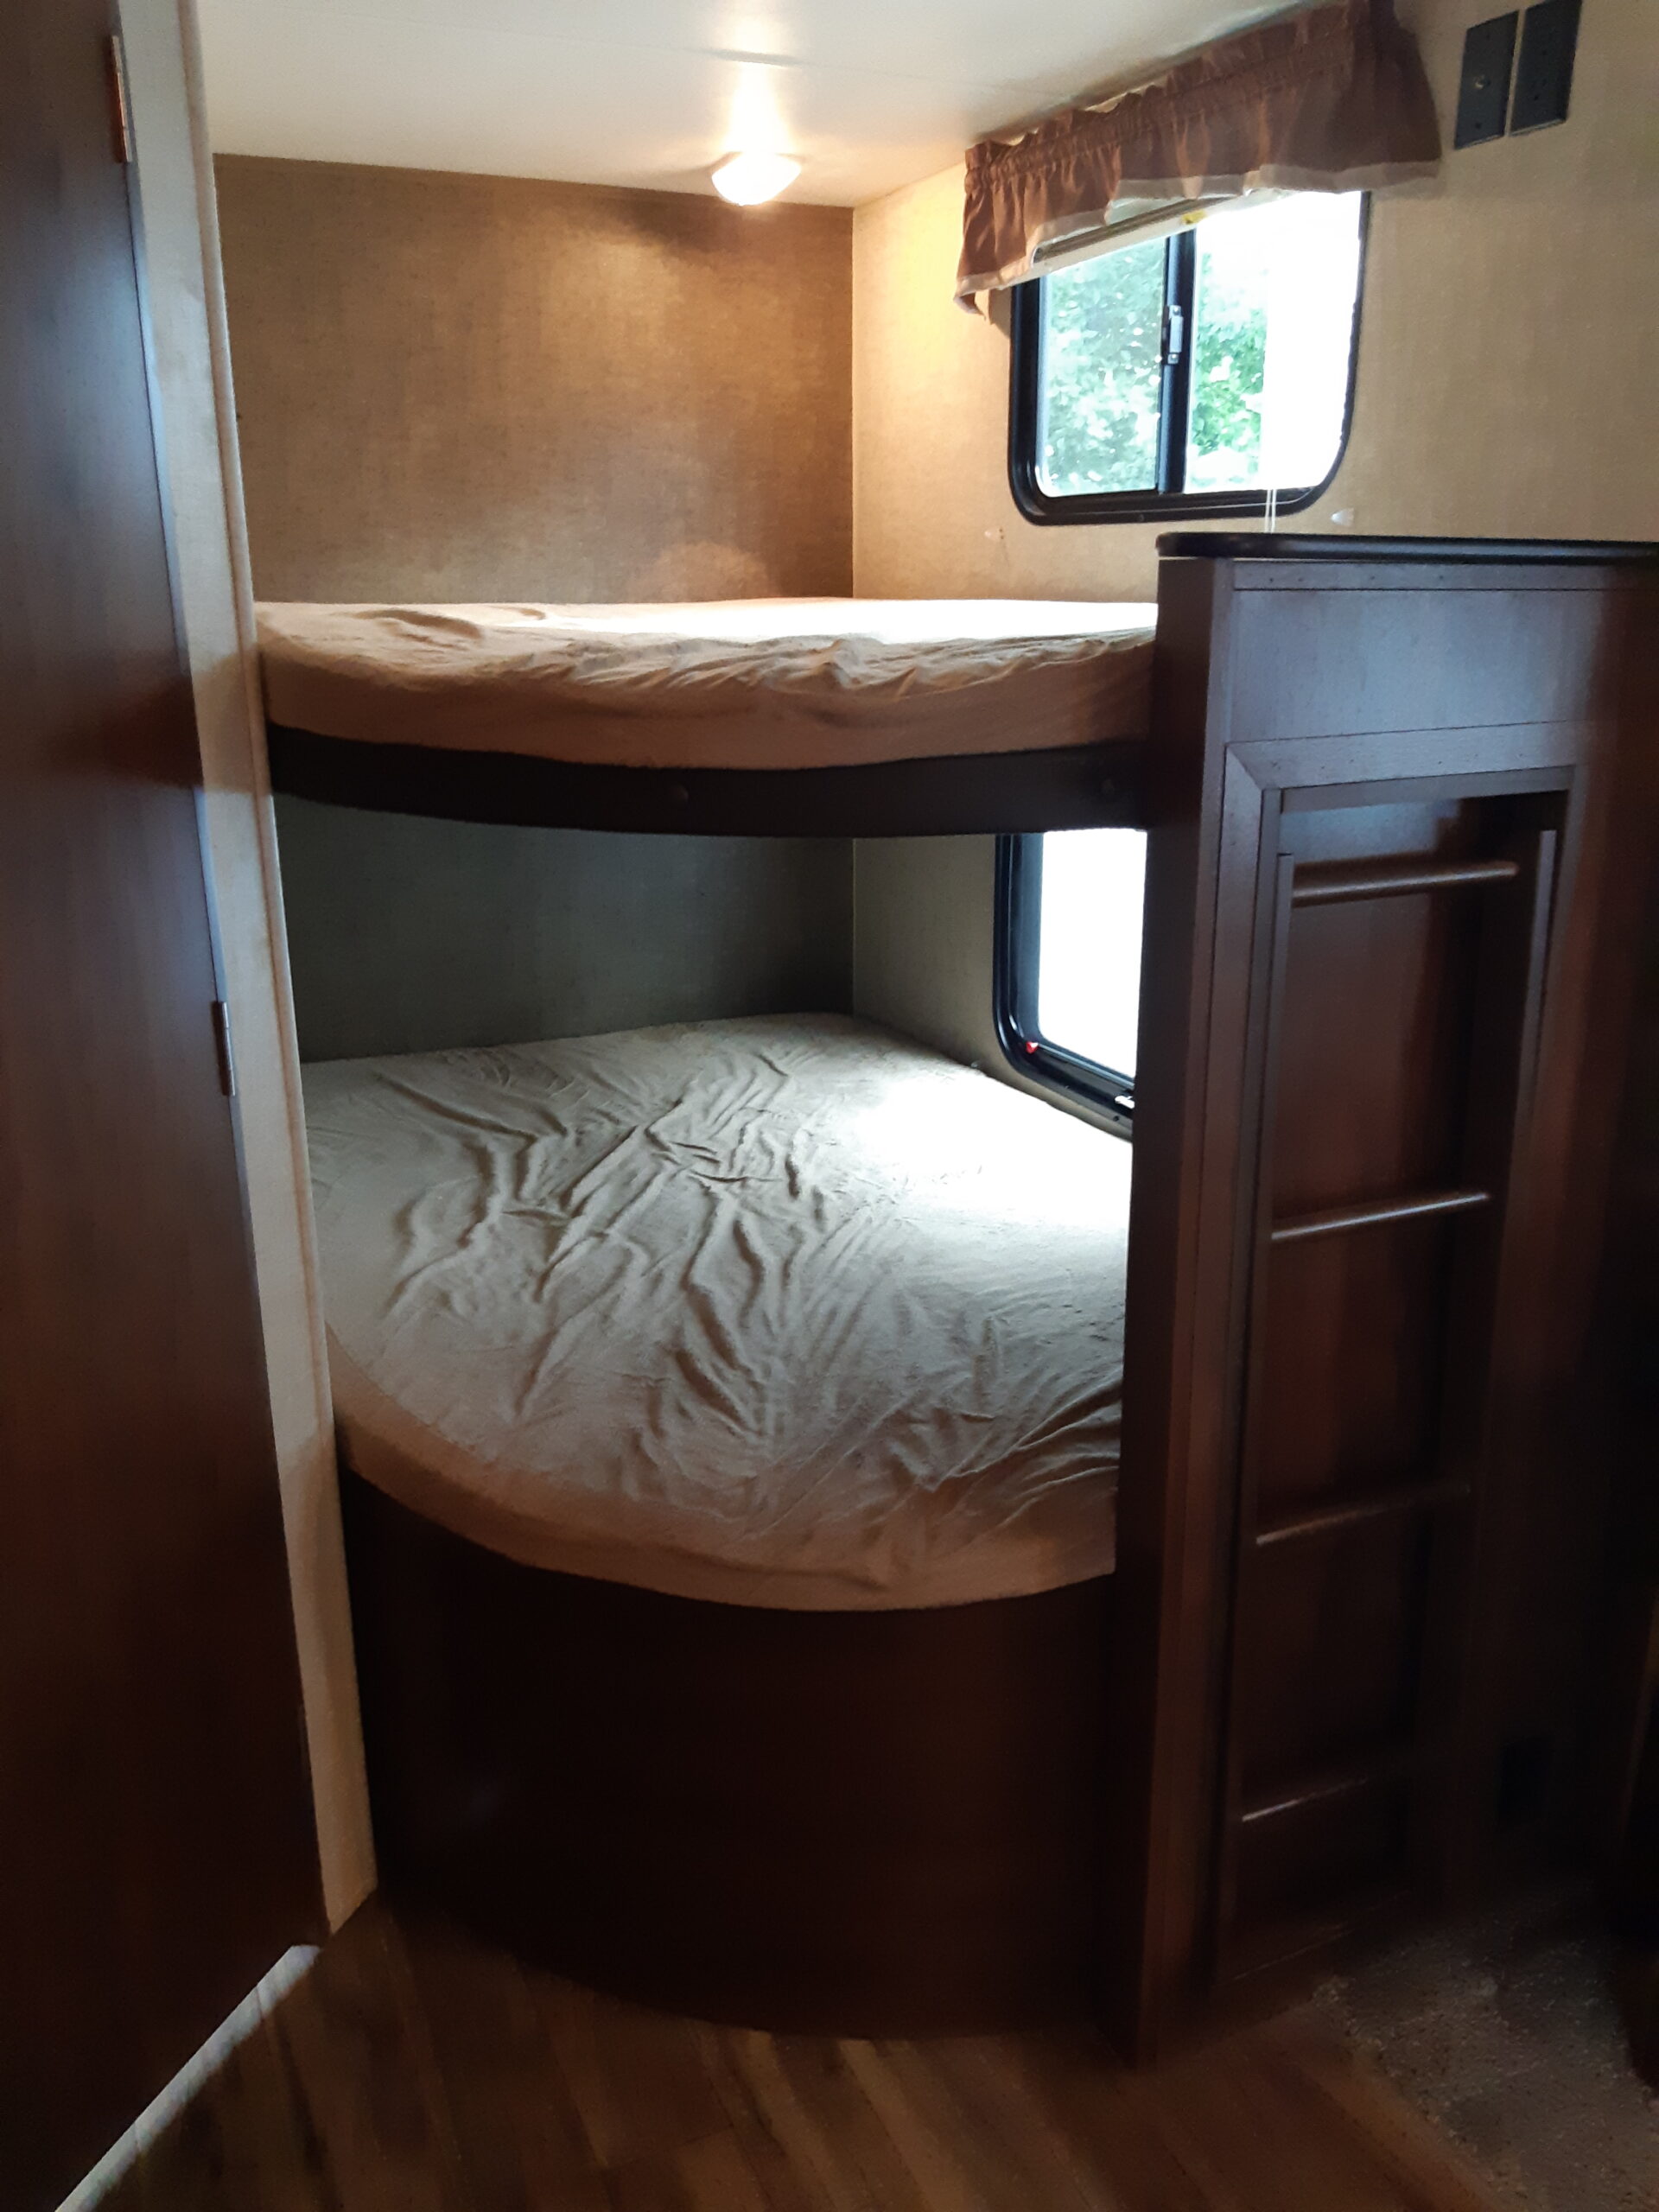
We kept the configuration but transformed the bunk unit into a functional office space.
Throughout the unit, we painted all the walls to a nice, clean white. We also painted the ceiling in the slide-out. Painting the walls white brightened everything up tremendously! This was a huge job, though—it took about 4 coats of paint but made all the difference.
We updated the lighting by spray painting the light covers gold and installing LED bulbs.
One of the first changes we made was removing the window valances. While not my first choice for design, we kept the factory blinds. To replace the valances, we built our own out of lumber that we stained a dark ebony.
Tip: Don’t feel like you have to completely gut your RV. If some elements are in good shape or functional then try to keep them. We kept a lot of the elements as they came.
Master bedroom update
For the master bedroom, we only updated the headboard (and replaced the mattress!).
The headboard was a super easy upgrade. All we did was take strips of MDF, cut them to length, and installed using glue and Brad nails. Then we painted the whole headboard that beautiful green color!
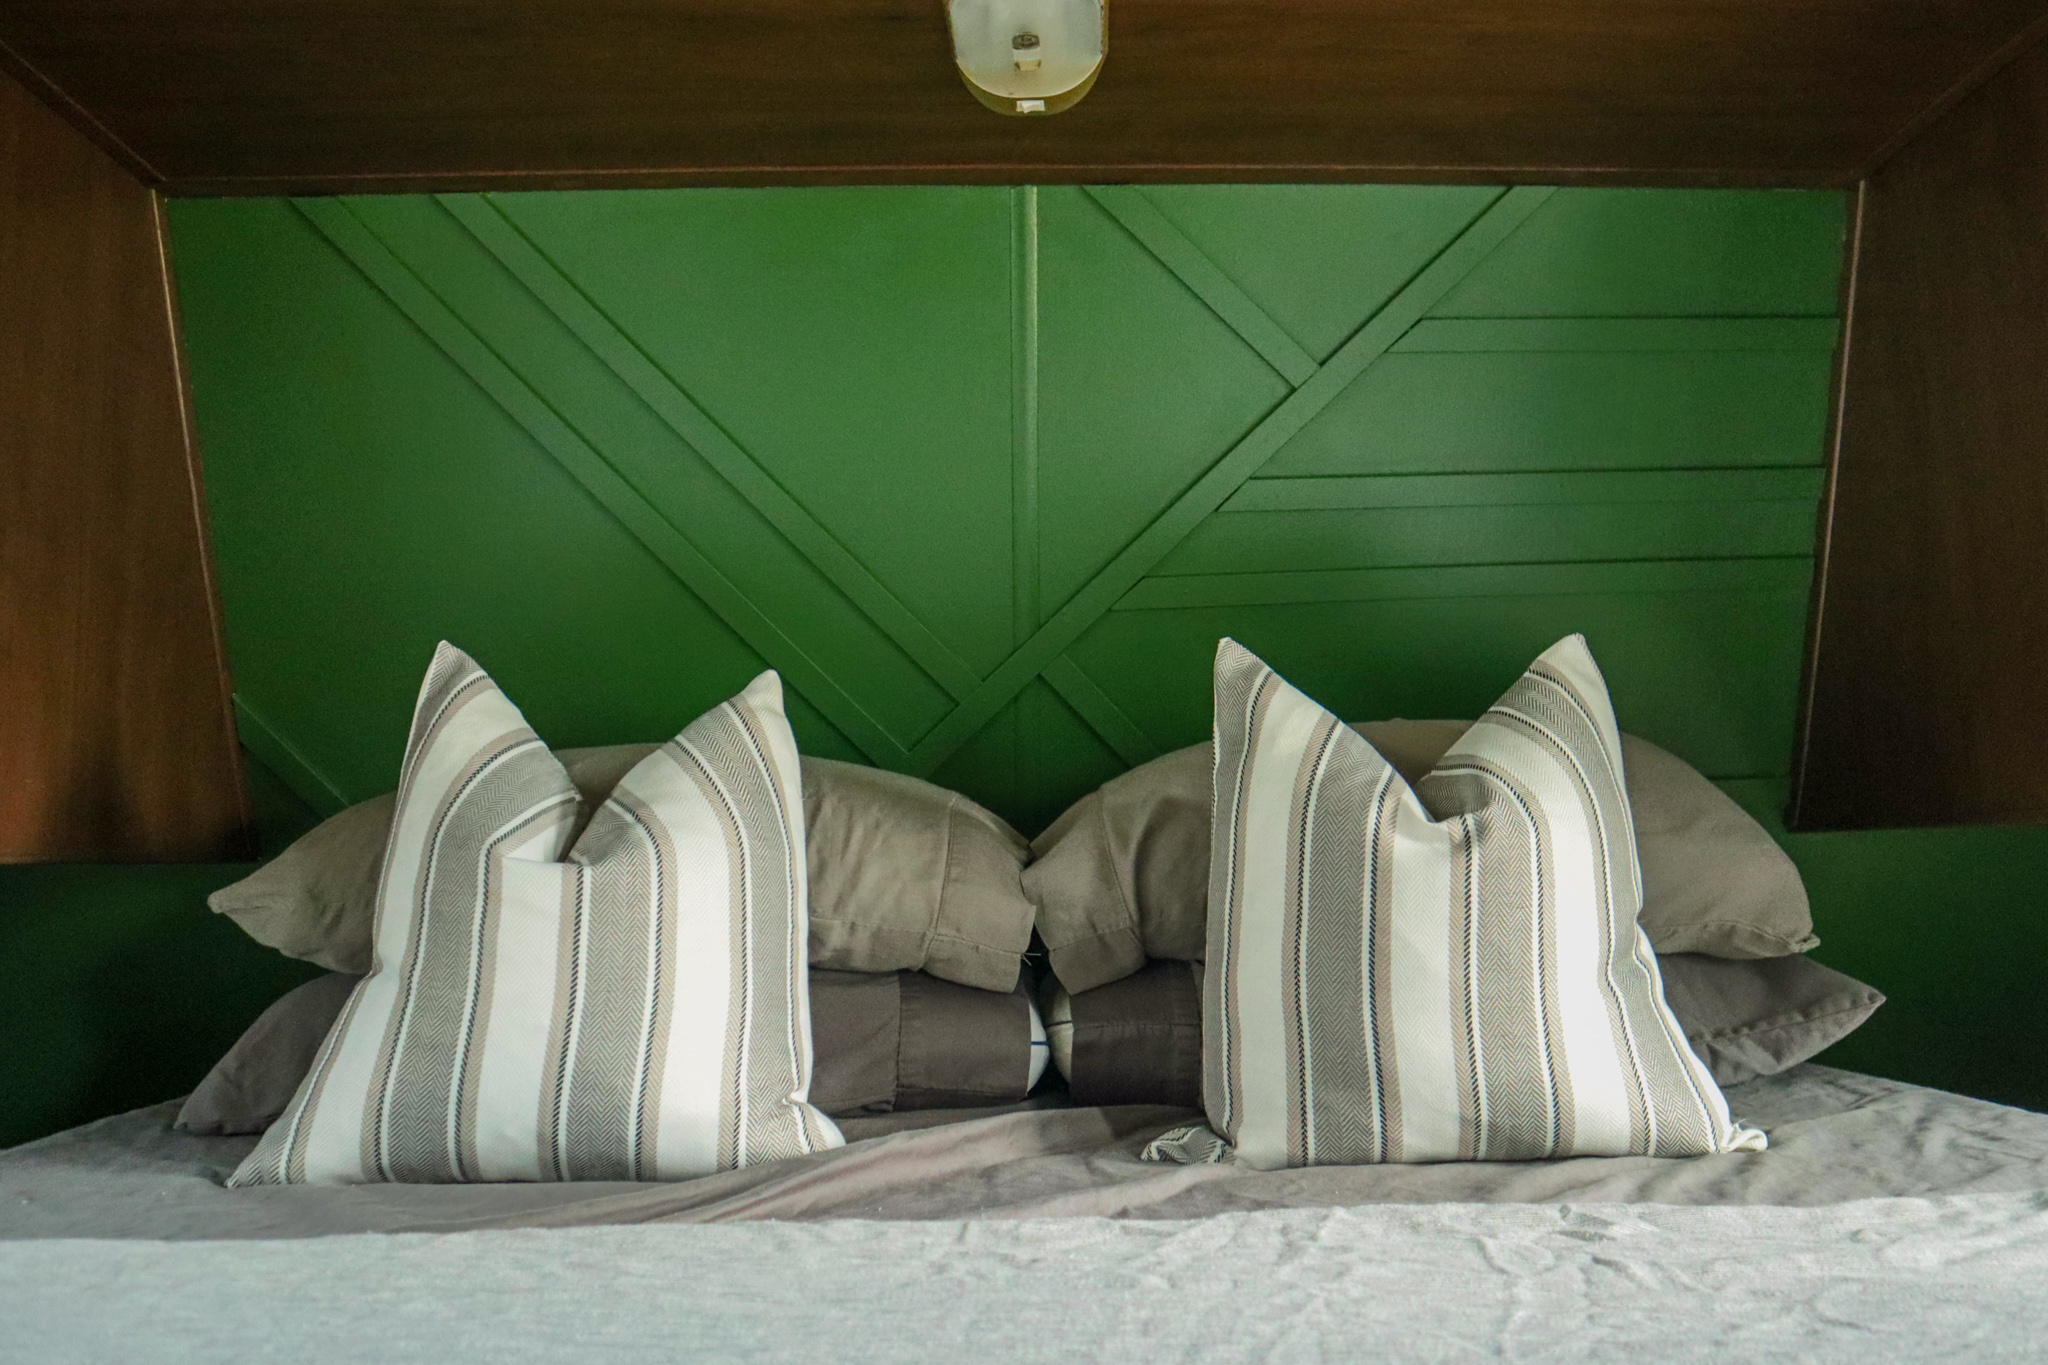
This green was chosen because it felt very rainforest-like and reminded me of the green color of peace lily leaves.
Tip: Paint the walls of your trailer a neutral color before you start painting/changing your cupboards. You may find that the cupboards and wood trim really look beautiful when they are against a lighter paint color.
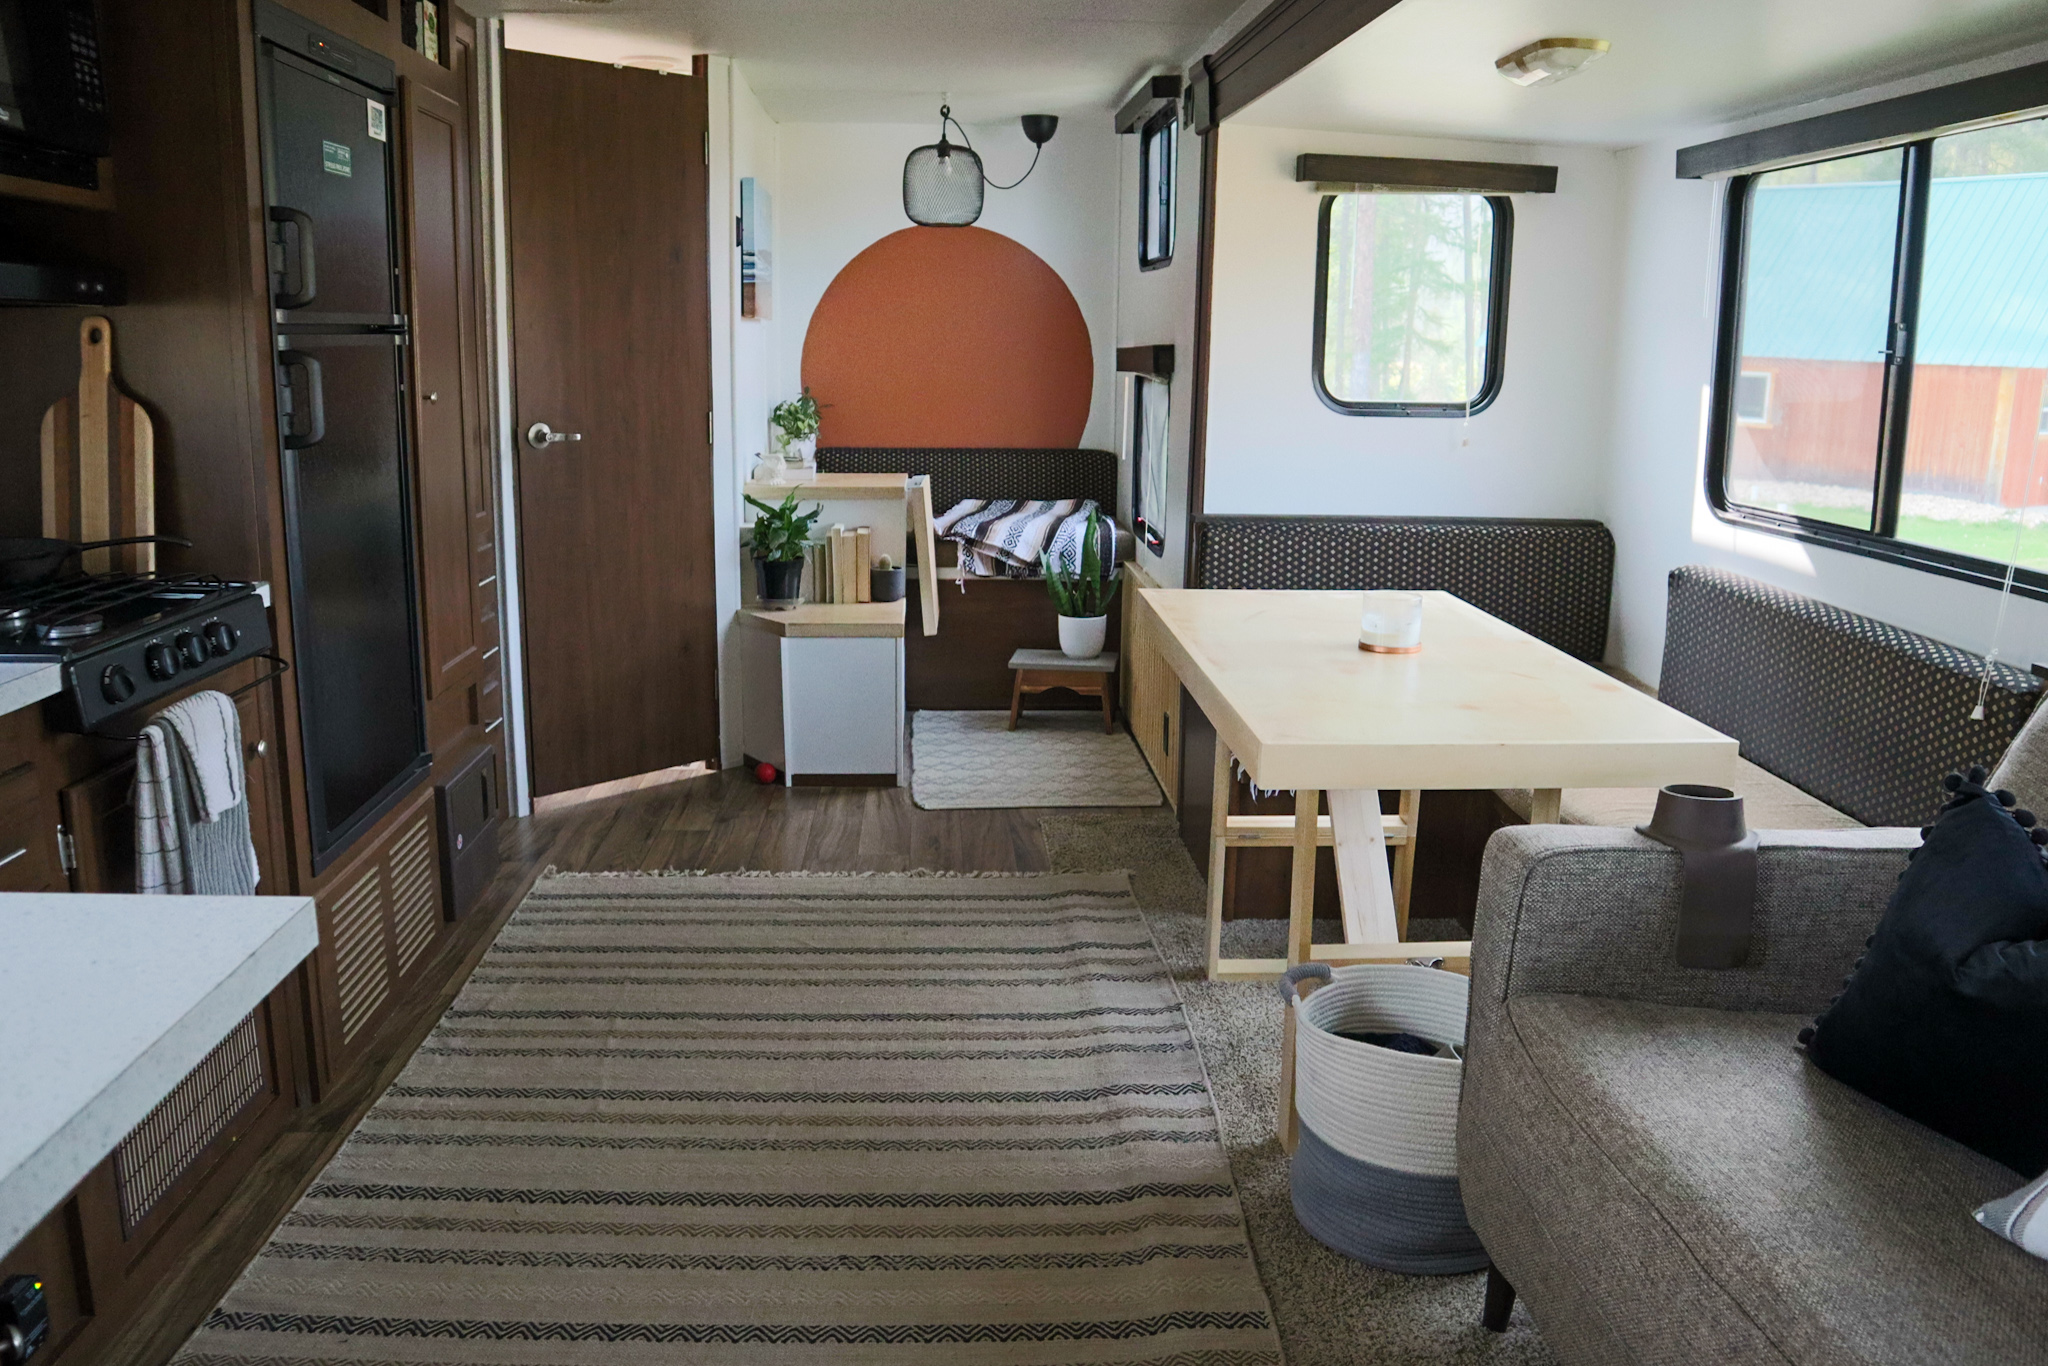
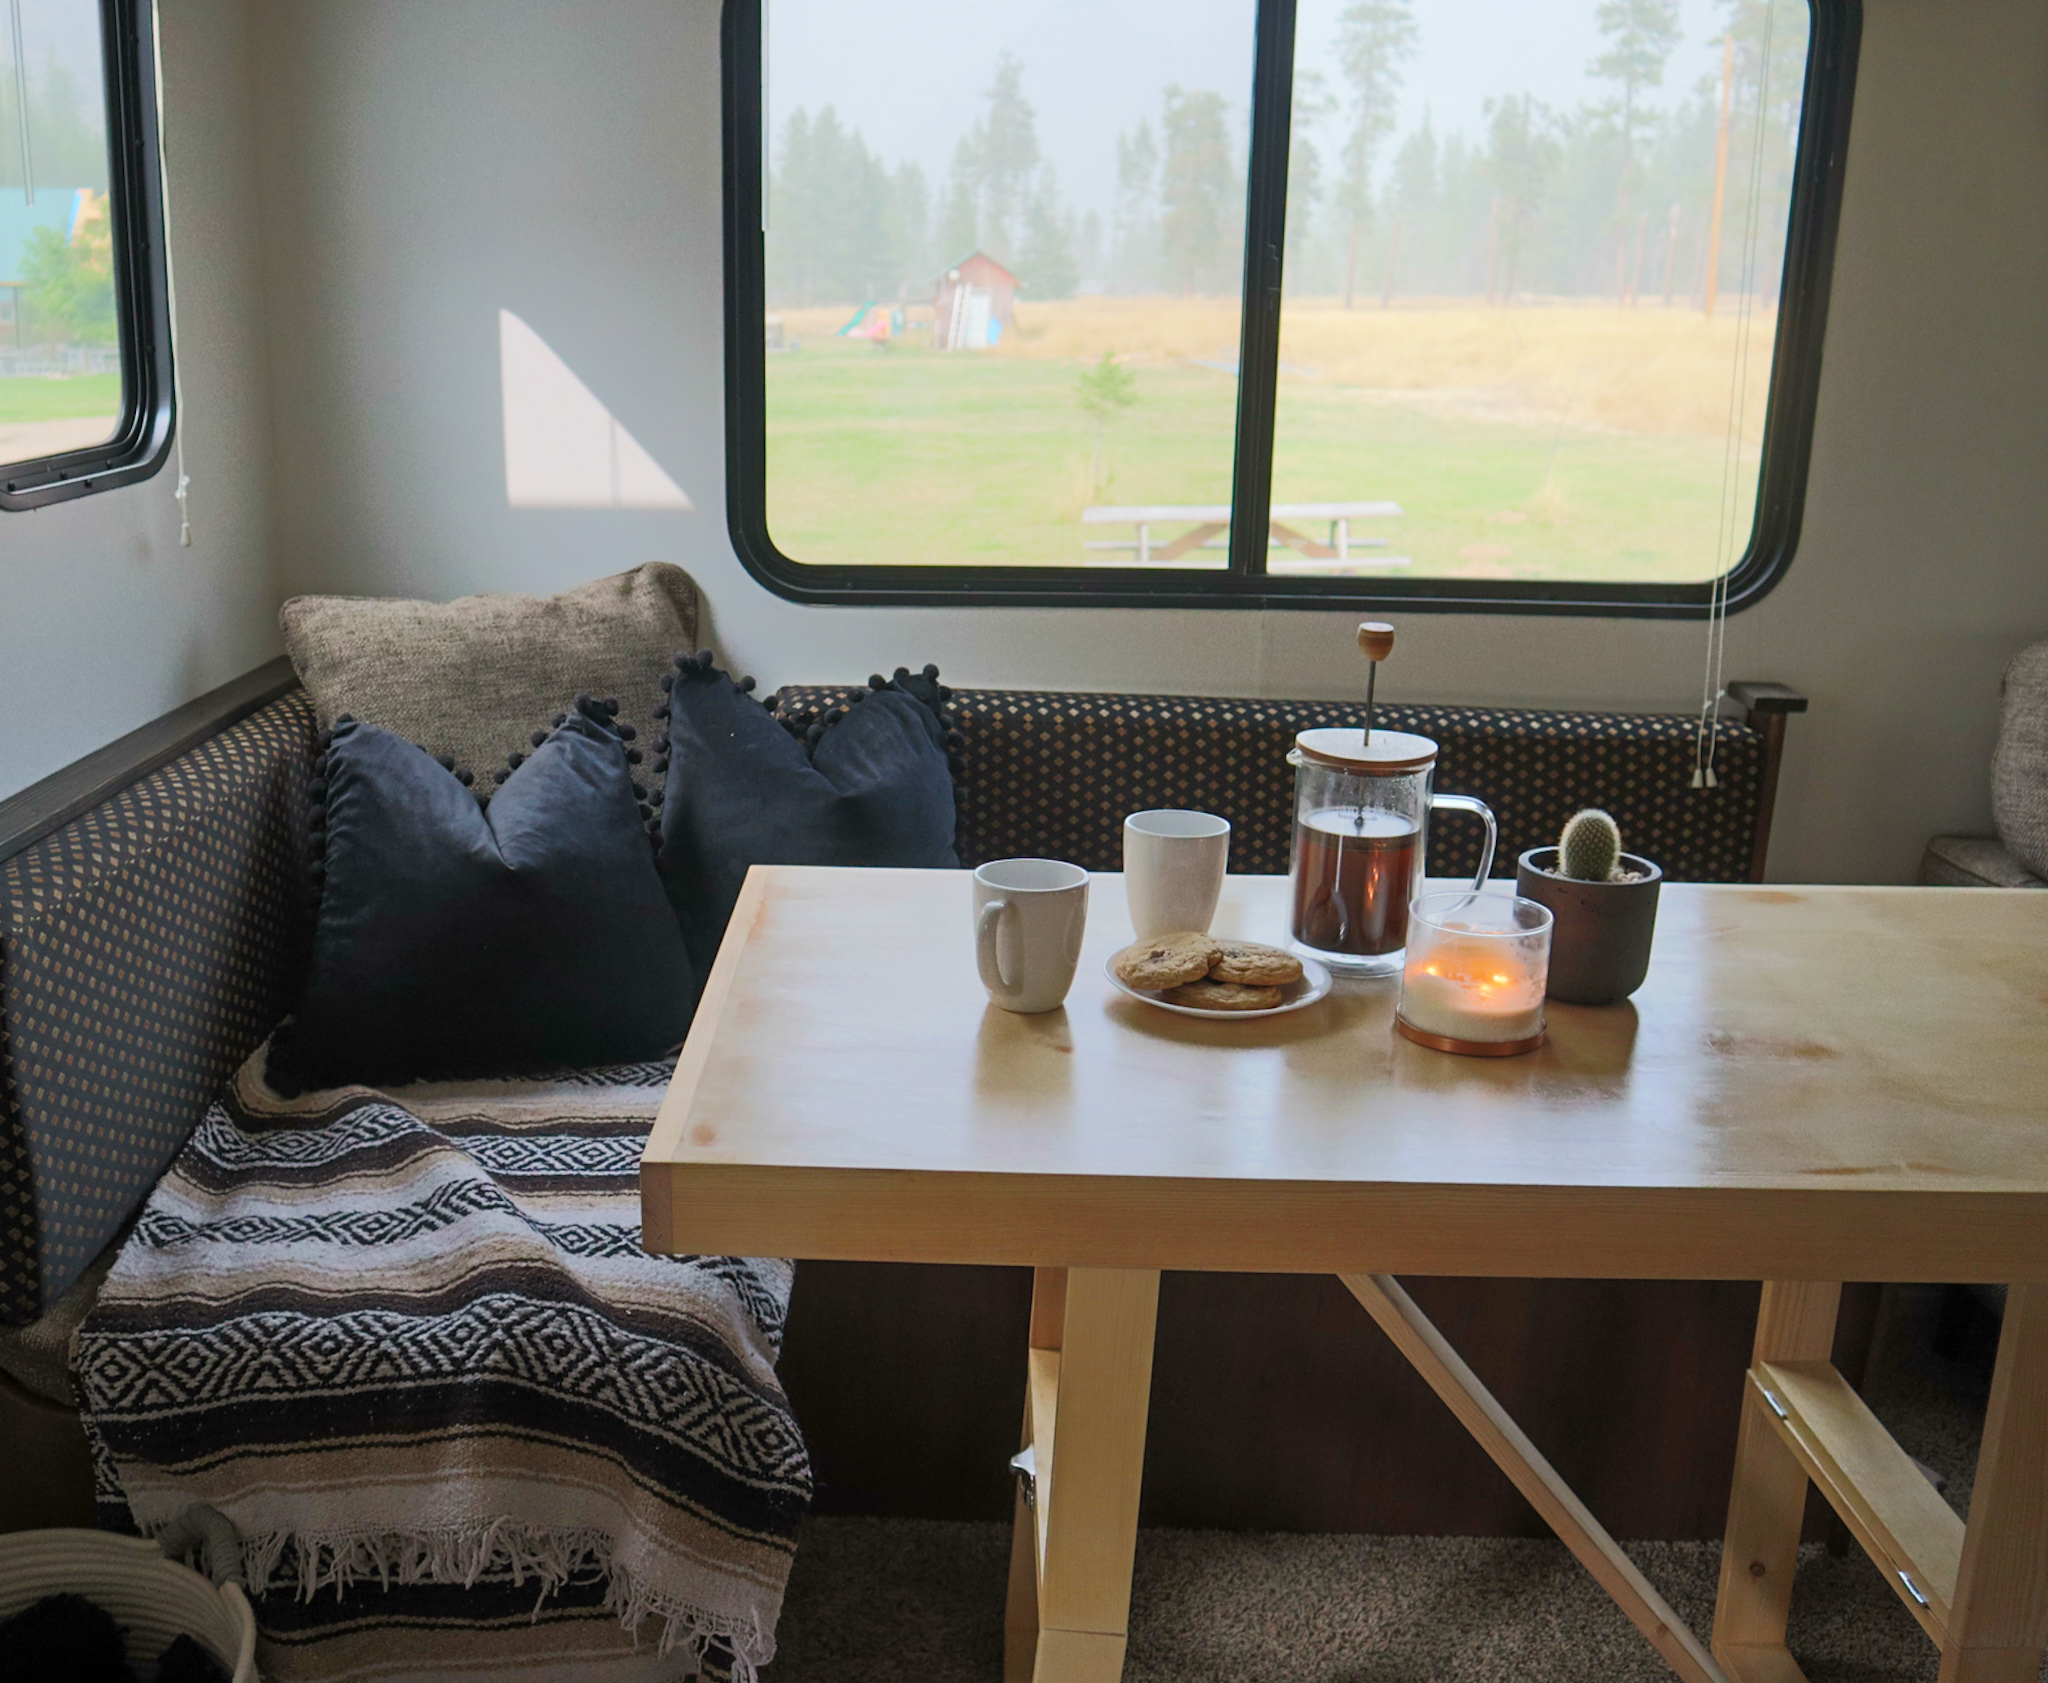
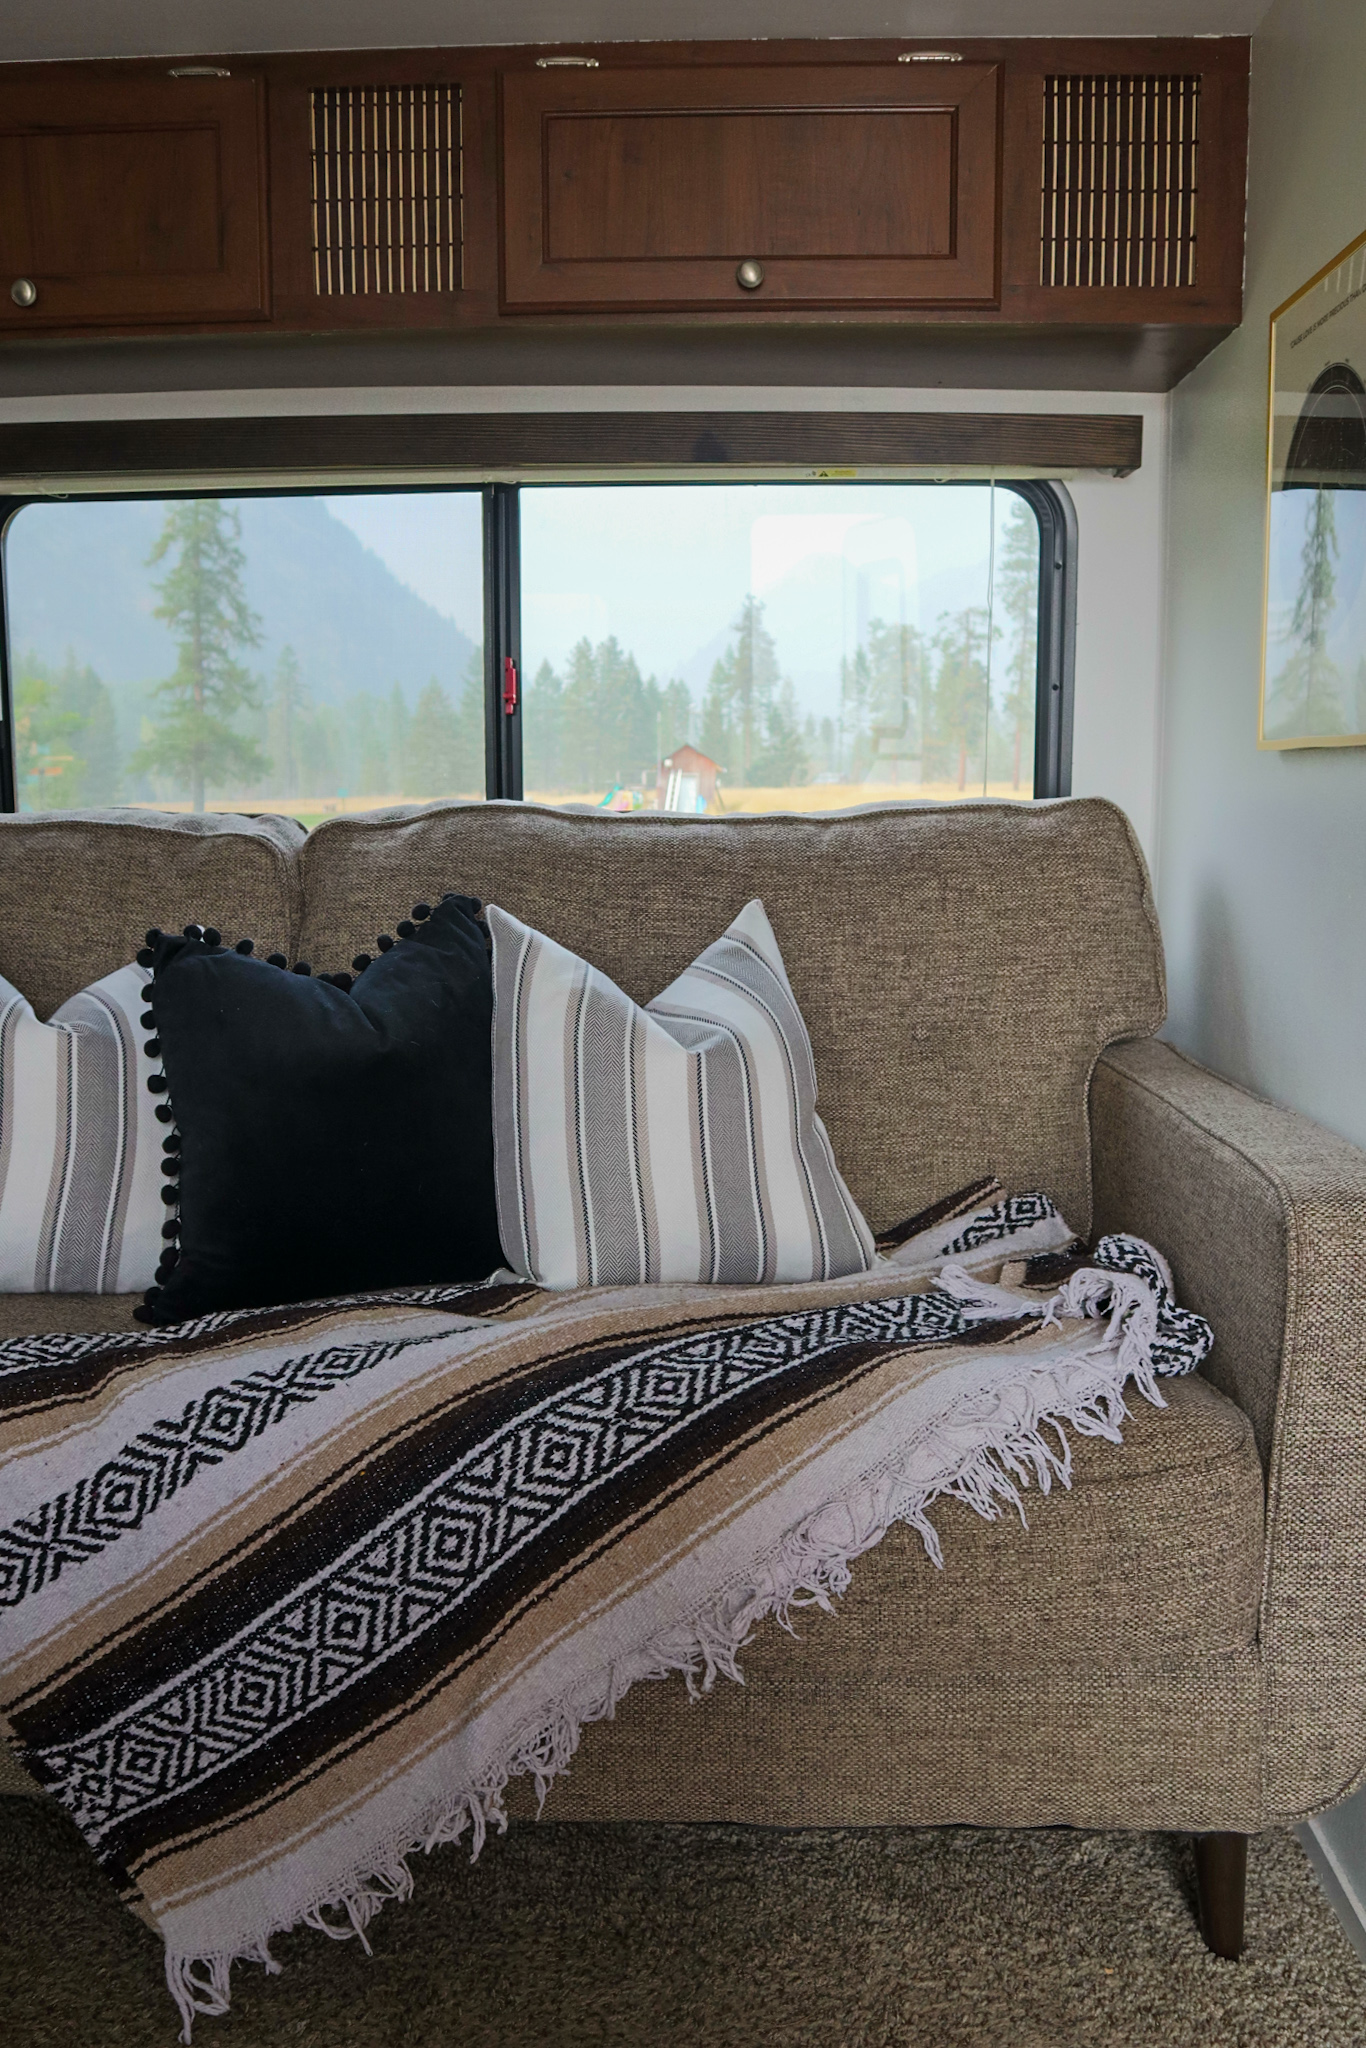
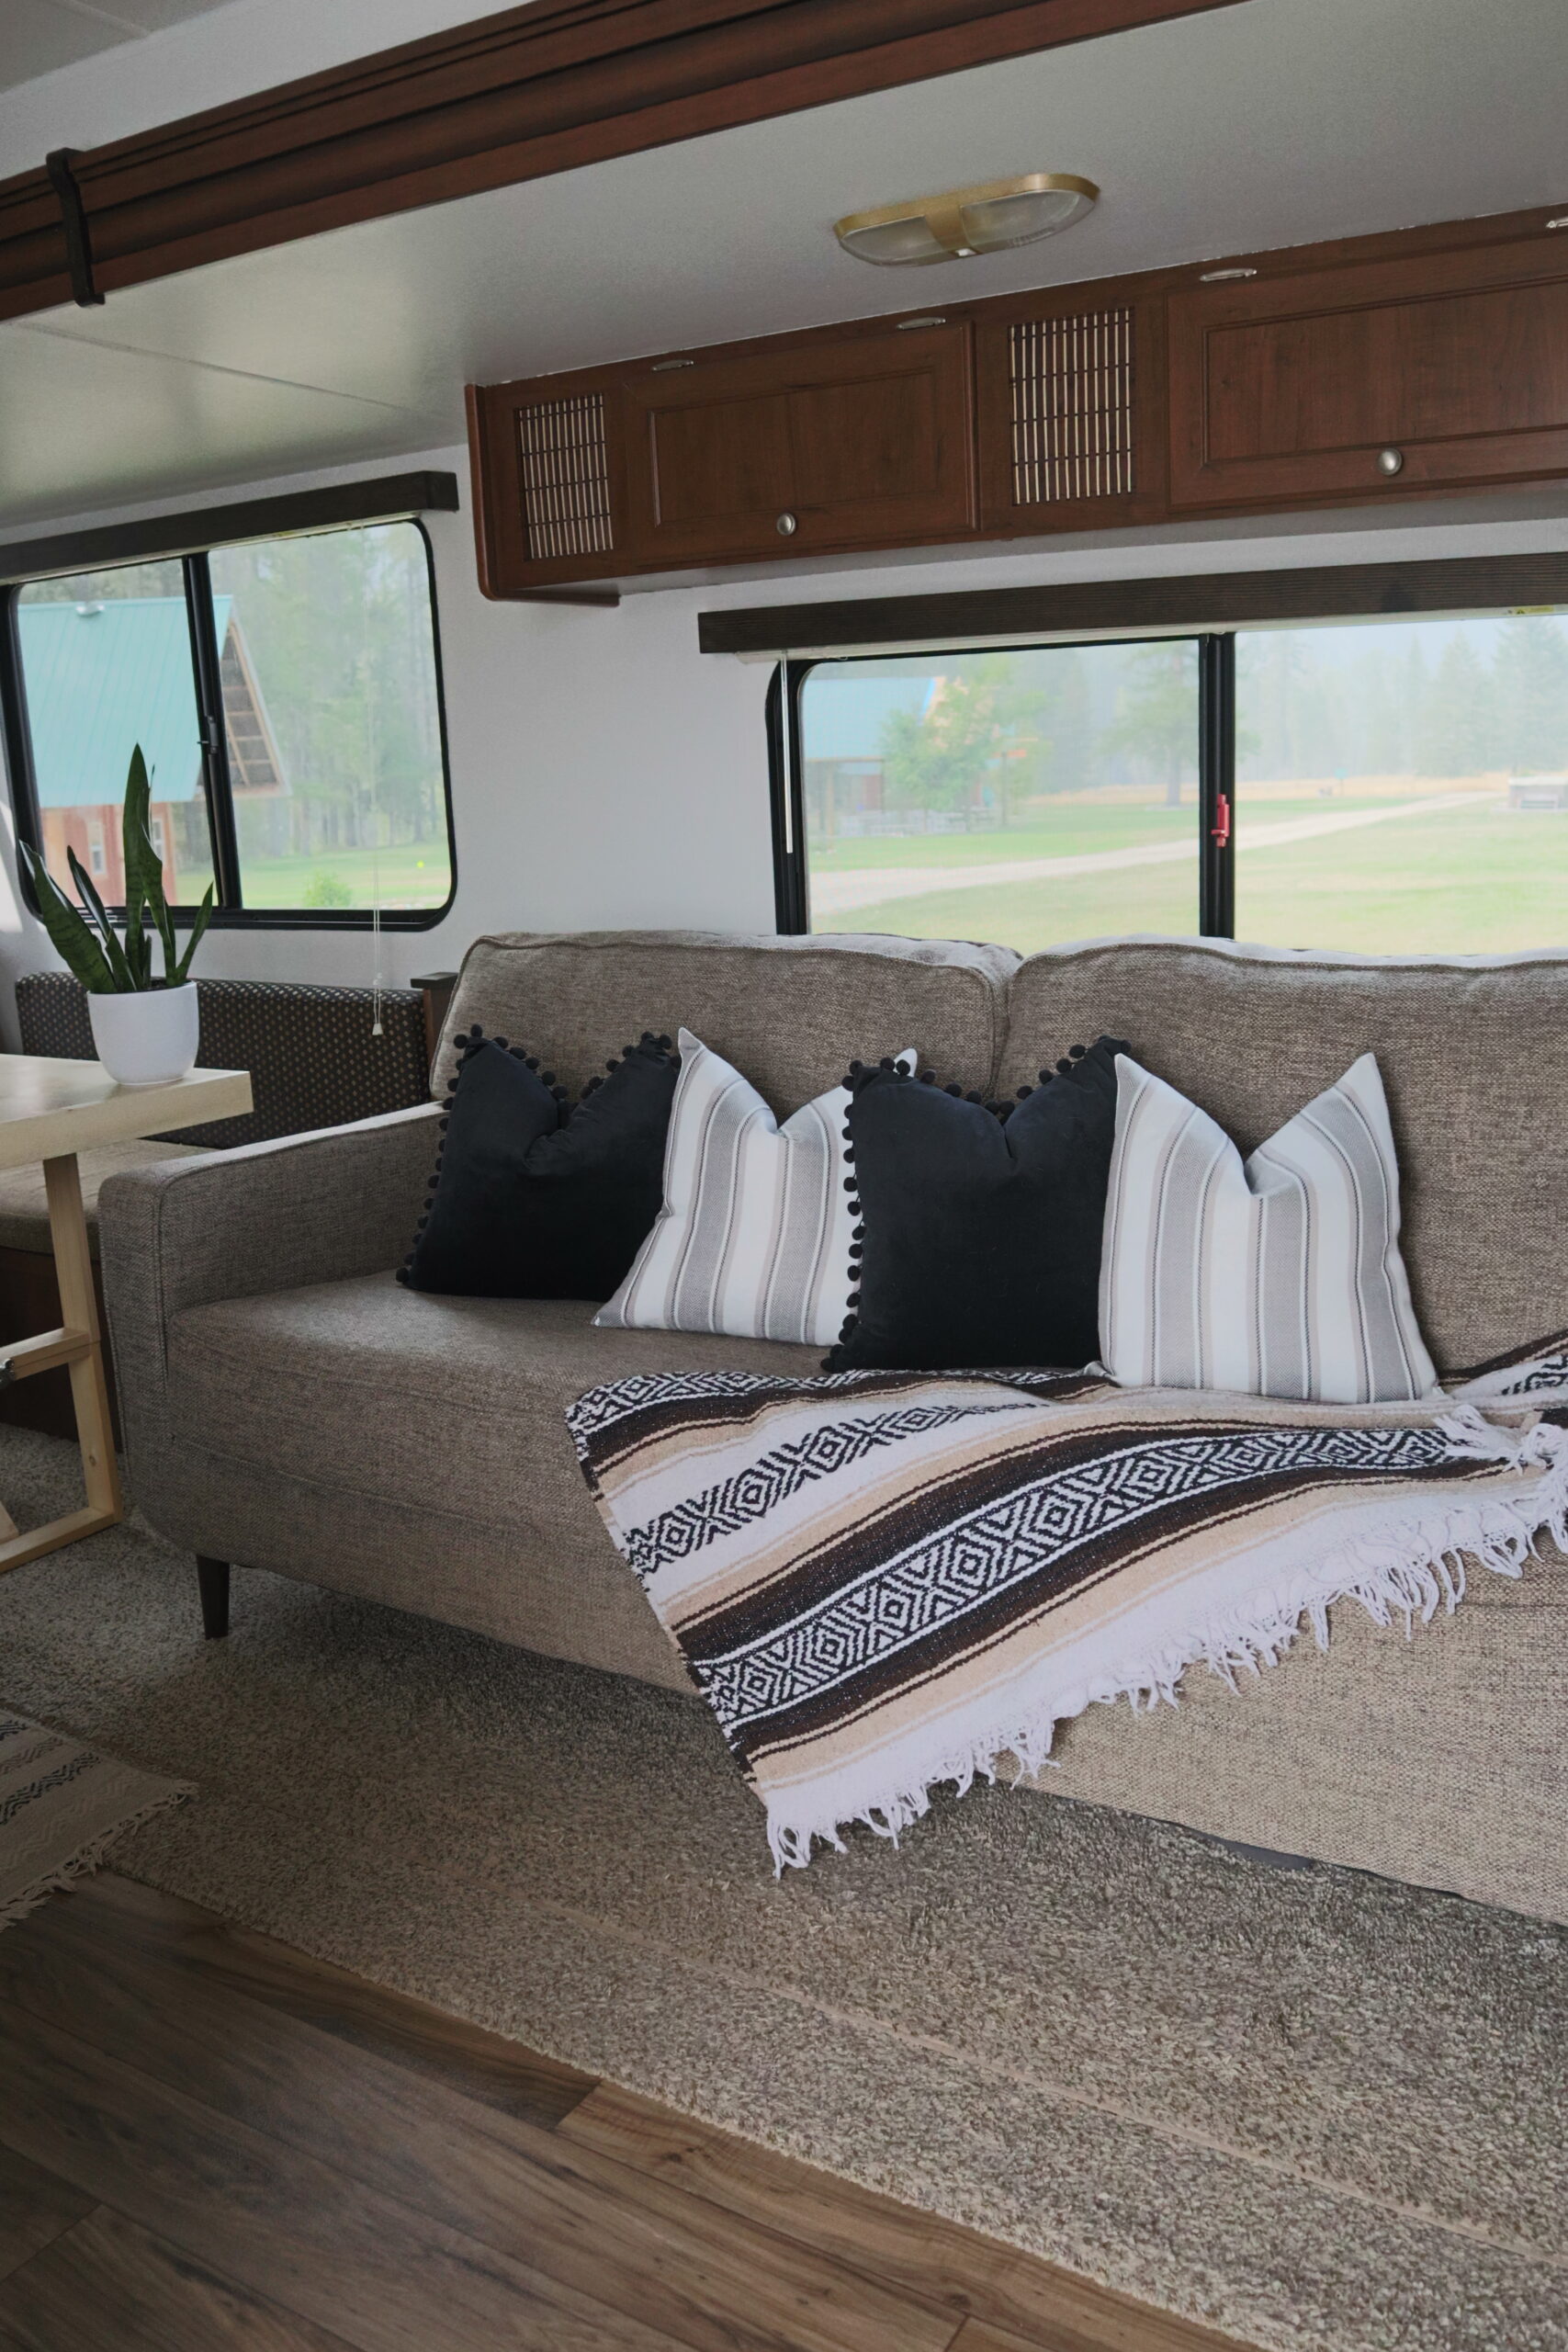
Living room & dining room update
For this space, we removed one side of the “C” in the dinette to make it an “L”. This allowed for a longer couch to be moved into the space.
Keeping the dinette booth was more for function than looks. I would love a cute set of dining chairs in the space, however, the dinette provides a lot of storage!
To see how we utilize the storage space, check out this article.
For the couch, we moved a residential couch into our tiny home. This particular couch was way too big to go through the door. We had to move it into the trailer by removing a window.
Money saving tips
Did you notice the detail in the overhead storage? That design element was only $2! Check it out here.
We reused the dinette cushions! Instead of reupholstering them which would have cost hundreds, we kept the same fabric. This was something we designed around.
RV kitchen renovation
This RV unit had a good kitchen, but there is always room for improvement.
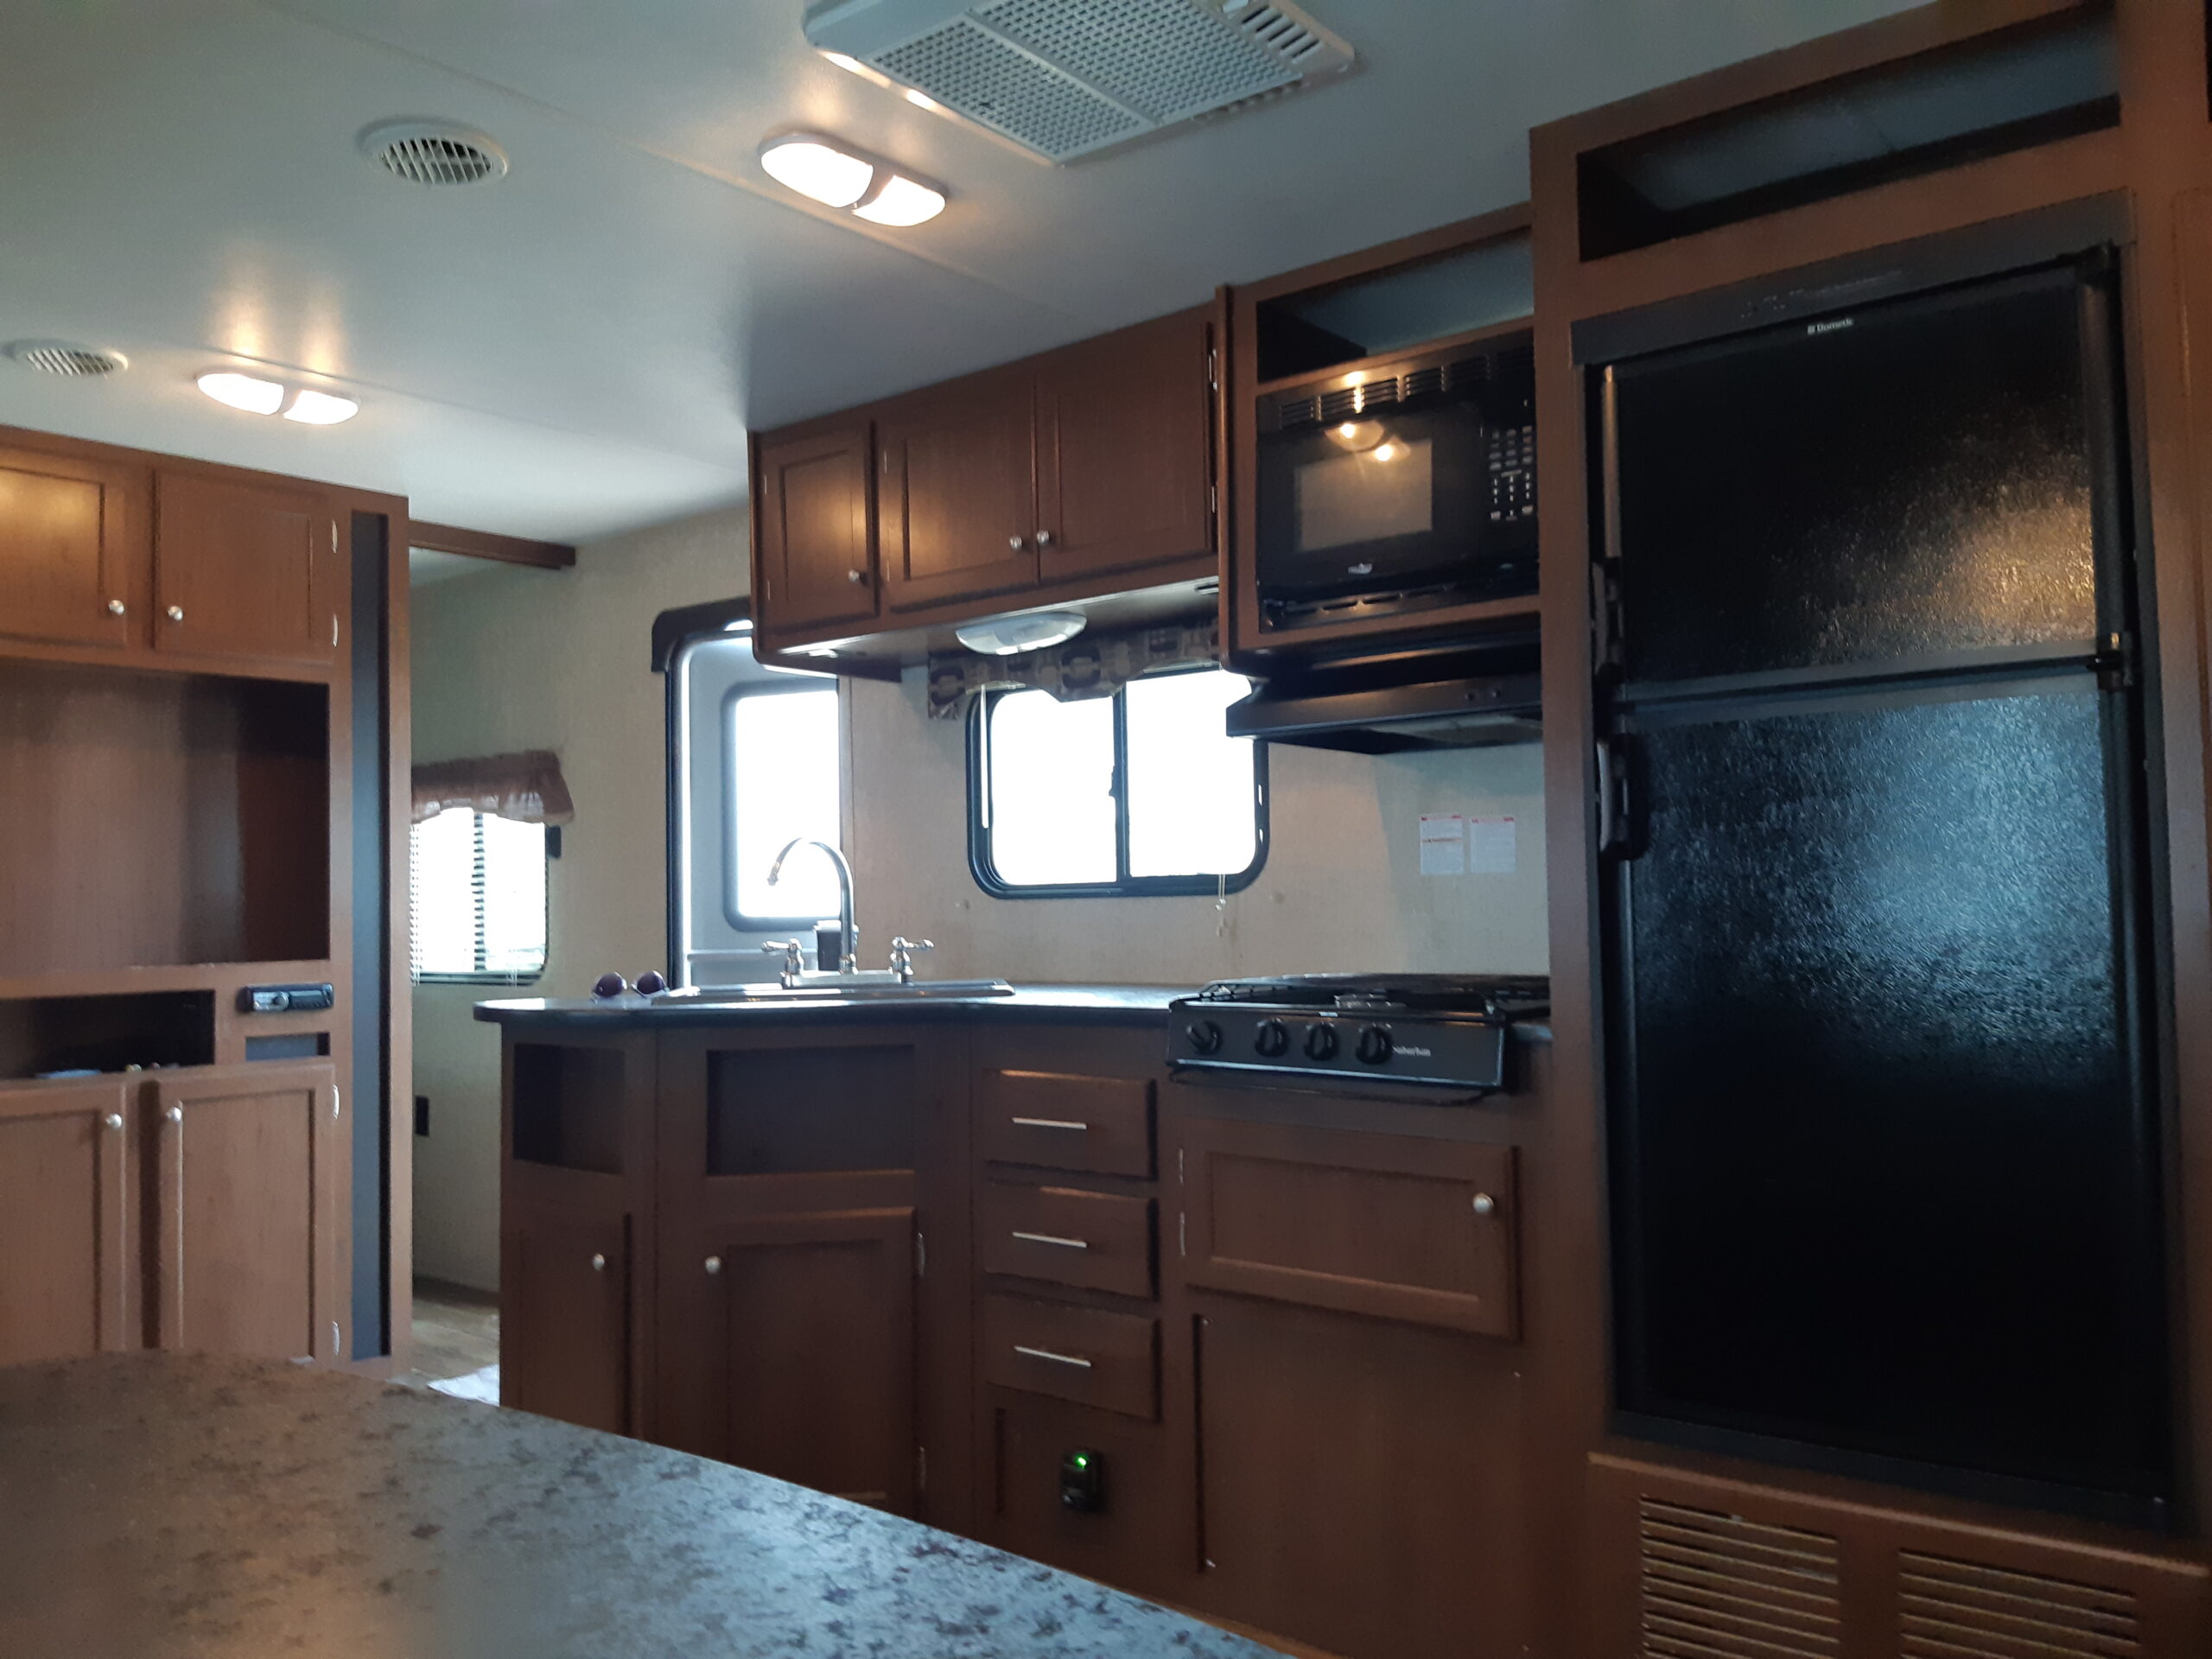
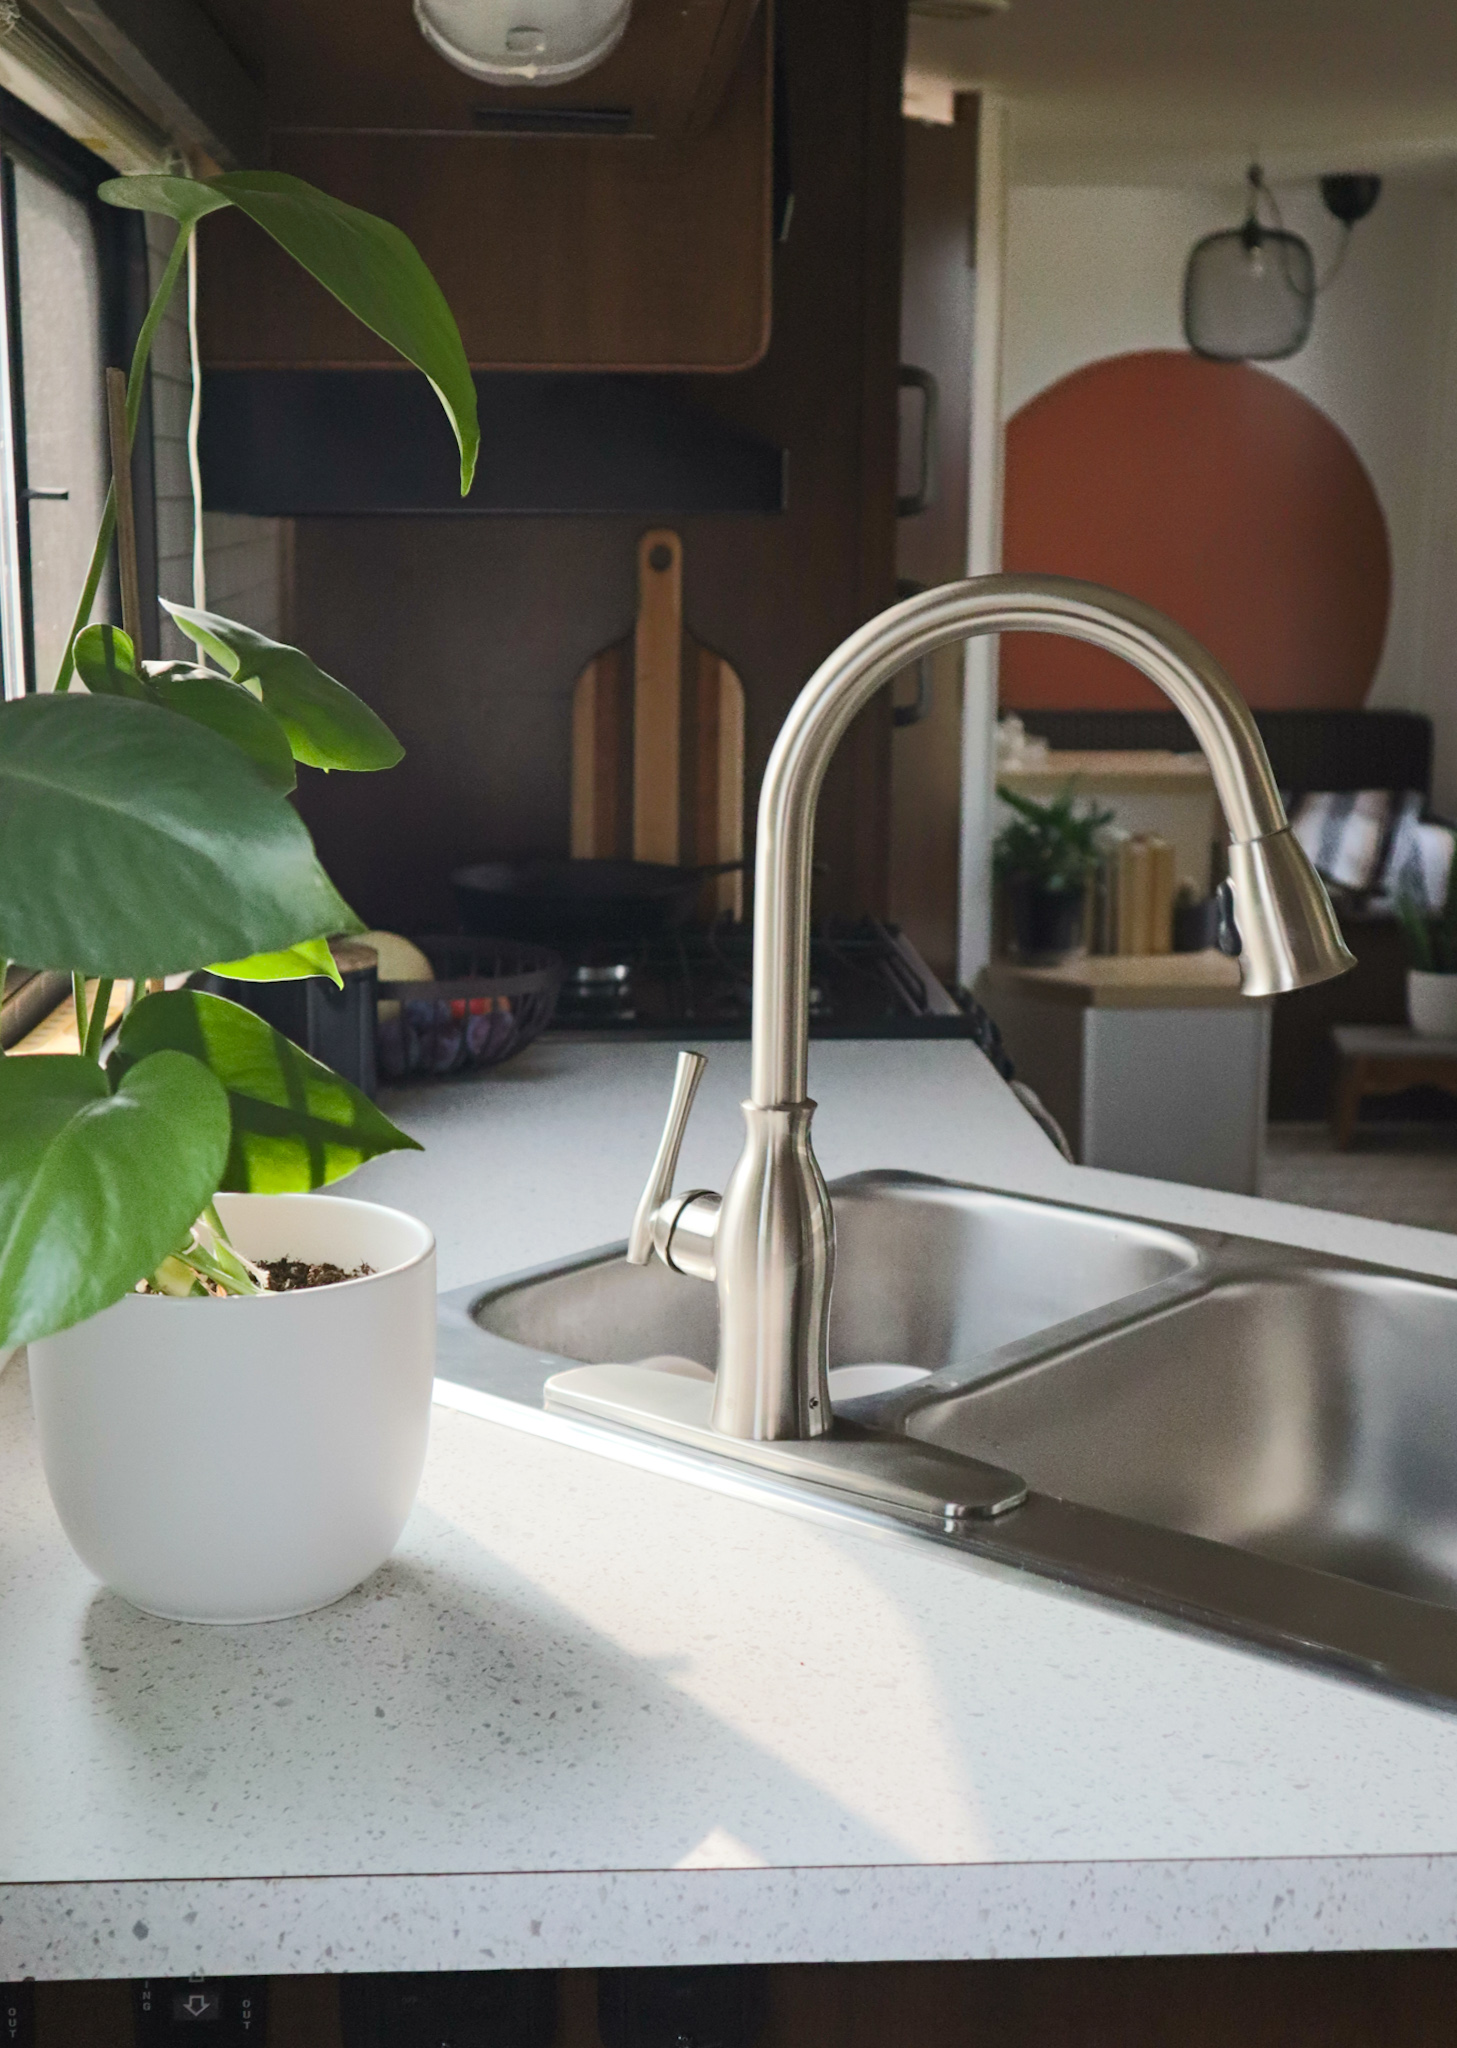
For the RV kitchen renovation, we completely redesigned and installed new countertops. While this seems like a costly project, we did it for around $150!
Another upgrade in the kitchen was installing peel-and-stick backsplash. We went with a classic white subway tile.
We went with a deep double basin sink and new faucet. These are optional changes, but I would recommend everyone who is fulltime to update their sink because the factory sink was extremely shallow and small.
RV renovation how-to: Countertops
To renovate the counters, we used particle board, which my husband cut into into the shape of counter we wanted. He extended the “L” of the existing counter and squared off the edges.
In doing so, we gained a lot of counter space. He then used laminate sheets and glued this to the particle board. After, he cut a hole for the new sink.
Bathroom update
For the bathroom, we also upgraded the counters and faucet. We were able to claim a couple more inches of counter space by installing custom size counters.
Sometimes you need to choose function over aesthetics. In the bathroom, we chose to keep the existing shower, tub, and toilet. They are that almond color you commonly see in RVs. Not the most beautiful, but we covered the shower and tub with a cute shower curtain.
Similarly, we kept the existing bathroom sink. It is super small, but it serves its purpose well. We chose to have more counterspace over a larger sink.
We went with a bold, geometric color block painted on the back wall. I fell in love with this beautiful terracotta color that played off the darker wood beautifully. Behind the sink, we installed cedar fluting to play into that mid-century aesthetic.
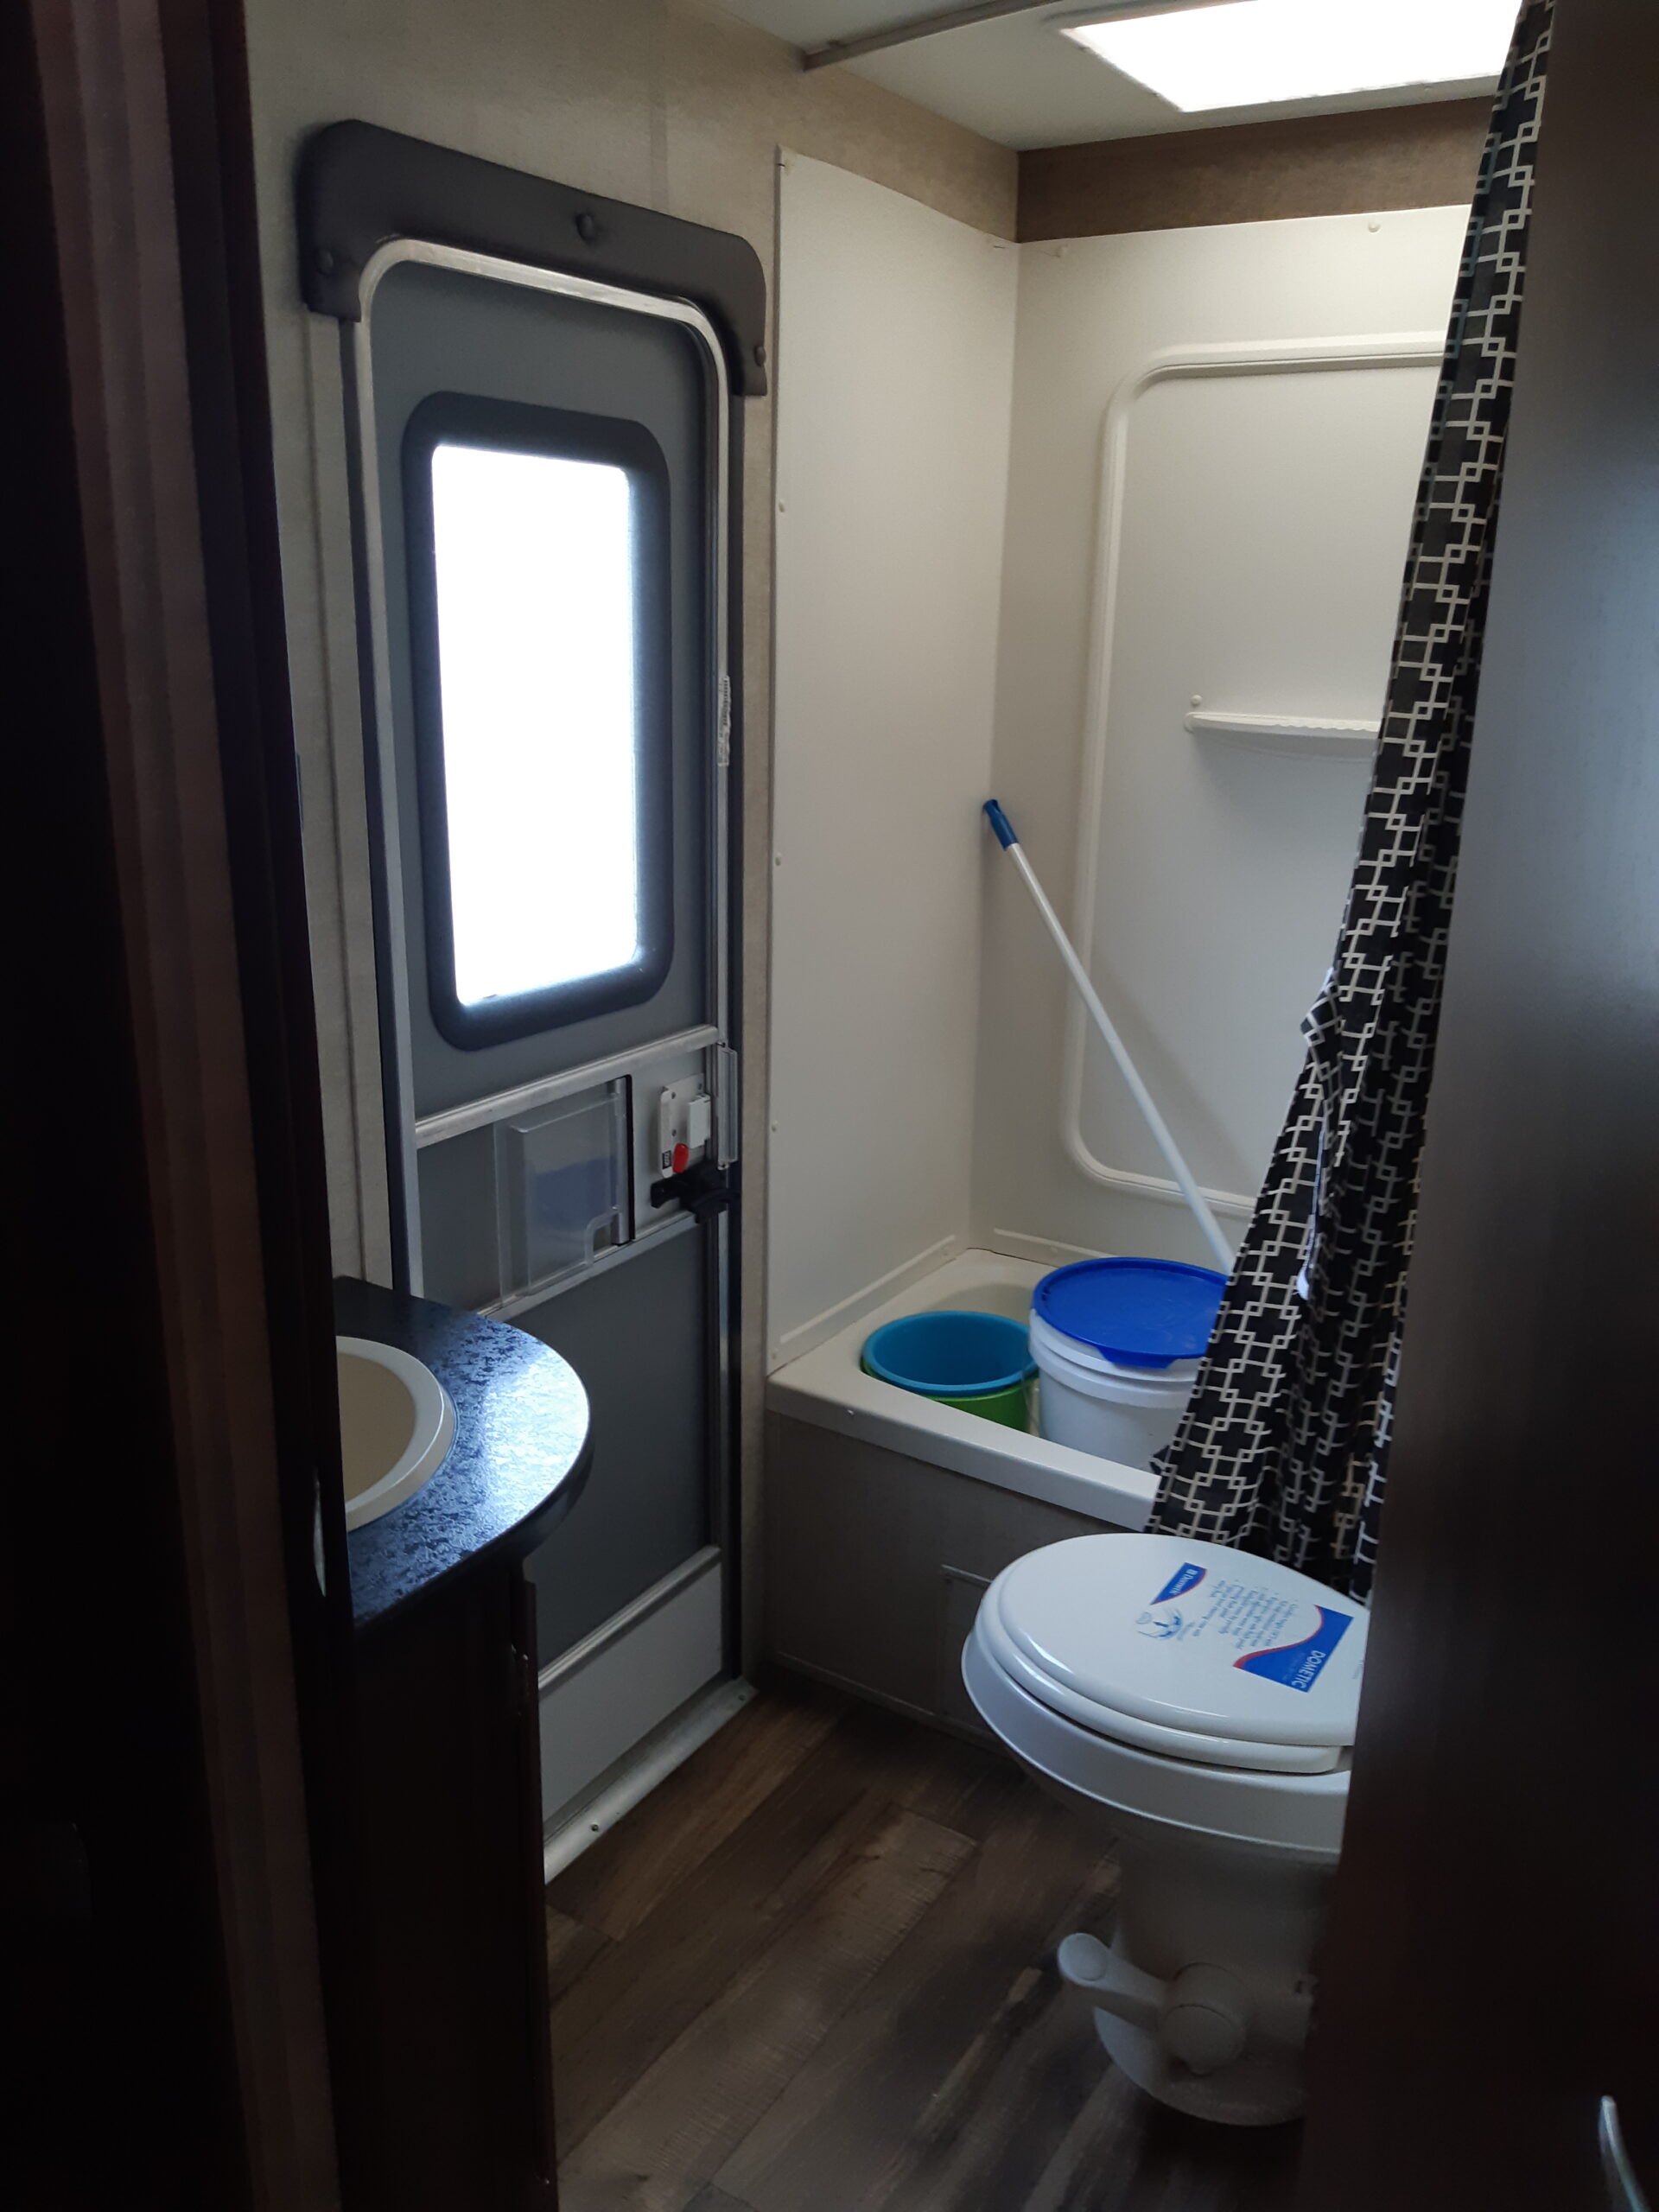
Tip: We used clear silicone caulking to finish. Over time the silicone has yellowed – I would recommend using a white silicone for your caulking to keep it super clean looking.
RV office renovation
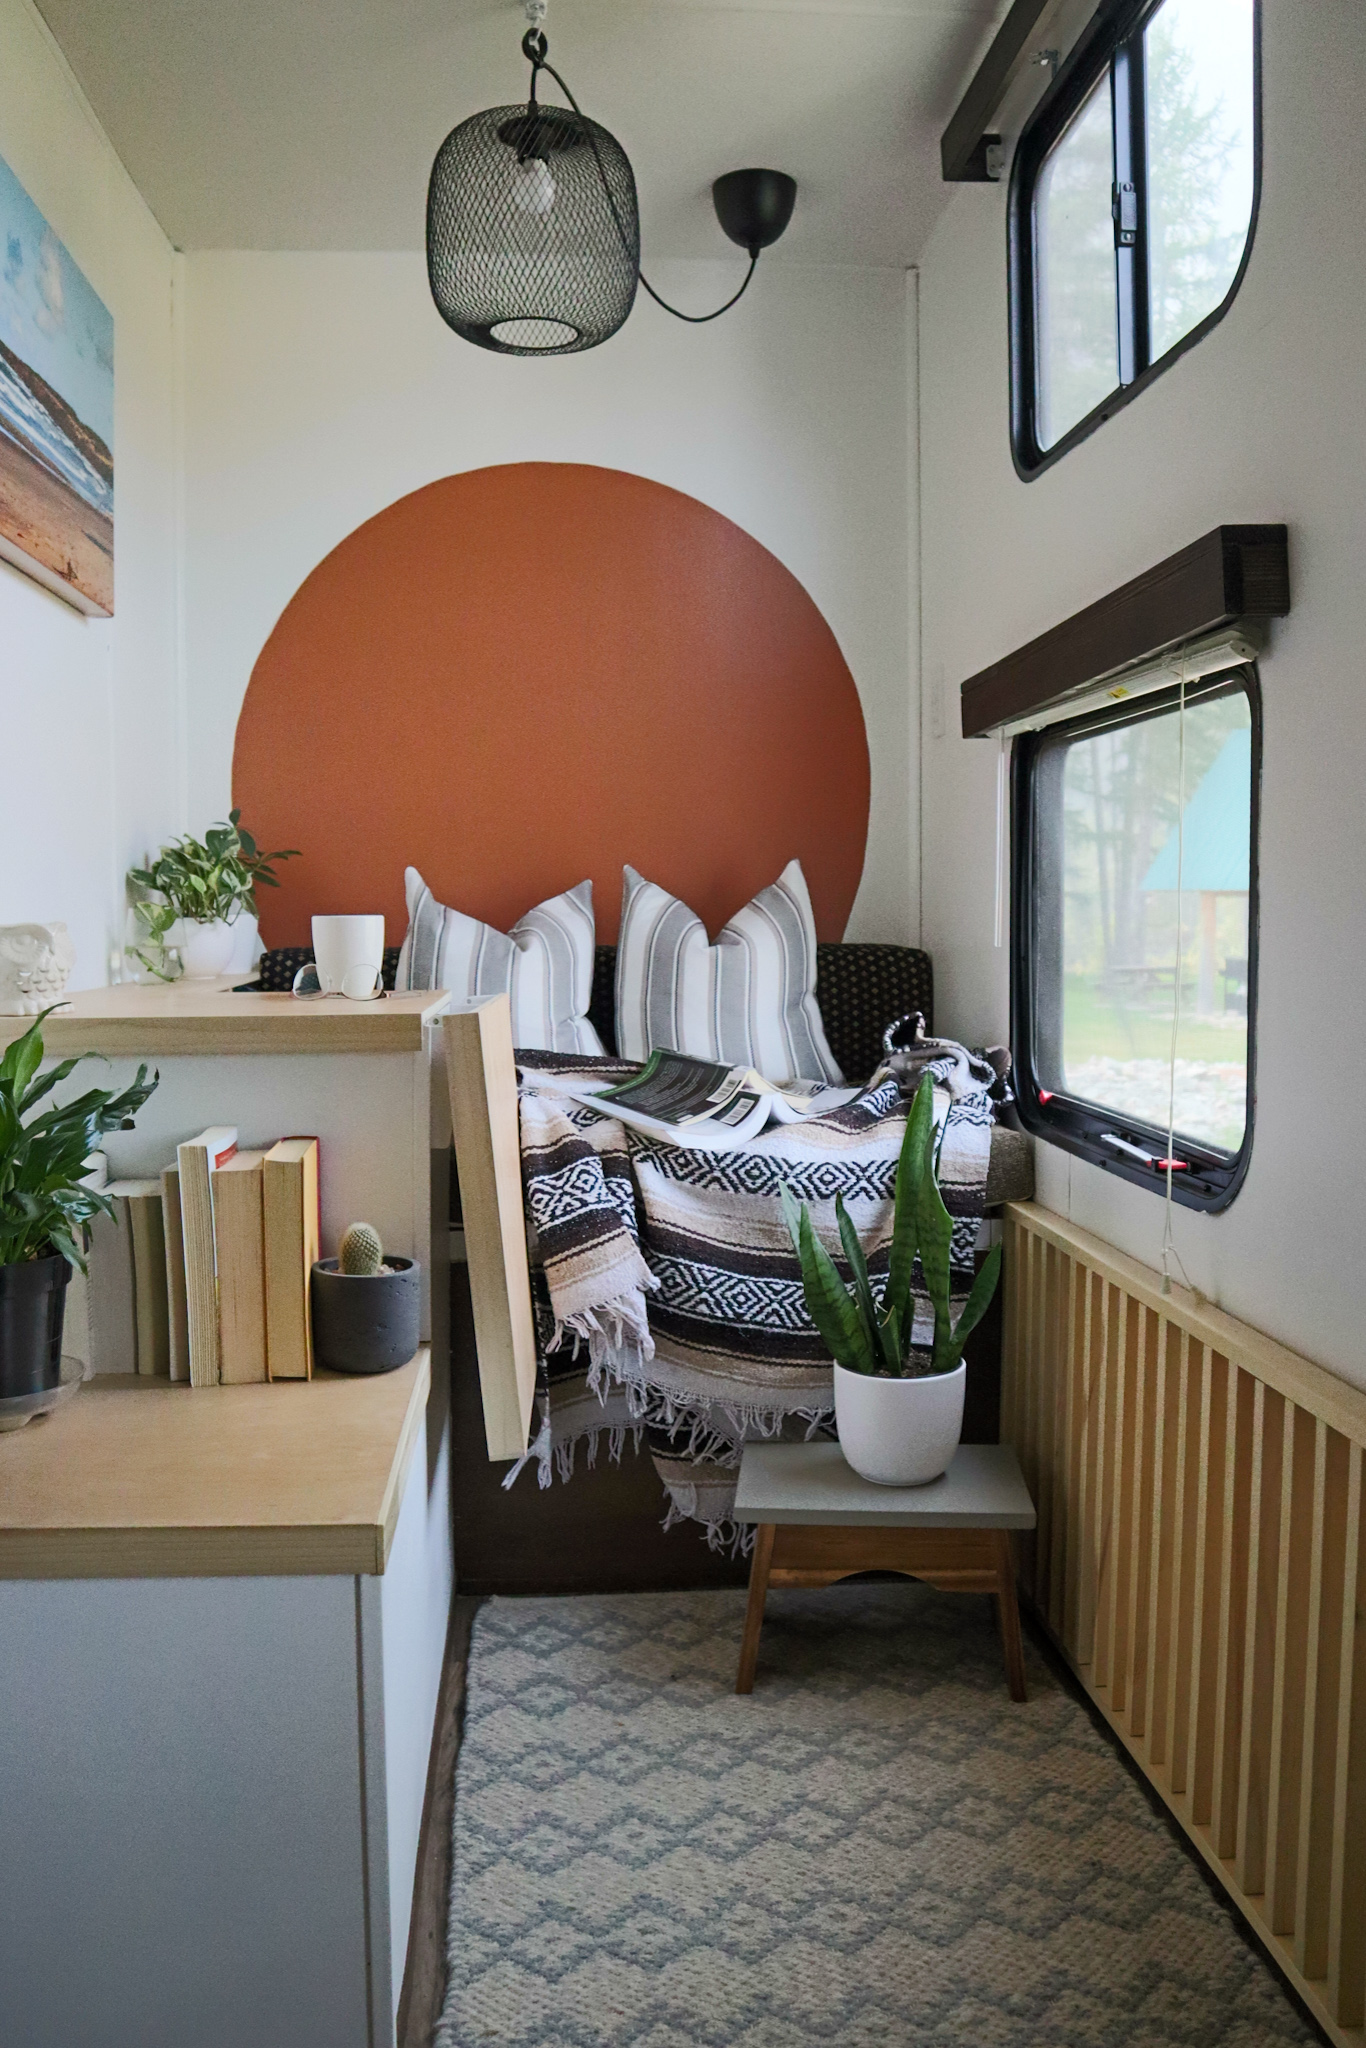
Last but not least, one of the most beautiful spaces we created – the office! One of our goals with this RV renovation was to create a fully functional office.
I am so proud of my husband for creating this gorgeous space. This space took a lot of clever planning and reworking.
For the office, we removed both bunks. For the bench seating, we used part of the bunk frame and materials. We reused the cushions from the dinette—they fit perfectly with no modifications!
The desk has a simple fold-up table. Inside the desk and along the wall is additional storage.
For lighting, I found this simple pendant light that we ran from the demolished top bunk light. The light that illuminated the bottom bunk was rewired to create a 110-volt plug plus 2 USB charging ports.
How we hid unsightly elements
Unfortunately, underneath the bottom bunk was the plumbing from the bathroom and the water heater. We cleverly hid the plumbing inside the bookshelf, desk, and seating. Every part of the office can be removed for access to the mechanical parts of the hot water heater and to access plumbing.
With the removal of the bottom bunk, we lost the outside accessible storage. To cover the panel, we installed wood fluting to compliment the same element in the bathroom. All of the light wood in the trailer is stained a natural color to compliment the existing wood elements.
Tip: The bunk house to office renovation did not follow the initial plan. We had to change direction and plans in this space as moved through the RV renovation.
Stay flexible and not get upset when the design changes. Often it will be better than you originally planned!
I am so in love with our RV renovation! It is exactly what I wanted and my husband made all my design dreams come true. He worked so hard to complete this renovation before we went full-time and moved to Mexico. You can check out more pictures of our RV renovation here.
You may also like these Top 5 RV Renovation Ideas from Drivin & Vibin: