
SRS Warning Light On In Your RV? Fix It!
The SRS warning light illuminates in the instrument cluster to alert you of an issue with your vehicle’s airbags. For RVers, this is primarily relegated to Class B and Class C motorhomes. If the SRS warning light comes on, you’ll want to investigate as soon as possible.
In this article, you will discover:
- The common cause for a SRS light on in your RV
- How to get rid of that light
Let’s get started!
Why does the SRS warning light come on?
SRS is an acronym for Supplemental Restraint System. It is made up of many components. These include:
- Driver and passenger airbags.
- A warning light.
- Passenger seat switches.
- A pyrotechnic inflator.
- An igniter.
- Crash sensor(s).
- An electronic control unit.
In some RVs, you will see the letters SRS when there is an issue. Others use a stick figure with an airbag. They all mean one thing – your airbag may not deploy when there is an accident.
4 Common Causes Of A Faulty SRS Warning Light
1. Faulty Passenger Seat Occupancy Sensor
If you are sitting in the front passenger seat, a sensor will send signals to the SRS system. It also reads the weight of the person sitting or an object occupying the seat. A defective sensor will cause the SRS warning light to go on. At this point, it is no longer an indication of whether the passenger seat is occupied. The airbag can be easily triggered unnecessarily.
What can damage the Passenger Seat Occupancy Sensor?
- Using seat mat bypass
- High frequency of front-seat passenger usage
How to fix it
It is advisable that you replace your faulty seat occupancy rather than repair it. Replacing a damaged seat occupancy sensor costs between $485 and $513 for a new sensor, with added labor charges on top of that. It does not take long to replace a damaged seat occupancy sensor. 90 minutes is usually enough for the entire procedure.
Faulty SRS Control Module
Like all computers, the SRS computer is not immune to wear and tear. Heat, excess vibration, age, and water damage can lead to a defective SRS control module. If this is really the case, the only option is a replacement.
What can damage an SRS Control Module
- Corrosion due to exposure to light moisture
- Exposure to water
Replacing Airbag Control Module
Airbag control module replacement could cost you between $600 and $700 for a new module, again with added labor fees. Like all computers, the SRS computer is not immune to wear and tear. Heat, excess vibration, age, and water damage can lead to a defective SRS control module. If this is really the case, the only option is a replacement.
Faulty Clock Spring
This spiral-wound special rotary electrical connector inside the steering wheel maintains a connection with the SRS computer. One part of the clock spring follows the steering wheel while another part attaches to the steering column.
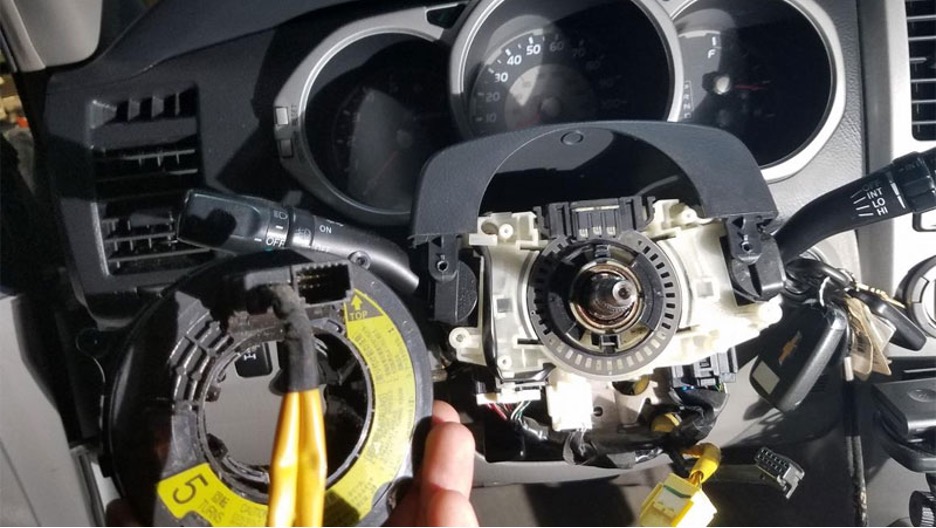
What damages Clock Spring?
- Wearing of their electrical ribbons and connections.
- They may also become faulty if you do not replace them after an accident in which the airbag is deployed.
- Regular repair of the steering column may also damage your car’s clock spring.
- Frequent removal of rack, gearbox, pinion gear, or coupling also damages the clock spring.
Replacement costs
It is better to buy a new clock spring for reliability. You could easily spend between $200 and $400 to replace your damaged airbag clock spring. This spiral-wound special rotary electrical connector inside the steering wheel maintains a connection with the SRS computer. One part of the clock spring follows the steering wheel while another part attaches to the steering column.
Faulty Seat Belt Latch
The SRS sensors monitor when seatbelts are fastened. If something gets inside the buckle, it could interfere with the connection. Clear any foreign objects that may be interfering with the connection of the seat belt. If you cannot see anything, spray compressed air into the buckle.
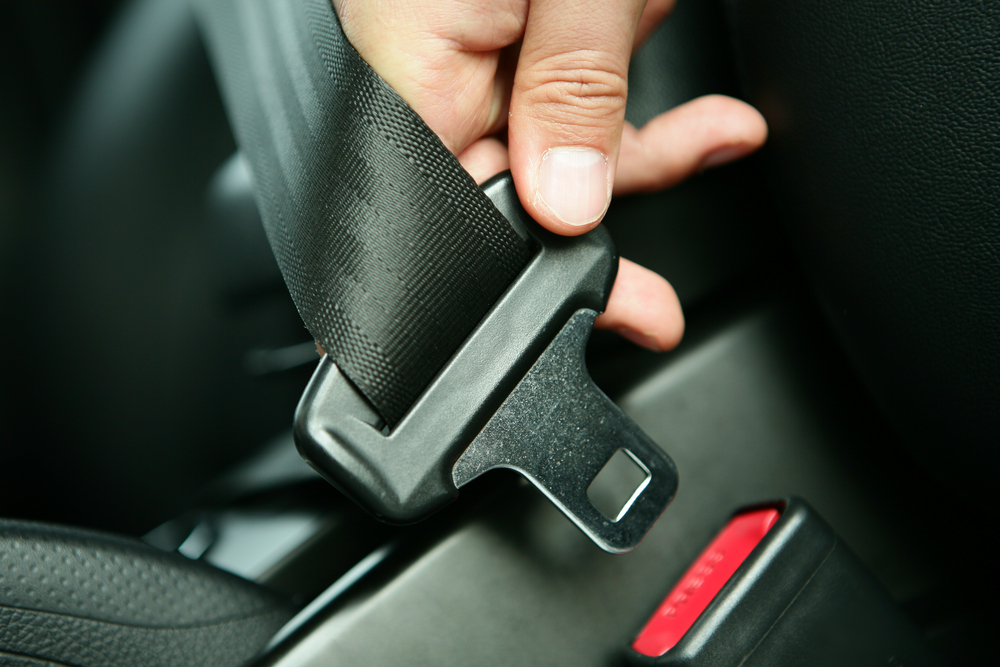
What is the cause of a faulty seat belt latch?
- Something could be stuck in the seat belt buckle
- Damaged locking mechanism
How to fix it
To fix this problem, you will have to insert a butter knife or any thin and pointed object inside the buckle. Use the knife/object to dislodge a foreign object inside the buckle. If there is a bigger object in the buckle, such as a coin, you will need to remove the buckle so that you can remove the object or fix the locking mechanism.
How do you reset the SRS light using a scan tool?
It is crucial to note that resetting the SRS warning light will do nothing. All it does is disable the notification that your RV has an issue. A professional mechanic should perform all works done to the SRS system if you are not 100% sure of what to do. Follow the steps below to reset the SRS warning light on your RV.
1. Read the trouble codes using an OBDII scanner.
Working with the SRS system is crucial. Always read the trouble codes with an SRS OBDII scan tool to get the idea of where to start troubleshooting. However, do not clear the trouble codes before fixing the problem. Read the codes and get information about what can cause problems, and continue the diagnosis.
2. Repair the fault(s)
Whatever is causing the SRS light to be on should be corrected or replaced. Resetting the SRS light without fixing the problem can cause the airbags not to function properly when an accident occurs. The Diagnostic Trouble Codes (fault codes), which are five-digit codes, help you identify a particular problem.
Google the codes, and you can get:
- What the problems are
- How to fix it (if it’s easy)
- How much it may cost
- Even where to buy the replacement parts
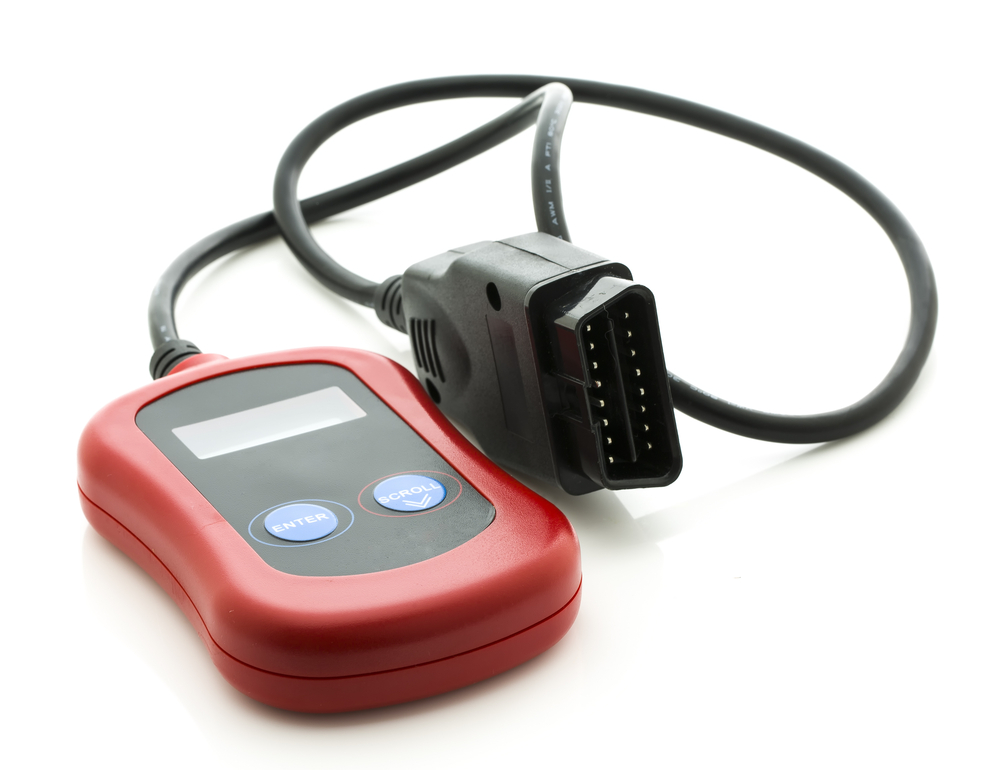
3. Resetting the SRS Warning Light
After you have installed the new parts or cleaned dirty seat belt latches and are 100% certain that every part is installed correctly, it’s time to reset the SRS warning light.
You will need an OBDII scanner or just disconnect the battery for 30 minutes. Reset the SRS light and check that it disappears from the dashboard. If the SRS light is still on, it means you did not fix it correctly. Reread the codes to check for any other trouble codes. You could erase the codes by disconnecting the battery cable or computer power source. However, this remedy may cause more problems, including loss of electronic presents in the climate control system and radio.
Conclusion
Are your SRS lights on? No problem. The SRS scanner will pop the SRS warning light instantly after a little troubleshooting. If you want to read the SRS fault codes, look for a scanner that costs at least $100. The tools that cost less than $100 may not access the airbag module. However, your mechanic may charge more than $100 just for reading the codes. So, it’s quite a no-brainer to get a scan tool and do it for yourself.
Make sure you keep track of all your RV maintenance and repairs with an online tool such as RV LIFE Maintenance. Not only can you keep all of your documents in one place, but you’ll also receive timely reminders when maintenance is due to help you avoid costly repairs and potentially serious accidents.