
If your neck gets sore behind the wheel, or you just like to catch some ZZZs when you’re in the passenger seat, you may want to consider a travel pillow for more cushion and support. They’re actually relatively easy to make, even if you don’t have a sewing machine or a lot of sewing experience. These pillows by Vikalpah on Instructables are so simple, you can hand-sew them together or even just use fabric glue. Here’s how to make your own, step-by-step.

First: Gather your supplies.

What you’ll need:
- 1/2 yard fabric
- Matching thread
- Fabric glue

- Paper for pattern
- Ruler & a pencil
- Hand sewing needle
- Fabric scissors & paper scissors
- Straight pins
- Pillow stuffing
- An iron
Step 2: Create your pattern.
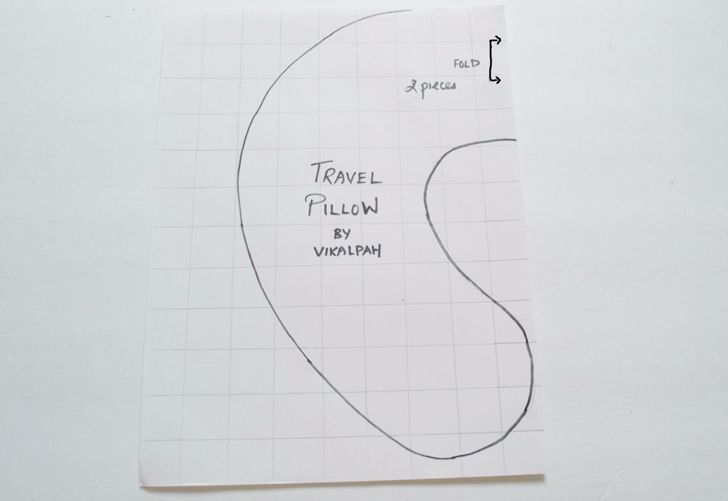
Vikalpah used 9″X12″ paper![]() to make this template, but you can also tape two A4 sheets if you don’t have a 9″X12″ sheet.
to make this template, but you can also tape two A4 sheets if you don’t have a 9″X12″ sheet.
Using a ruler and light pencil, divide the paper into one inch squares. Then, draw the outer curve of the pillow from the third square (counting right to left horizontally) down and around to the inner curve. Your line should end up near the fourth square from the top (as pictured above). Maintain the four inches width throughout the pattern to draw the half pillow shape. Once you’re content with your shape, cut it out using scissors.
Step 3: Cut your fabric.

This drawing will now serve as a template to cut out the fabric for your pillow.
To start, double fold your piece of fabric. You can do this by folding the fabric once vertically, and then again horizontally, and then attach your template on top.

To keep your template from moving, use straight pins to attach it directly to your fabric. Be sure to leave about ¼ of an inch extra room when you’re cutting, for the seams.
Step 4: Stitch your pillow up.

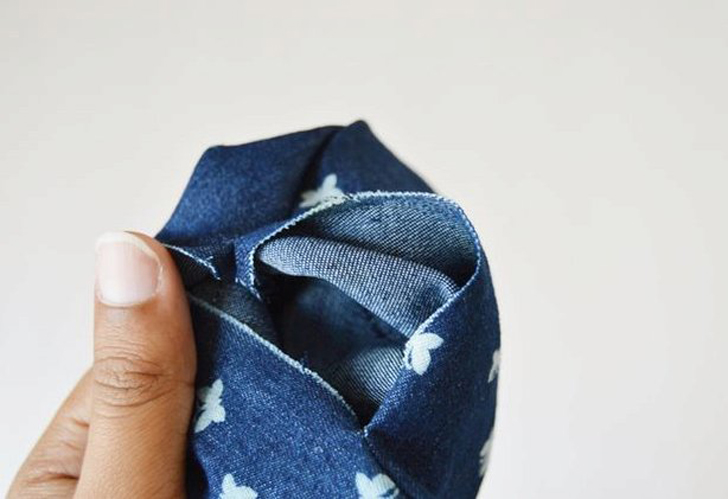
This should give you two U-shapes to now stitch or glue together. Place the cut fabric pieces facing each other, and pin them together using straight pins.

You can attach the two pieces of fabric together by hand sewing them (by making back stitches all around), or by using fabric glue. Stitch along the edges with 1/4″ seam allowance, leaving about a 4″ gap on the top. Make small slits on the seam allowance, as pictured above (be careful to not cut through the seam).
Step 5: Turn it inside out.
Turn the pillow form inside out, and iron the seam allowance on the gap. This will make it easier to hand-sew after stuffing it.
Step 6: Stuff it, and close the gap.
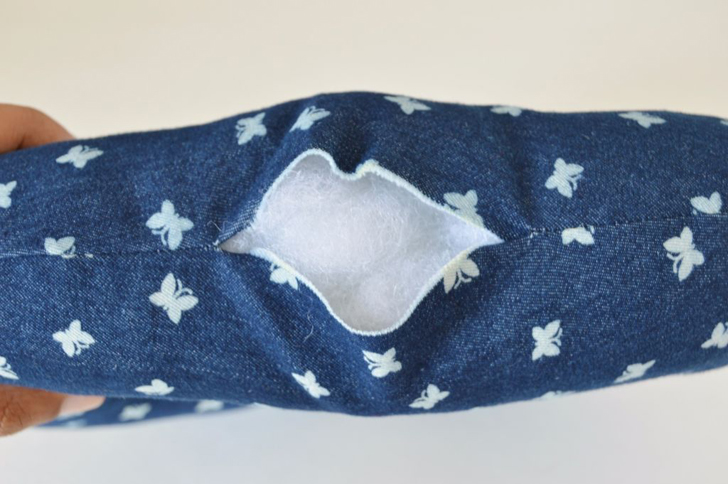
To finish, stuff your pillow through the gap. Try working with only a little stuffing at a time to make it easier on yourself. Pack it in as tightly as possible, making sure that you’ve filled each corner to its fullest.
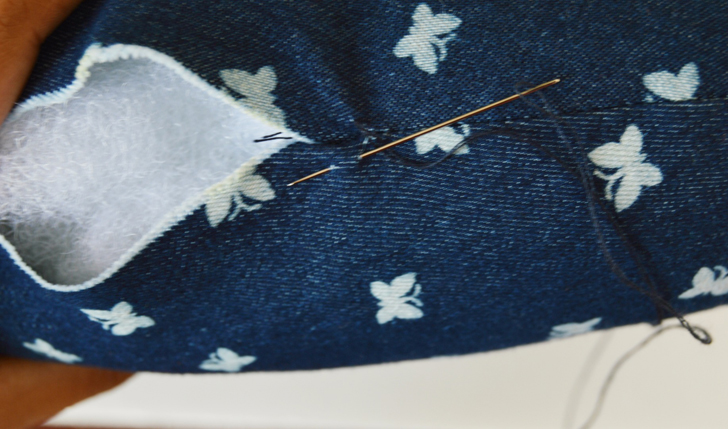
Once you’re completely satisfied that it can’t be stuffed any further, thread the hand sewing needle and close up the gap by making a ladder stitch. (Here’s how.)

Or if you’re using glue, rather than sewing – use glue to close up the gap, and use pins to hold it together until it completely dries.
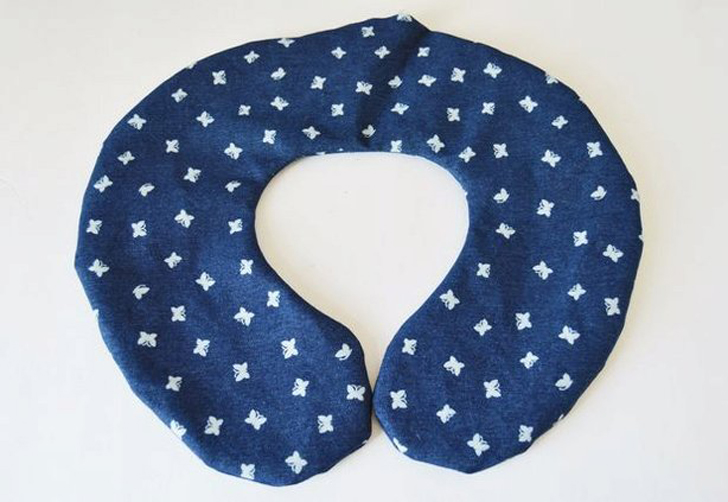
And voilà! Your travel pillow is now complete, and your comfortable neck will thank you the next time you’re traveling. To change it up, you can use fabrics with quirky patterns, different types of material from fleece to cotton, or you can even use two different patterns sewed together as one pillow. It can be totally customized to how you like it, and the options are virtually endless.
If you love DIY crafts, check out these Genius Ways To Use Wine Corks In Your Home And RV.


