How To Build A Porch For Your RV
Have you had enough of navigating wobbly RV steps to get in and out of your RV? Are you tired of gathering outdoors at ground level? Maybe you RV in an area where there are bugs like fire ants or scorpions that you don’t want joining you for breakfast.
Having an RV porch makes it easy to enjoy the outdoors while you avoid some of the downsides to RV camping It also allows you to go up and down easy-to-navigate steps (or even a ramp) to enter and exit the RV. If you are a stationary RVer, consider building an RV porch. It’s not really difficult to build one yourself when you follow these simple directions.
Planning and building an RV porch doesn’t require an awful lot of skill, but you should be able to measure, plan, and operate a drill. The way we’re going to build, you won’t need to use a saw to cut wood. It’s also nice to be able to use a skill saw to trim anything that’s needed. You could also use a jigsaw or a carpenter’s hand saw if that’s what you happen to have.
Step 1: Get permission and necessary permits
Before you begin your build, you’ll need to check to see whether or not you are allowed to build. Check with the management of your RV park and, if necessary, check the local bylaws. Some areas require a building permit to build a porch or a deck. It’s a good idea to find this out before you start building.
Step 2: Make a plan
Decide on the size and height of your porch. The size will depend on what you intend to use your porch for. Will you be using it for entertaining, or will it simply serve as a way to get into the RV without navigating RV steps? Do you want to build a ramp for wheelchair access? When deciding on the size of your RV porch, be sure to remember that standard lumber comes pre-cut to lengths of six, eight, and ten feet.
The height of your RV porch will depend on its intended use. If your porch will be more than eight inches above the ground, you’ll want to consider installing a handrail and balusters too.
Now draw a footprint plan for your porch. Include measurements of width and length. Next, draw a front view of your RV porch including the height. Also, be sure to include any handrails and balusters in your drawing plan. It’s important to include the measurements on your plans as they will come in handy as we make a materials list.
Step 3: Make a materials list
Material needs vary according to the type of materials you build your porch from. We are going to be building this porch from the most economical material: pressure-treated lumber.
You’ll need lumber for posts, beams, joists, and decking. You’ll also need stair treads, balusters, and handrails. When choosing lumber, be careful to pick straight pieces that have as little taper as possible.
Deck blocks
Deck blocks will be the foundation for your porch. You’ll need one deck block every four feet of beam length, so if your deck is eight feet wide by ten feet long, you’ll need six deck blocks.
If you are on dirt, rebar will be used to hold the deck blocks in place. You’ll need one 12″ piece of rebar for each deck block. If your deck will be on a concrete pad, you won’t need to use rebar to secure it.
Posts
Posts will support your porch. We’ll be using 4×4 pressure-treated posts for our porch. You’ll need one post for each deck block in whatever length you’ll be using.
Get your posts cut to length at the lumber yard, both for ease of transport and to make your deck go up faster.
Beams
Beams will support your floor joists. Use 2×8 pressure-treated lumber cut to the appropriate length. You’ll need two beams for decks under 14 feet wide.
Joists
Use 2×6 pressure-treated lumber for floor joists. You’ll need one joist every 24 inches, measuring from the center of each joist. If your deck is 10 feet long, you’ll need five joists.
Decking
Decking is what will really affect the overall appearance of your deck. While there are different ways to lay out decking, we’re going with simple and easy. For our example 8×10 deck, we’ll use 1×6 pressure-treated decking in 10-foot lengths to span the width of the deck.
Skirting (Rim joists)
Skirting will give your deck a finished appearance and provide a place to hang your floor joists. You can use 2×6 cuts of appropriate lengths for this.
Stairs
Prefabricated metal or wood stair stringers will make it easy to set up your RV porch stairs. Use 2×6 cut to appropriate length for your stair treads.
Railings and balusters
You’ll need these on at least one side of your stairs and on all sides of your porch that someone could fall from.
Hardware
Remember to calculate the hardware you’ll need. You’ll need galvanized lag bolts to attach the beams to the posts. Joist hangers are the easiest and most secure way to hang joists on rim joists. You’ll also need fasteners. You can use 2.5-inch common galvanized nails or galvanized screws if you plan to disassemble your deck to move someday. Decking can be fastened to joists with your choice of either 1 1/2-inch finishing or deck screws.
Safety equipment
Pressure-treated lumber is highly toxic to work with. You’ll need to protect your eyes, skin, and lungs from sawdust. You’ll need safety glasses, work gloves, and a mask or respirator.
Step 3: Mark it out
Now you’ll want to mark out the corners of your deck. Use wooden stakes or build batter boards at each outside corner of where your deck will be. Then attach a string to each stake. Use a carpenter’s square to make sure each corner is square.
Step 4: Put deck blocks in place
Measure the appropriate distance between deck blocks and ensure that the spot for each block is level, removing vegetation and rocks.
Deck blocks will be placed under where your beams will be positioned. Use a hammer to drive a piece of rebar into each block to prevent shifting. You should leave two inches of rebar exposed above the deck block.
Step 5: Prepare your posts
Draw a diagonal line between each corner of the bottom of each post. It should look like an “X”. The middle of the “X” will be where you will drill a hole with a 1/2 inch bit to a depth of two inches.
Step 6: Set posts onto deck blocks
Place each post in place with the rebar in the hole you just drilled, holding it upright.
Step 7: Attach beams to posts
Use lag bolts to attach the beams to the posts.
Step 8: Attach the joist hangers to the skirting/rim joists
Measure the distance between the joists on center and mark. Attach the joist hangers to the rim joists.
Step 9: Attach the joist to the rim joist
Lay the joists in place over the beams. Nail or screw one end of each joist onto the joist hanger on one of the rim joist boards. Then attach the other ends to the joist hangers on the other rim joist board. You should now have all of your joists sitting as a framework on the beams. Use screws to fasten the joists onto the beams.
Step 10: Fasten the decking
Now it’s time to lay the decking out. You can fasten it in place using either deck screws or nails. You should leave 1/16 inch between the edge of each board.
Step 11: Attach stair stringers
Use screws to attach each stair stringer to a piece of 2×6-foot. Use galvanized carriage bolts to attach the board to the rim joist of the deck you just built.
Step 12: Fasten stair treads onto stringers
Screw or nail the stair treads onto your stringers.
Step 13: Build the railing
Now it’s time to make your RV porch safe. There are many different styles of porch railings. We’ll walk you through the basic process of building a railing.
Posts can be 2x4s or 4x4s, depending on the appearance you want. First, install posts by attaching them to the rim joists using galvanized lag bolts or carriage bolts. Then attach two 2×4 boards between each pair of posts. Then attach vertical balusters or boards to these. Screw or nail a 2×4 handrail on top of the top horizontal pieces.
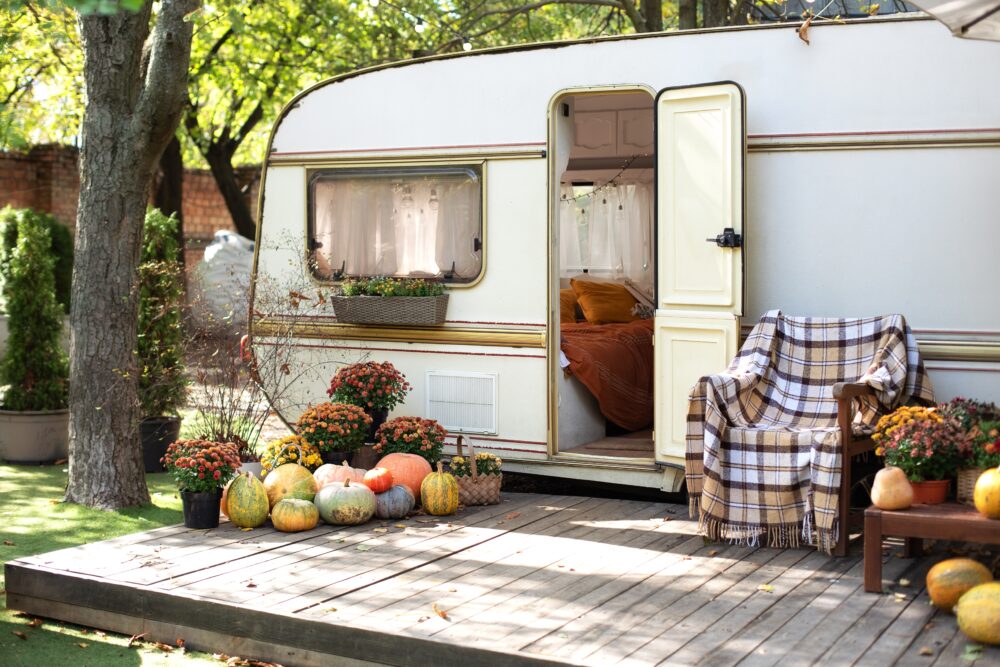
Now stand back and admire the beauty of your work for a few minutes, grab a chair, and relax on your new RV porch.
Please note that projects like this can vary greatly depending on local regulations, the specific RV and site situation, individual skill levels, and other factors. It’s always best to consult with a professional or someone experienced with this type of project before starting. For more tips from RVers, visit an online forum like iRV2.com.


Before you begin, maybe consider what sort of habitat you’re creating for rodents, snakes, spiders, scorpions, or whatever other pests. Because a low deck that makes a nice big cave can shelter some critters you do not want to co-habitate with. Don’t ask me how I know unless you’re prepared to buy me more than one beer and commiserate a lot, maybe lend a shoulder to cry on. Think it through and consider the worst-case scenario.