
Should You Use RV Rubber Roof Coating?
One major perk of having an RV is that you have a roof over your head no matter where your travels take you. But sometimes, you might take that roof for granted. Like any other component in your RV, your roof needs some maintenance. If you neglect your roof, you might just end up with a leak!
But do you really need to apply an RV rubber roof coating? Here we look at the types of RV roof materials, the types of RV rubber roof coating materials, when you should apply an RV rubber roof coating, and how to apply the coating to your RV roof.
How long does an RV rubber roof last?
According to most sources, your RV’s rubber roof should last between 10 and 20 years. At around the 10-year mark, you can expect some leaks and to need to reseal your roof. Depending on the wear and tear your RV endures, you may need to start resealing around the 5-year mark.
Types of RV roof materials
In general, there are 3 different types of roofing material for RVs.
Rubber TPO & EDPM
This is probably the most common material for an RV roof. There are two types: EDPM roof (Ethylene Propylene Diene Monomer) and TPO (Thermal Poly Olefin) roof. These are membrane-type rubbers used for flat RV roofs.
Each type has specific maintenance requirements, so make sure you check your owner’s manual.
Fiberglass
This type of roof is hard to the touch and less common than rubber roofs. Fiberglass adds cost and weight to the RV.
Fiberglass roofs require less maintenance than rubber RV roofs though, which can make them a more preferable material to use.
Aluminum
This RV roof material is rare with the notable exception of the iconic Airstream trailers, but you probably won’t see it on other RVs.
Like fiberglass, aluminum adds cost and weight to the RV. Similarly, it requires less maintenance than rubber.
Types of RV rubber roofing coating materials
There are three primary types of RV roof coatings:
- Silicone – A silicone roof coating product will usually not require a primer or more than 1 coat. Typically this type of coating is more expensive but is easier to use and requires less product. Silicone roof coatings have high reflectivity, resistance to weather and wind degradation, and resistance to ponding water. They are also extremely elastic meaning they won’t become hard or brittle. A downside of silicone is that it holds onto dirt which can make your roof look dirty. In addition, silicone can only be recoated with silicone.
- Acrylic – An acrylic roof coating product will likely require a primer. This type of coating will also require two coats and some reinforcement around areas of protrusion. Acrylic roof coatings have good performance features such as reflectivity, leak protection, and are UV resistant.
- Urethane – A urethane roof coating product will require at least 2 coats. They are more durable than silicone and acrylic. They provide good impact resistance – good for high-traffic areas – and are UV resistant and reflective. A downside of this type of coating is that they give off a strong odor at installation.
When should you apply RV rubber roof coating?
Even with proper inspections, cleaning, and resealing, you will likely need to apply a rubber coating to your RV’s roof at some point.
…climate, location, travel, and use impact maintenance. I stress to everyone that inspection and maintenance is required and it never hurts to [do] both often.
William Miller, National Brand Manager for Heartland RV
So when should you apply RV rubber roof coating to your RV’s rubber roof?
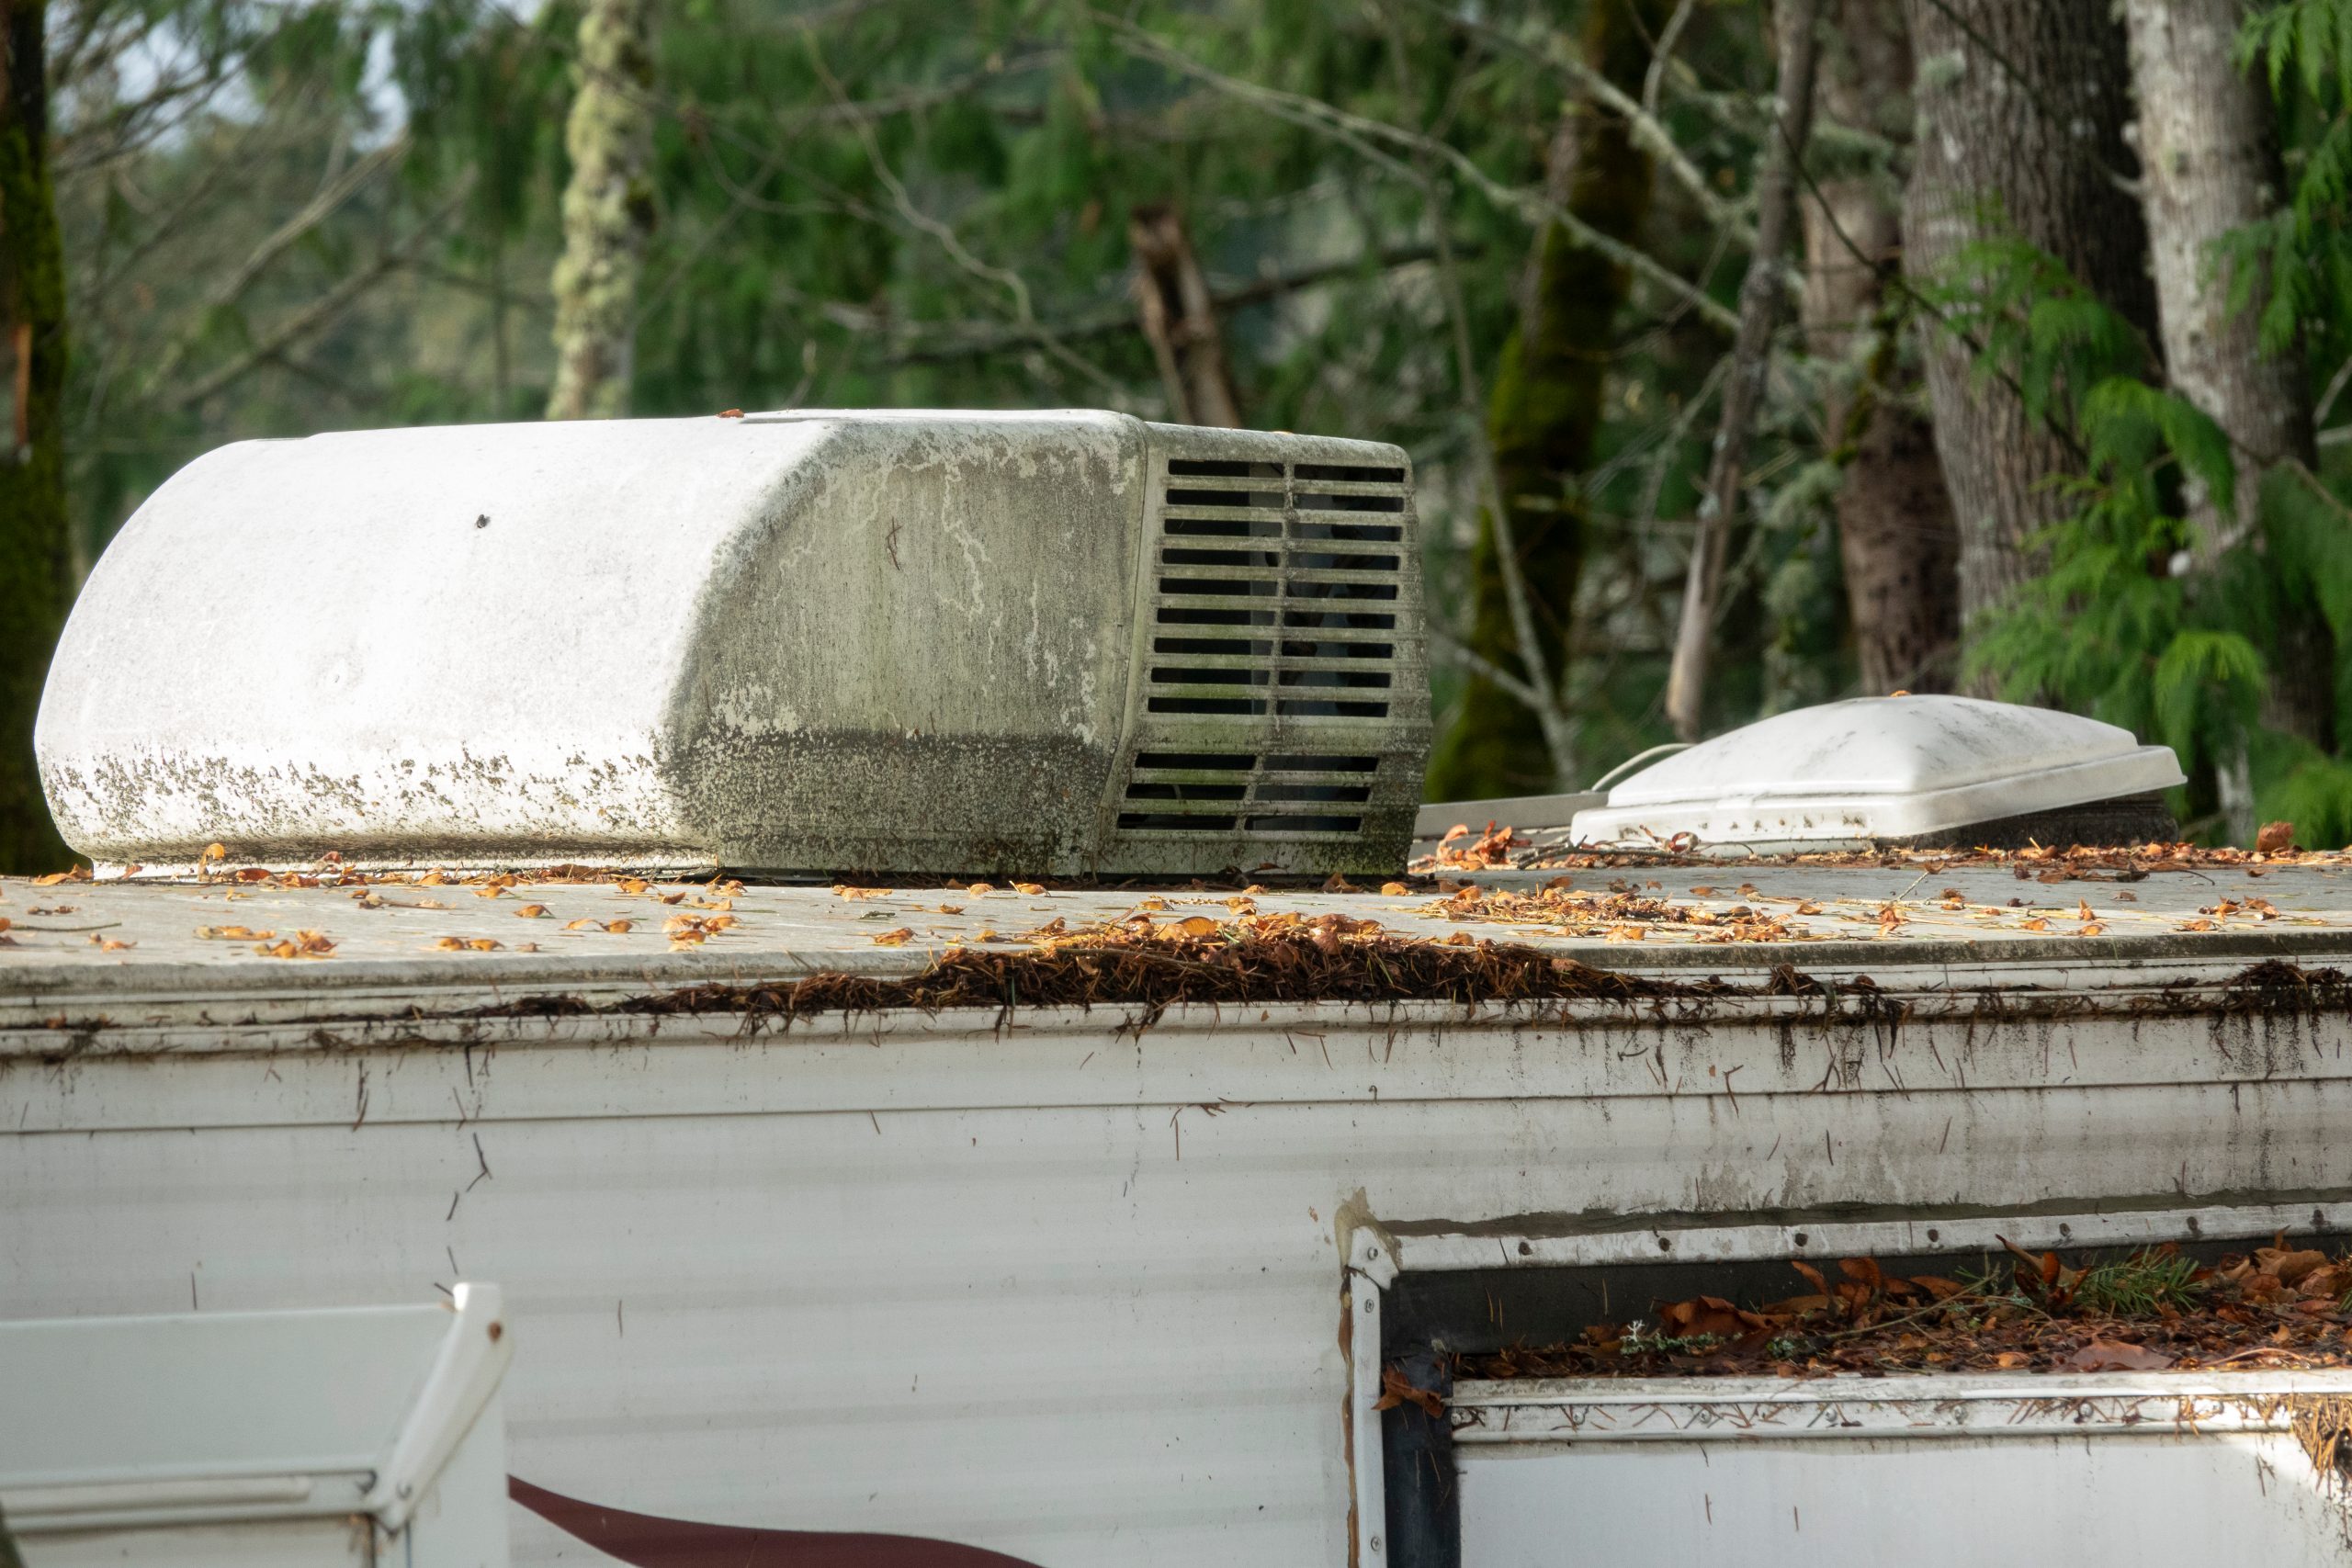
- When the roof has a chalky appearance. This is a sign that the protective layer on the rubber has worn off; this happens slowly over time and is normal.
- When resealing the roof isn’t stopping water from making its way into your RV. To prevent costly water damage, you likely need to recoat the entire roof and seal up any leaks instead of patching them individually.
How to apply an RV rubber roof coating yourself
If you’re here, then you have probably determined you need to apply a rubber coating to your RV’s roof… and you want to do it yourself.
Here is the general process for applying an RV rubber roof coating. Keep in mind that you need to confirm your RV’s roof type prior to starting this project. Also, make sure you follow the directions of the specific rubber coating product you choose to use.
In general, there are two highly recommended RV rubber coating products for EDPM roofs: Dicor’s Roof Coating System and Heng’s Rubber Roof Coating.
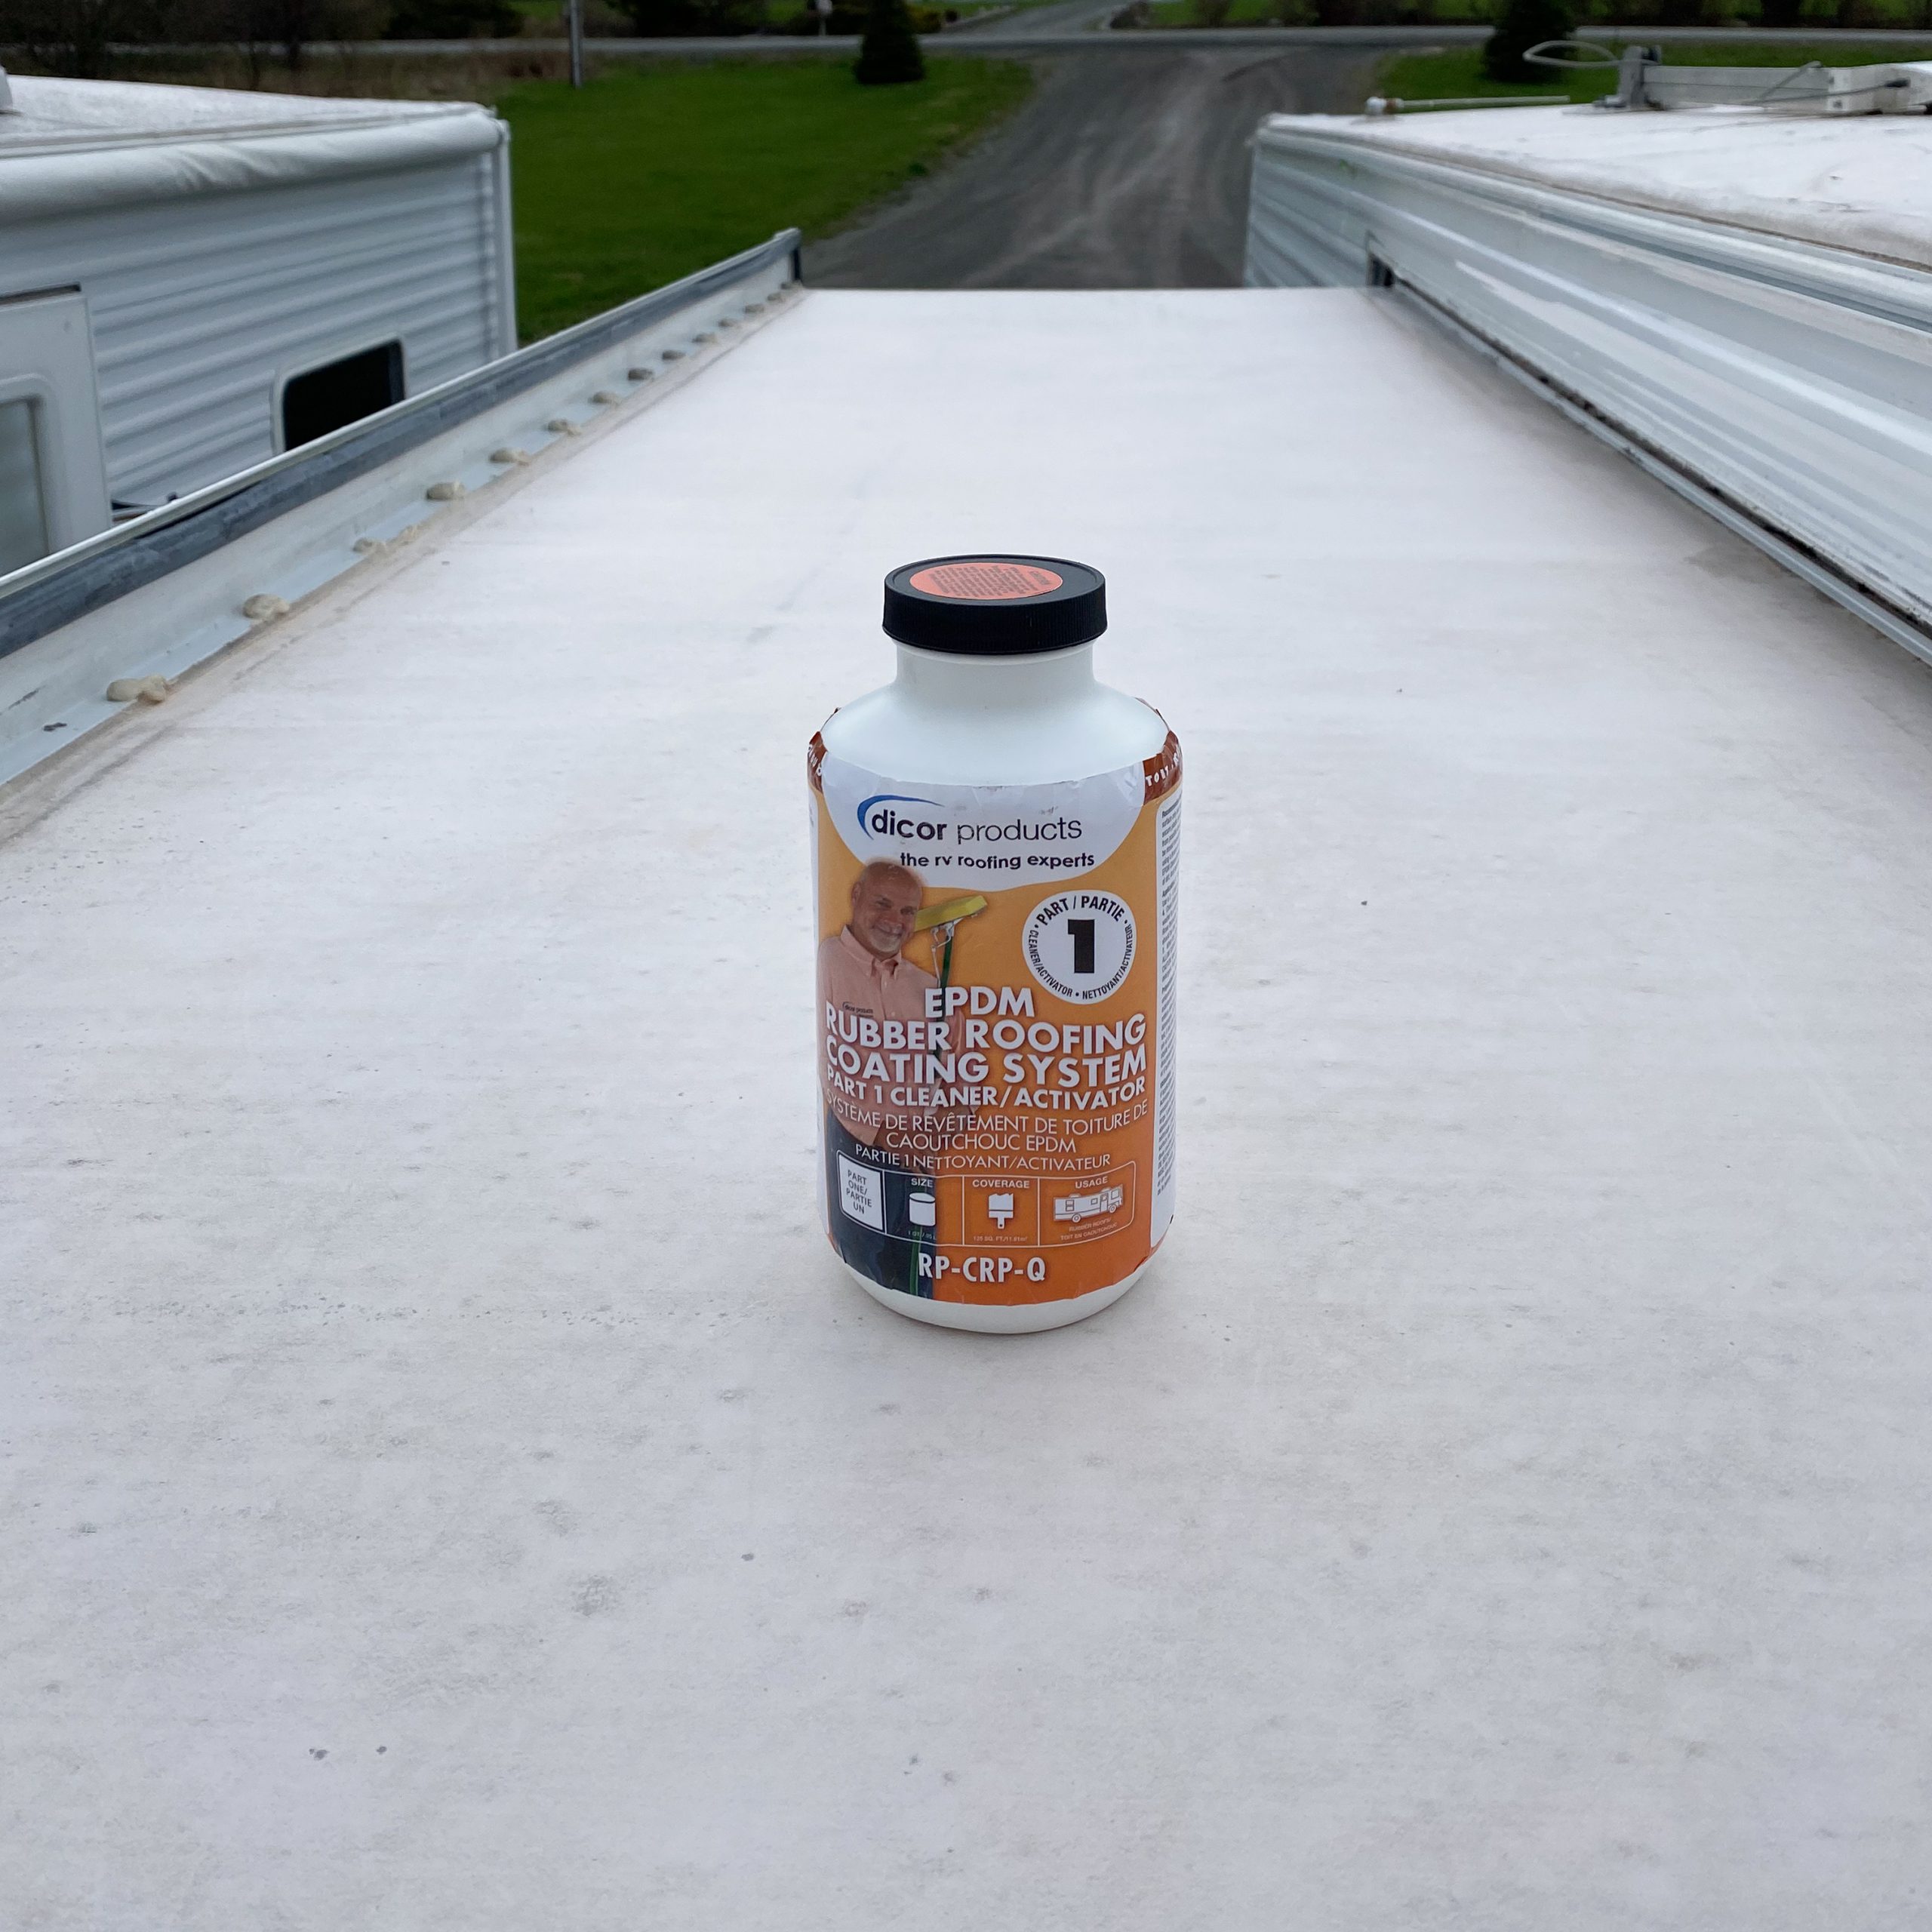
1. Prepare your roof’s surface to apply the Dicor Roof Coating System.
NOTE: Entire project must be completed in one day; including cleaner/activator application, rinsing, and 2 coats of acrylic coating, each dry to the touch.
Start with the cleaner/activator product after sweeping any large debris off the roof. Make sure you protect your RV’s components and sides by taping plastic onto those areas.
After cleaning, the roof should be “white” in color, which is an indication that the surface has been chemically altered.
Dicor Products
2. Prepare to apply the second step of the Dicor Roof Coating System.
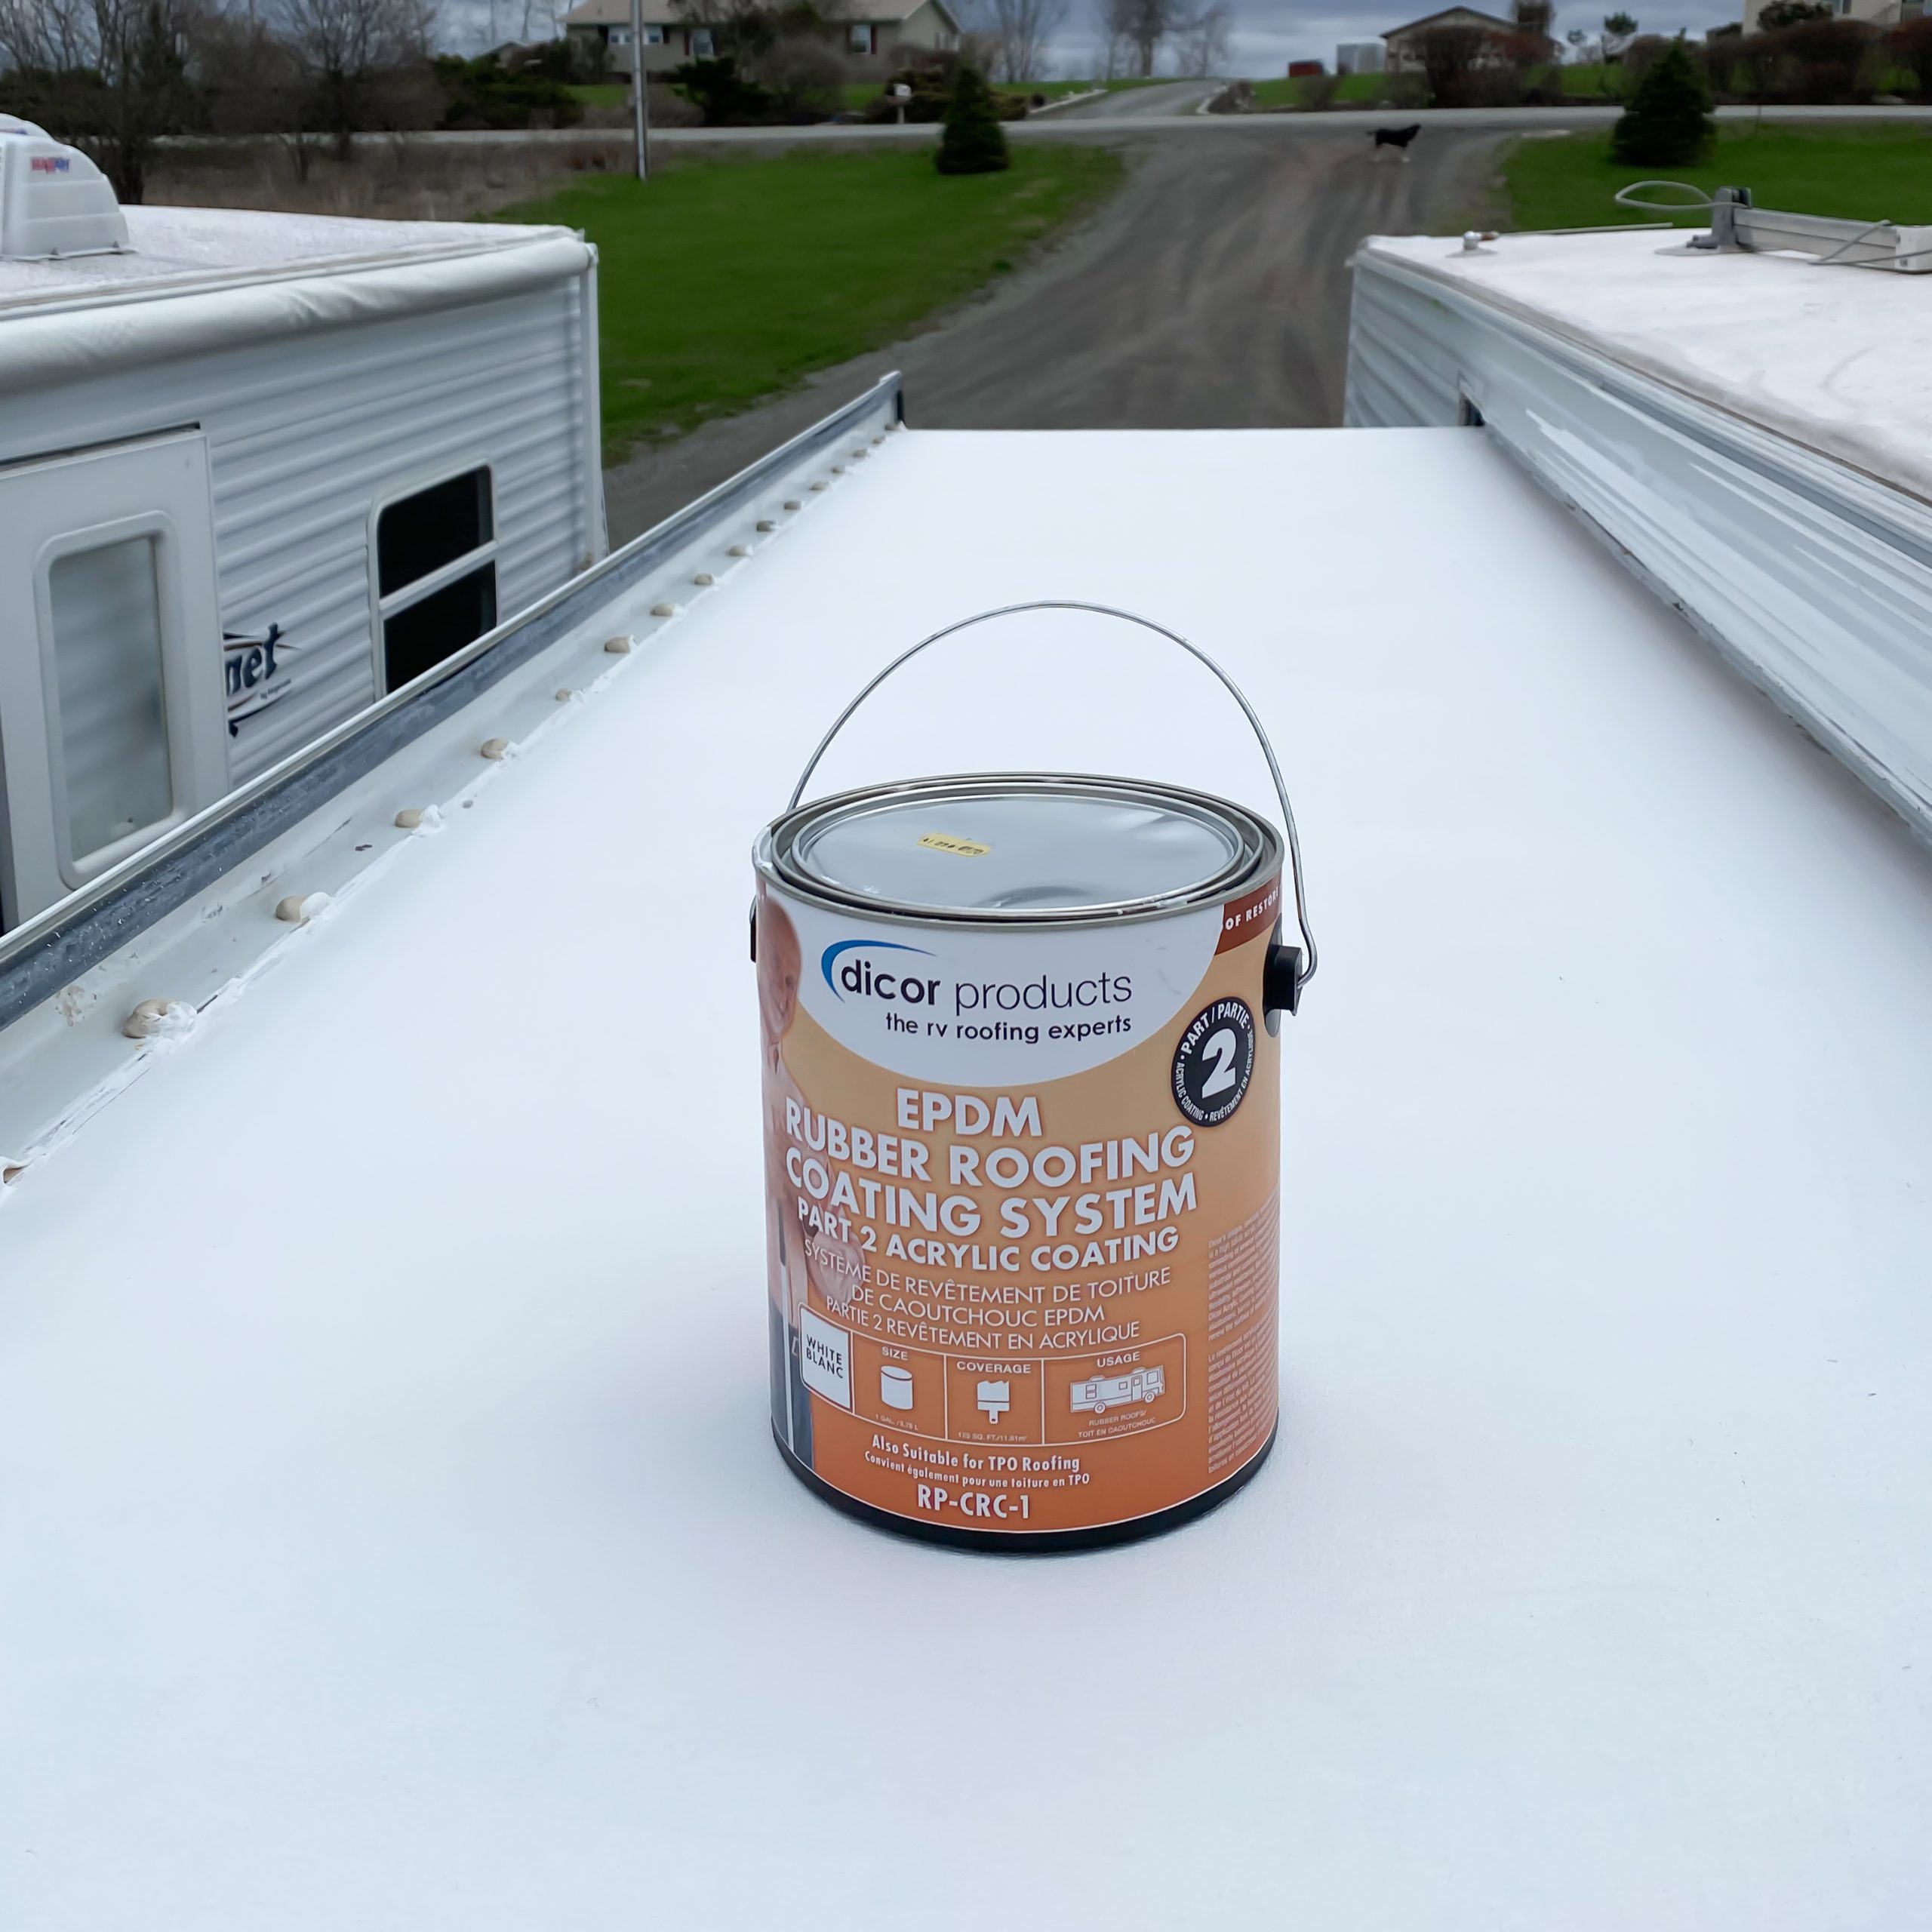
At least 5 minutes before you are ready to apply the second step, thoroughly mix the contents.
Apply the coating with a medium nap roller or a brush to your RV’s roof.
Apply at least 2 coats of the Dicor rubber roof coating product. 1 gallon of product is suitable for 125 square feet of roof.
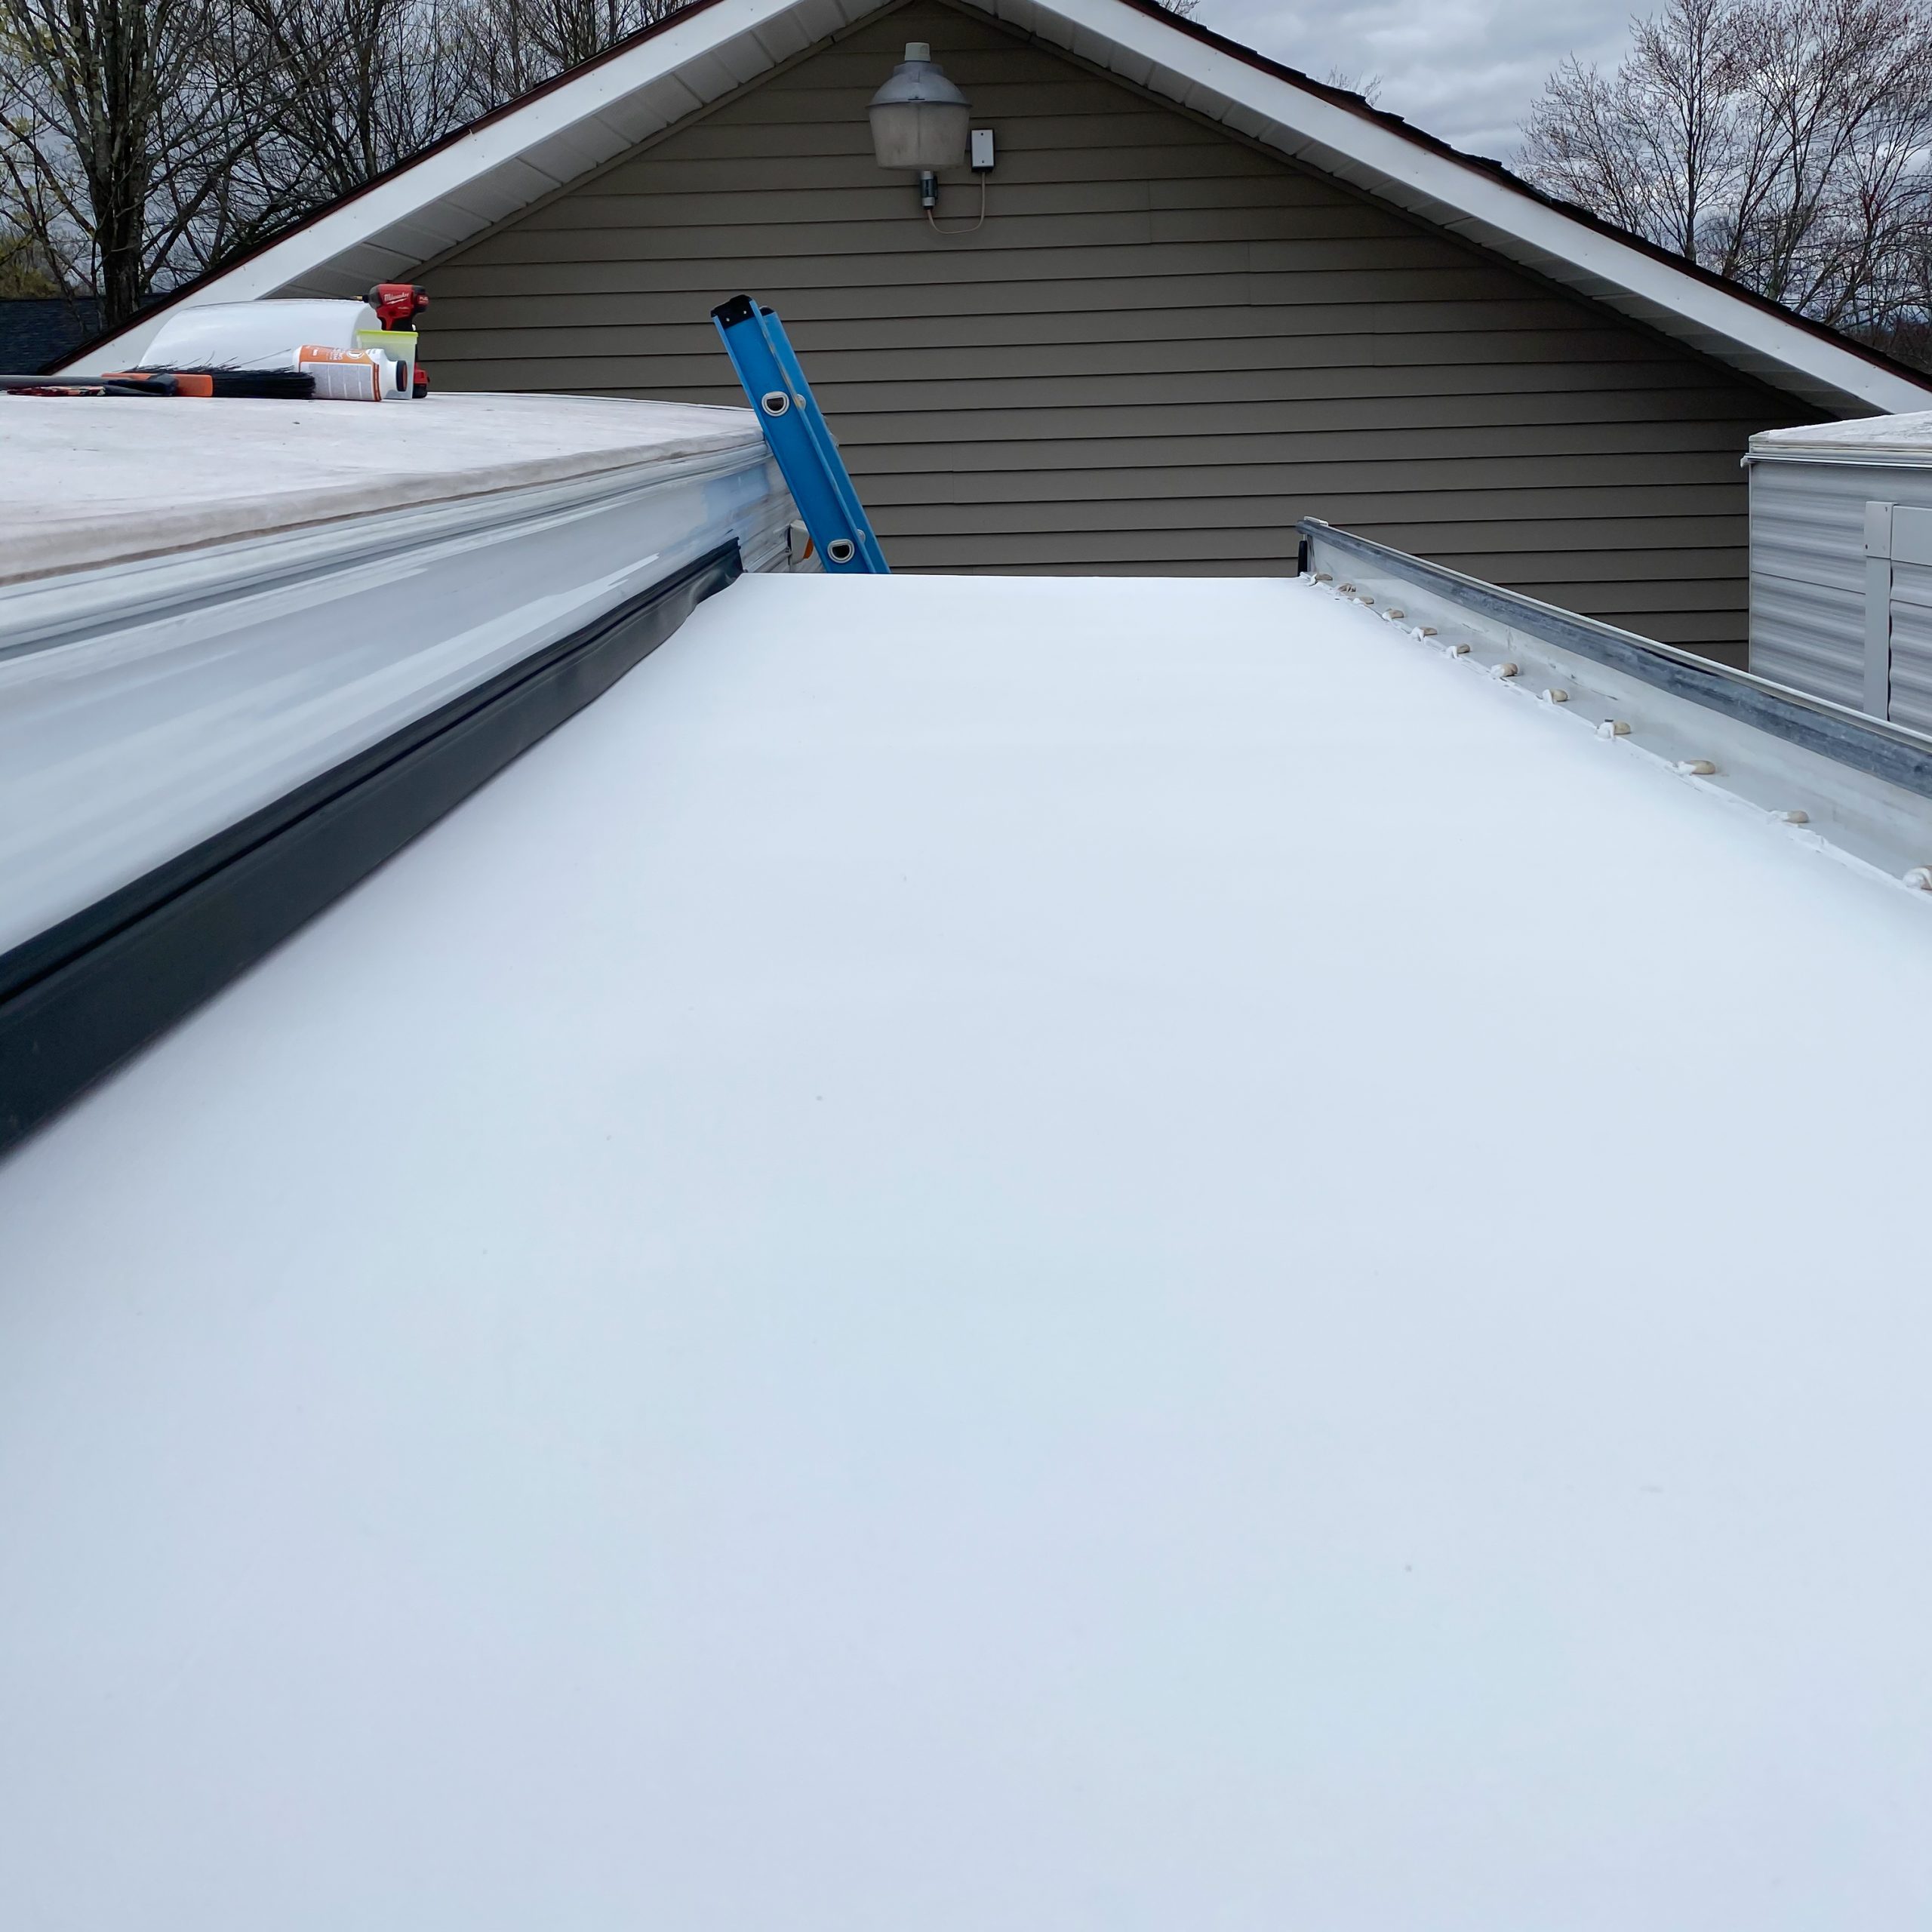
3. Ensure the coated surface is uniformly coated and free from any voids, pinholes, or blisters.
If you are experiencing any dreaded water leaks and subsequent water damage, it might be time to consider applying an RV rubber roof coating to your rig. This is also a great way to freshen up your RV’s appearance and a great preventative maintenance measure if your rig is older.
Make sure you keep track of all your RV maintenance and repairs with an online tool such as RV LIFE Maintenance. Not only can you keep all of your documents in one place, but you’ll also receive timely reminders when maintenance is due to help you avoid costly repairs and potentially serious accidents.
Do you have any experience using a RV rubber roof coating product? Do you have a favorite product?


