Is Your RV Water Heater Leaking? Here’s What To Do
Having hot water in your RV to shower away the camp smoke and bug repellent is a luxury we have come to expect while RVing.
Can you shower and wash dishes with cold water? Sure, but do you want to? No. As with all appliances and systems in an RV, water heaters need to be maintained for the best operation and life cycle.
Even with RV maintenance, there can be issues from use. The most common problem that arises is a leaking water heater.
At first sight, this can look bad. Replacing a water heater can be an expensive job, and in many cases, beyond the skillset of most RV owners.
Oftentimes, however, an RV water heater leaking can be an easy fix. There are a few common reasons for a water heater to leak.
Pressure relief valve
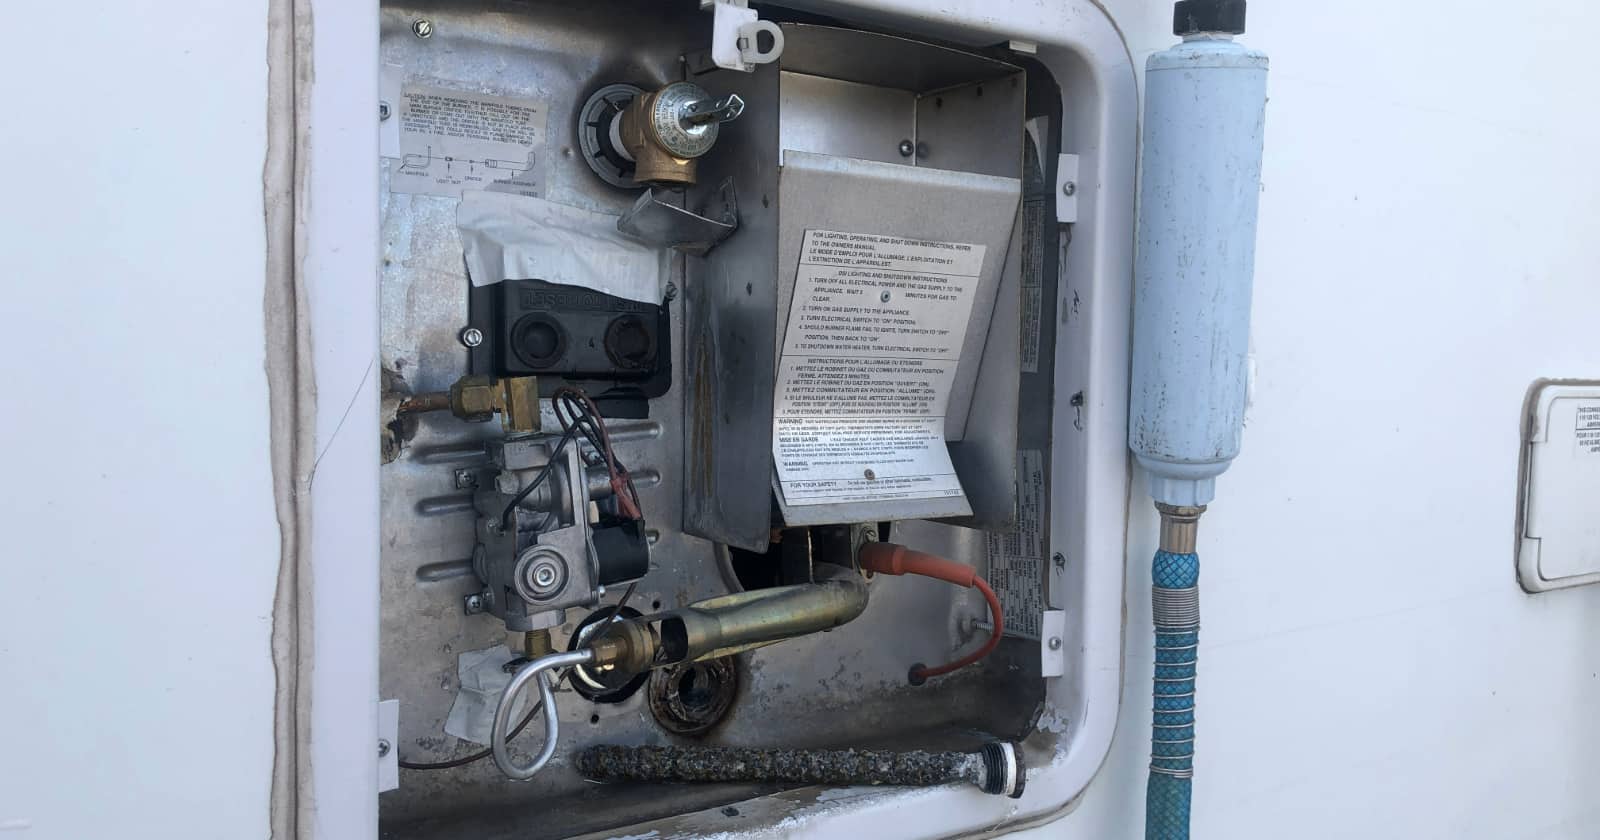
The basic operation of a water heater goes like this… A tank is filled with water and heated with either gas or electricity. When this happens, it creates a rise in temperature and expansion, and as a result, pressure inside that tank.
These pressures and high temperatures can be dangerous, and the tank and components can only withstand a certain amount of pressure. The pressure relief valve is the safety mechanism that ensures the maximum pressure or temperature isn’t exceeded.
That said, if your water heater is leaking from the pressure relief valve, it may be just doing its job. If the valve is only leaking while the tank is hot, it may be that the tank needs to be refilled to a correct level with the proper air gap.
An air gap at the top of the tank allows for some expansion, and sometimes this space is reduced resulting in the access pressure and water dripping from the valve.
Should the valve be leaking while the tank is cold, or producing more than a drip, the valve can be replaced following the same procedure by removing and replacing the valve after draining and before refilling the tank.
Make sure the tank is cold and release any pressure slowly. High-pressure hot water can be very dangerous!
Drain plug
All water heaters are equipped with a drain plug at the bottom of the tank. This plug is removed and reinstalled continually for maintenance, so wear and damage to the threads are possible.
Most drain plugs are plastic, so the threads can easily be damaged resulting in a leak. If you suspect a pinhole in the plug, the leak will likely become pressurized and more of a spray when the tank is heated.
Plastic is used to eliminate a metal plug from forming corrosion and damaging the tank itself. Damaged threads on a drain plug are cheap and easy to replace. Damaged threads on the tank could result in replacing the whole tank.
There are metal plugs available that in theory should never have to be removed. Keep in mind that without removing the drain plug, it is more difficult to flush your tank, and the smaller valve could stop larger debris from being flushed out.
Drain plug replacement is easy, and it’s a great time to perform a flush of the water heater.
Fittings
Like most RV plumbing fittings, the ones on your water heater are most likely plastic fittings with a metal clamp holding them in place.
These fittings and clamps can fail, resulting in a slow leak or a steady stream of water.
Having a few connections and clamps in your tool kit could save a weekend camping trip. Keep in mind that the clamps require a special tool to fasten them and this is something else handy to have.
Anytime you have to remove a fitting or disconnect a water line, you have to shut off the water supply and drain any water from the lines before beginning.
Water tank
This is a worst-case scenario that hopefully doesn’t happen. If you can see water leaking from around any of the fittings welded to the tank or from the body of the tank, you are unfortunately in for a full tank replacement.
Ignoring a leaking tank can be dangerous due to the high pressure and boiling water temperatures.
Removal of the insulation may be required to confirm a leak location. Water heaters can be replaced as a complete assembly, or in some cases, just the tank itself.
Routine maintenance including flushing, inspection, and replacement of anode rods (in systems that include them) will help eliminate this worst-case scenario. The anode rod is cheap insurance for your tank. Anode rods are designed to corrode instead of the tank, saving the tank material.
Having the know-how to fix your leaking RV water heater can save you money and a week of cold showers. Utilizing fellow RVers and resources such as iRV2 Forums will help you through this and lots of other RV projects.
Make sure you keep track of all your RV maintenance and repairs with an online tool such as RV LIFE Maintenance. Not only can you keep all of your documents in one place, but you’ll also receive timely reminders when maintenance is due to help you avoid costly repairs and potentially serious accidents.
Continue reading: