
How To Add An LED Indicator Light In Your RV
Do you have a switch in your RV that operates something out of sight or not close to the switch? Maybe an outside porch or awning light, water pump, or in my case, the water heater.
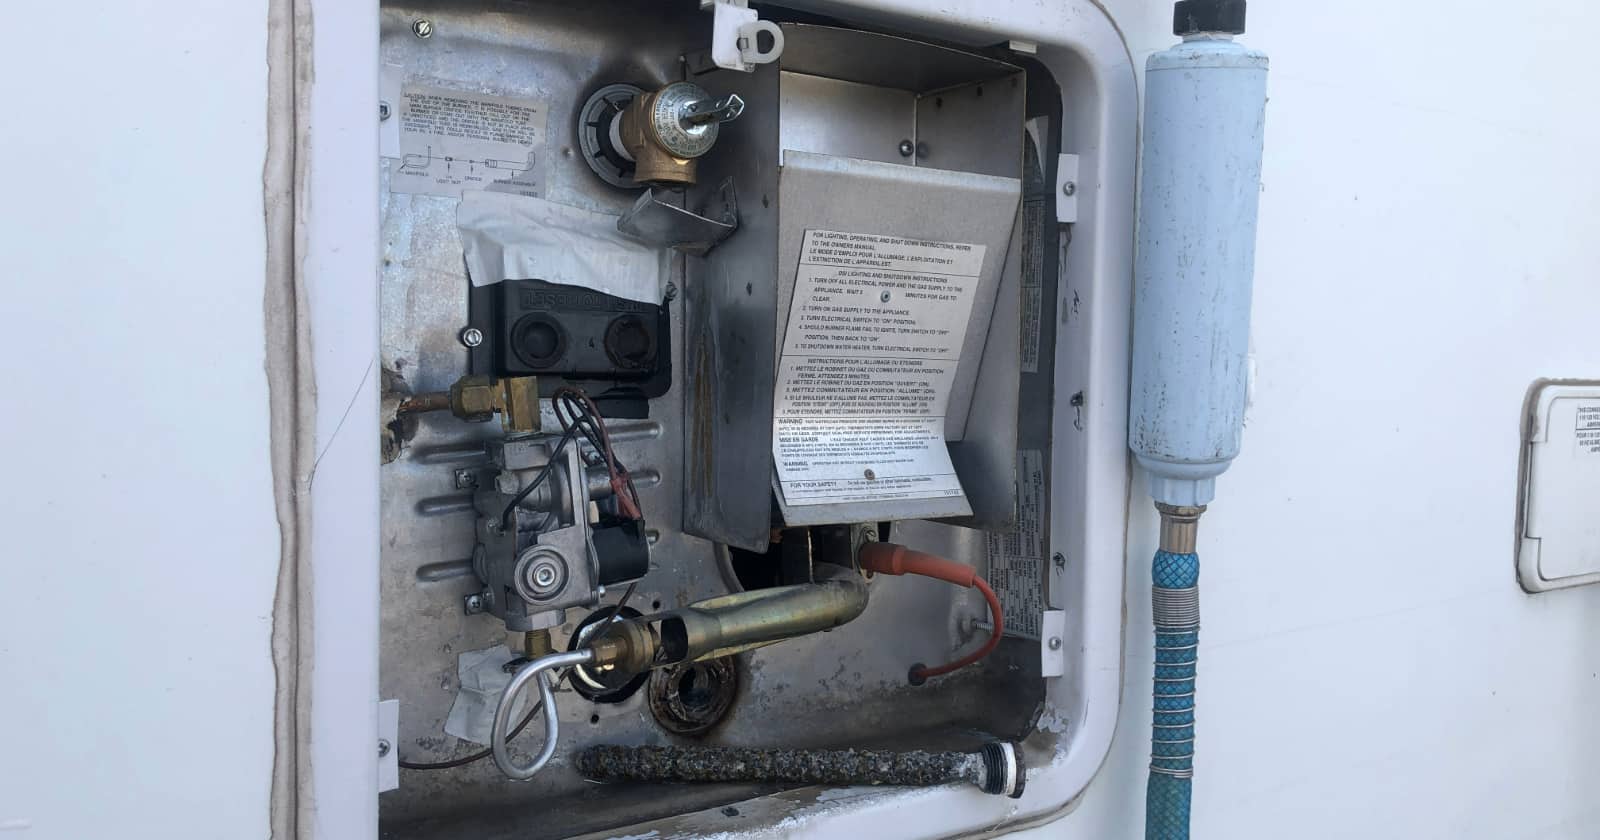
Sometimes it is hard to tell if these switches are in the on or off position. Not knowing their position could result in you inadvertently leaving something on such as the porch or awning lights, or in my case, forget to turn the gas water heater off.
This problem occurred all the time for us, forgetting to turn the gas water heater off, wasting propane. I finally found a mod that would help us not make that mistake. Simply adding an LED indicator light above the switch that is lit when the switch is in the on position helps solves this problem. The addition of a LED indicator light makes knowing if my water heater is on or off as simple as a quick glance.
Be prepared, this mod takes a little time to do correctly. Plan on taking your time and do not get into a rush.
Tools needed
These are the items you will need to complete this project:
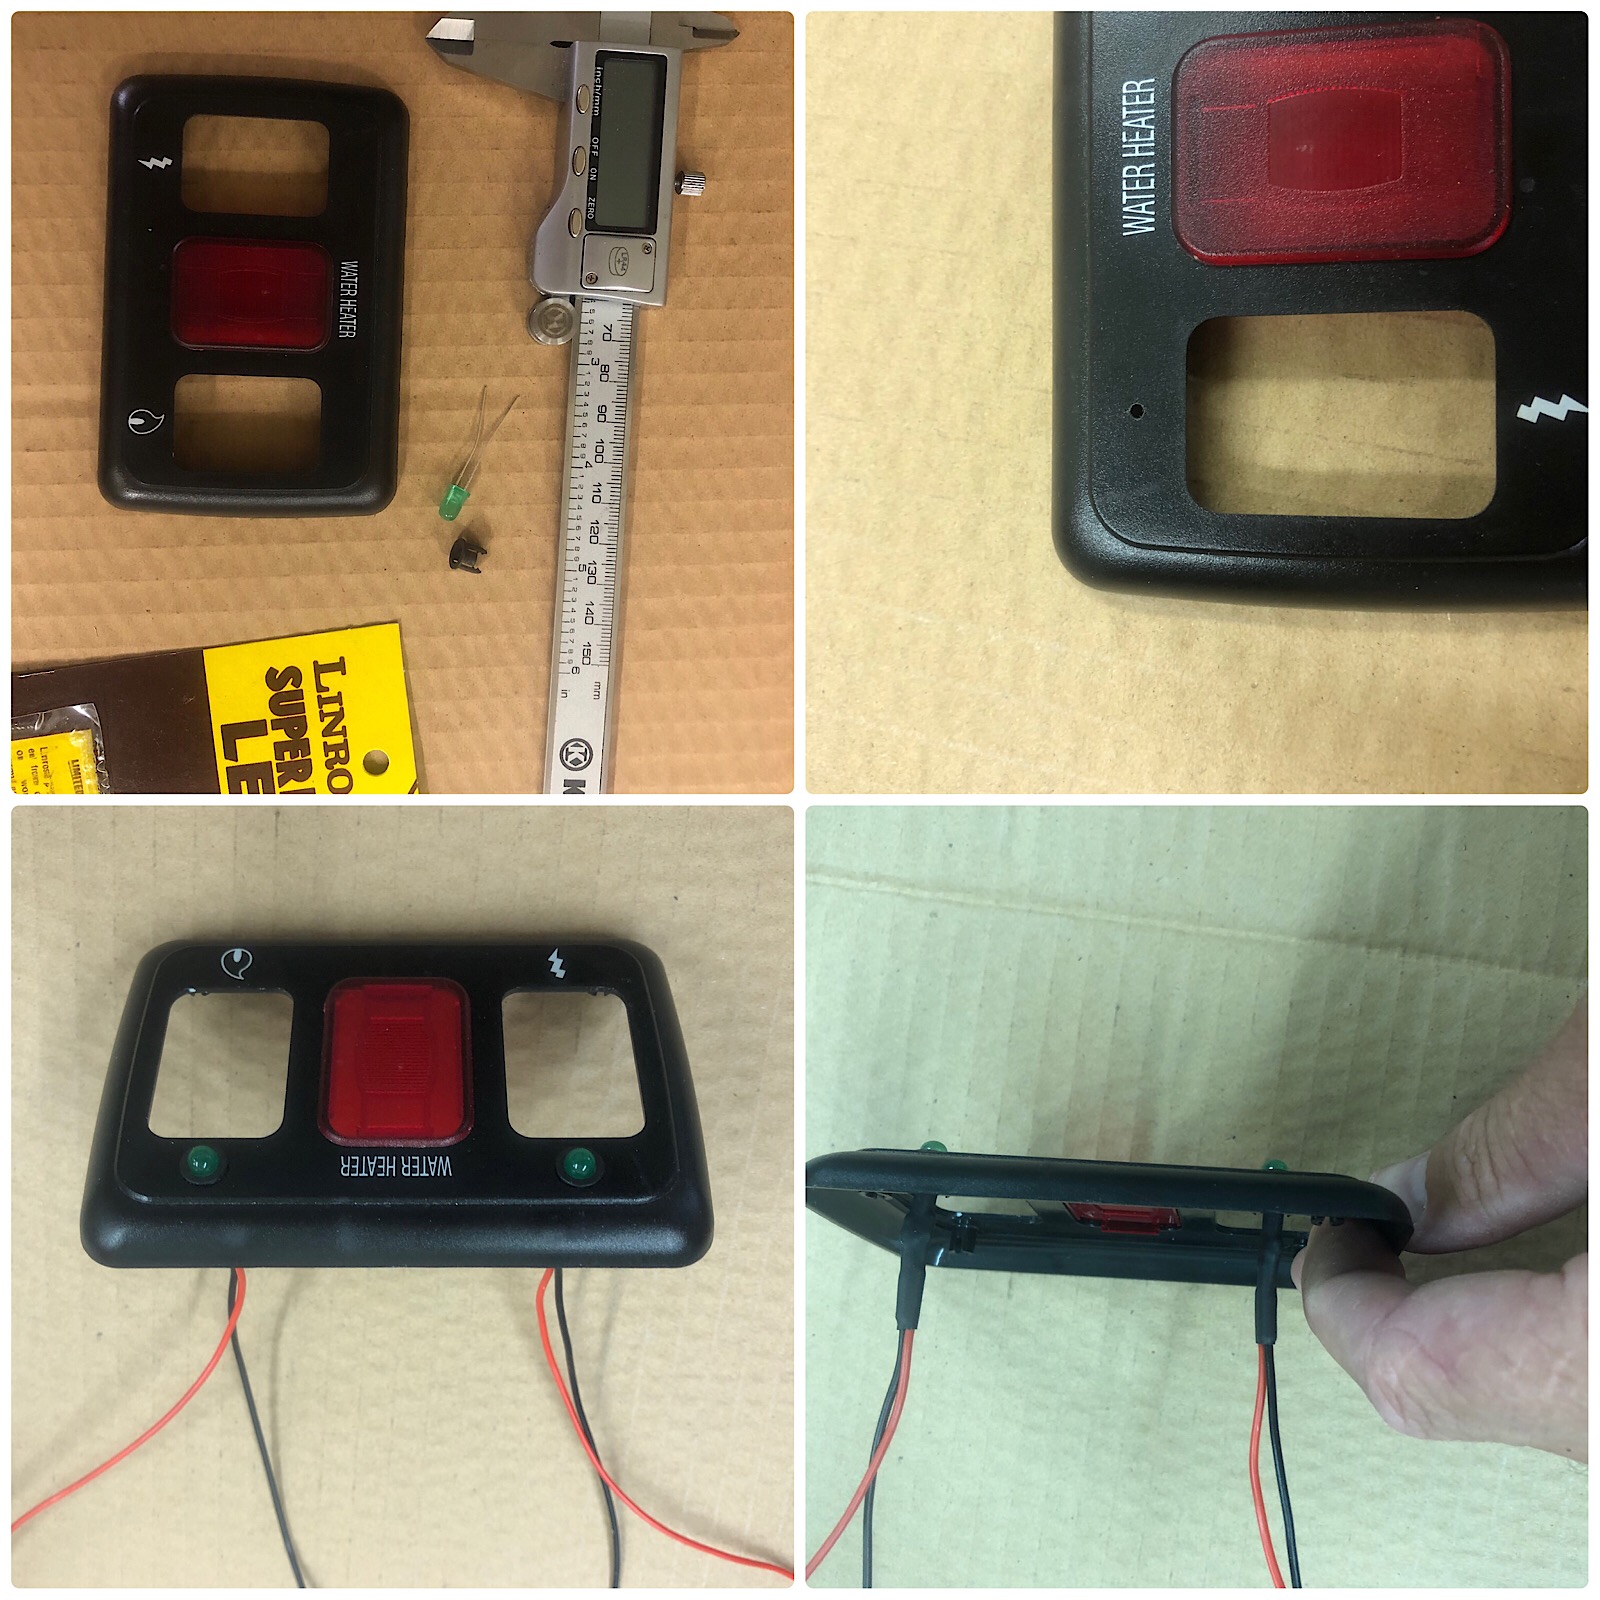
- Linrose 5mm 12-Volt LED bulbs with bezel
- Measuring device to lay out mounting holes
- Flat and Phillips head screwdrivers
- Drill (preferably a drill press)
- 1/16th-inch drill bit for drilling a pilot hole
- 17/64” drill bit for drilling hole for the bezel
- Soldering iron and rosin core electrical solder
- Red and black 24 gauge wire 6” red and 6” black for each LED
- Small heat shrink and heat gun
- Crimp-on blade connectors and crimping tool
- Electrical multimeter
- Time
- Patience
I have a good friend who added LEDs to the water heater switch in his trailer. When he purchased his LED lights, he bought an extra set just in case he had a problem. Turns out he did not need them, so he gave me his extra pair. The Linrose LEDs that I used for this project were model number (B4302H5 12V). These LEDs came with a bezel that made the installation of the lights super easy. They are readily available on Amazon here.
This project was a little more involved than some I have done, not hard, just tedious with all the small parts. Also note this was done on my 2014 Airstream International. Other RV switches may vary, but the basic concept should be the same.
Getting started
I started by removing the switch cover. This was done by slipping a small flat-head screwdriver behind the cover and carefully prying it off.
Once the cover is off, the next step is to mark the locations for the LED lights above the switches on the switch cover. Once you have the locations marked, you will need to carefully drill two 1/16th” pilot holes in those locations. Do not skip this step! The pilot hole will allow the larger 17/64″ bit to stay centered in place when you enlarge the hole as required for the LED bezel.
A small black plastic bezel was included with the LED. It snaps into the 17/64″ hole drilled in the switch cover. This plastic bezel will later hold and retain the LED bulb in position once snapped into place.
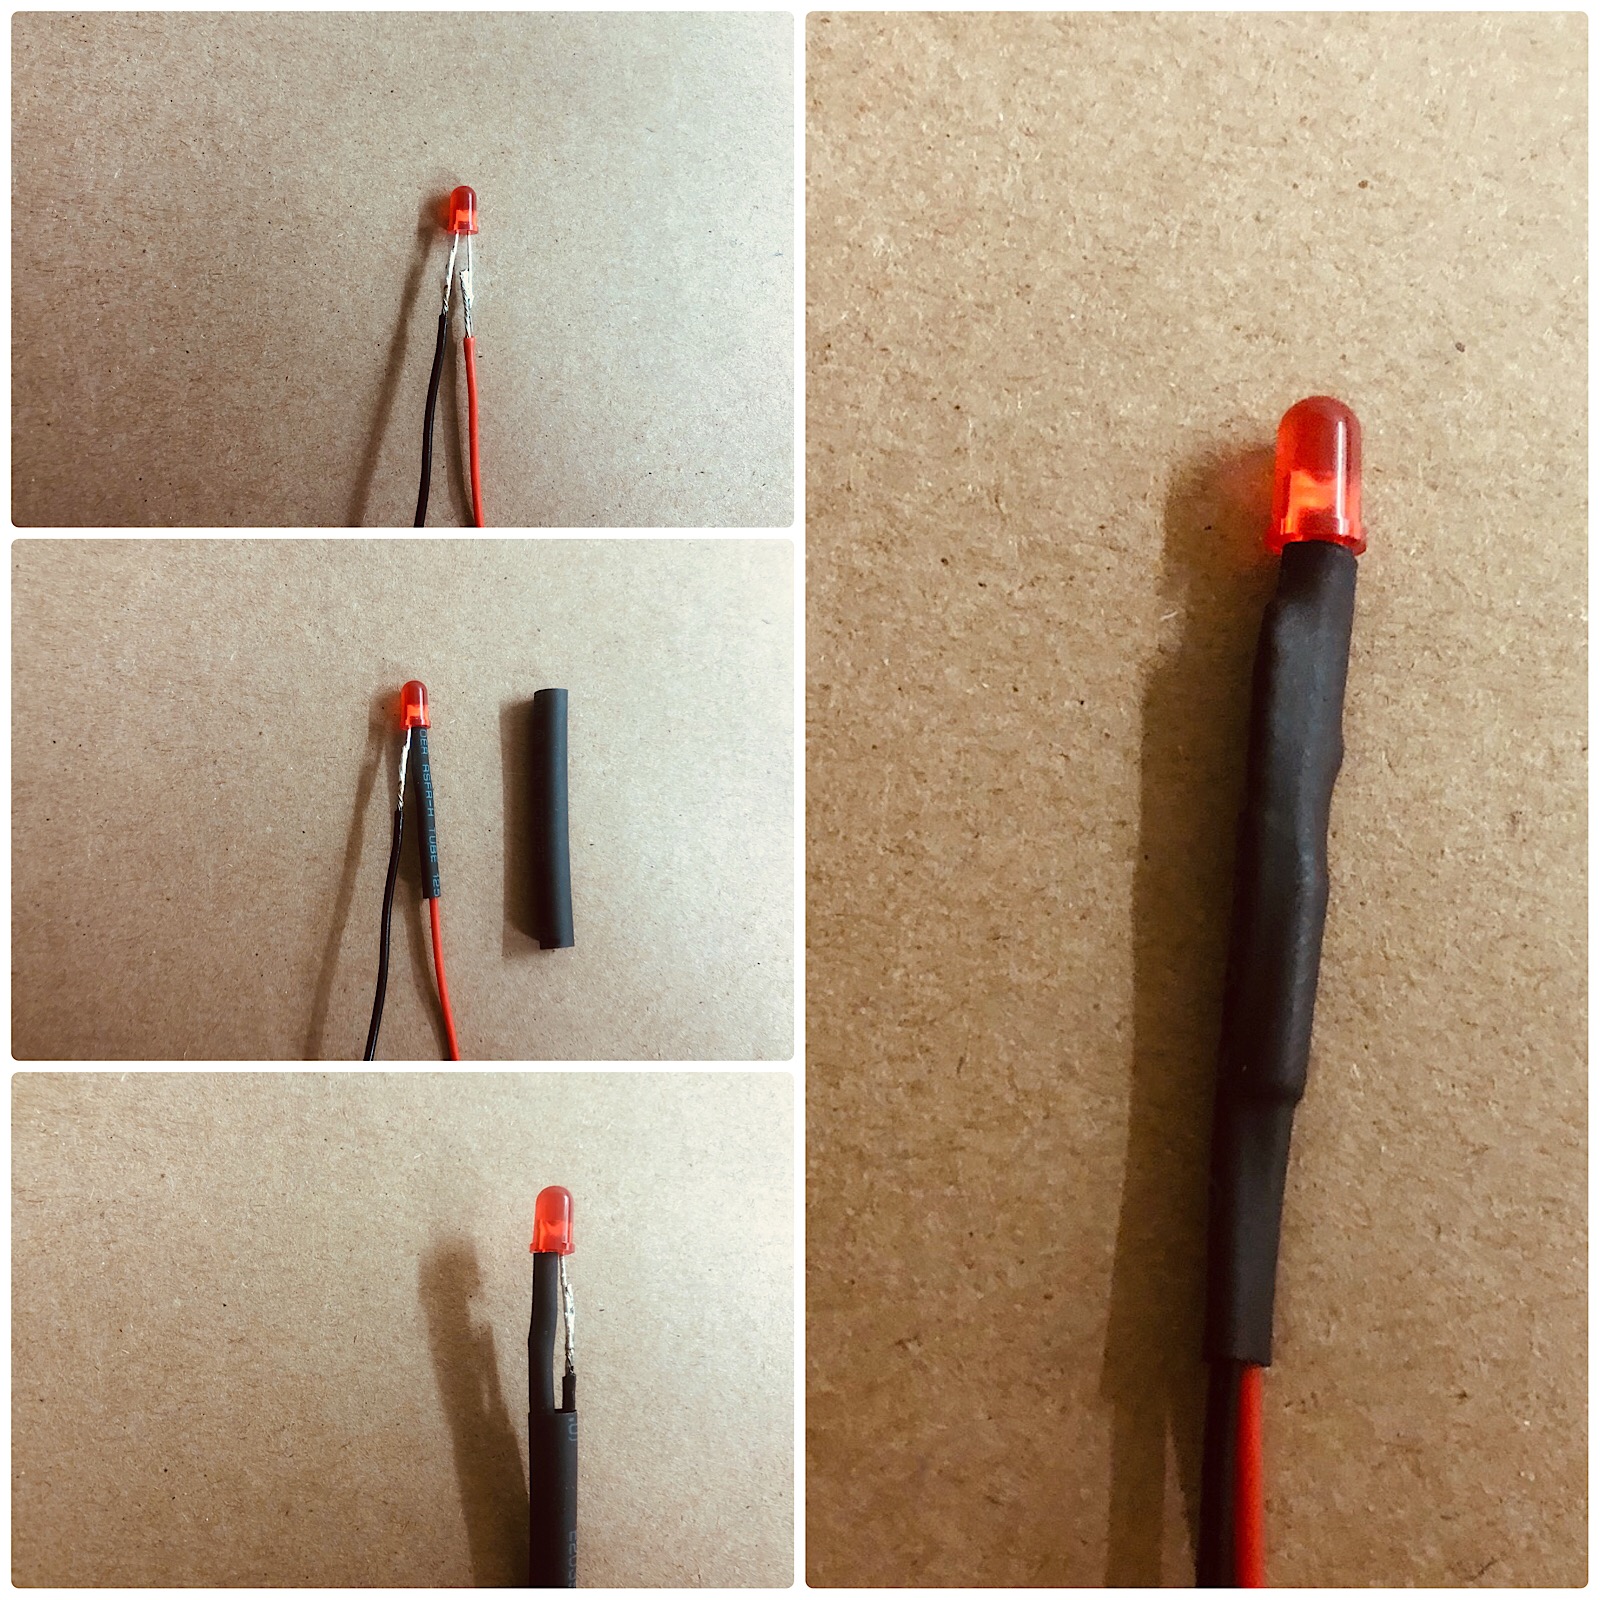
Preparing the LEDs
The Linrose LED lights come “raw” with no wires attached. To prepare the LED lights for wiring into the switch’s power, I soldered a 6” piece of 24 gauge wire to each of the LED’s leads, designating red for the Positive (+) leads and black for the Negative (-) leads.
You will need to read the instructions provided with your specific LED to determine which lead is which. Next, you will need to isolate each of the leads from the others by placing a small piece of heat shrink tubing over one of the leads and shrink it down over the lead. Then place a second piece of heat shrink tubing over both leads and shrink it down over both leads.
The completed LED should look like the above photo. When you get the LEDs to this point, they are ready to snap into the bezel and switch cover.
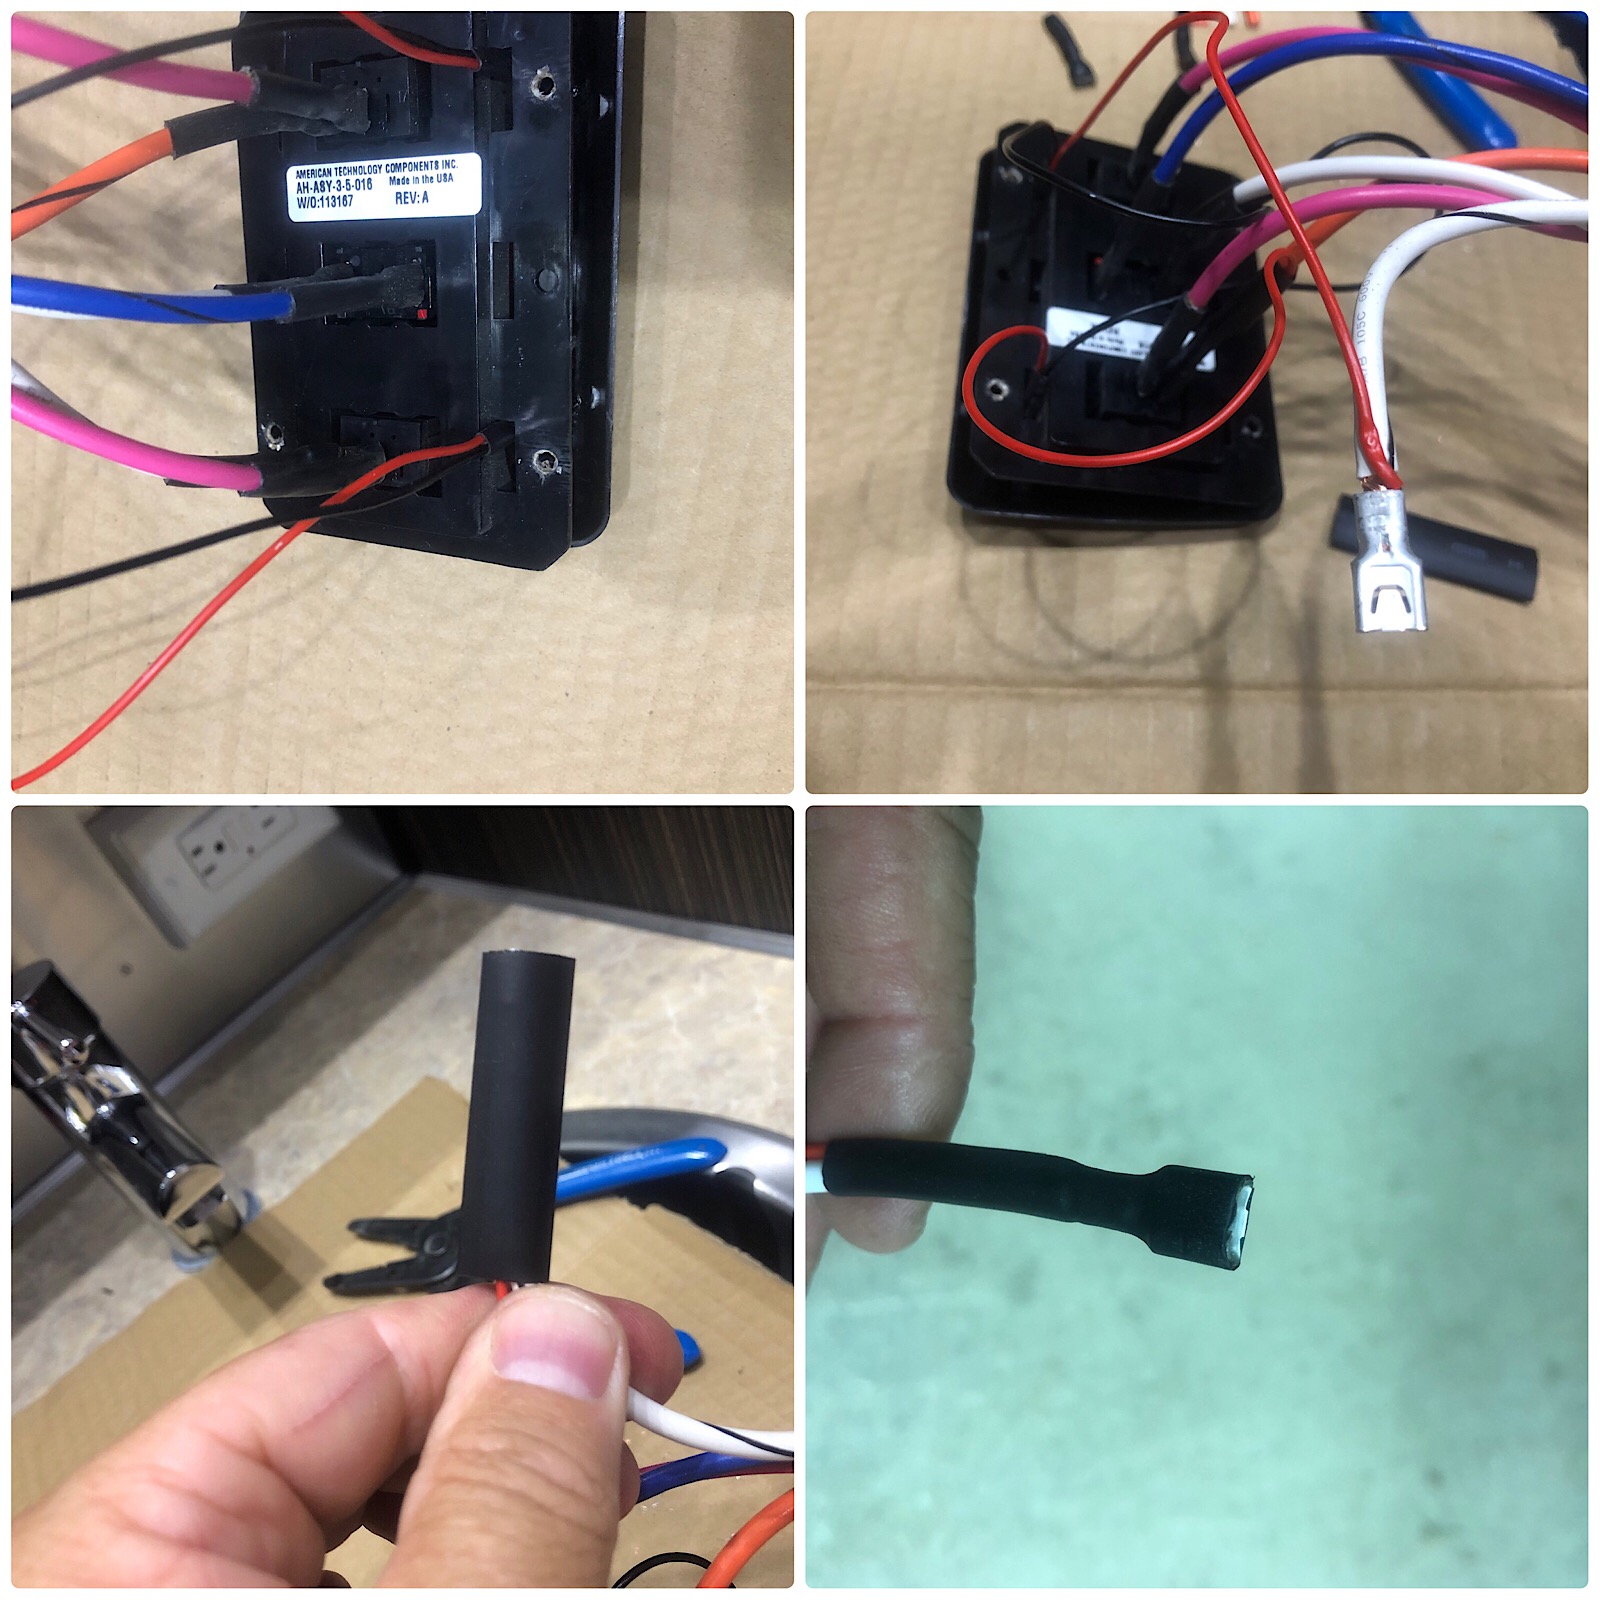
Wiring the LEDs to the switch
The wiring portion of this project involves using a multimeter or simple voltmeter to locate and connect the 12-volt Negative (-) black leads of the LED to a 12-volt Negative (-) wire close to the switch.
For me, that 12-volt Negative (-) wire was on the water heater’s system failure light. Then I located and connected the 12-volt Positive (+) lead from the LED to the switched side or load side of its correlating switch. The goal is to have the LED illuminate when the switch is in the on position and turn off when the switch is in the off position. If you wire the LED’s Positive (+) lead to the wrong side of the switch, the LED will stay on all the time.
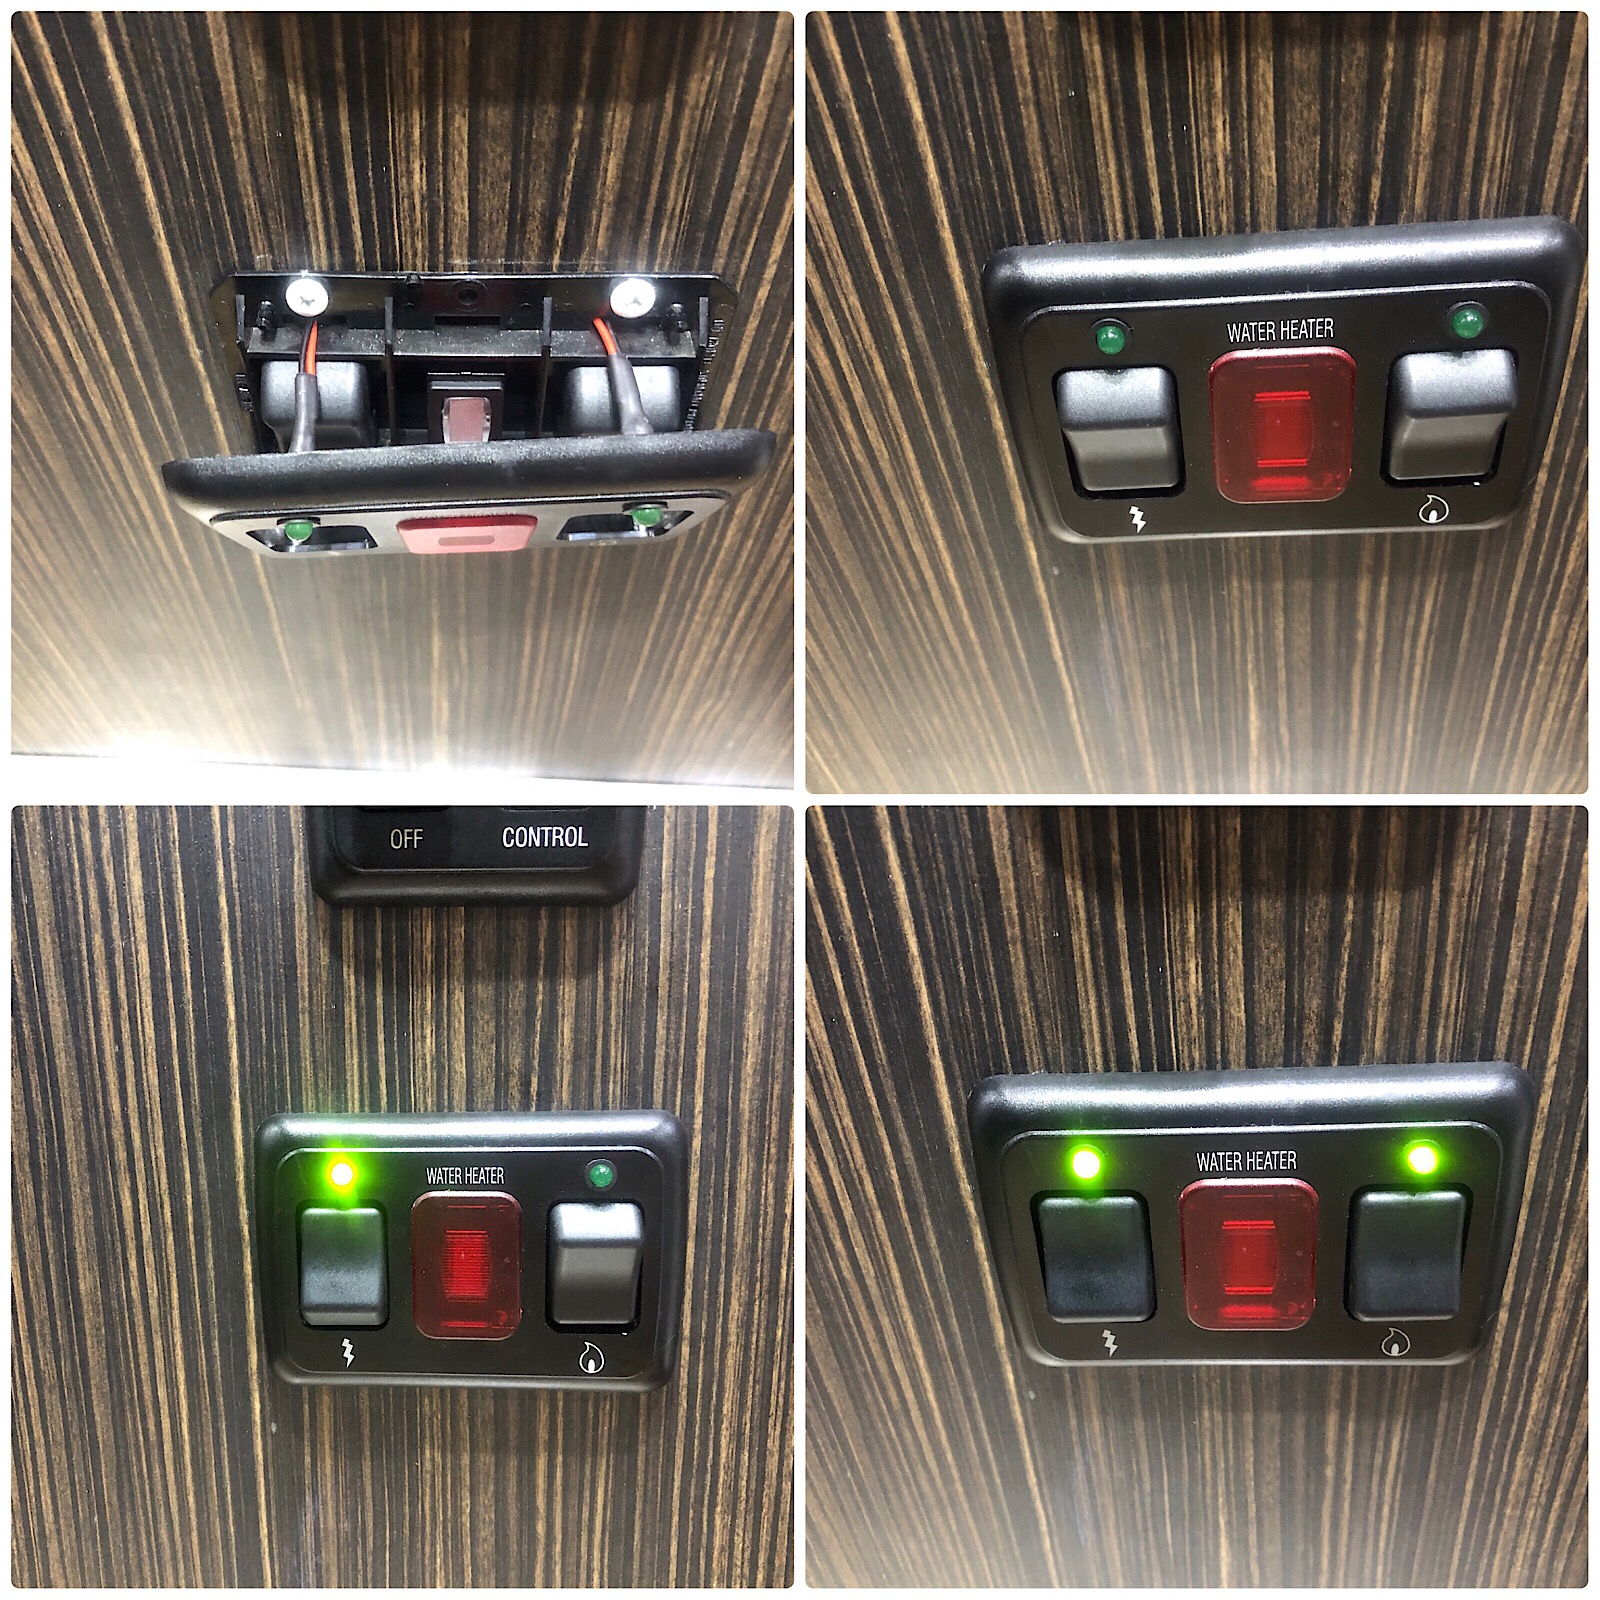
Buttoning things up
When all the wiring is connected, confirm everything works as it should and carefully reinstall the switch in the wall. Take your time and tuck all the wires back in place neatly to prevent damage to the wires or LED light. Secure the switch cover back in place. Finally, once everything has been reinstalled, turn on the switch to test your work and admire your accomplishment.
Wow! This little MOD was a little hard to explain. I hope the details are at least somewhat clear and that the photos provide some clarity. Please feel free to leave any questions and comments below.

Its a good one for sure!
Clearly described and illustrated. Great mod. I need that on my bathroom light.
Thanks for your kind words. This little MOD works very well as a reminder for those switches we tend to leave on….
Good information. I would suggest that people who do this be careful to buy the specific LEDs cited, OR get a standard LED. With a standard LED, you will need to attach a small resistor in line with one of the leads.
If you search for “LED resistor” you will find many pages that tell you how to calculate what resistor to use. I mention this because MOST resistors do not have a built in resistor.
I have done the same thing in the past for awning lights, only I used a LED with a built in bezel and wires. This saves a lot of time and headache. 10 mins. and the job was done. Drill a hole, snap in the LED and hook up the two wires.
I think this is a good and worth while project and well explained as I have left my water pump on and this would prevent that.