
Here’s a neat mod to add an on / off switch to your exterior LED light strip.
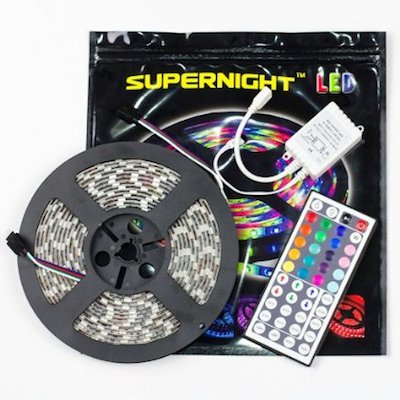
Some LED light strips come with a remote control device to turn them on or off, change colors, or vary the blinking rate.
The package to the right includes an infrared remote control with a 16 foot long string of 300 LEDs.
If the LED light strip on your RV didn’t come with a remote control, don’t worry.
We’ll show you how to add an after-market remote that will allow you to turn your lights on and off from some distance away from the camper.
Use a Remote With Your Exterior LED Light Strip For Safety and Convenience
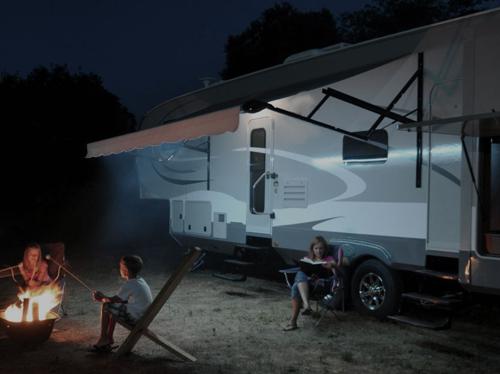
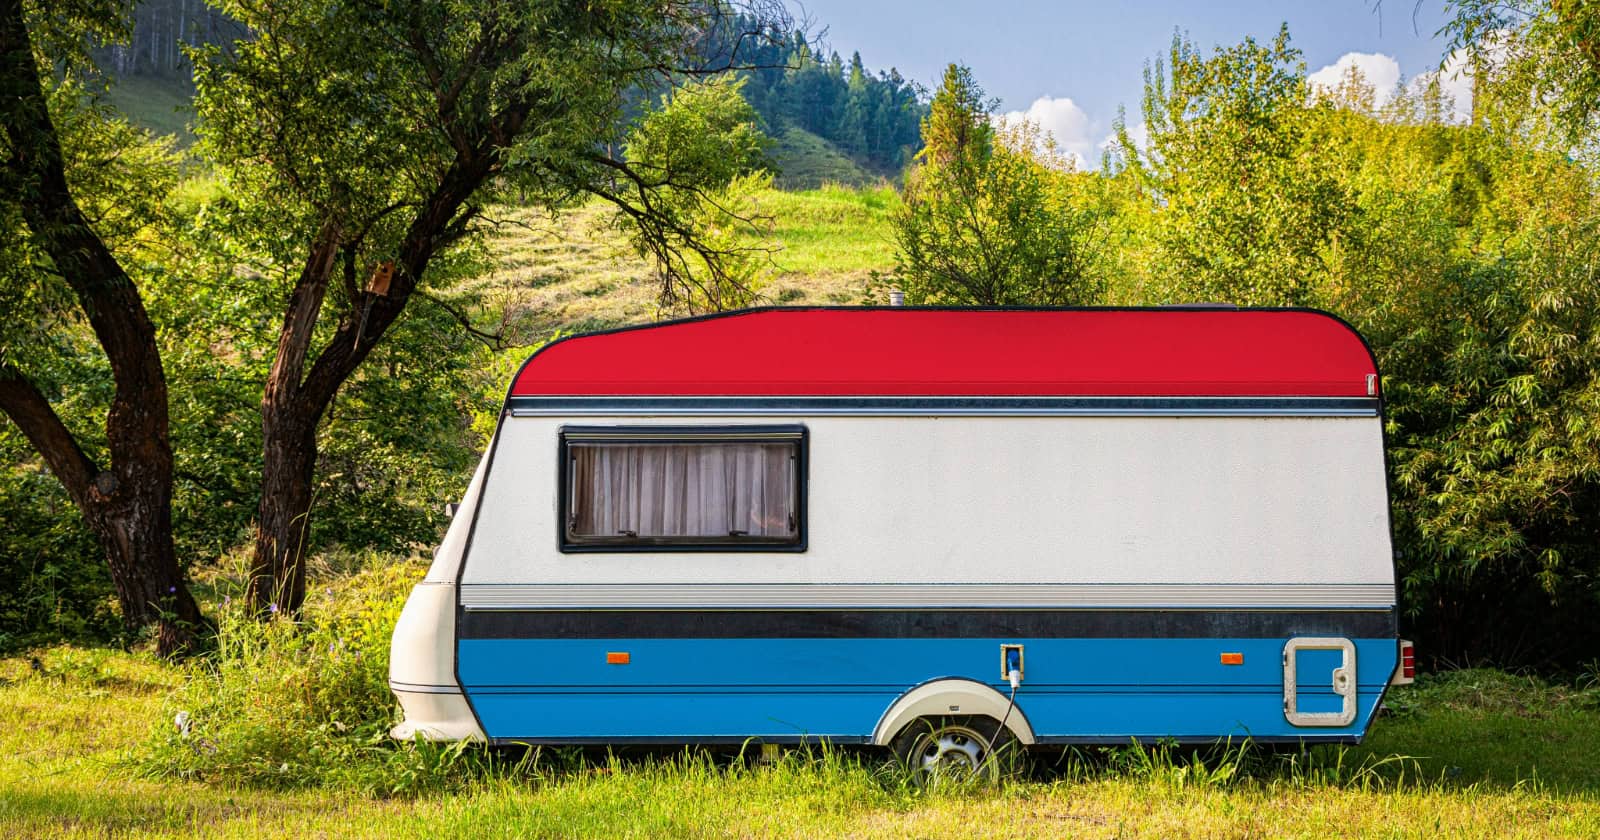
A popular place to install an LED light strip is underneath the awning, right against the side of the trailer.
Related: How to Replace Incandescent and Halogen Bulbs With LEDs in Your RV
By installing the strip in this location, the light from the LEDs will reflect off the bottom surface of the extended awning, and create a nice ambiance for relaxing outside.
You’ll also get plenty of light even with the awning rolled up.
The remote will allow you to turn the lights on and off without having to go inside your rig – no more fumbling around in the dark for your trailer keys.
An LED remote puts lighting at your fingertips (literally).
User ctpres at the iRV2.com Forums shared his simple and inexpensive method for adding a remote to his exterior LED light strip.
For only $10 and 30 minutes of time (assuming you already have the awning lights installed) you could get this remote up and running.
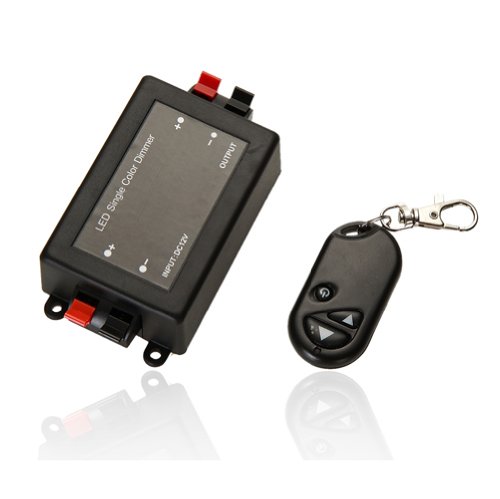
With his recommended remote, you can also dim the lights in addition to powering them off and on.
Here’s what you’ll need:
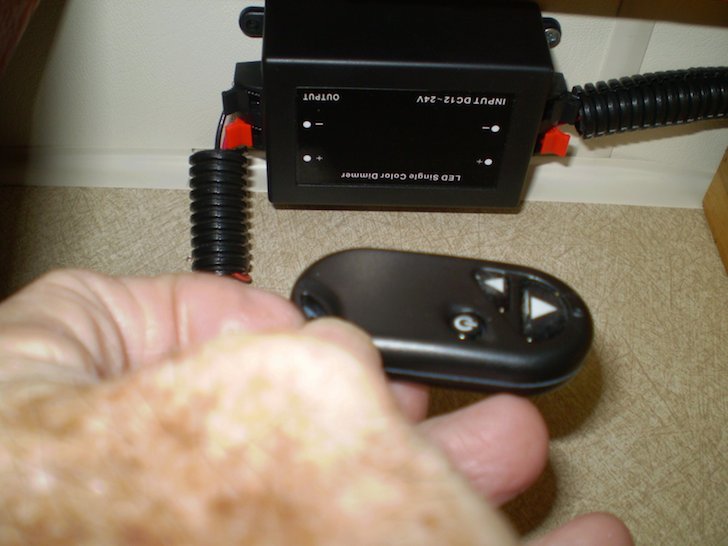
- RF Dimmer for LED Lighting with Wireless Control.
- Some Variation of LED Outdoor RV Awning Lights – recommendation (these have self adhesive backing)
How to install the LED remote control:
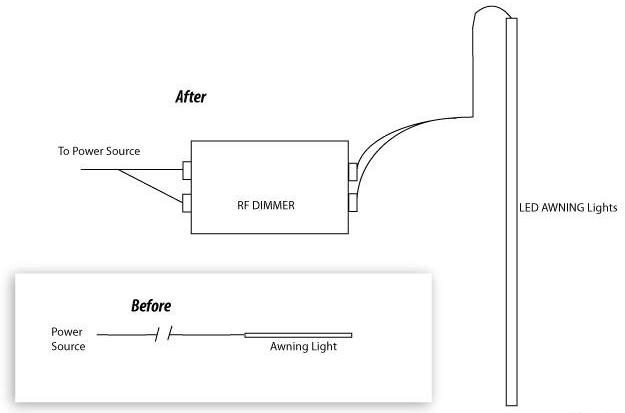
- Install the LED awning lights where desired. A good spot is near the top of the trailer, and under the awning.
- Install the RF Base Unit in a dry location with as little interference between the unit and the outside as possible (in an RV storage compartment or on the inside of a wall on the awning side).
- Use screws, 3M strips, or double sided tape to fasten the RF base unit.
- Run wire from the power source to the RF base unit “Input”. (doesn’t hurt to use wire tubing to protect the wires)
- Run wire from the RV awning lights to RF base unit “Output”. (doesn’t hurt to use wire tubing to protect the wires)
- Attach the key fob to key ring and enjoy!
Here’s an installation diagram you might find helpful:
Here’s what ‘ctpres’ had to say about his installation,
Somehow we usually forget to leave an outside light on during daytime exploring and come home to a dark porch, fumble with keys and finally get in.
Problem solved: Added wireless remote control to awning strip lights. Two bonus features from this project, now we can remotely dim/brighten the lights and in an emergency they will flash, all from the same key fob.
Installation so easy, just cut wire to light, hot wires to input, light wires to output – observe polarity and mount with a couple screws or double stick tape.
Via: ctpres


Thanks Tracy! Glad you found the article helpful.
Alot of vary good information better than trailer life magazine
Hey Ricky,
That sounds like a neat idea. I can’t think of a reason off the top of my head why it wouldn’t work. Are you thinking of making some duct work to reroute the warm air under the chassis?
Is it possible to use the heat coming from the heater vent outside to heat the underside of your RV?
We are very happy to hear that you enjoy our site! 4 years is enough time to get most of the modifications you should ever need done on your RV!
This site is super for me. 4 years and counting to retire, sell the house and go full time on the road.