How To Build A DIY Bug Guard For Your Motorhome
While driving down the road, the front of your rig gets covered in bugs and debris. It can be challenging to clean it all off, and it may even chip your paint.
There are some products on the market intended to help this problem. Some RVers have used their skills to build their own bug guard as well.
Commercial bug screens
The placement of headlights and the shape of motorhomes vary from model to model. You can imagine that makes standard commercial products difficult to produce. Most of the products intended to solve this issue look just like the bras you can get for cars or trucks.
FIA makes a Universal Motor Home Bug Screen that can be purchased online and installed using the included stick-on fasteners.
There is one disadvantage to all of these solutions. They all require something to be attached to the front of your motorhome, whether it be removable stick-on fasteners or permanently screwed on twist fasteners. There aren’t many people who relish the thought of drilling holes in their new motorhome’s face to keep the bugs off.
Do It Yourself Bug Guard
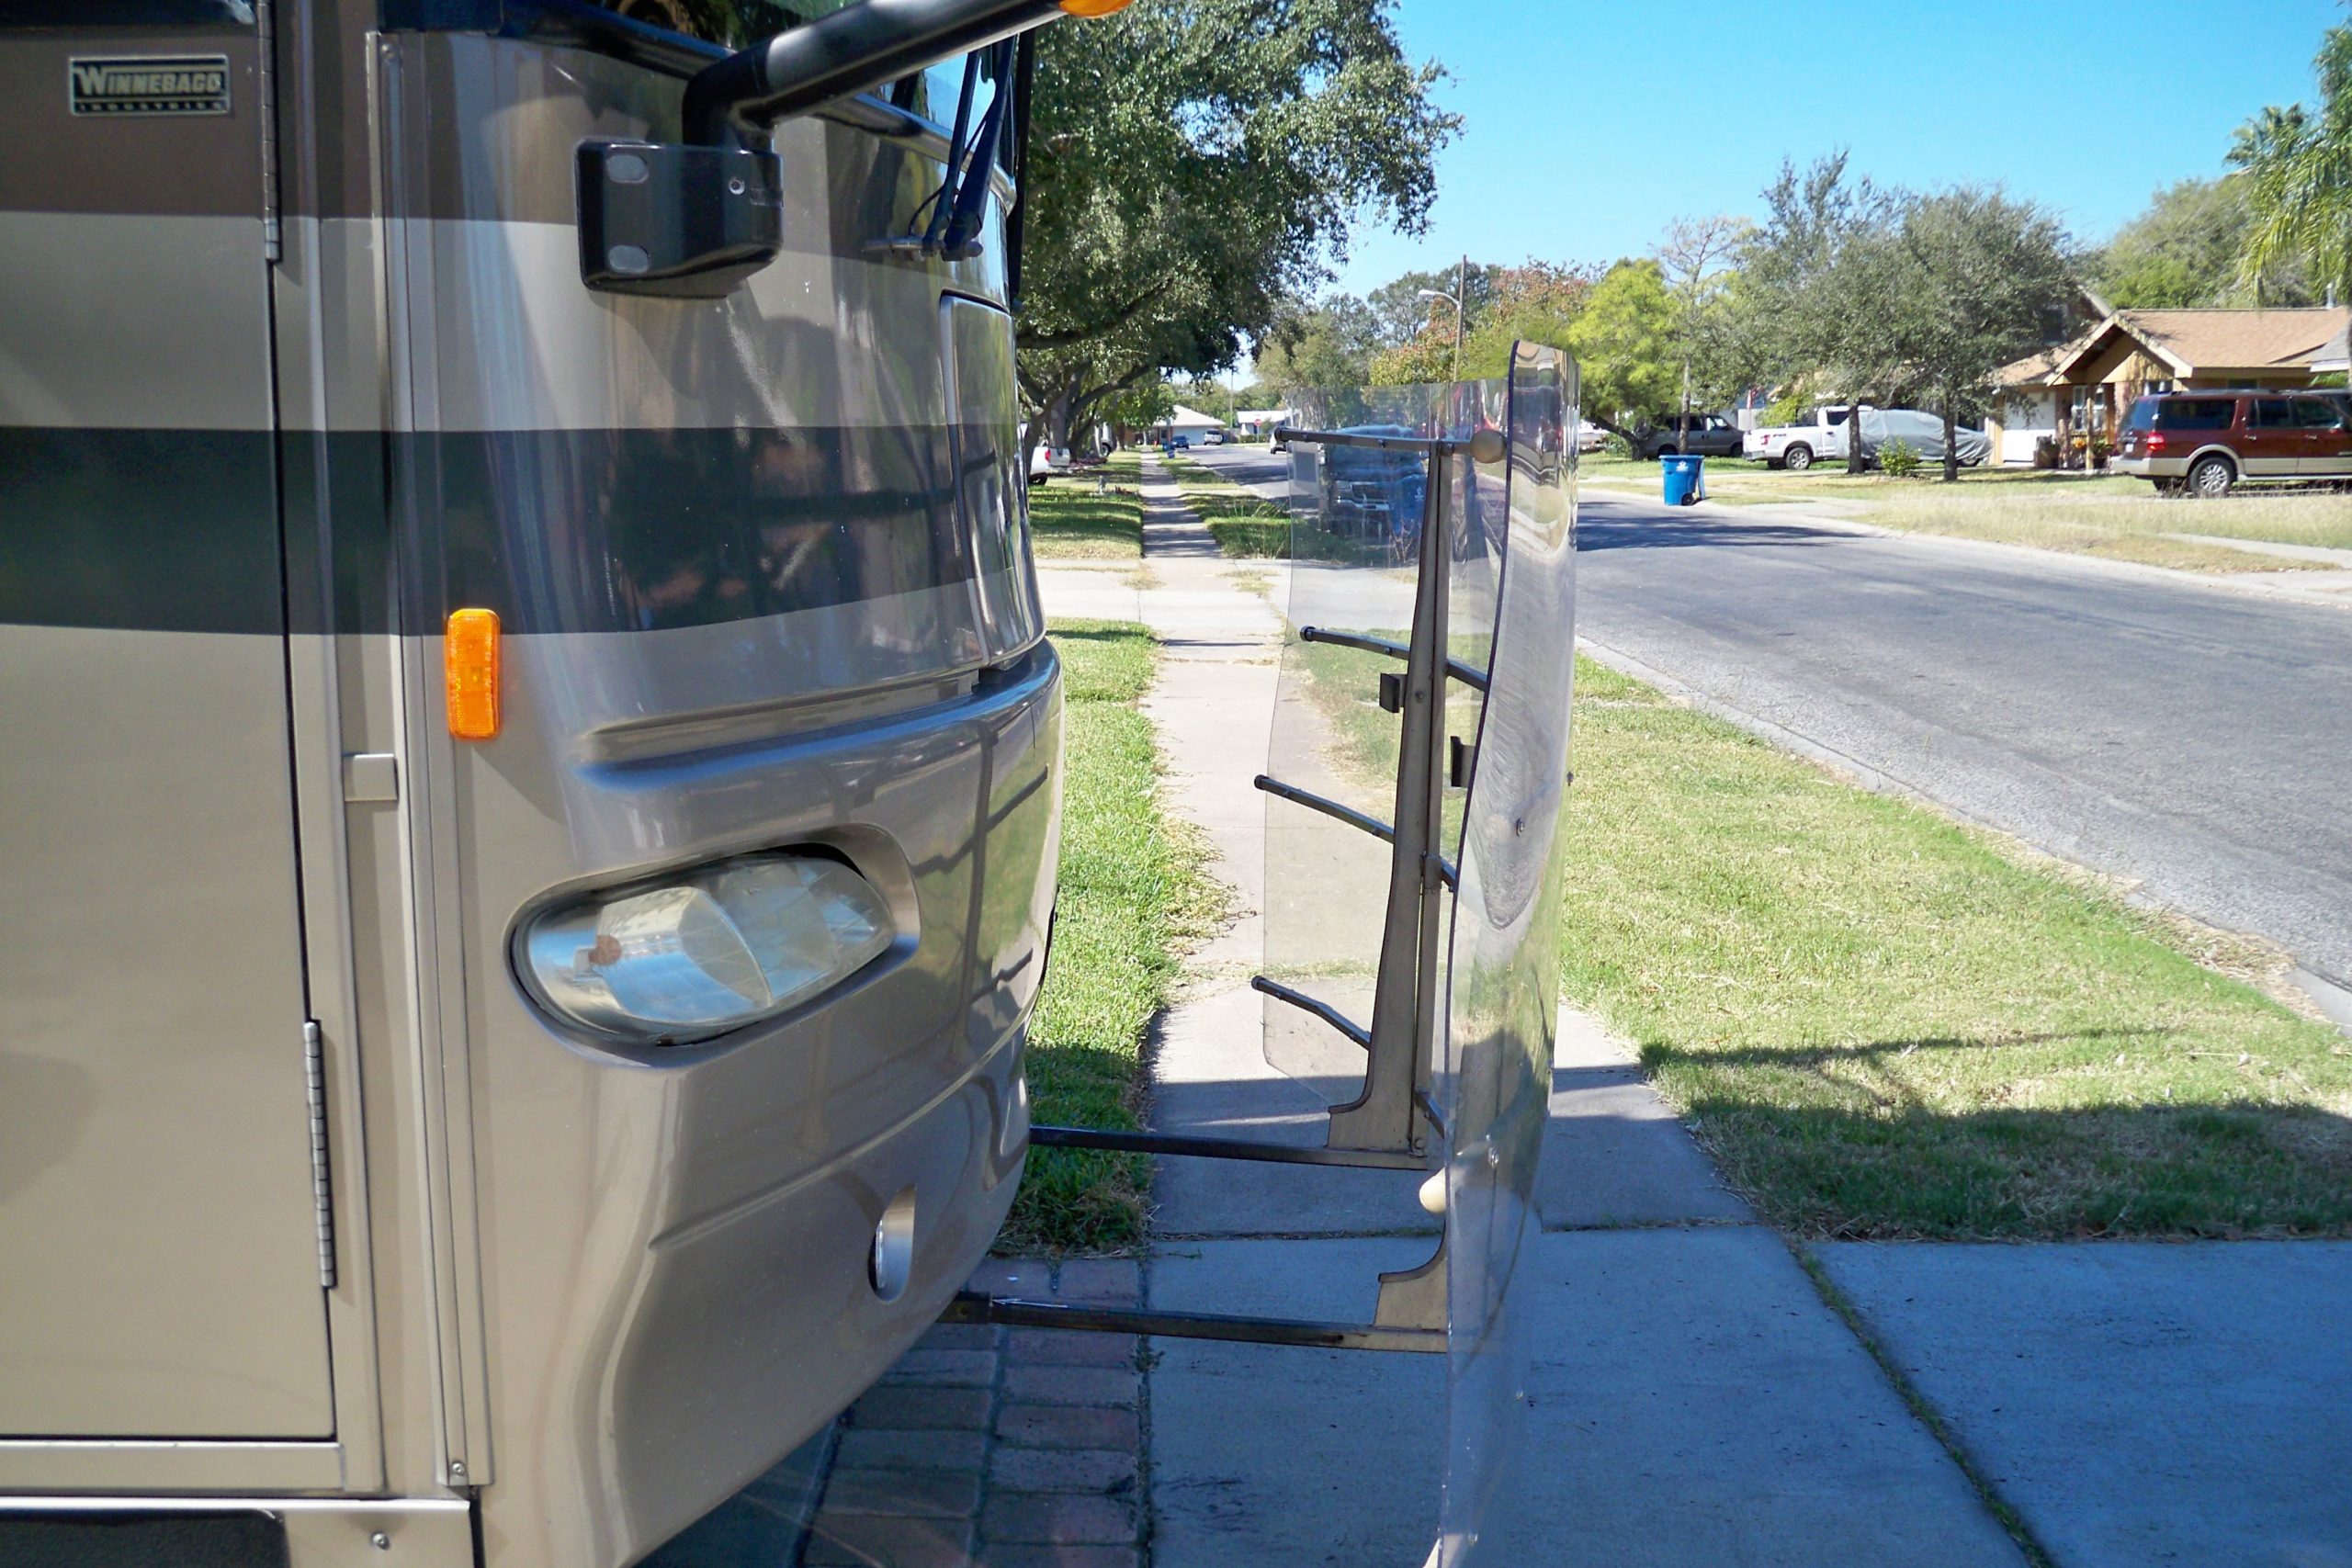
Peter Colby, an RVer from Texas, decided to make his own bug guard.
“The reason I built this was to stop damage to the paint job on our Winnebago and not have anything permanently mounted to the front,” Peter stated in an email.
He has a diesel pusher, so the engine is located in the back while his generator is in the front. The generator support brackets gave him a nice spot to mount the bug guard. Below are some photos of the build, including the materials used in the product.
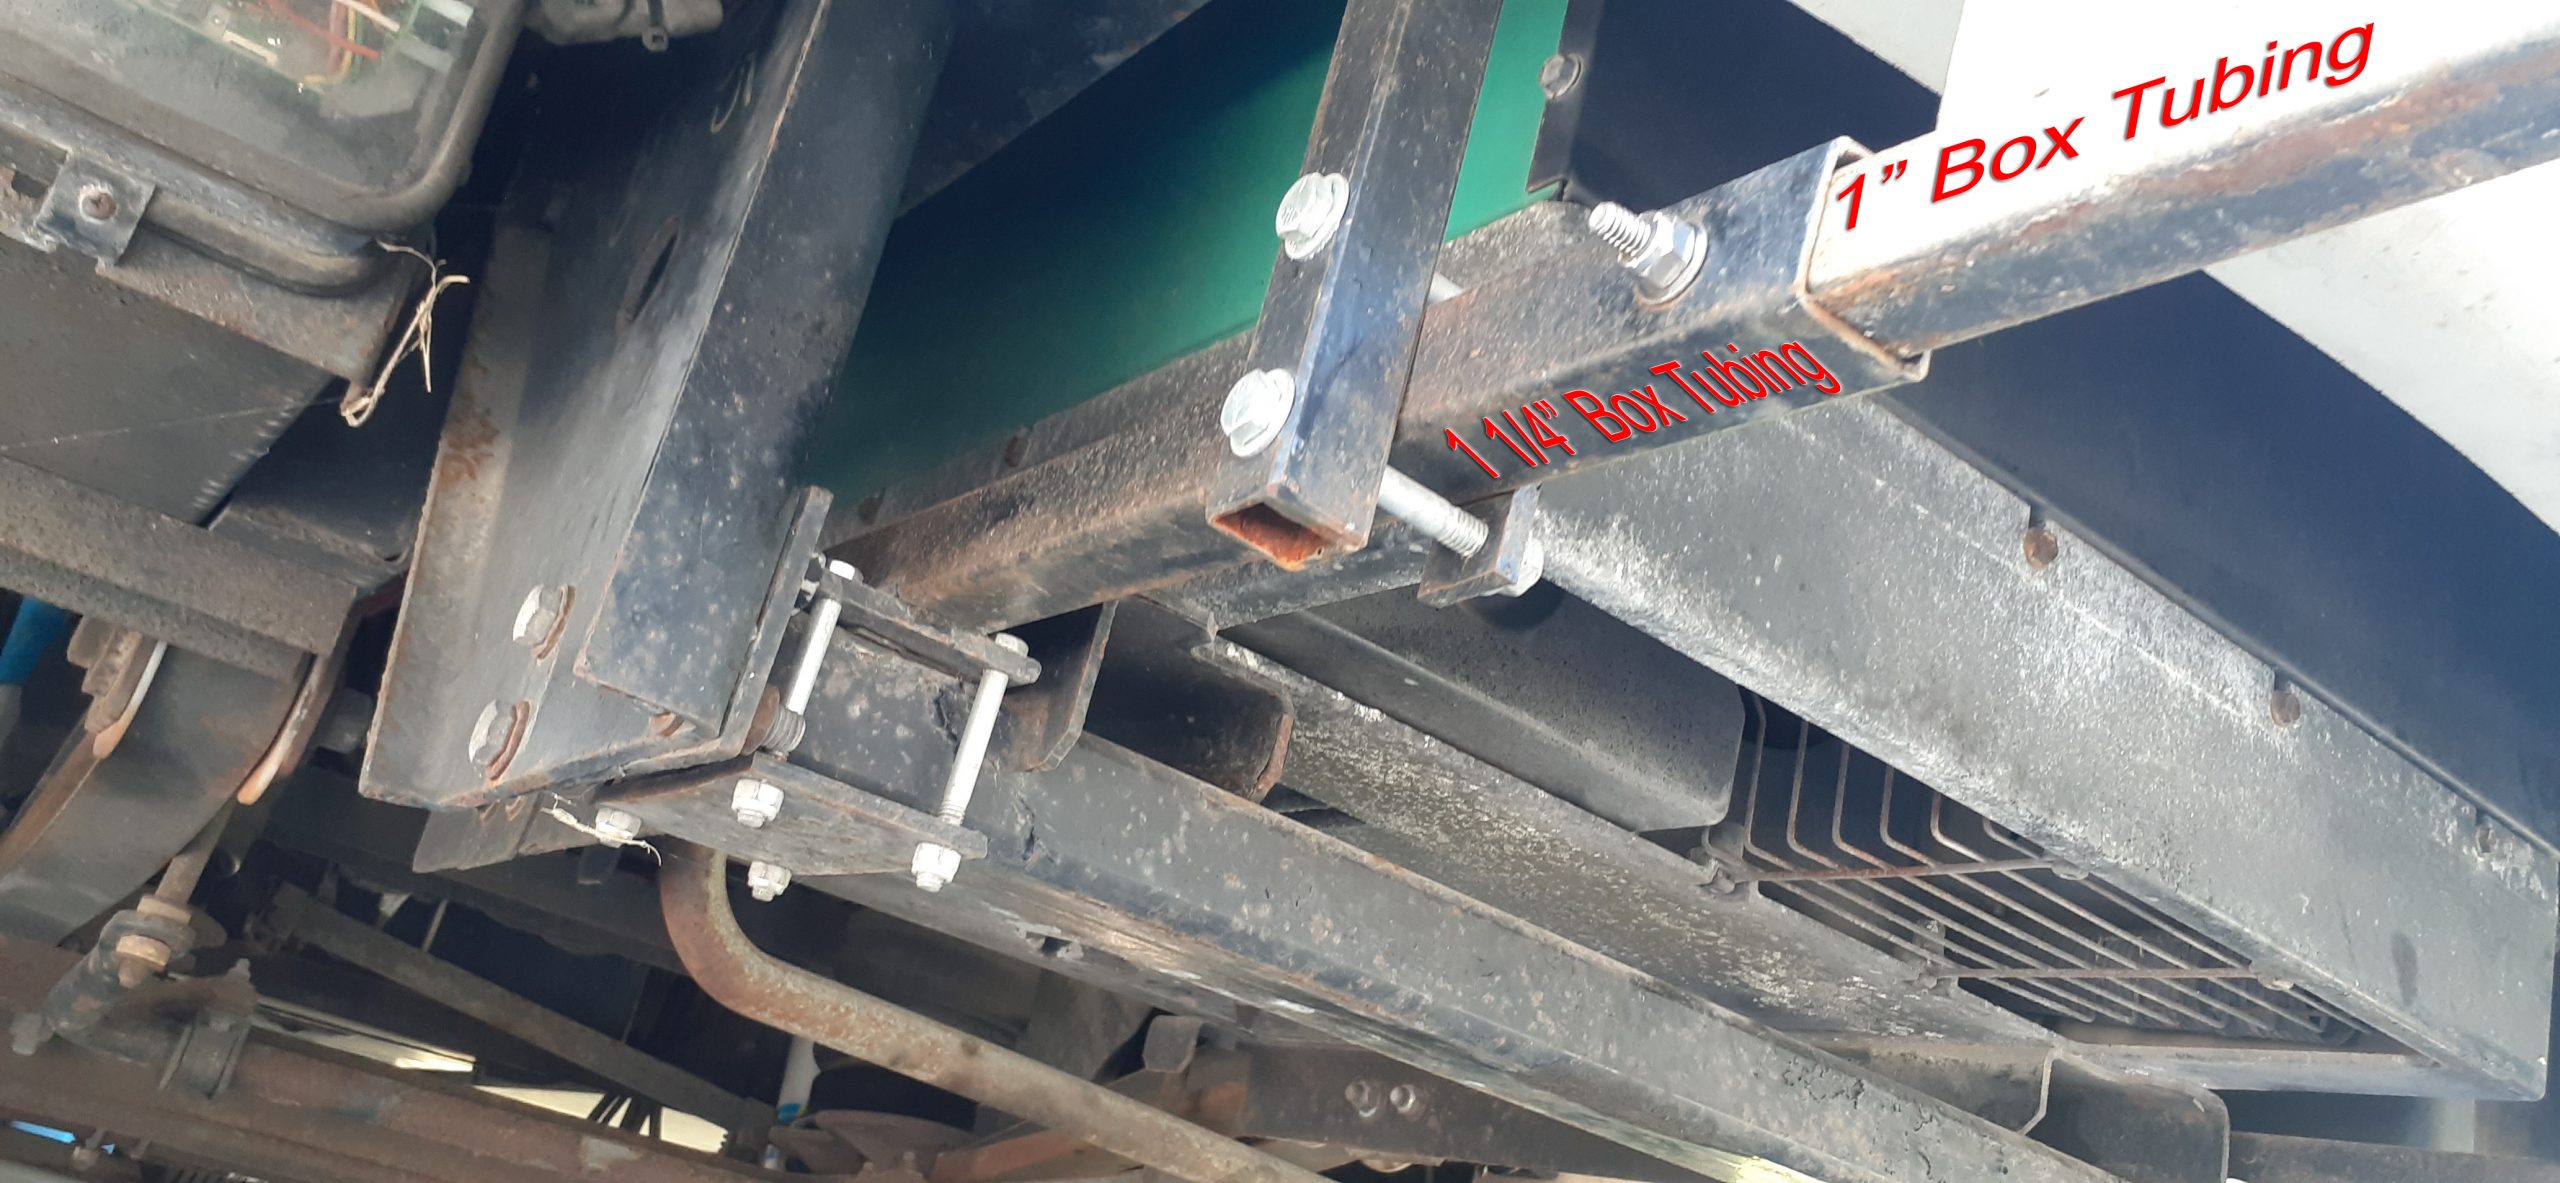
In the photo above, you will notice 1 ¼” box tubing was bolted to the generator support. This allows a second piece of 1″ box tubing to slide in and out. The 1″ tubing is locked in place with a ¼” X 2″ nut and bolt.
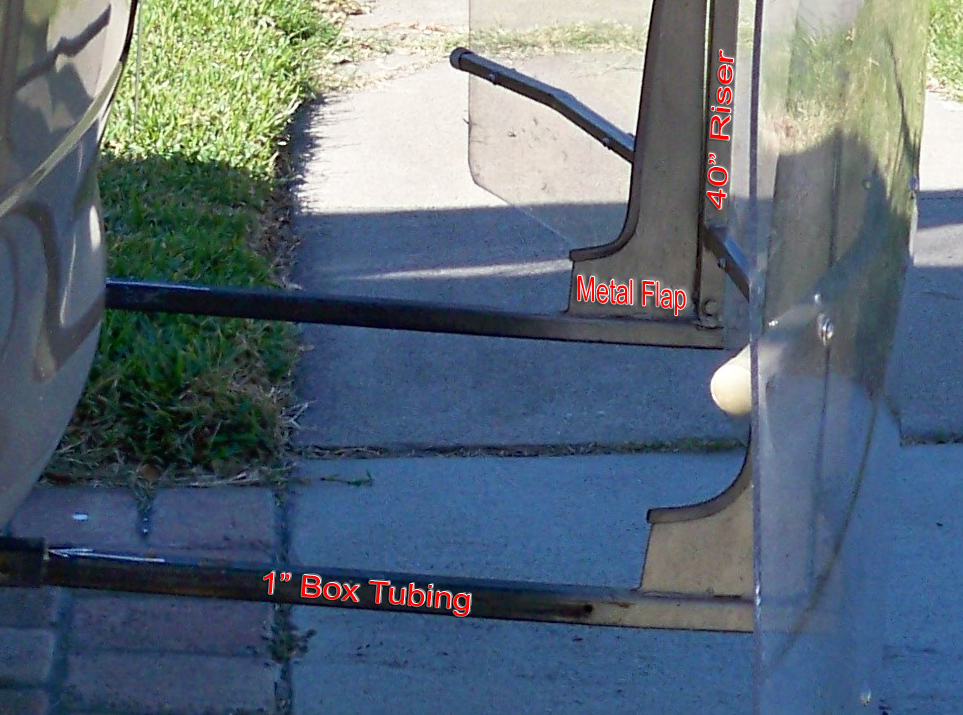
A 40” riser was welded onto the 1” box tubing, and the metal flaps you see in the photo were welded on to prevent the riser from bending or flexing backward while driving.
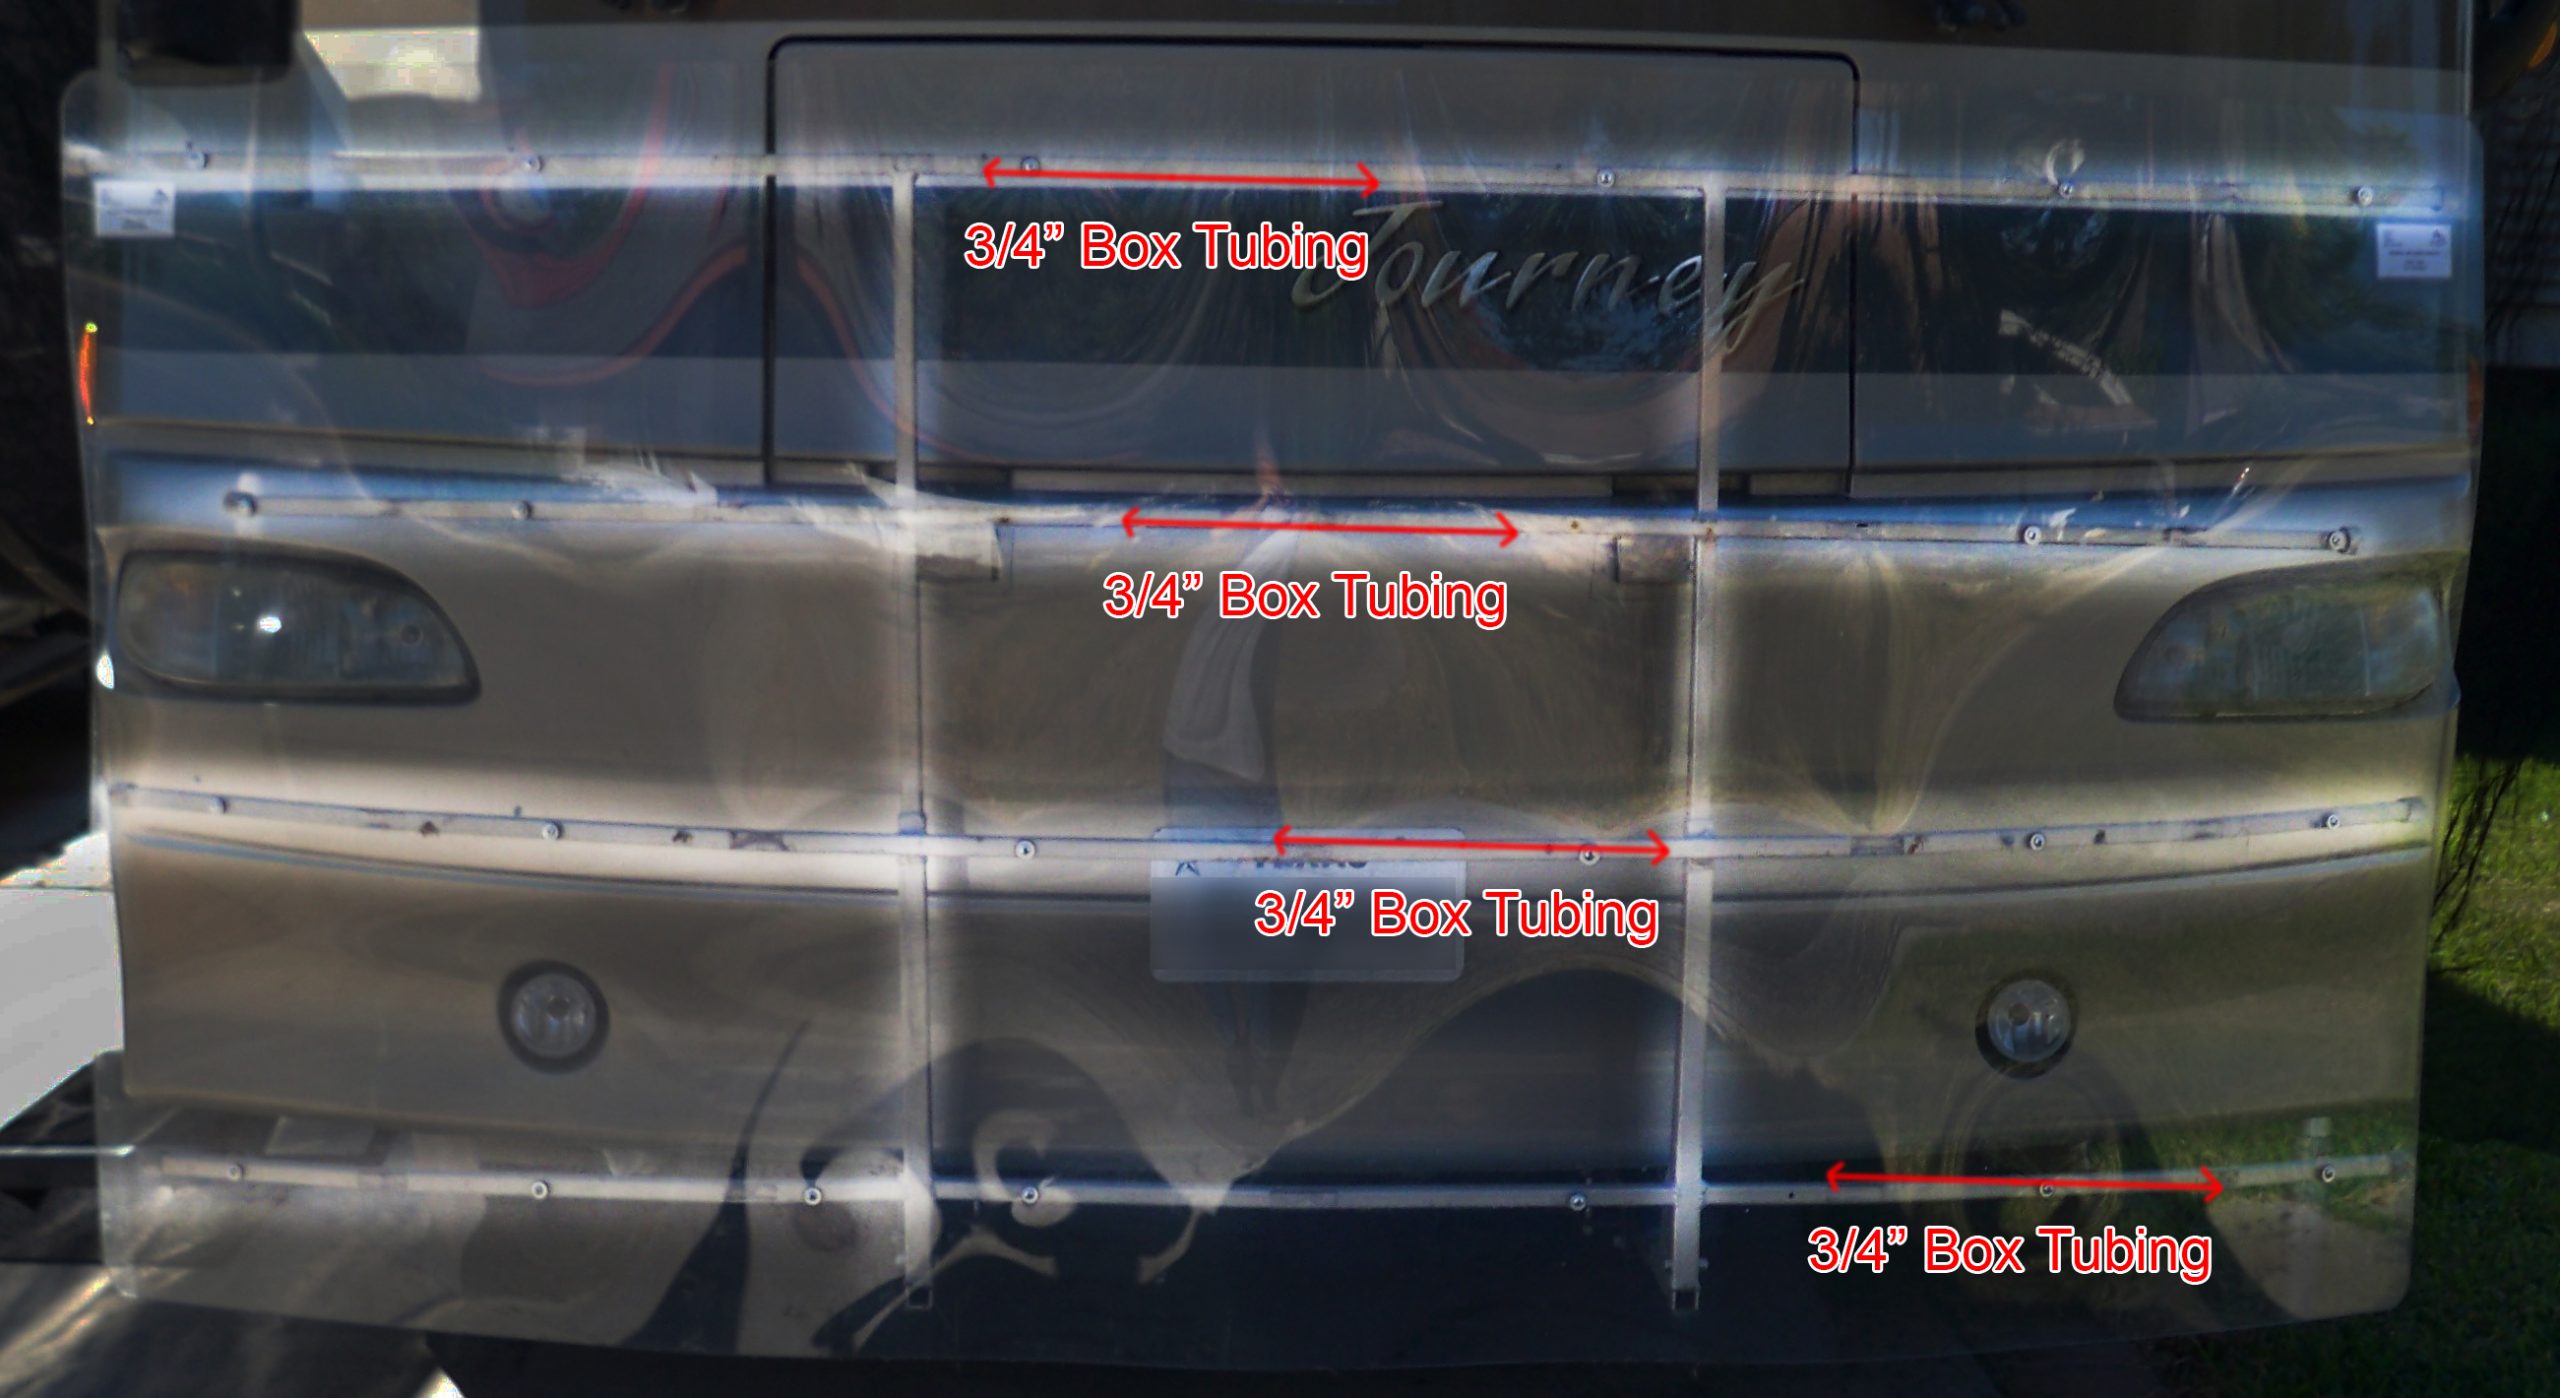
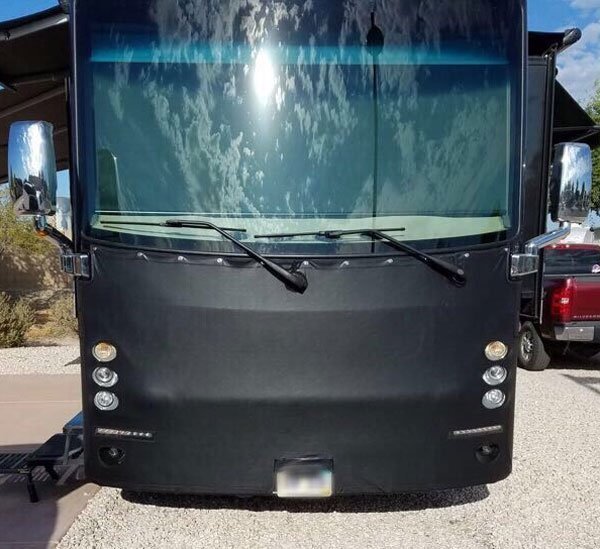
To attach the 4 X 8 sheet of 3/16” polycarbonate plastic, four horizontal pieces of ¾” box tubing were welded to the 40” risers. They were bent to fit the shape of the motorhome, and holes were drilled to attach the plastic via screws and washers.
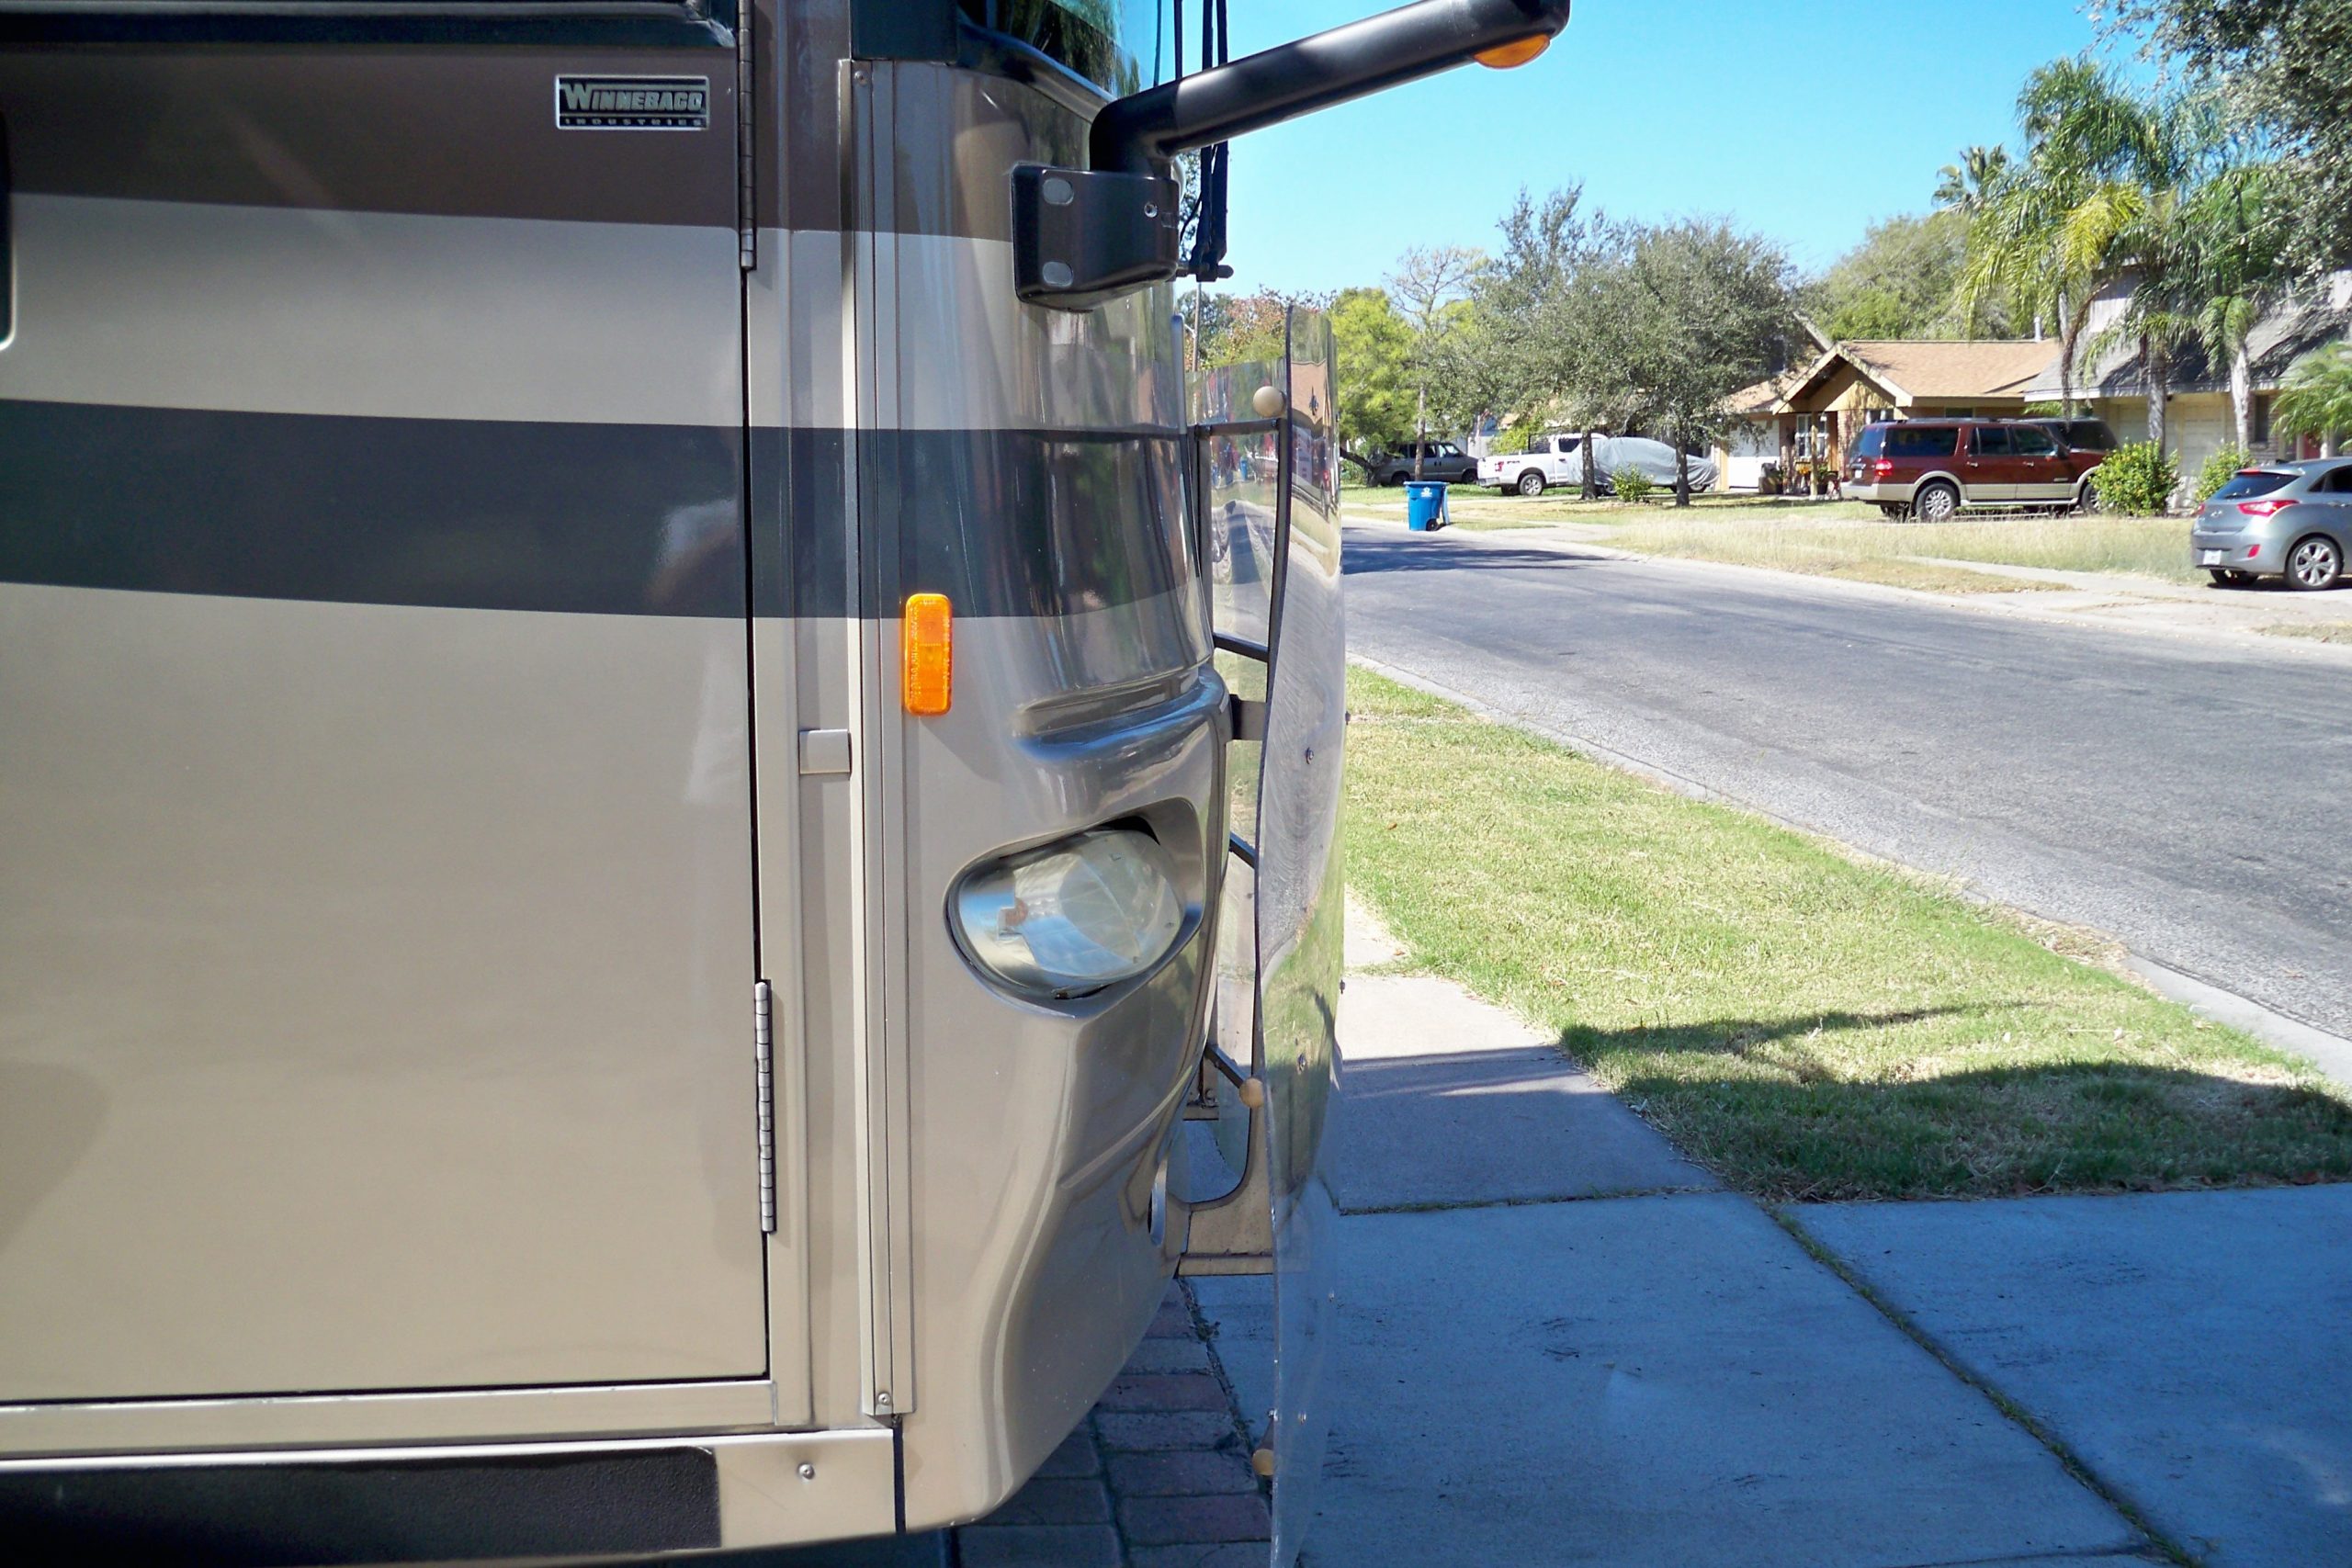
The results look great, and the setup looks quite durable. According to Peter, “I did this setup over two years ago, works fine no issues and no more chips.” He has made a similar bug guard for a friend’s travel trailer as well.
Join the community
Looking for some do-it-yourself inspiration for your next RV project? Join the iRV2.com forums to find a whole community of RVers who love to share their ideas, tips, tricks, and modifications. If you are a veteran DIYer, the community would love to hear your ideas as well.