
Easy DIY Motorhome Repairs That Anyone Can Do
While we come from a family of carpenters, we ourselves aren’t truly handy. Coming up on three years of RV ownership, however, has really changed that self-perspective.
As an RV owner, being able to maintain a budget and still accomplish the occasional motorhome repairs is important. Anyone will tell you this who has owned an RV for any length of time!
When we sold our stick-and-bricks home, deciding which tools we needed to keep was a key factor in downsizing for the rig. Unlike many RVs, we have a single storage bay. Fortunately, we have a toy hauler, so that allows us to keep camp chairs and other bulky items inside the rig.
We opted to keep most of our small Ryobi cordless tools (drill, impact driver, etc.) as well as all the wrenches, sockets, screwdrivers, and the hammer. Along the way, other tools have crept back in, too. They have come in handy for these light RV repairs as well as other small maintenance tasks.
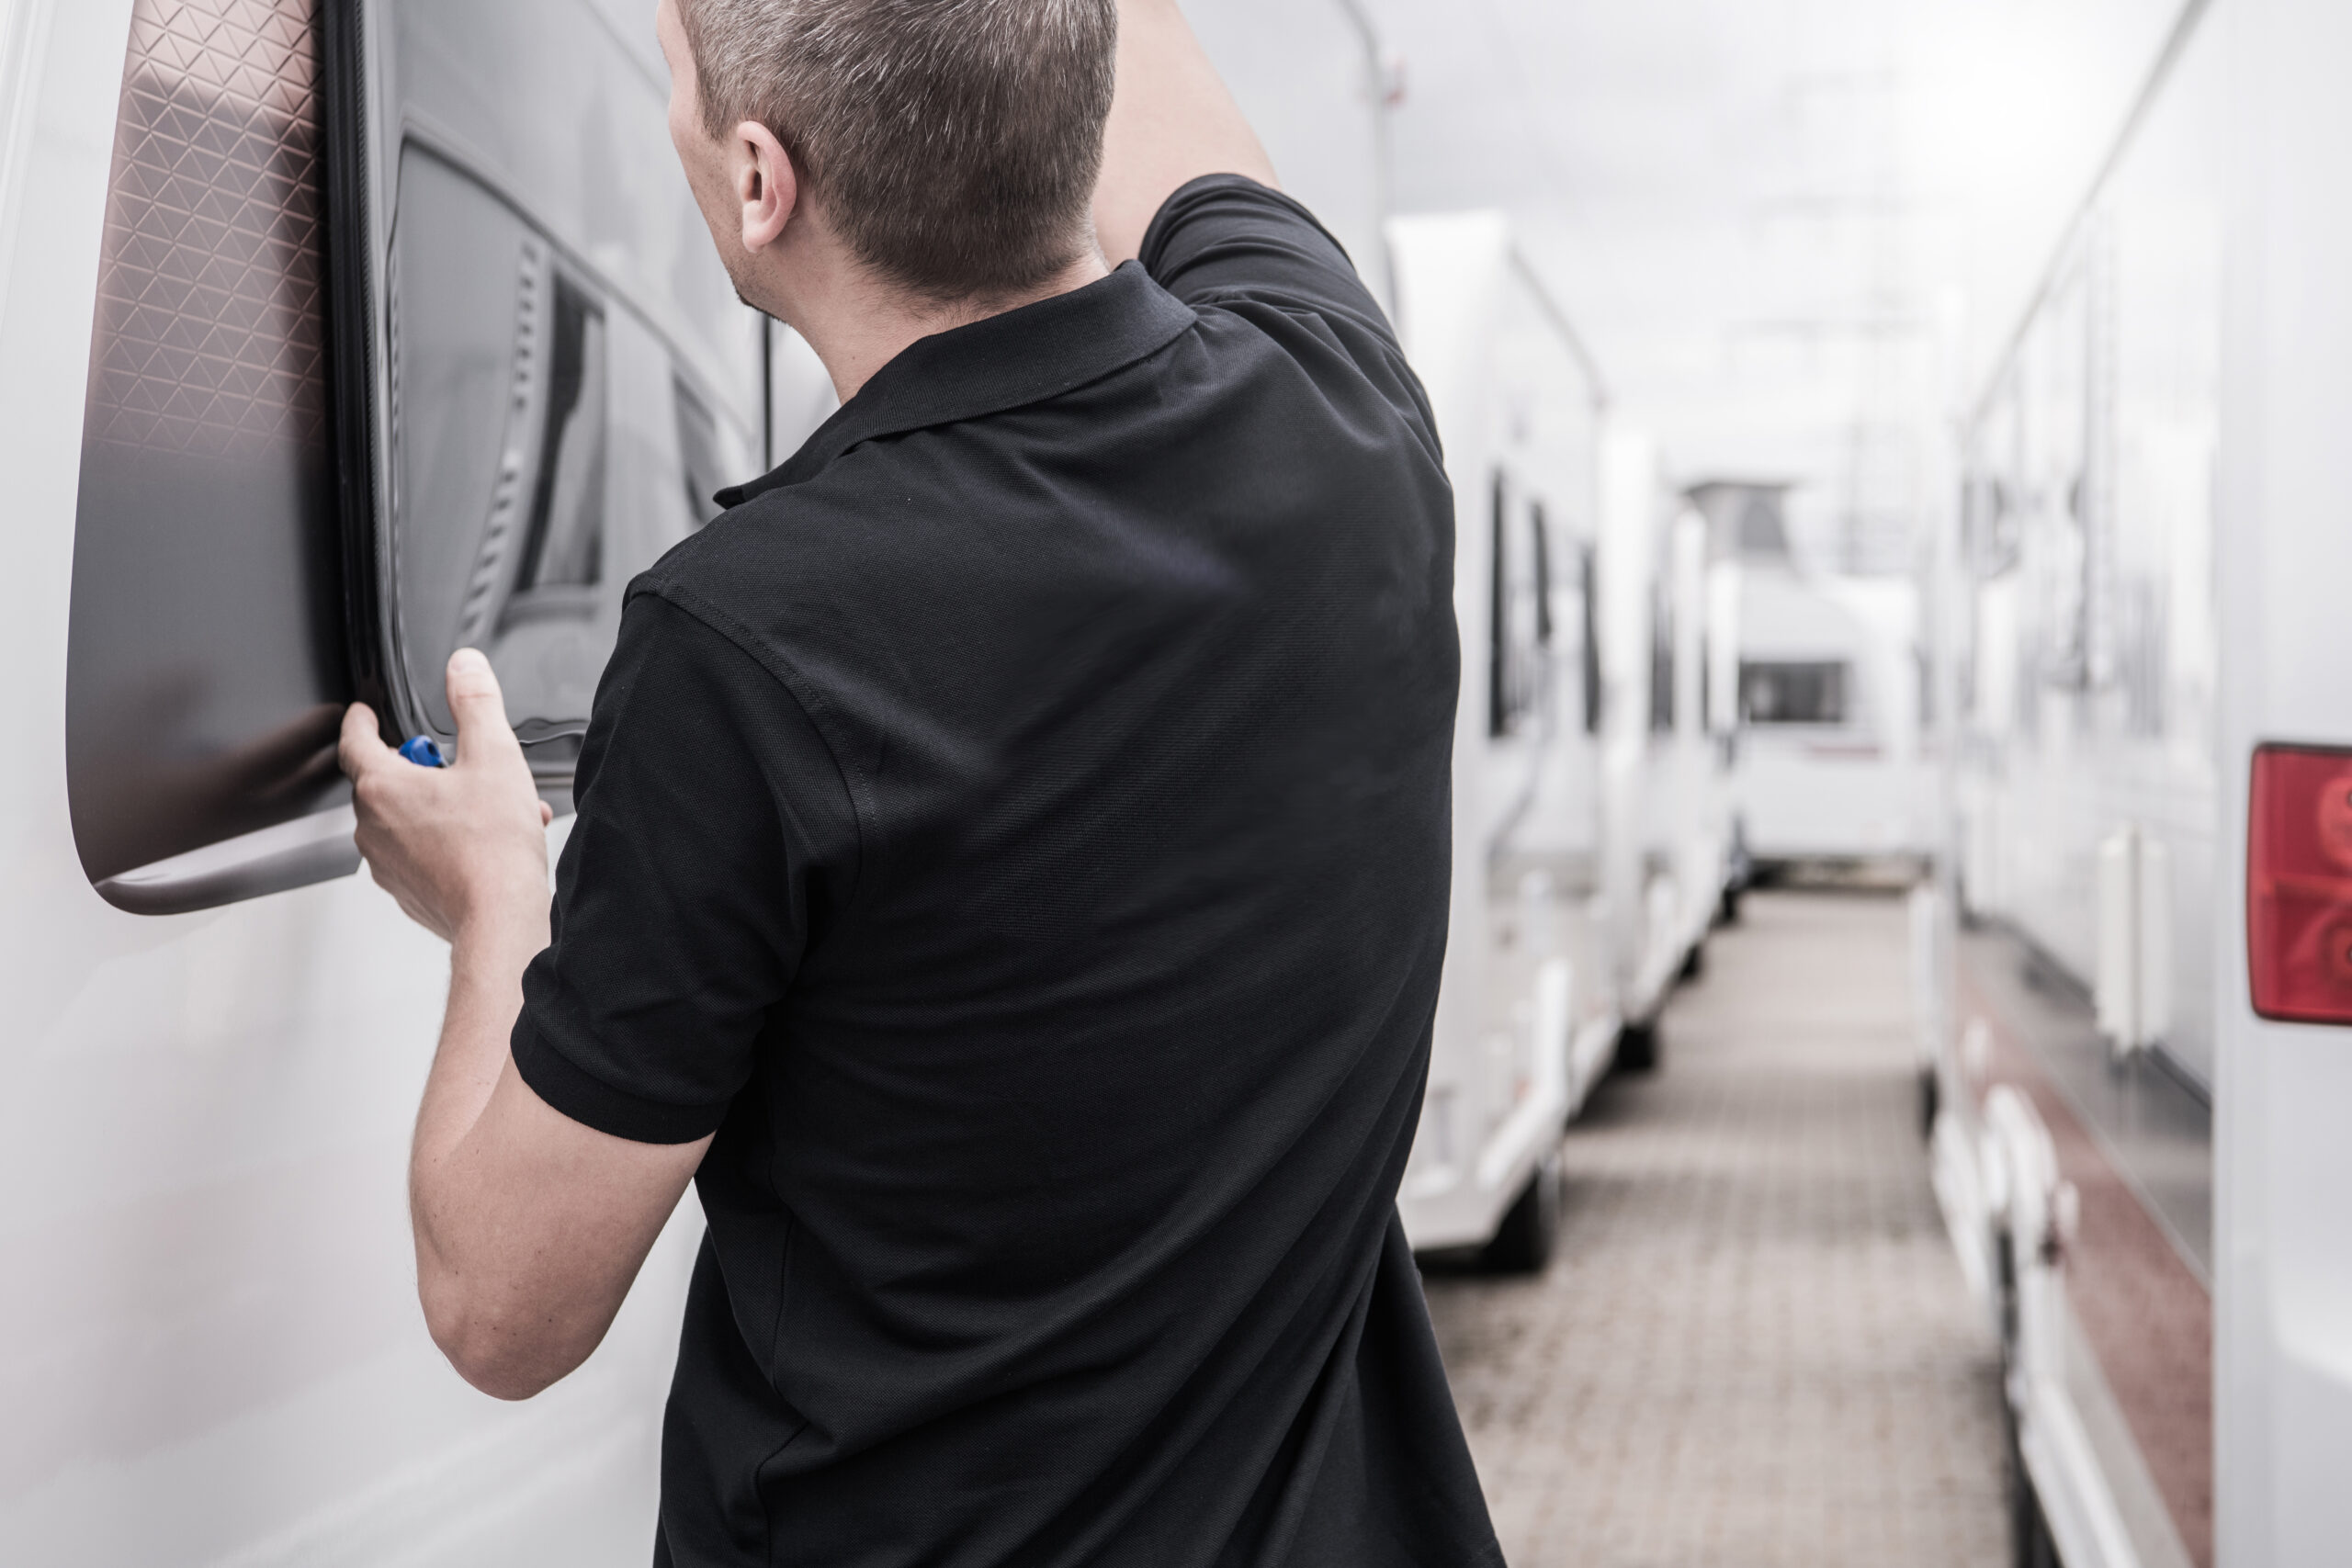
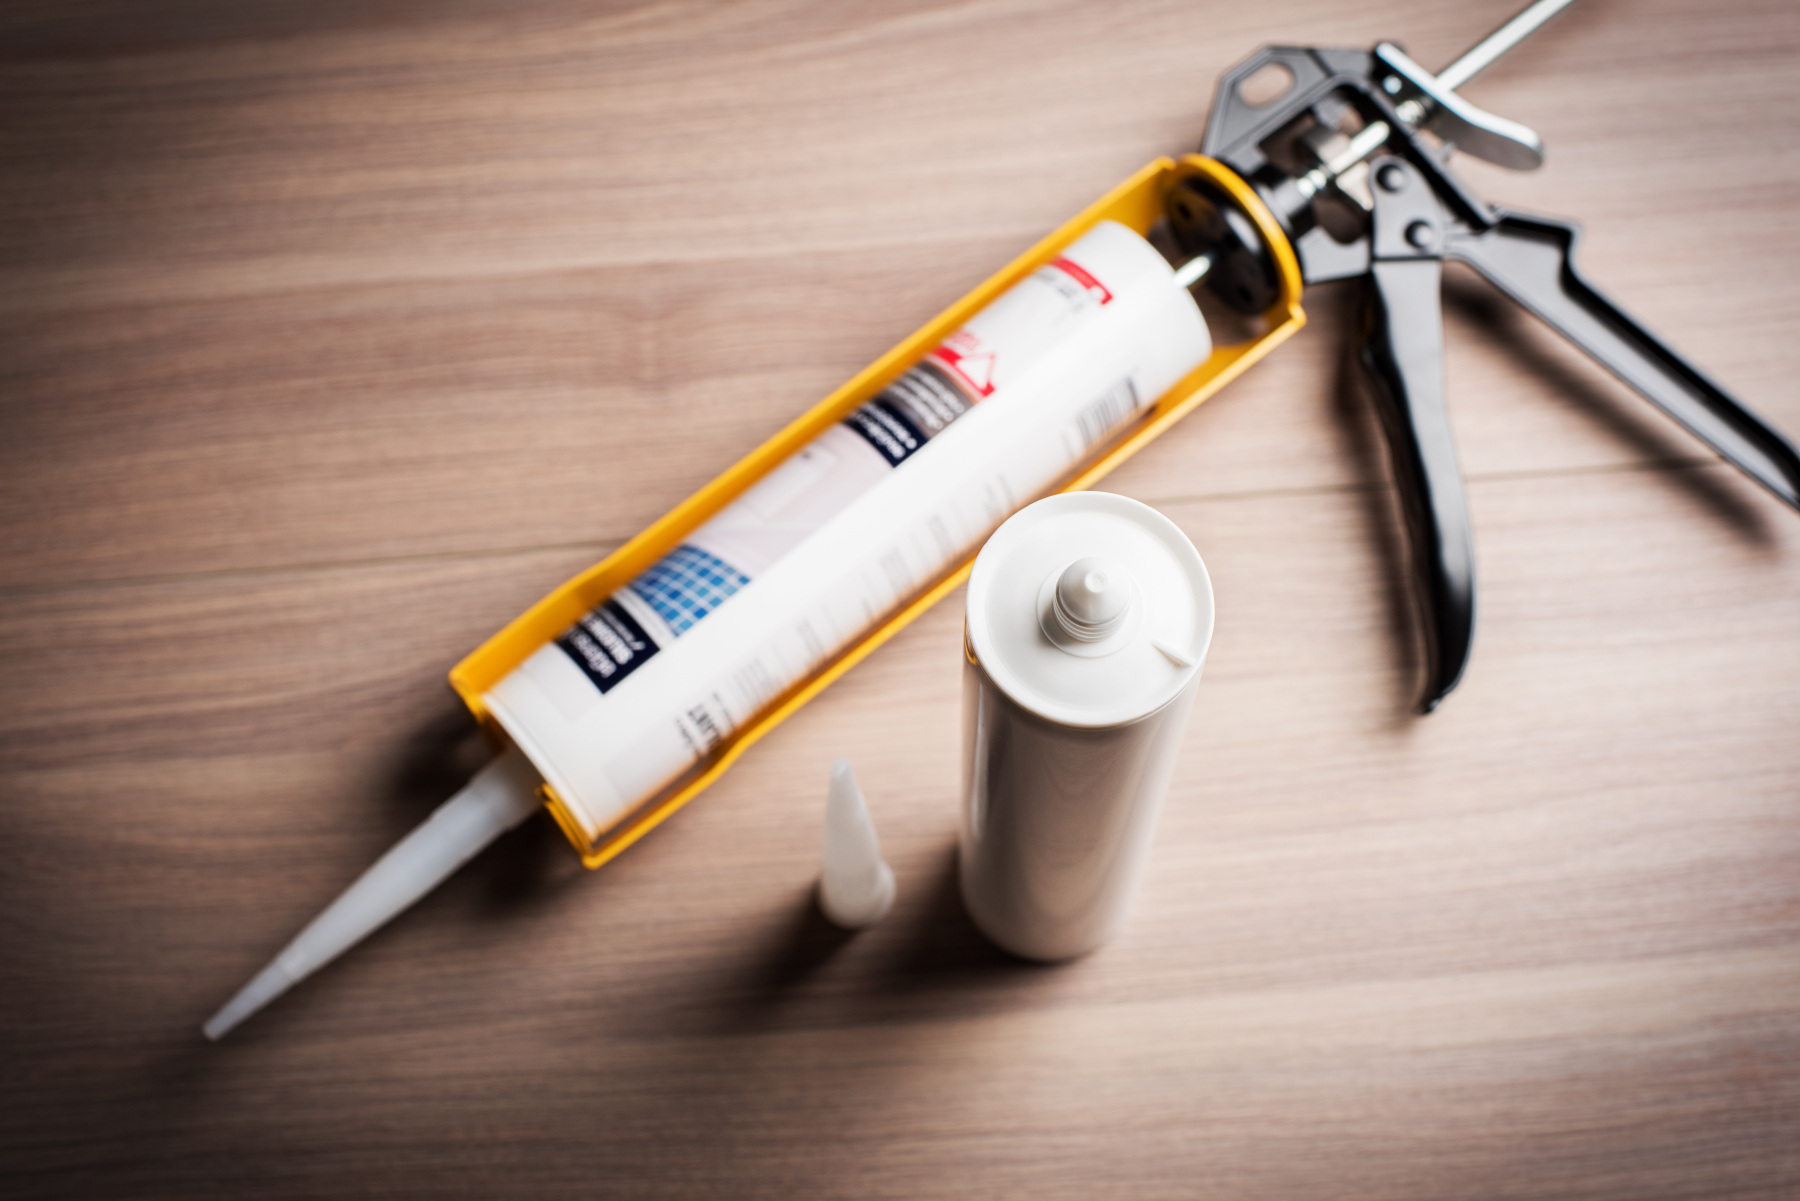
1. Re-caulking RV seals
This job falls not only under easy motorhome repairs but also routine RV maintenance. Check your seals! They’re everywhere on an RV: at the window frames, between any sheets of metal, between the sink and cabinet, all over!
A caulking gun is fairly light, and you can pick up the correct types of caulk at any hardware store across the country as needed. We always carry one unopened tube of silicon caulking at all times. Before re-applying new caulking, always remove the old substance and clean the area well with appropriate products to ensure the new stuff sticks and seals.
You can also place about a quarter inch of blue painter’s tape on either side of where the caulking will go before putting down your bead. After you use your finger to smear the bead to make a smooth surface, carefully remove the painter’s tape. This will reduce the spread of the caulking and keep your seals clean and attractive.
While we’re on this subject, it’s even more important to regularly check the seals on your RV’s roof. There are vents, fans, antenna mounts, wire passthroughs, and more that are probably watertight with lap sealant. If you have solar panels, it’s likely the angle bracket mounts for them also have sealant at the screw holes. There are many different types of RV roofing materials; always check with your manufacturer for the right lap sealant to use.
Please note: Lap sealant isn’t typical caulking. You will probably need to acquire caulking from an RV supply store or order online. Best to have a tube or two of this on hand before you need it.
2. Checking and tightening screws
While this might sound simple, it too falls under maintenance and can prevent a greater problem. Walk around your rig and have a screwdriver (not a drill) with a square bit on it and a ladder. You’ll be surprised how many screws there are! (You may or may not be surprised at how many are loose.)
While doing something else, we noticed some loose screws. On just one side of our 44’ rig, we had 28 loose (or completely missing) screws! We recommend a screwdriver instead of a drill so that you can be sure not to overtighten anything.
3. Replacing torn screens
Replacing torn screens is one of the easiest motorhome repairs. Screen material is easy to acquire and install. You’ll need that as well as a screen roller tool.
After removing the old screen, use a marker to create an outline of the same shape. Cut it out with simple scissors (if you bought plastic screening), then use the roller tool to replace the rubber gasket and screen back into the frame. It takes a little practice, but after you’ve done it once, it’s fairly easy to do the remaining times.
4. Fixing simple power issues
Some power issues are also easy motorhome repairs, but they require a diagnosis. Many times, the problem is simply a blown DC fuse or a tripped AC breaker, or possibly even a tripped GFCI, which might just require pressing the Reset button on your primary GFCI outlet.
In the case of fuses, most modern fuses allow you to visually inspect the fuse for burnout. Simply replace that fuse with another of the same amperage. Resetting a breaker involves flipping it all the way off, then back on again.
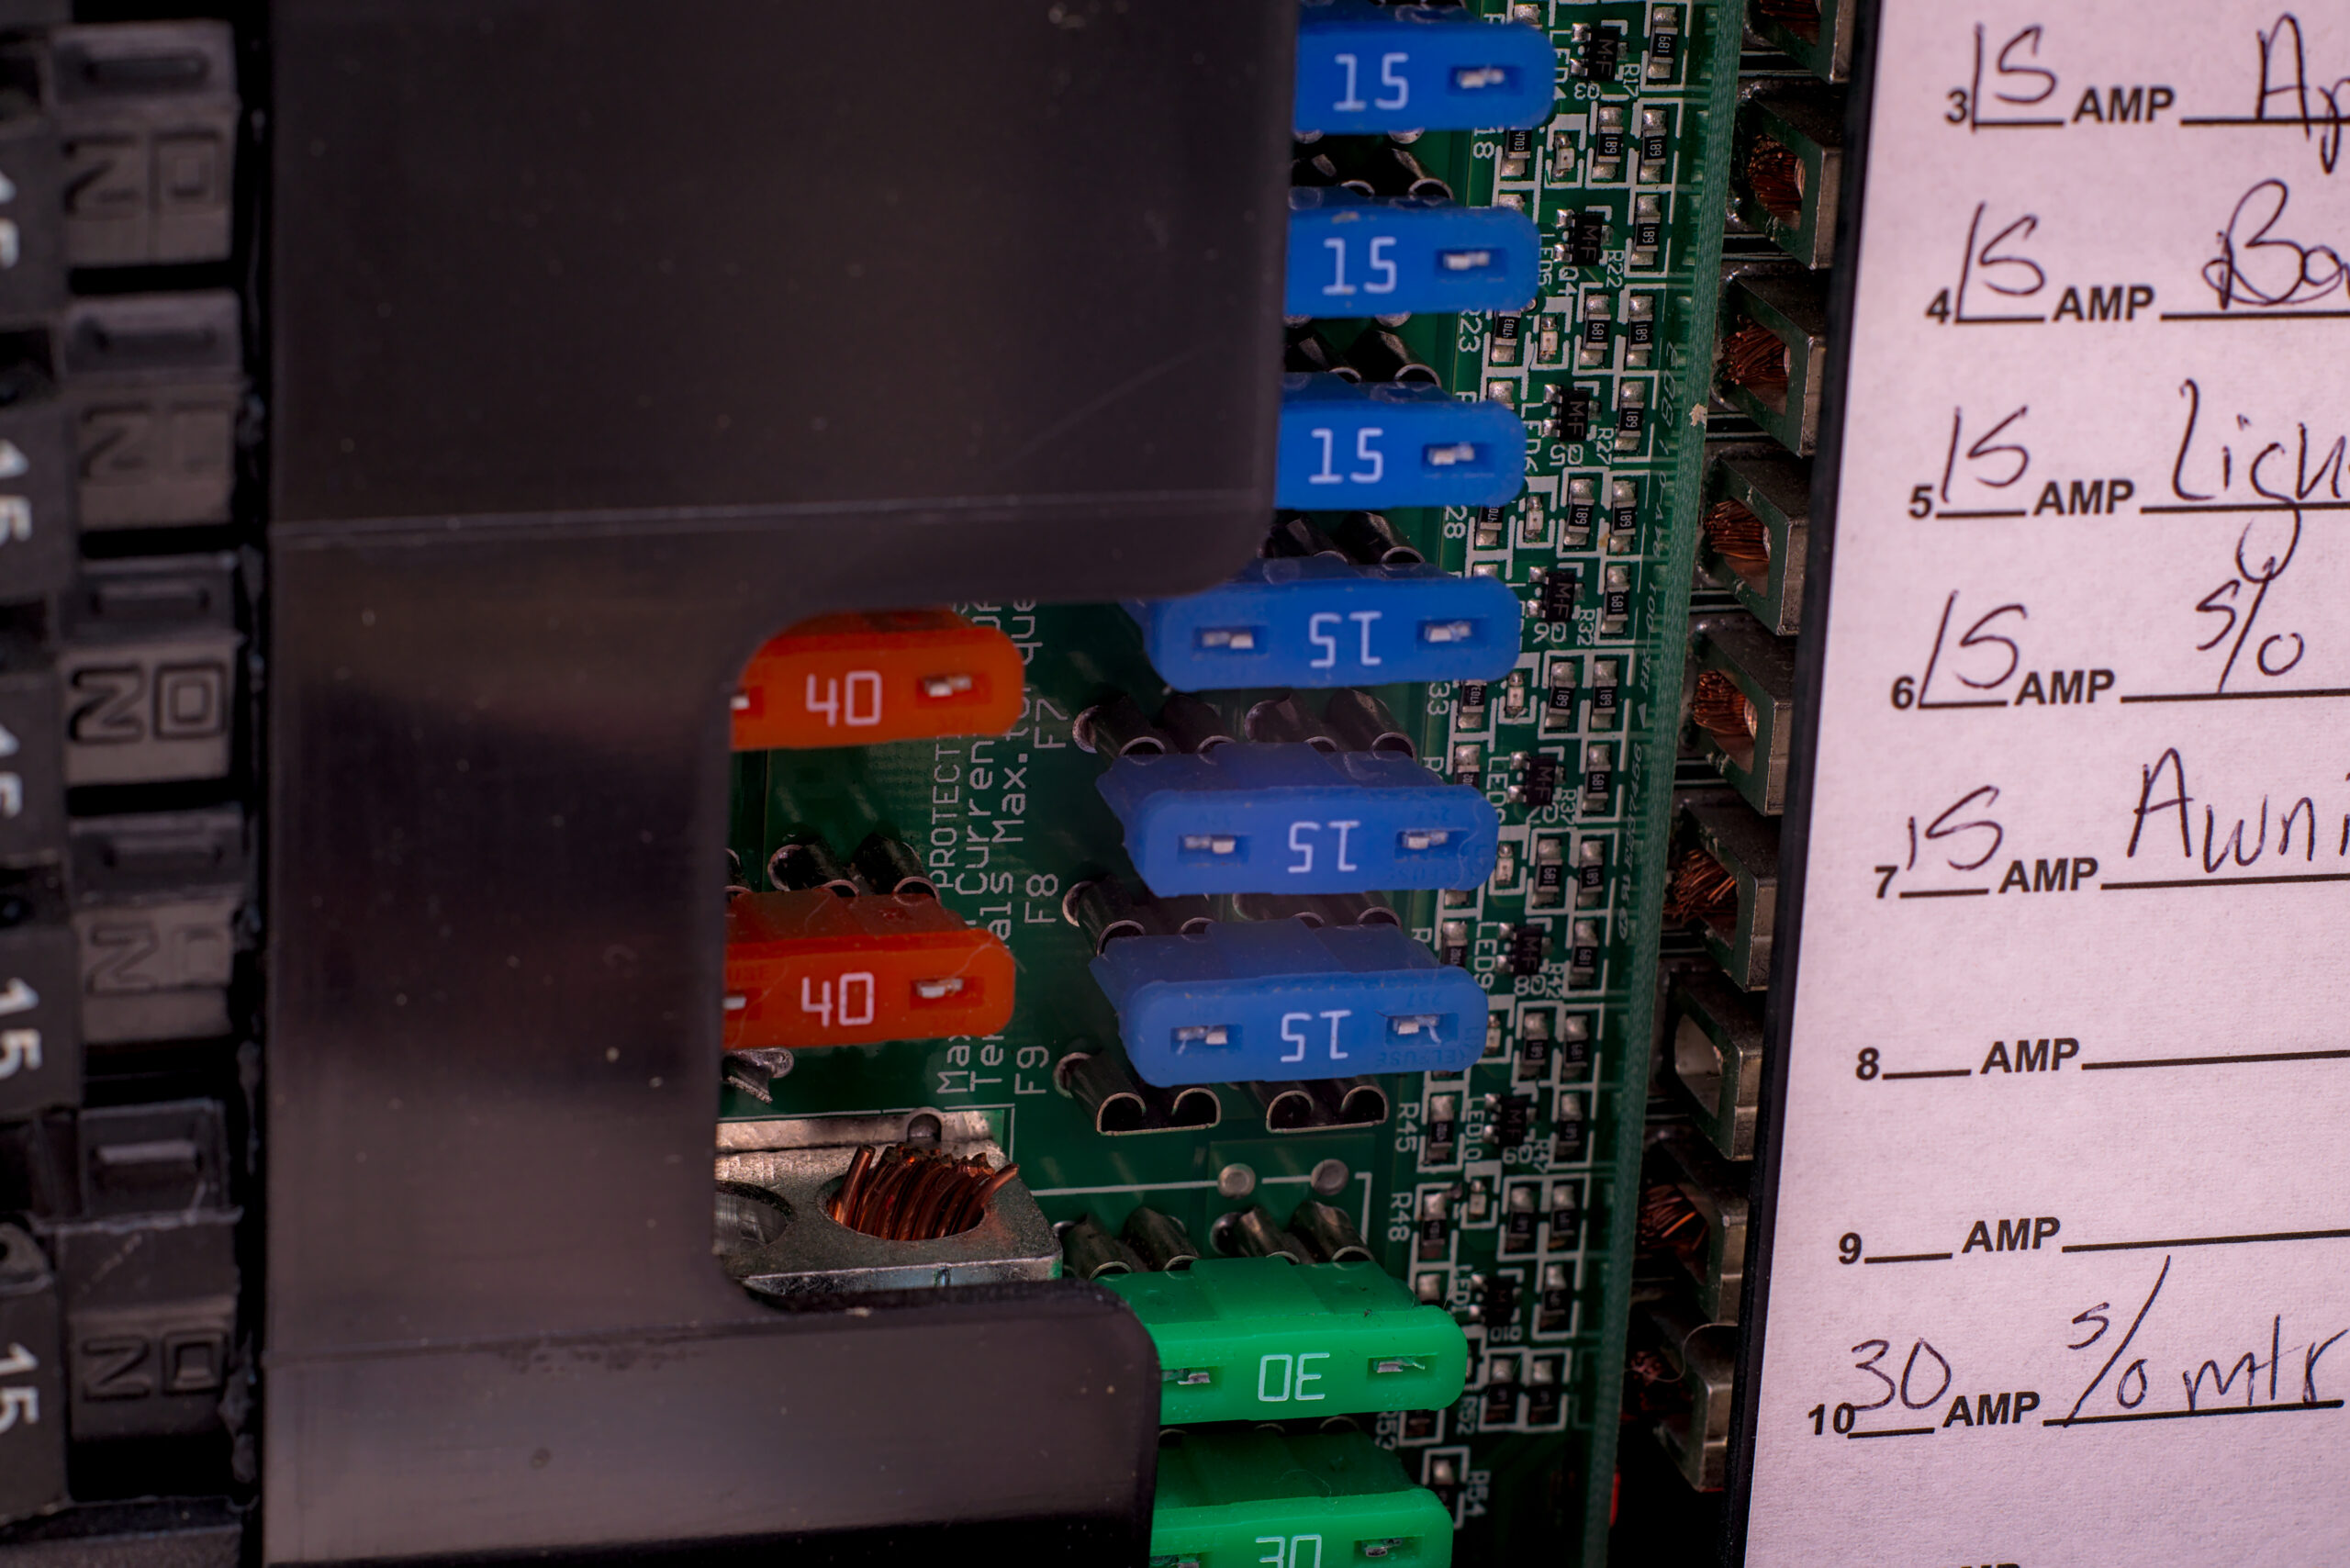
If you continue to blow the same fuse or trip the same breaker repeatedly, you have a larger problem such as a bad appliance or wiring that is worn down (usually against metal) or even gnawed at by rodents. In those cases, it is best to have a licensed electrician or RV tech resolve the issue. Continuing to replace fuses or resetting breakers can easily lead to fires, as a short circuit generates heat.
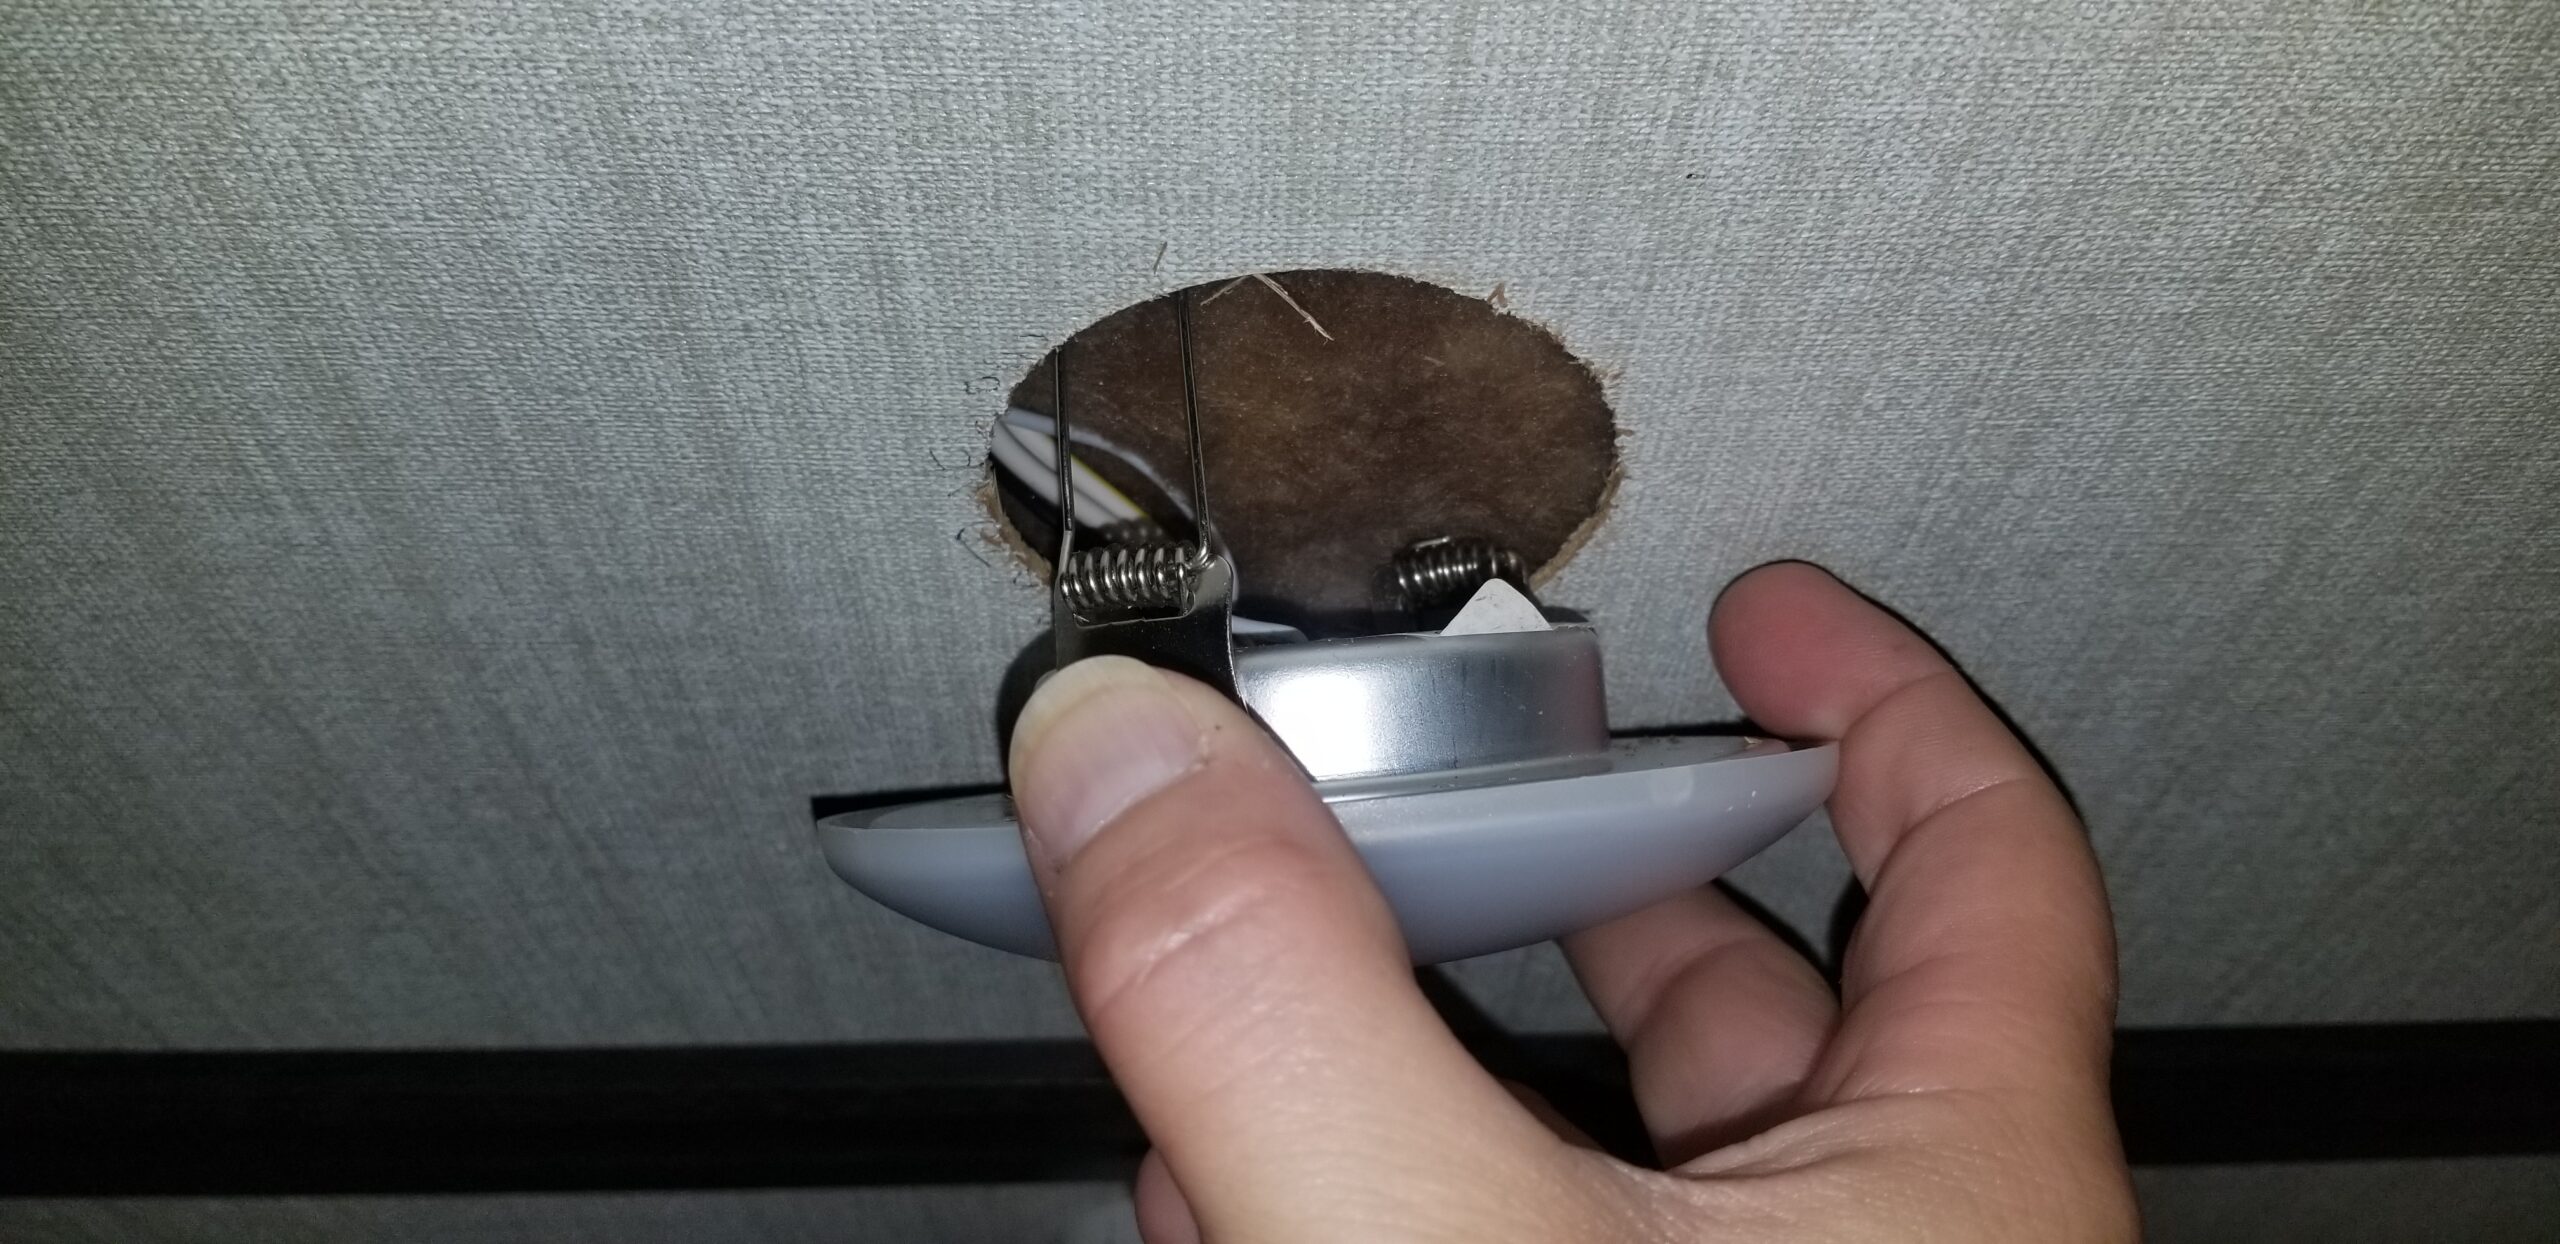
5. Replacing burned-out DC light fixtures
Most modern RVs use LED lights for inside illumination. Most of them are built the same way, too. They have two spring clips on the side that (much like a mouse trap, watch your fingers) are squeezed into an upright position, placed inside the hole in your ceiling, and then released to secure them in place.
Removing those lights is simply a matter of pulling them down (or carefully prying them out). As you do this, you’ll meet resistance while you’re bringing the springs into a more upright position. When you get the light loose enough, it will come out, but watch your fingers.
Once you wiggle the light fixture down, ensure your fingers are on the opposite sides from the springs! Then just label the wires if necessary for positive and negative and remove them from the light. Attach the new light to the wires, squeeze the springs, and put it back into the ceiling.
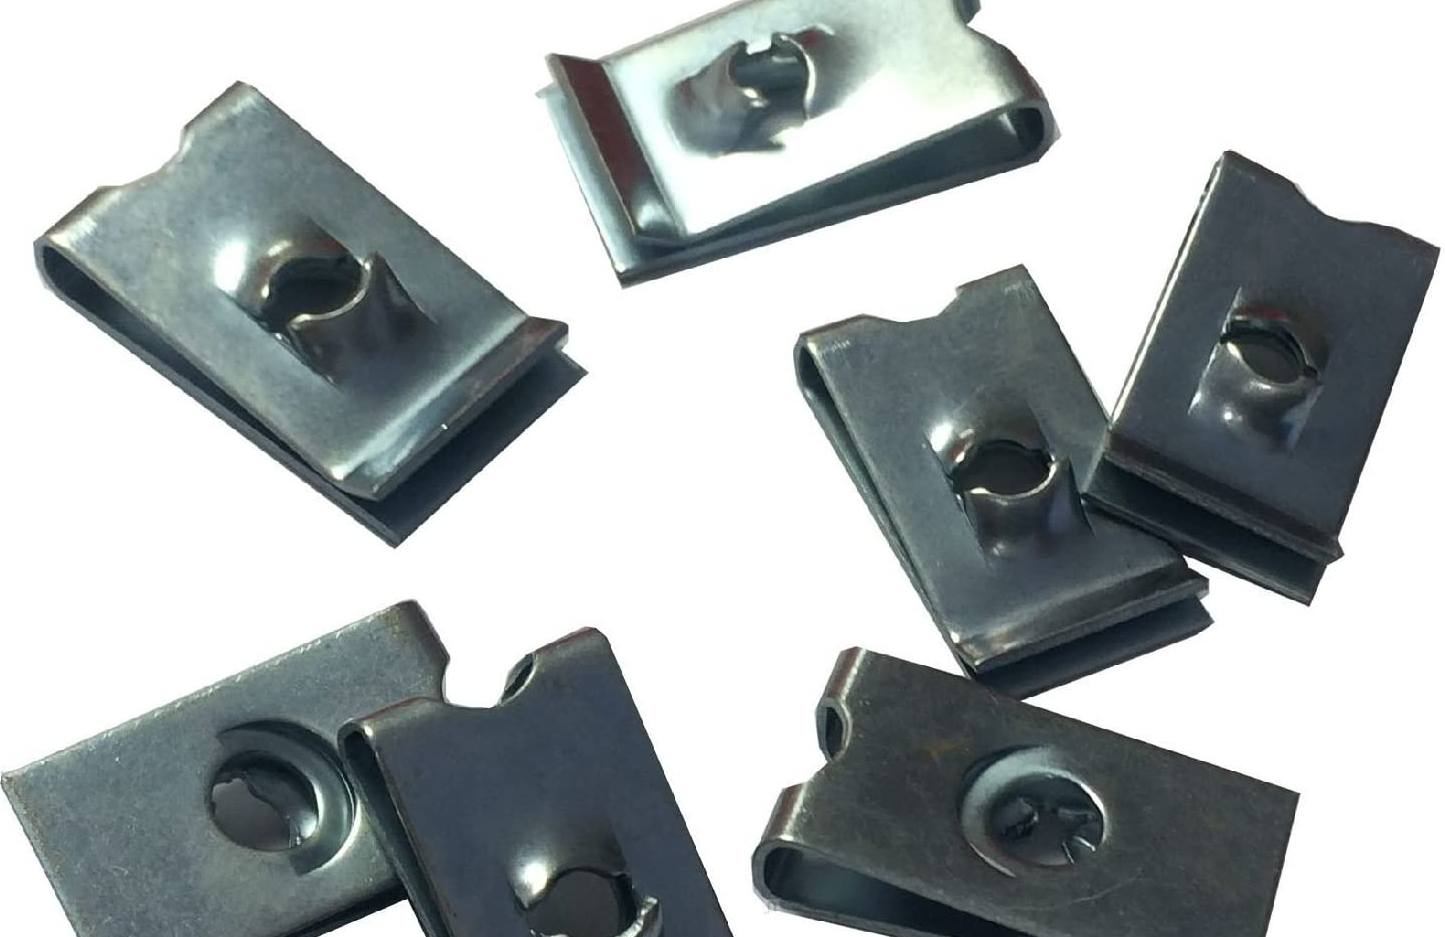
6. Securing dropped stereo speakers
This one comes from experience. Our RV has a three-zone stereo system. It has about eight speakers mounted in the ceiling. On two separate occasions, we’ve arrived at our campsite to find that one of the speakers had fallen from the hole and was dangling by the wires.
To keep weight down, most RV ceilings are built of a very thin particle board. A screw that wiggles repeatedly will eat away at that particle board. If the speaker is tightly fit, you might never notice. If the hole it is mounted in is wonky, a single loose screw may cause the entire thing to fall out, combined with the repeated earthquakes that RV relocation causes.
Remove all the screws from the speaker. Where the screw holes are in the particle board, put U nuts in place, and carefully re-mount the speaker with its screws. We say “carefully” because you might have to adjust the placement slightly as you add each screw. The two speakers we’ve done this repair to have not fallen since! There may also be many other uses for these in an RV.
7. Fixing a leaky (or spraying) faucet
Nine times out of ten, a badly running sink faucet is because the washer has become dislodged or is just old, or the tiny mesh screen inside the head is clogged or even rusty.
Sometimes a plastic or wire brush can remove or dislodge the debris or buildup. If not, removing the washer and screen from a faucet is usually a matter of unscrewing the small end cap.
If the faucet is leaking, replace the rubber washer and ensure a tight fit when replacing. If the faucet is spraying when it shouldn’t or in a direction it shouldn’t, clean the screen.
An overnight soak in a small amount of vinegar usually will remove the deposits. If it’s beyond cleaning, RV faucet filter screens are very low-cost to replace at your nearest hardware store.
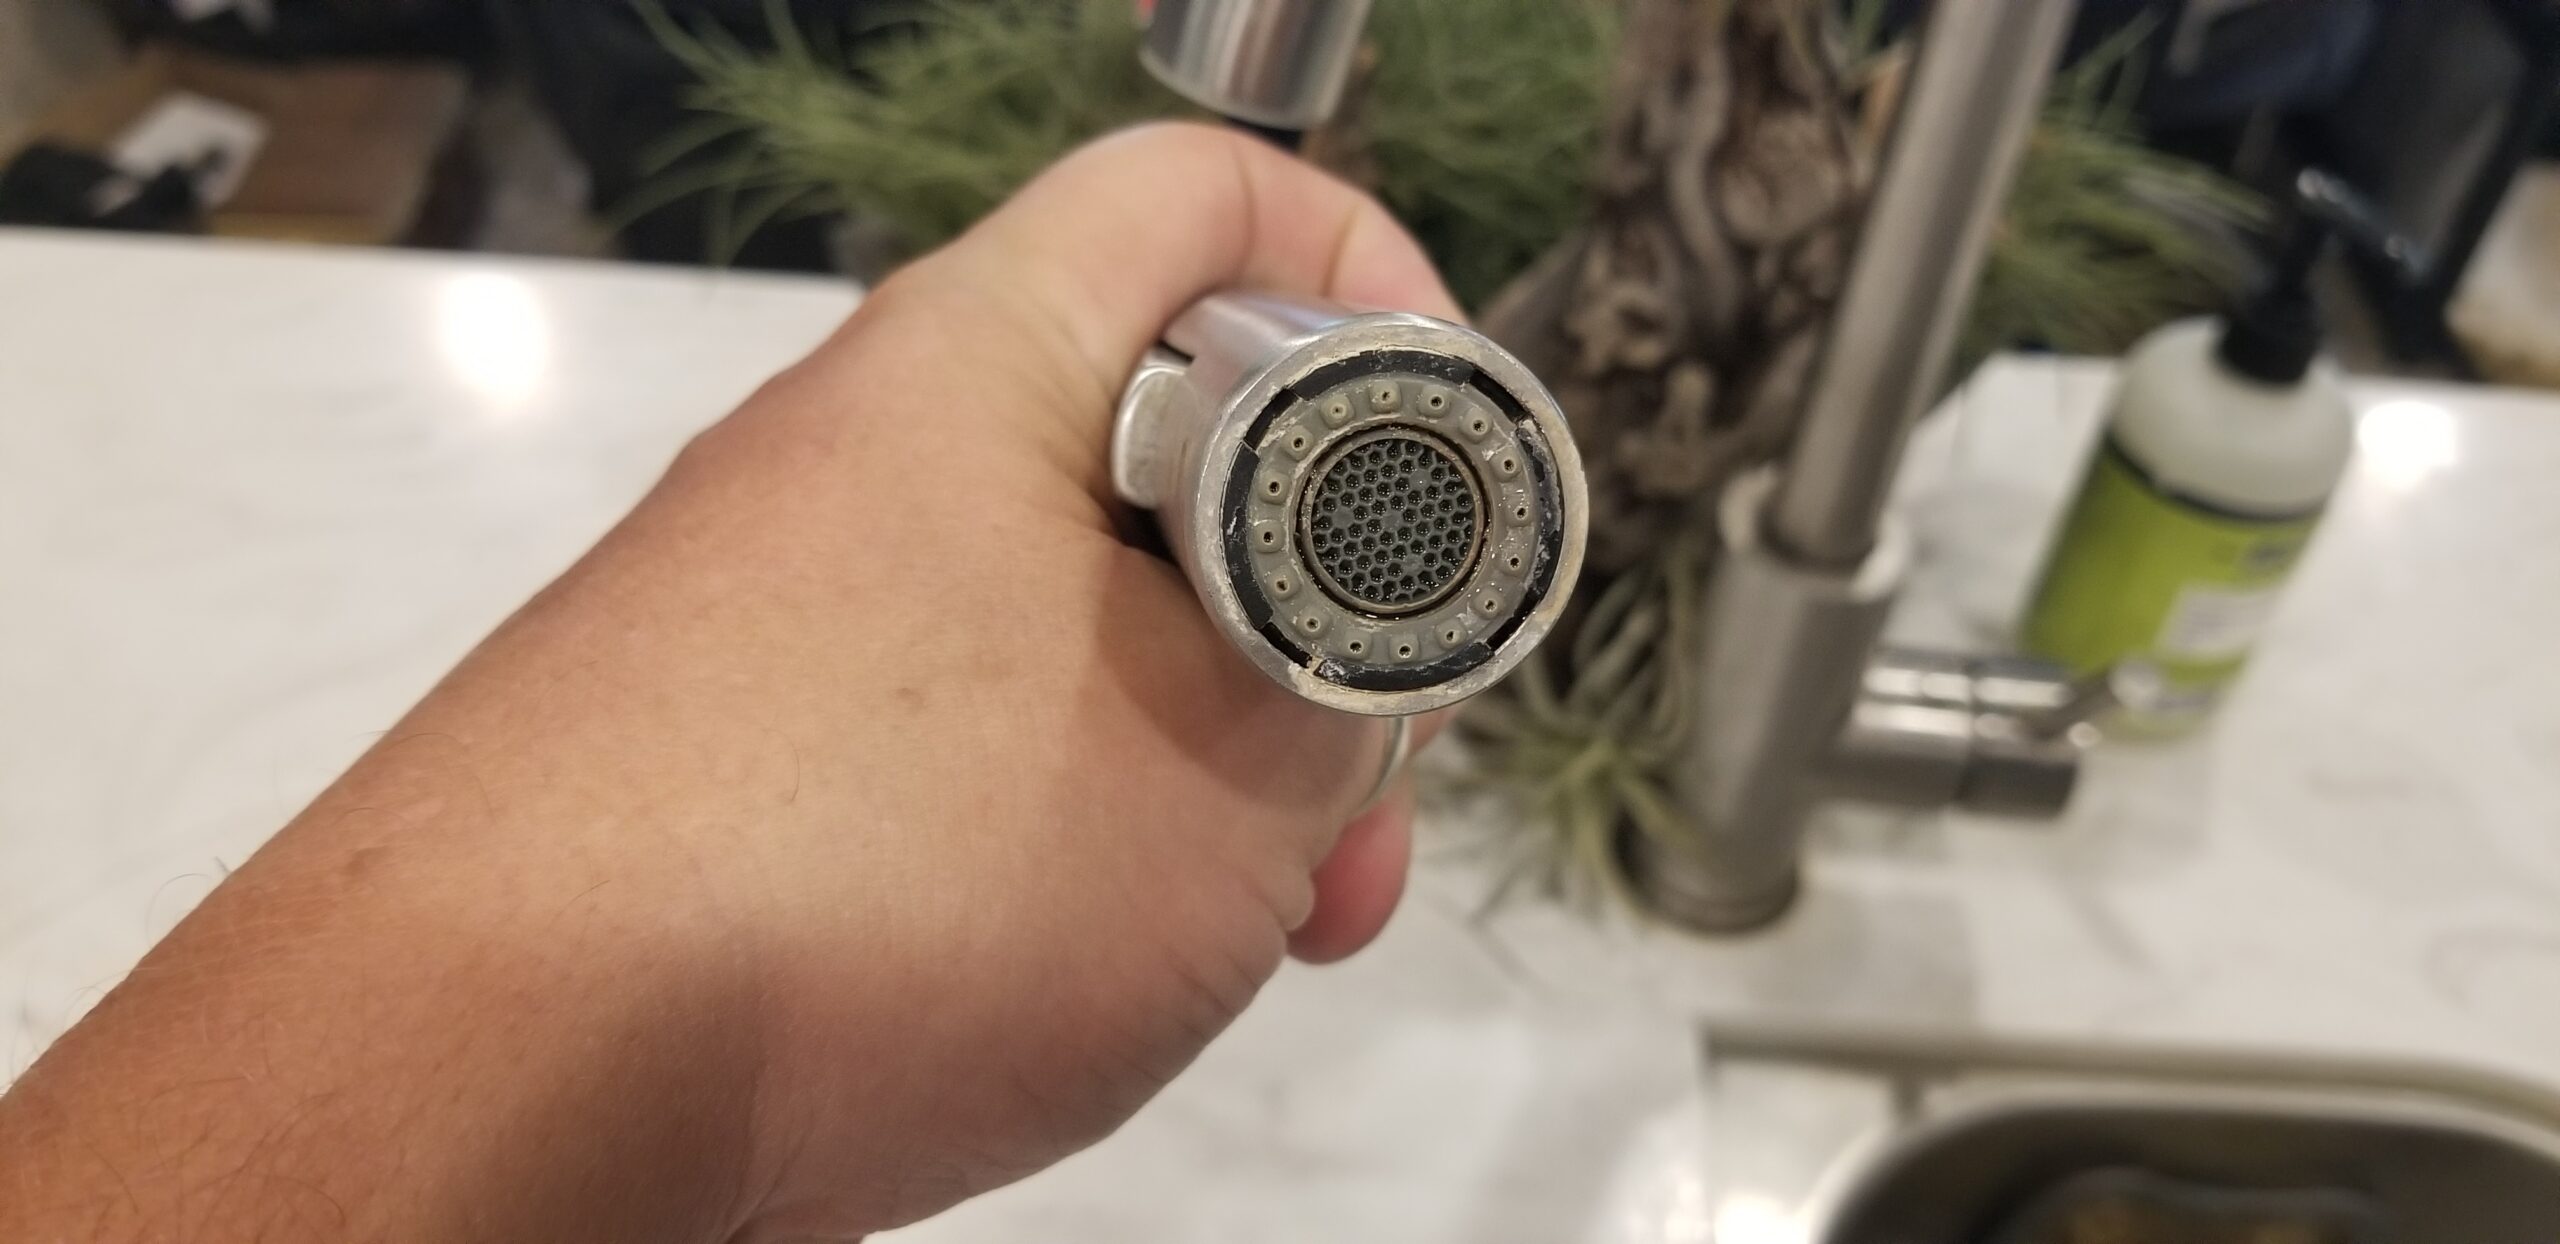
In the case of the kitchen faucet above, the unit required more than a simple unscrewing of a cap. In this case, there was a tiny Allen bolt holding a longer mechanism, with the push button that selects between stream and spray.
Overall, it came down to the same basic setup. Ensure a tight fit on the washer and ensure the screens are cleaned. (For this faucet, there was one at the top and one as seen in the picture.)
8. Replacing broken or falling trim
If your rig is like our rig, you will get parked just to find that the occasional trim has fallen off the wall or ceiling. (For RV ceilings, trim is often used to cover seams in separate sheets of the particle board mentioned earlier.)
A lot of trim is simply stapled onto the surface it’s adhered to. In order to replace the trim, you’ll need to, ahem… “trim” those staples. You might be able to pull them out with pliers, but it might be easier to just cut them as low as you can. If the trim is from the ceiling, find short screws that are as close to the same color as the wood of the trim and only about 1/4 inch longer.
On your stepladder, screw the trim back in place. Watch your edges and corners to ensure you get the same alignment as it was in before it fell. If on a wall, depending on the surface behind it, you can use the same screws to remount them.
If you have a good, solid backing surface, you might be able to use paneling nails. These can come in brown and white. Be sure to trim the nail down to just that quarter of an inch extra length. You don’t want to hit a hidden wire or poke outside of the rig.
Track your RV maintenance
We hope some of these DIY motorhome repairs help you keep your rig in top shape. This list only scratches the surface of what you can repair on your own. Not only will you save time, money, and the hassle of dealing with a backed-up RV repair shop, but you’ll gain confidence with each repair you finish. That has been true for us, and we bet it’ll be true for you, too!
Make sure you keep track of all your RV maintenance and motorhome repairs with an online tool such as RV LIFE Maintenance. Not only can you keep all of your documents in one place, but you’ll also receive timely reminders when maintenance is due to help you avoid costly repairs and potentially serious accidents.
Related articles:


