
Sponsored by EQ Systems
So, you’ve finally hit the road in your RV! As an RV owner, you need to know how to level your rig. This ensures that your appliances function properly and gives you a comfortable living and sleeping environment.
Securing a leveled position for your RV or camper trailer after parking in that picturesque campsite is paramount. EQ Systems, experts in RV leveling, offer the following tips for keeping your RV level.
1. Pack the essentials
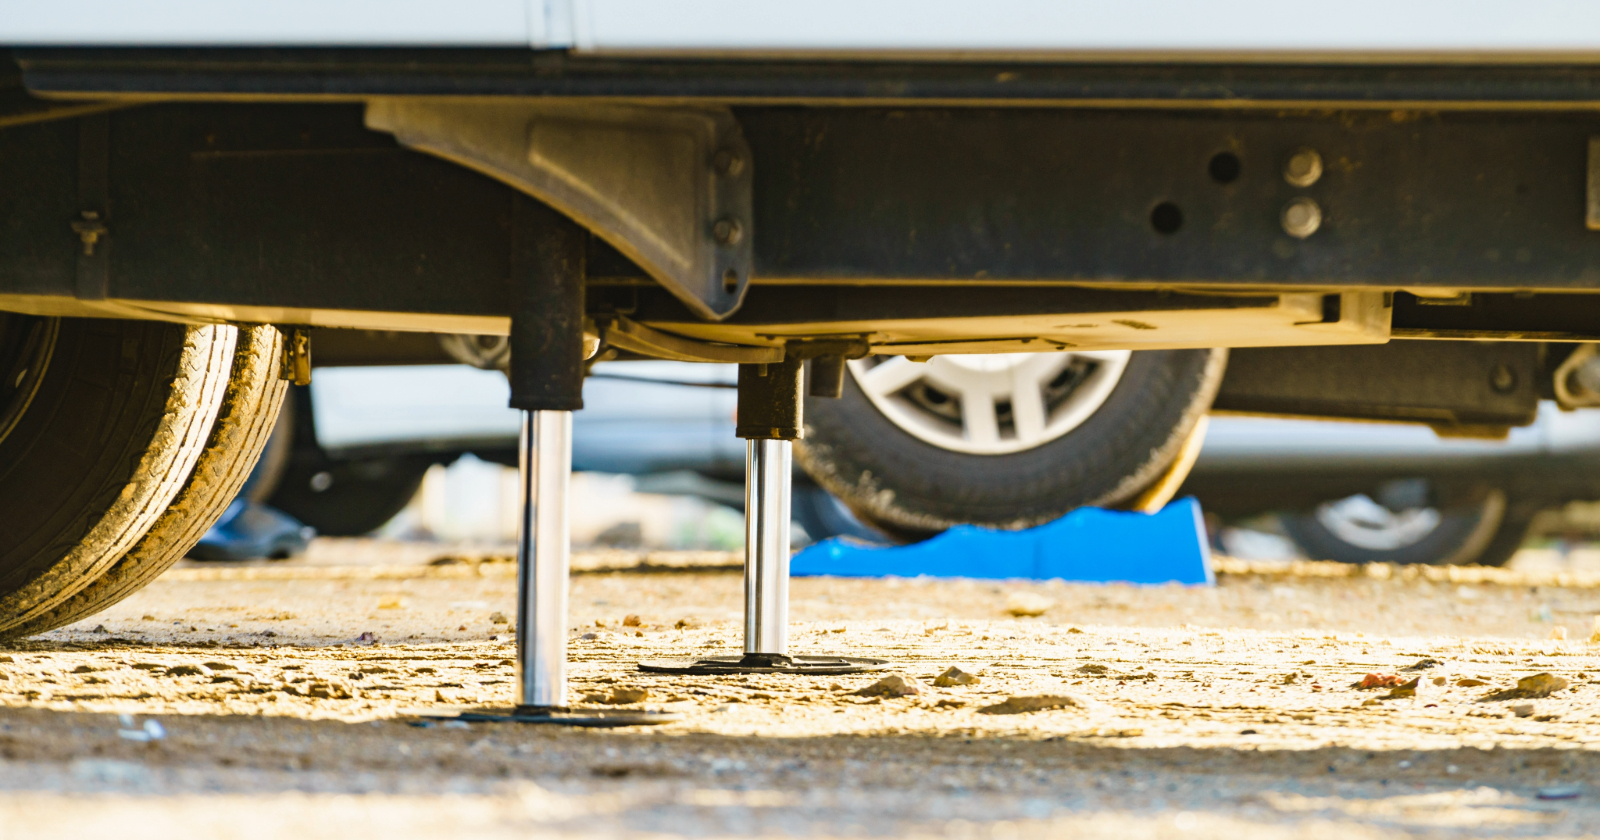
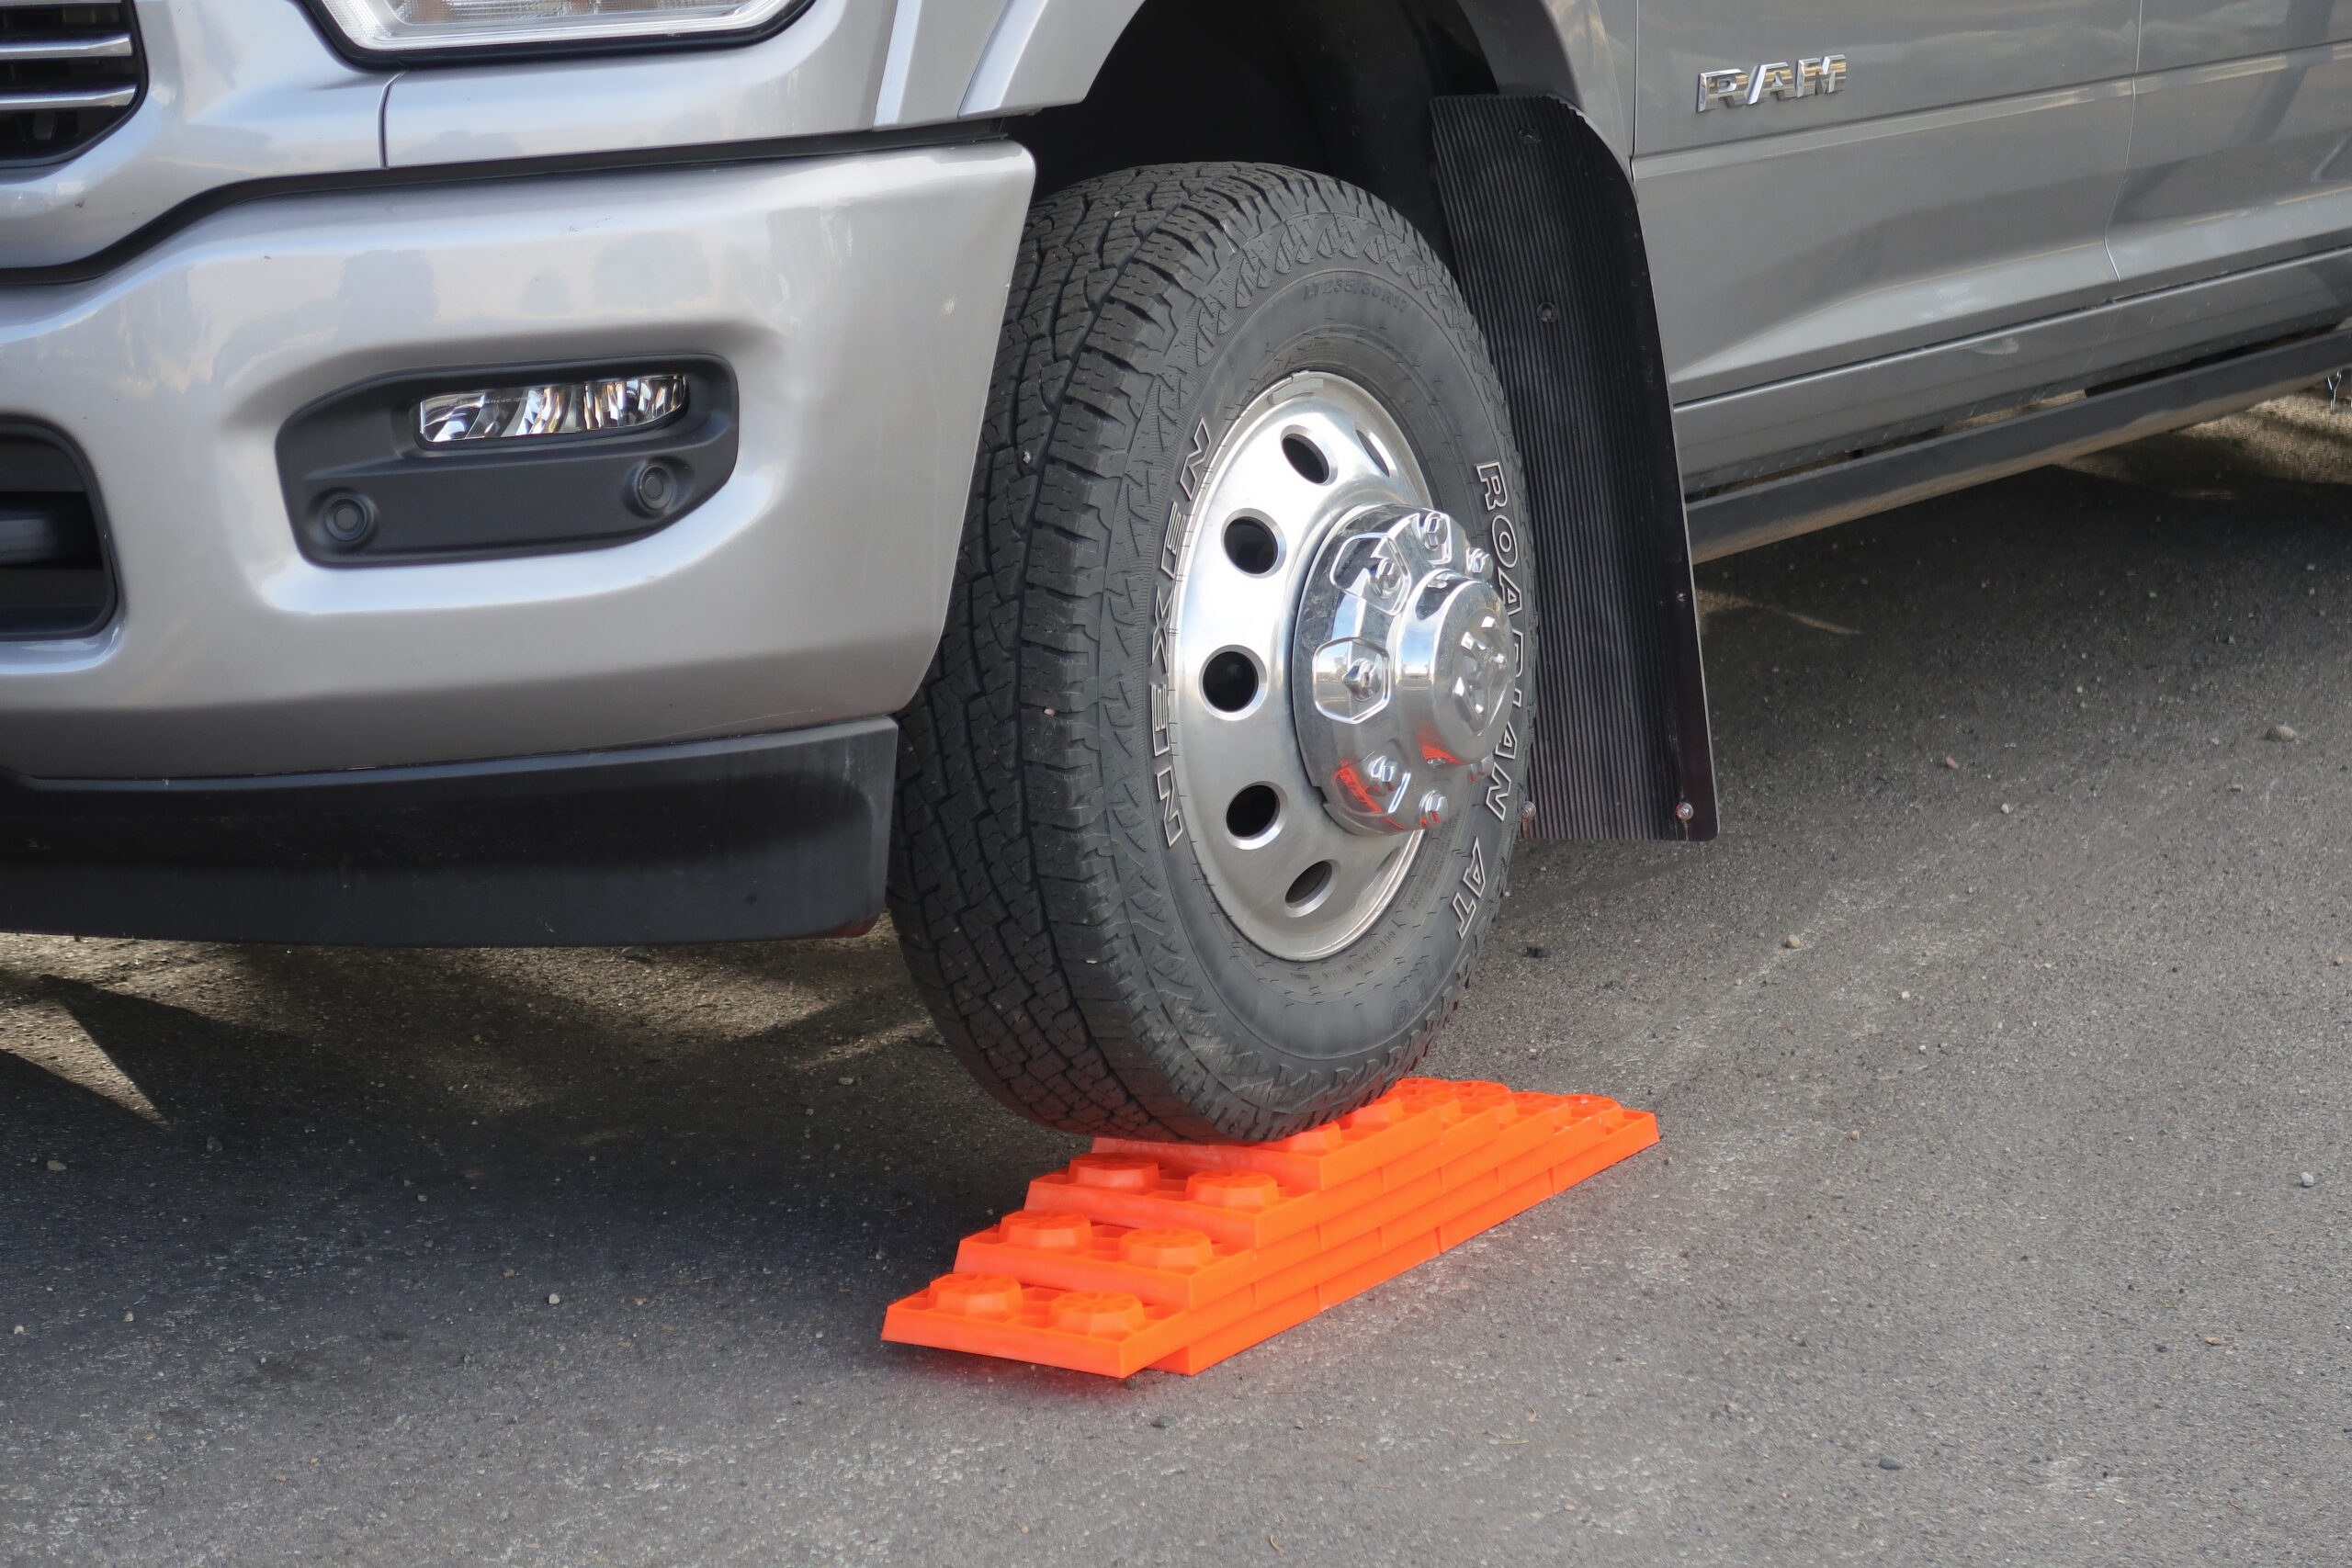
The first step to leveling your RV begins even before you set off on your journey. Make sure you pack the essentials: a leveling kit, blocks, bubble levels, and wheel chocks to secure your RV. These tools are critical and make the process easier and safer. Alternatively, you can add an automatic leveling system to your RV to simplify the process dramatically.
2. Scout your camping site
When you arrive at your camping site, drive around and inspect the ground. Look for the flattest spot possible. It’s easier to level your RV on a flat surface than on a steep slope. You can also use satellite view and read online reviews to scout campgrounds before you ever leave home.
3. Check your level
Before you start leveling, check how off-level the RV is. Use a bubble level or download a leveling app on your phone. Check the levelness both side-to-side and front-to-back.
4. Level side-to-side first
Level your RV side-to-side before front-to-back. For side-to-side RV leveling, use blocks or built-in leveling jacks if your RV has them. Driving onto a stack of blocks can help correct any unevenness.
5. Then level front-to-back
After your RV is level side-to-side, it’s time to adjust the front-to-back level. Use the tongue jack or the built-in leveling system if you have one. Elevate or lower as needed until your RV is level.
6. Secure your RV
Once your RV is level, use wheel chocks on both the front and back of the wheels to prevent the RV from rolling.
7. Verify the levelness
After securing your RV, it’s important to verify the level. Check with a bubble level again. Make any minor adjustments if needed.
8. Regularly check the levelness during your stay
Over the course of your stay, especially if it’s a long one, the ground beneath the RV can settle or shift. Make it a habit to check the levelness of your RV every few days.
9. Protect your leveling equipment
Keep your leveling blocks and equipment clean and dry when not in use. This extends their life and keeps them in good working order.
10. Practice makes perfect
Lastly, remember that proper RV leveling is a skill. The more you practice, the better and faster you’ll become. Be patient with yourself.
If all of that sounds like a pain in the neck, remember…it is! That’s why automatic RV leveling systems for every RV are so popular.
What happens to your RV if it is not level?
Some campers can be skeptical about investing in RV leveling systems. As time progresses, however, the realization of the challenges that come with parking on uneven ground often sets in. Adding a system is ultimately worth the cost when you weigh all of the outcomes. Here are a few of the complications you may face:
An unlevel RV can cause frame stress
Parking an RV or camper trailer on an uneven surface for extended periods can lead to a torque effect, forcing the structure to distort from its usual position. Areas like the chassis, door frames, and plumbing endure stress, impacting the vehicle’s longevity and necessitating expensive repairs.
Doors might stop closing seamlessly, and water flow within the system could be compromised. Appropriate leveling eliminates these imbalances, fostering improved performance and longevity.
Impaired slide-outs
Slide-outs are fantastic additions that amplify space and convenience during your camping trips. However, their functionality thrives best on level ground. Using slide-outs on uneven surfaces can induce undue stress on the metallic parts and mechanisms, leading to potential repairs or a slide-out jammed in one position. RV leveling is crucial if your RV has slide-outs. Generally speaking, you will level your RV first, then run out the slides.
Overheating or freezing issues with your refrigerator
RV refrigerators are crafted to function optimally in a balanced, level position. A tilted parking spot can cause the refrigerant solution to pool disproportionately, resulting in overheating or freezing issues. Continual use in such a condition could eventually cause a complete breakdown of the refrigerator, and even an RV fire.
Misleading Fluid Level Indicators
Parking on uneven ground can lead to inaccurate fluid gauge readings. Consequently, owners may mistakenly believe they’ve drained their black and gray tanks before heading back home, only to discover they haven’t. This can lead to a host of problems, particularly if the RV or camper is stored for a long period.
Learn more about EQ Systems
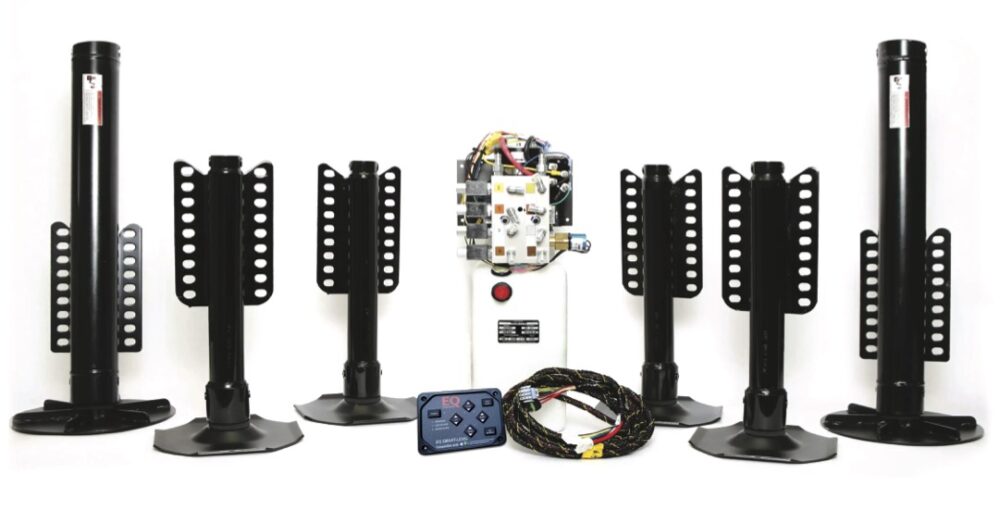
EQ Systems is headquartered in Cassopolis, Michigan, just a short trip east from bustling Chicago. EQ Systems provides a range of state-of-the-art, user-friendly, and reasonably priced EQ Smart-Level systems suitable for all kinds of rigs. Once professionally installed, these systems enable RVers to park and achieve perfect RV leveling in mere minutes.
For fifth wheel camping enthusiasts, EQ Systems presents the 4-Point Fifth Wheel EQ Smart-Level System, a perfect match for virtually all fifth wheel models. Outperforming the electric jack system and rear manual stabilizer jacks, this system allows users to manipulate the front two jacks either together or separately for easy trailer unhooking and reattachment. Furthermore, the EQ Smart-Level System offers the convenience of leveling your coach using your smartphone, thanks to the in-built Bluetooth feature.
Interested in learning more about EQ Systems’ comprehensive range of Smart-Level Systems? Visit eqsystems.us or dial 1-800-846-9659 to chat with EQ Systems professionals for all your inquiries.

I have a levelmate pro as well as bubble levels. I level the trailer to maybe 2 inch off or so then I hit my auto level and it take the tires off the ground on one side. This only happens in my driveway, my driveway slopes. I recalibrated the levelmate pro on level ground a couple of times but it never fails in my driveway tires are off the ground. Wondering how much damages is being done to my 5th wheel with the tires off the ground
I have a 2021 Newmar with slide outs. They recommend extending the slide outs first, then level (using the EQ Auto leveling system).
I couldn’t agree more. Leveling is very important. After connecting to shore hook ups should be your next task. However, I’ve been an RVer since I was 10 years old. I was taught to level front to rear. You have to do a walk around to know which is your worst situation. If the ground is very uneven, you start by driving up on blocks, that will allow the RVs suspension to be in its best relationship of the frame and wheels. Doing this also have an effect on both sides and front to rear. The goal is letting the RV suspension to work normally. Now you can level front to rear using a tongue jack or your Leveling system on the RV. Now level side to side, which should be close due your wheels being on the blocks you drove on to. You should only have to stableize the floor. Blocks under the wheels, then front to rear, then snug up with stableizing Jack’s. You never want to try leveling with stableizers all that said do yourself and your RV, find a way chose a fairly level site to begin with.
Be aware of loose rocks under your wheels! A while back, I backed into a site on a slight slope (no problem, we can level it), put blocks under one side of the trailer, unhitched, and began leveling front-back with the tongue jack. As I jacked up the trailer, suddenly one side slid on the loose rocks and the tongue jack fell off of the blocks I had under it! It was very scary for everyone! Now, I always make sure I’m not on a slope with loose rocks!