Imagine this: You’ve just arrived at your picturesque campsite, eager to unwind amidst nature’s serenity. Yet, there’s an essential task ahead – leveling your RV. Although not the most thrilling part of your journey, ensuring your RV is properly leveled is crucial, affecting everything from your sleep comfort to the optimal functioning of appliances like your refrigerator.
Navigating uneven terrain can make leveling your RV a challenging affair. In the realm of RVing, setting up and packing up camp are often the least enjoyable parts. However, an efficient and streamlined process can significantly ease this burden, and this is where DIY RV leveling blocks come into play.
Why Do I Have To Level my RV?
A level RV is more than just an aesthetic necessity. It’s critical for safety and functionality. An uneven setup can affect your fridge, drains, and even the ease of opening and closing doors and windows. More importantly, a properly leveled RV is stable and safe, reducing the risk of it rolling off jacks, which can be both scary and dangerous.
Different Types of Levelers
Depending on your RV type, you might need various levelers to achieve the desired balance. RVs equipped with hydraulic or electric jacks usually require just a solid pad under the jacks for stable footing. On the other hand, RVs with manual scissor jacks, meant solely for support, may need additional leveling aids like roll-on and multi-height levelers, typically made from plastic.
Then, there’s the option to build your own RV leveling blocks. These can be customized to your needs, are simple to construct, and require minimal materials and skills.
Crafting DIY RV Leveling Blocks 101
For a successful DIY project, focus on crafting two main types of leveling blocks: solid blocks for under your jacks and multi-level blocks for under the wheels. Both types should be sturdy, water, and bug-resistant. Pressure-treated wood, finished with a resistant coating, is an ideal material choice. When fastening, opt for weather-resistant options like galvanized or stainless steel to prolong the lifespan of your blocks.
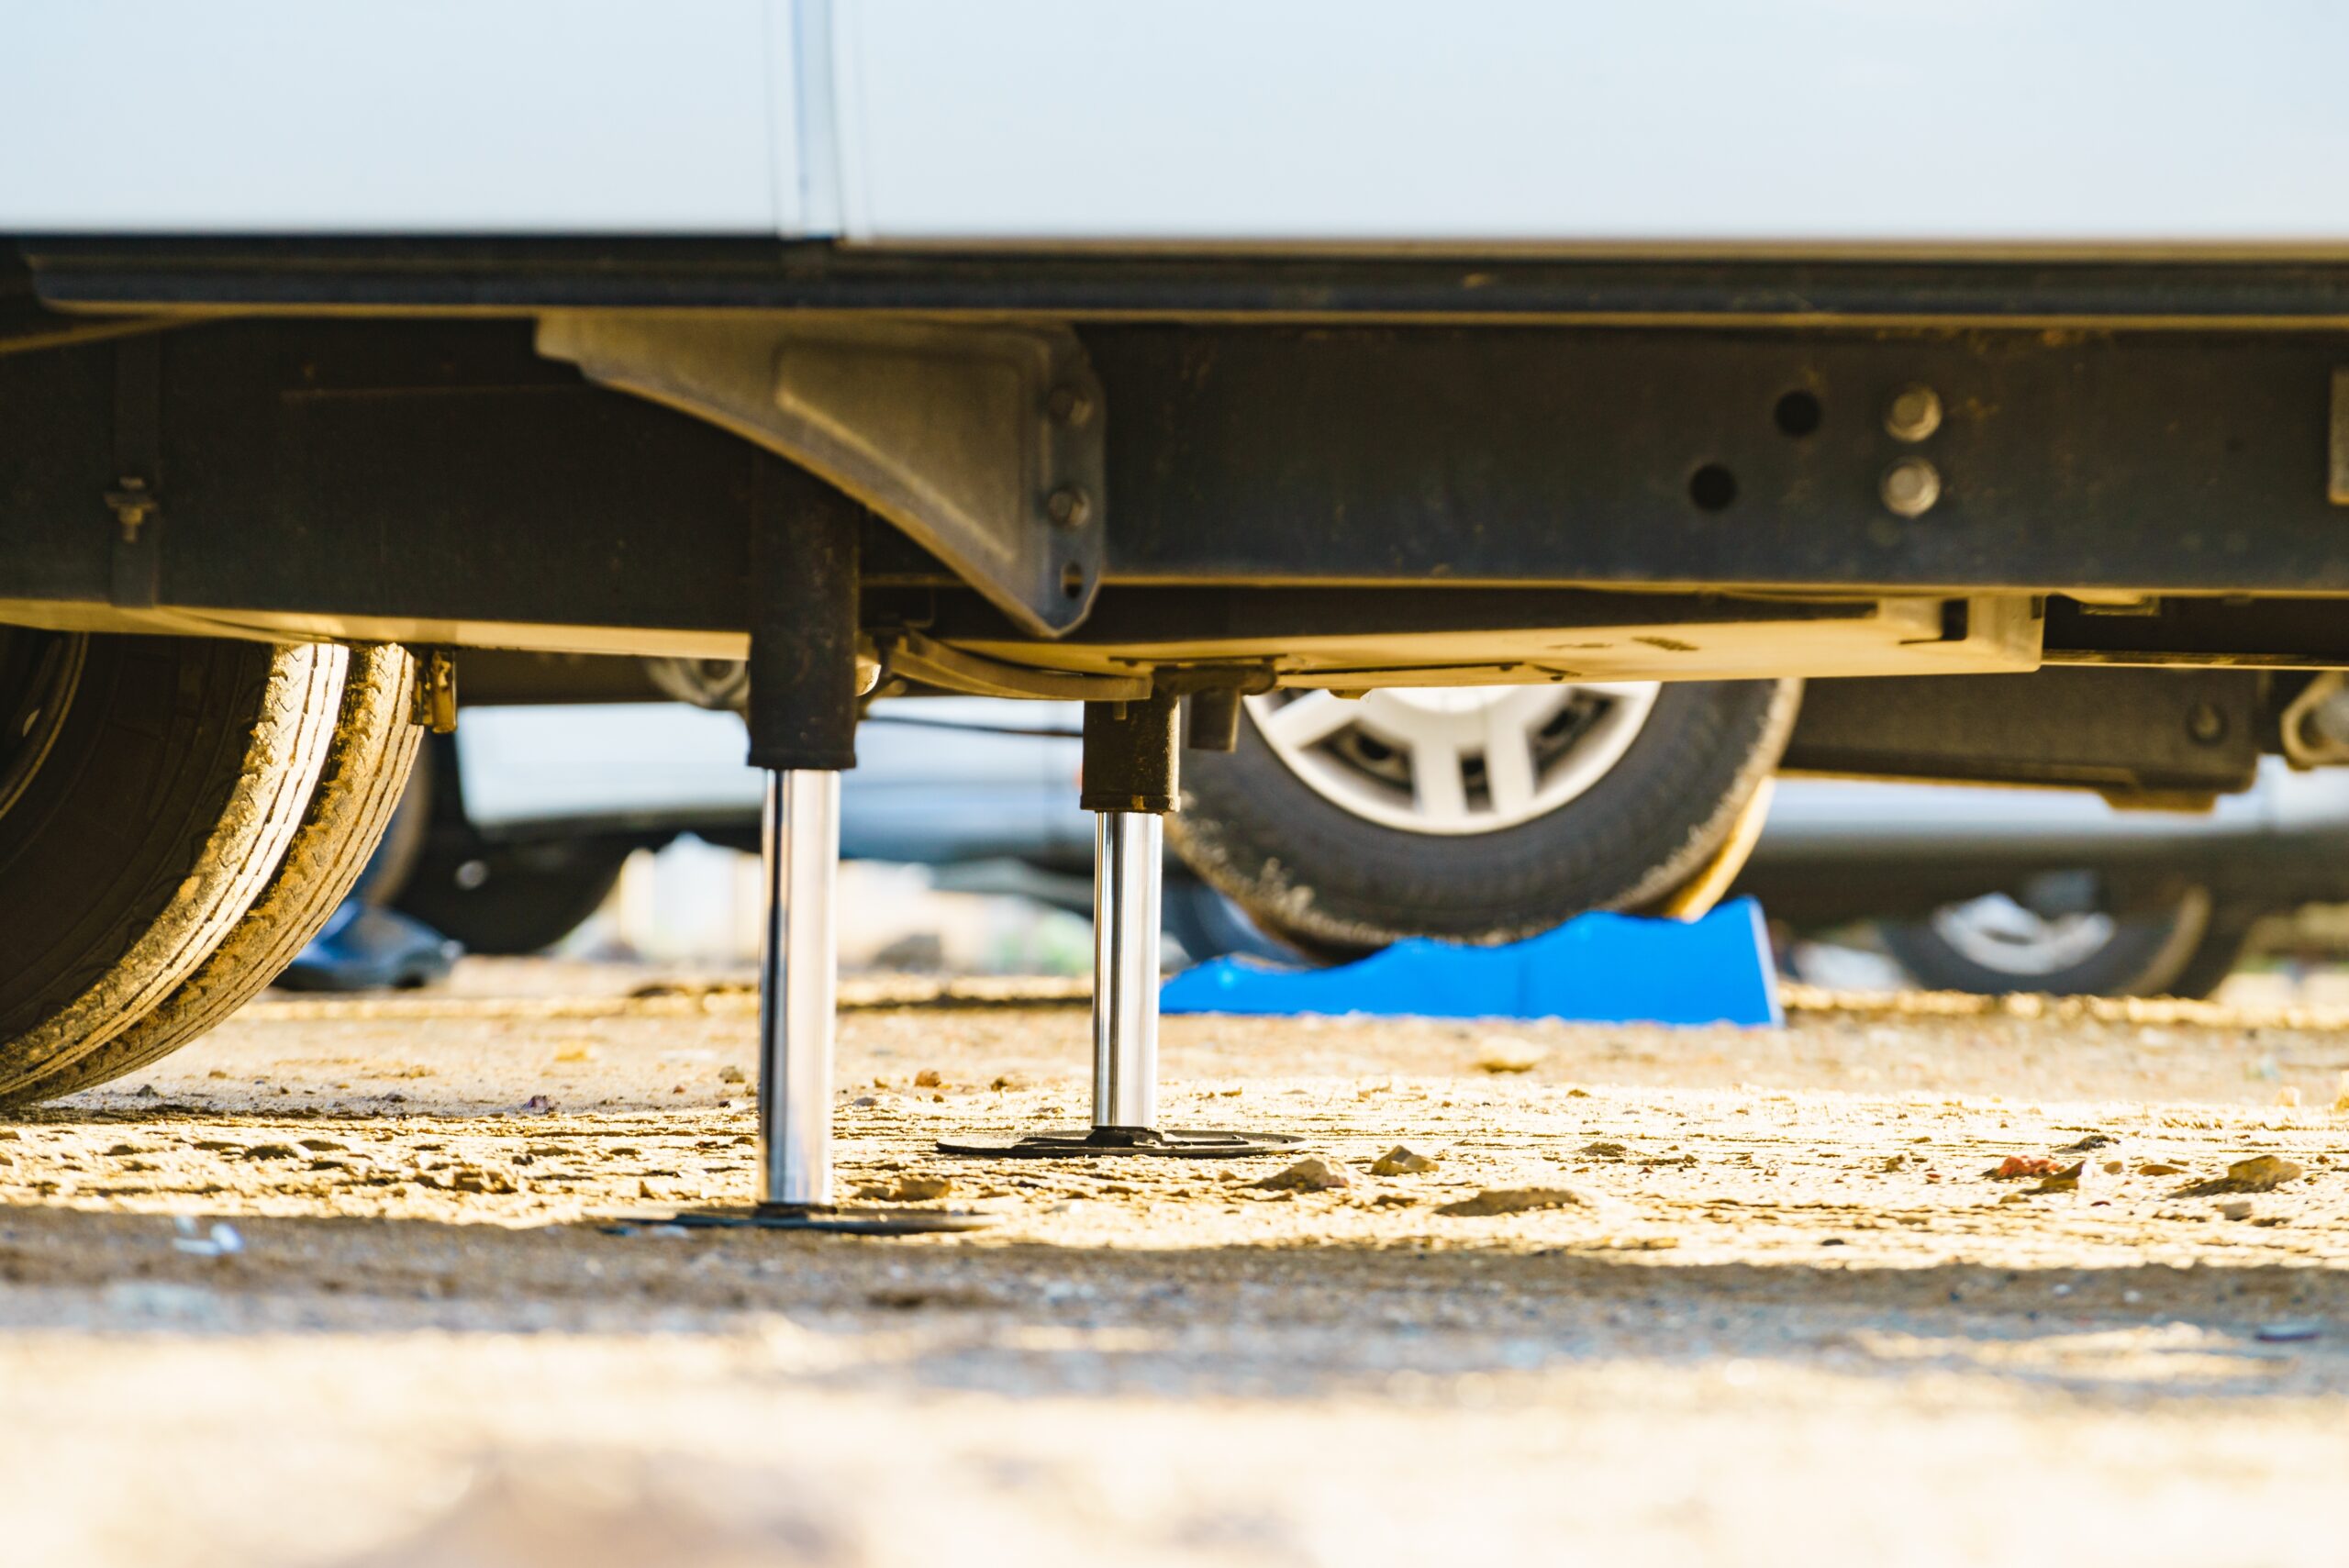
Creating Jack Leveling Blocks for Your RV
Jack leveling blocks are straightforward to construct and incredibly useful for various camping scenarios. Having a robust collection on hand ensures you’re well-prepared, regardless of the parking terrain. These blocks are particularly beneficial for stabilizing RVs with scissor-type jacks, which tend to be less stable when fully extended.
Size and Construction:
- Determining the Size: Aim for a size that strikes a balance between adequate support and easy storage. Square blocks are typically easier to manage, both in terms of construction and calculation of materials. A dimension of 10-16 inches square works well for most RVs.
- Cutting the Lumber: Once you’ve settled on the dimensions, cut your lumber to the required length. Each block will be comprised of lumber pieces of equal length, arranged side by side.
- Preparing the Plywood Base and Top: Cut two plywood pieces for each block according to your chosen dimensions (e.g., 14″ x 14″). It’s advisable to assemble one block first to ensure the size is practical and makes efficient use of your materials.
- Assembly Process: After successfully assembling the first block, proceed to cut and assemble additional blocks. You can streamline this process by having a partner help with either cutting or assembly. The choice of lumber and plywood (1/2″ thickness or more) should be based on availability and budget considerations.
- Securing the Blocks: Attach the first row of lumber pieces to one plywood piece. This not only helps in keeping the lumber aligned but also maintains the block’s square shape. Continue by adding and securing subsequent rows, if needed, and finish by attaching the top plywood piece.
- Adding a Handle: For ease of handling and transportation, consider adding a handle to the side of each block. This small addition can make a significant difference in the practicality of using the blocks.
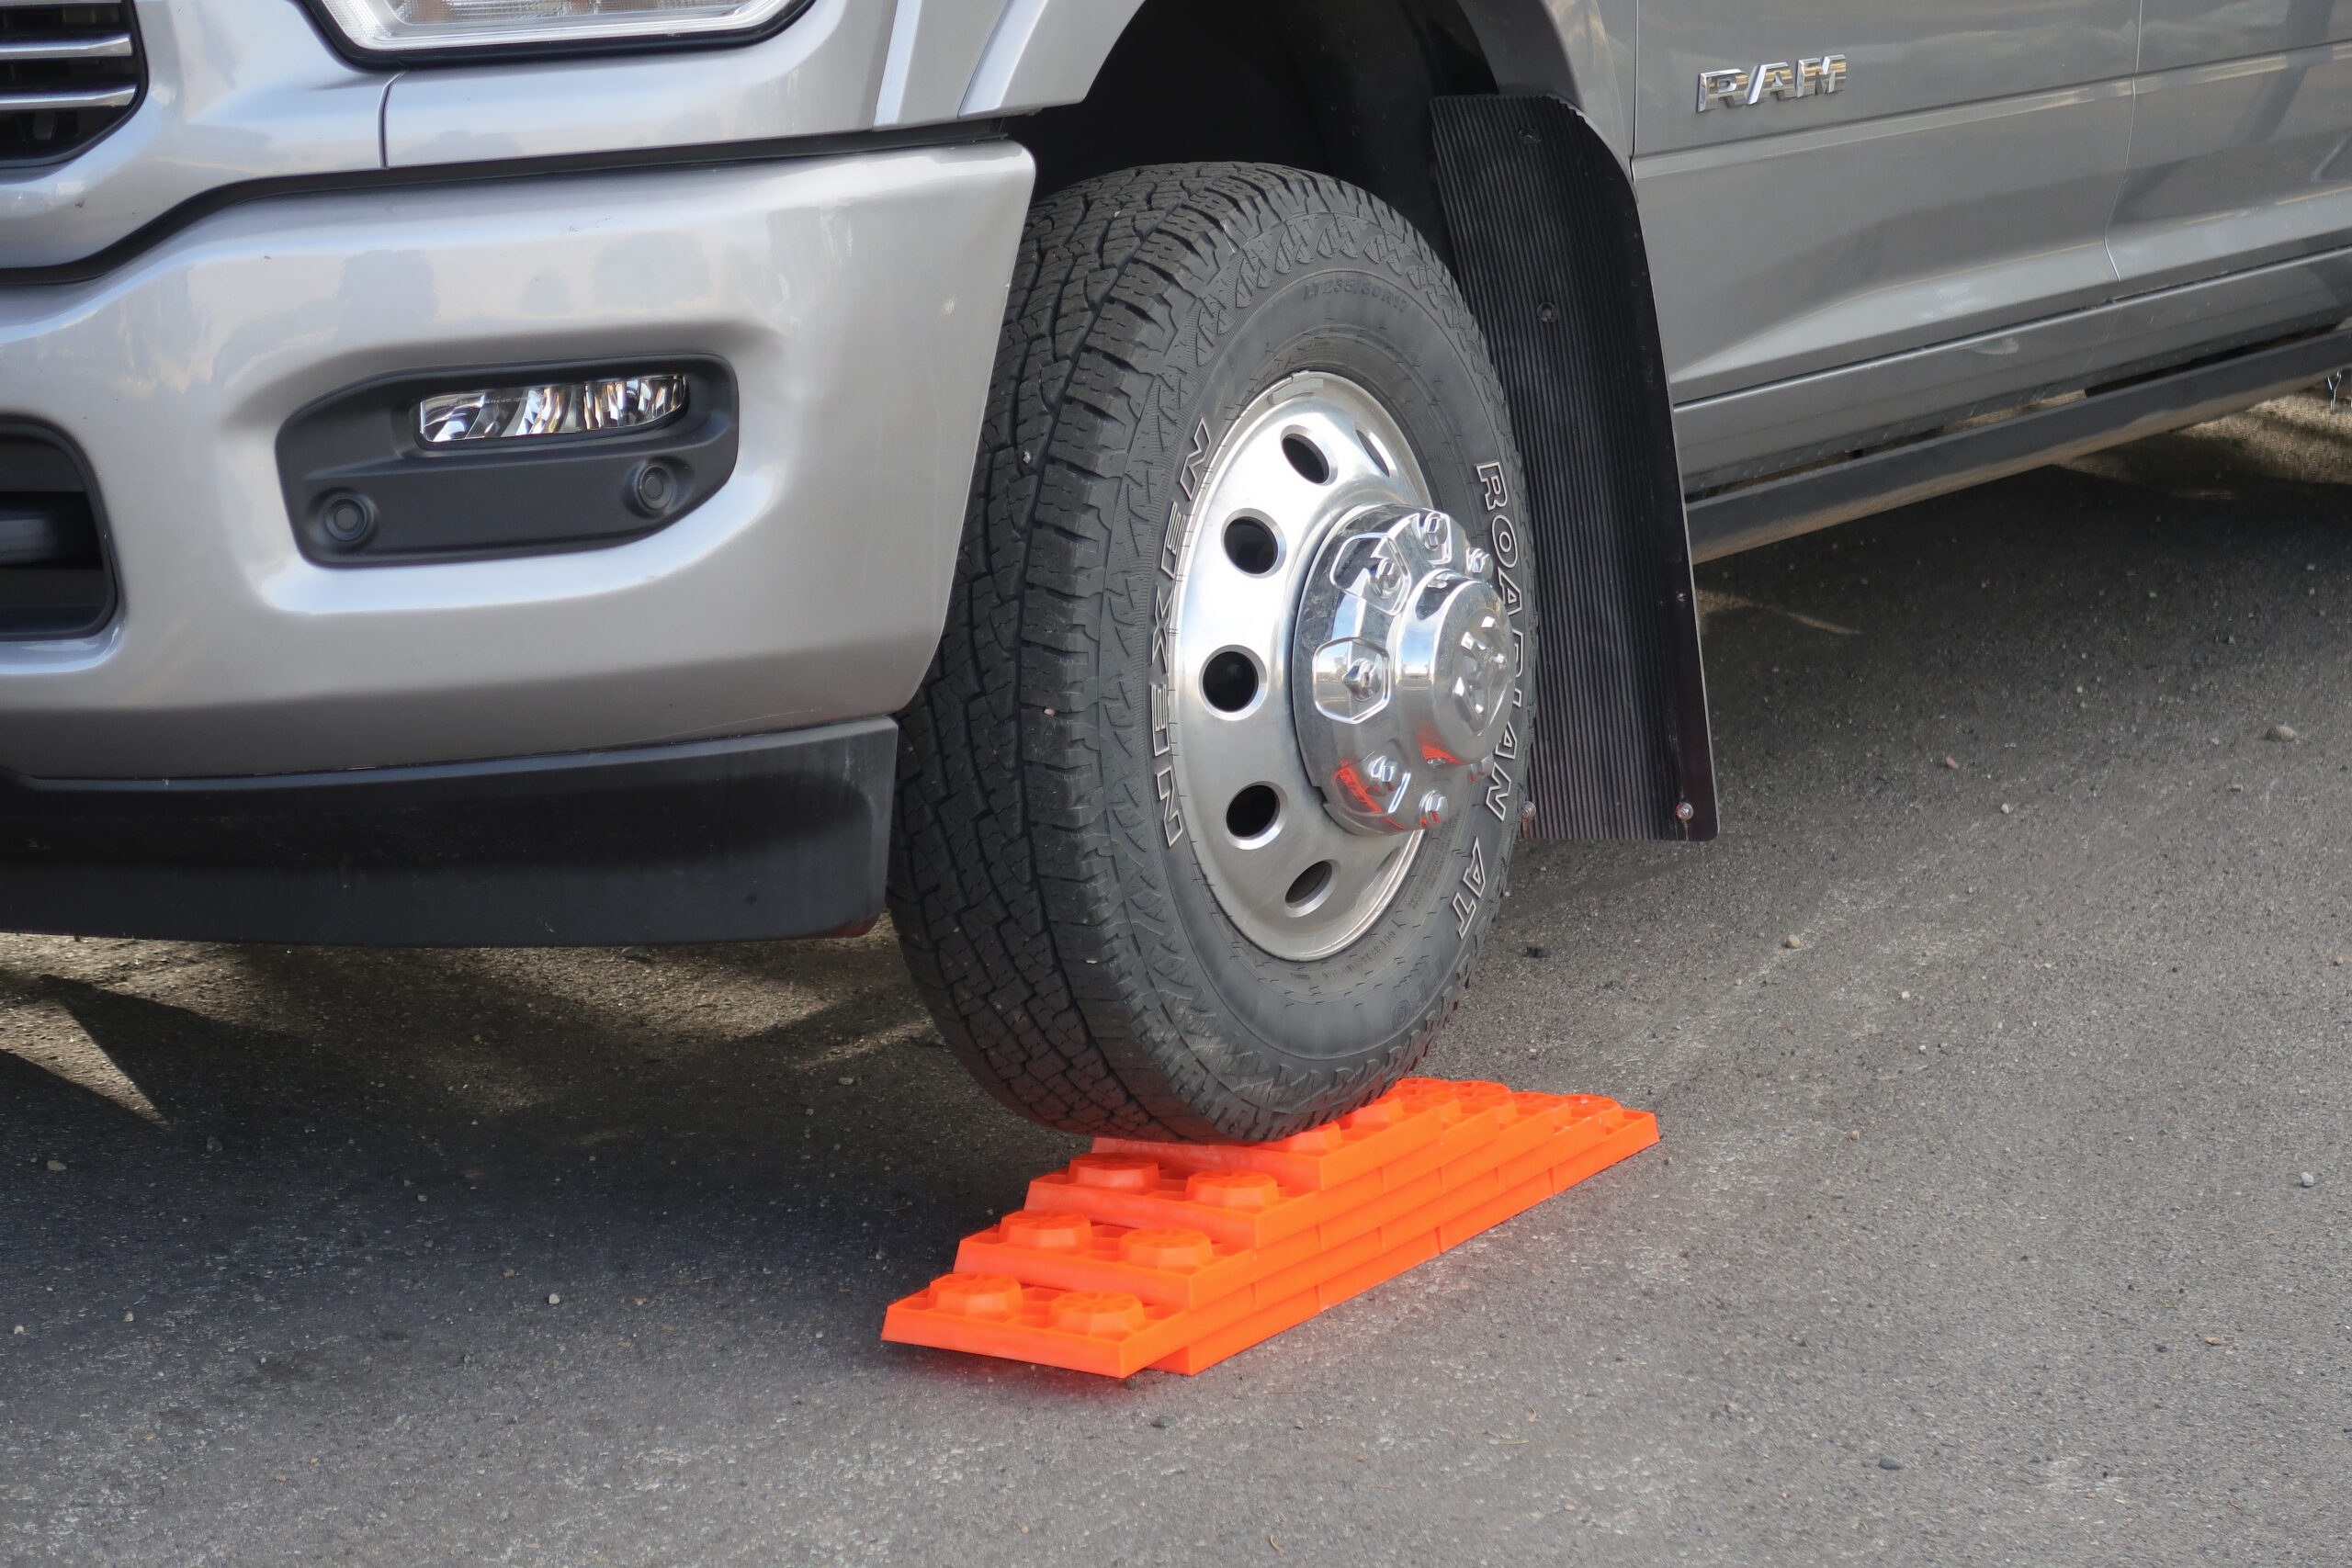
Constructing Side-to-Side RV Wheel Leveling Blocks
Leveling your RV side-to-side often presents more of a challenge than adjusting it front-to-back. A practical and common solution is to use multi-level blocks, which your RV can easily drive onto.
Designing and Building Multi-Level Blocks:
- Strength and Accessibility: Your leveling blocks must be robust enough to support the RV’s weight and designed for easy driving on and off. Wood is an excellent material for these blocks due to its strength and workability.
- Determining Dimensions:
- Height: A total height of around 7.5 inches is standard, usually achieved with five layers of 1.5-inch thick material.
- Width: The width of the blocks should be at least 6 inches, but wider dimensions are preferable for better tire support and to reduce the risk of the RV tires rolling off the edges.
- Adding a Stop Block: Incorporate a stop block at the rear end of your leveling blocks. This feature prevents the RV from rolling too far back and off the block.
- Creating a Tiered Structure: You’ll need five lengths of wood, each one progressively shorter than the last, to form a step-like tiered structure. Start with the longest piece at the bottom and work up to the shortest on top.
- Assembly: Align all pieces flush at one end, with each successive layer extending further out at the opposite end. Secure each layer to the one below it using screws, ensuring each piece is firmly attached.
- Angled Front Edge: Cut the front edge of each level at an angle. This modification eases the process of driving your RV onto the blocks, making the transition smoother.
Final Touches and Tips:
Ensure that all edges are smooth to prevent tire damage. A coat of weather-resistant finish can extend the life of your blocks, and a bright color can enhance visibility and safety.
Simplify Your RV Life with DIY RV Leveling Blocks
Creating your own RV leveling blocks is a practical and rewarding approach to ensuring your vehicle’s stability. With these custom-made blocks, you’re equipped for any terrain, enhancing both safety and comfort on your journeys. This DIY project not only saves costs but also adds a personal touch to your RV experience, making each trip more enjoyable and worry-free.
Continue reading:
- Add a Bigfoot RV Leveling System to Your Travel Trailer or Fifth Wheel
- A Complete Guide To Dewinterizing an RV