
Must-Have Tools For RV Plumbing Projects & Repairs
Doing RV repairs and improvements yourself is a great way to avoid pricey labor costs and inconvenient detours to RV repair shops. Plumbing projects and repairs are no exception.
However, based on our experience, plumbing projects of any kind are never fun and doing them in an RV can sometimes be even more frustrating.
Not only are you dealing with smaller spaces and harder access points, but the components are also different than what you’ll typically find in a house. For this reason, there are some tools that we recommend having on hand specifically for RV plumbing repairs and replacements.
So whether you are currently traveling, getting ready to travel, modifying an existing RV, or building something from scratch, add these tools to your RV toolbox and you’ll be ready for any plumbing project that comes up.
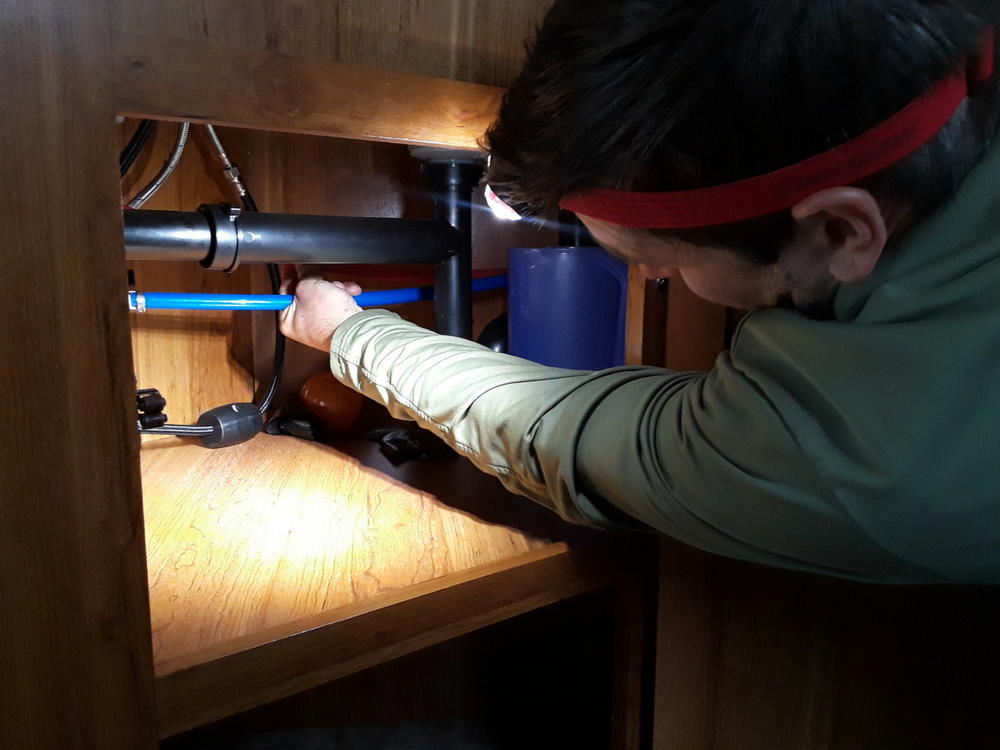
1. PEX tubing crimper and cutter
The majority of RVs have PEX tubing as their plumbing lines. This PEX crimping tool is used to crimp the PEX fittings around the tubing.

Having this small, lightweight tool on hand will allow you to replace a leaky sink or toilet or conveniently repair a plumbing line if it needs to be replaced. The tool isn’t completely necessary, but having it will help you make a nice clean cut.
2. PEX fittings and tubing
If a plumbing line breaks in your RV, you may be able to do a quick and easy fix by splicing in a new piece of PEX tubing. For this reason, it is super convenient to have a couple feet of PEX tubing along with some PEX couplings, rings, and an assortment of 90-degree fittings on hand.
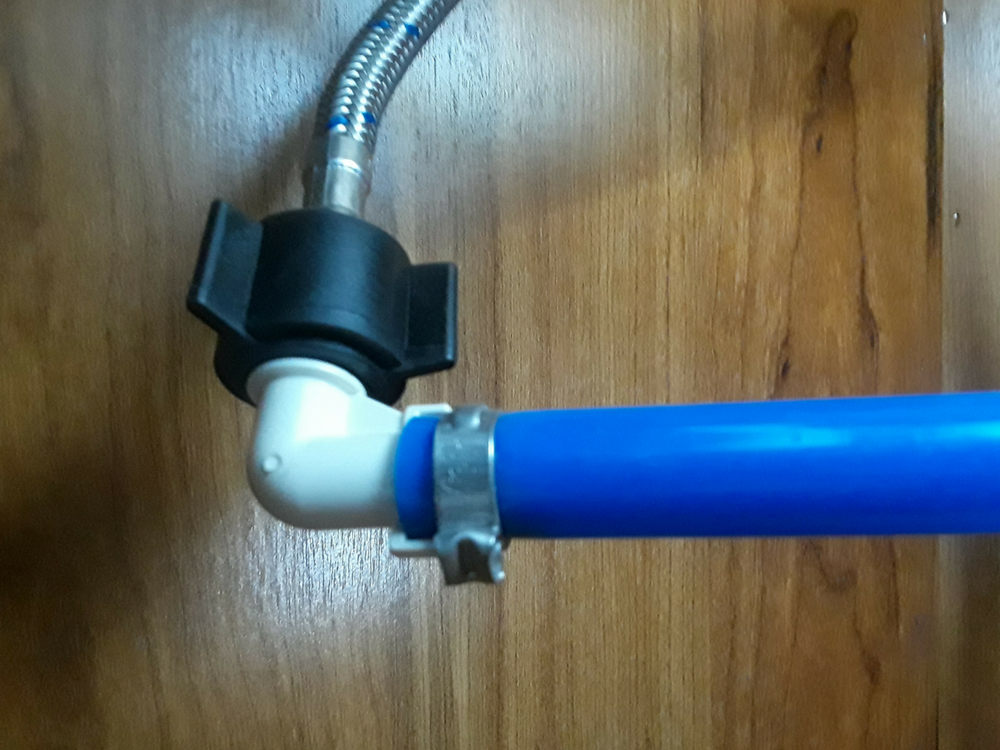
We highly recommend splicing in a new piece of PEX tubing whenever possible rather than monkeying with any of the original fittings in your RV plumbing lines. Our experience has shown us that as soon as you start removing fittings and couplings, especially in older RVs, you will end up with more leaks and in turn more repairs than you started with.
3. Pipe clamps and plugs
Having these small, lightweight supplies on hand will be helpful anytime you spring a leak while on the road. It basically allows you to cut a leaking plumbing line and plug it.
Simply cut the line, insert the plug in the end, and clamp the tubing around it. This means you can continue running water to your other sinks, showers, or toilet until you can make the repair.
Most RV plumbing tubing is either 1/2 inch or 3/4 inch, so carry those size plugs and clamps.
4. Teflon tape and pipe sealant
You will want Teflon tape and pipe sealant on hand any time you are doing any kind of plumbing repair with threaded connections. It serves as a sealant so it will prevent any weeping or future leaks from fittings that you have replaced.
In an RV, it is especially important to have good tight connections as you are jostling and bumping around while driving down the road. If your fittings aren’t sealed properly then a drip can begin and will often go unnoticed as the plumbing in RVs is usually tucked away in unseen places.
For this reason, we recommend using both Teflon tape and pipe sealant on all threaded fittings for an extra tight connection.
5. Plumber’s grease
Plumber’s grease is convenient to have on hand to repair any faucet handles that may not be operating smoothly. Simply remove the handle, then remove the cartridge, and lube all moving parts with the plumber’s grease.

Wipe off excess grease and reinstall the cartridge and the handle. Your handle will now work like new, and an added bonus is that the grease also works as a water sealant and will help prevent your handle from leaking.
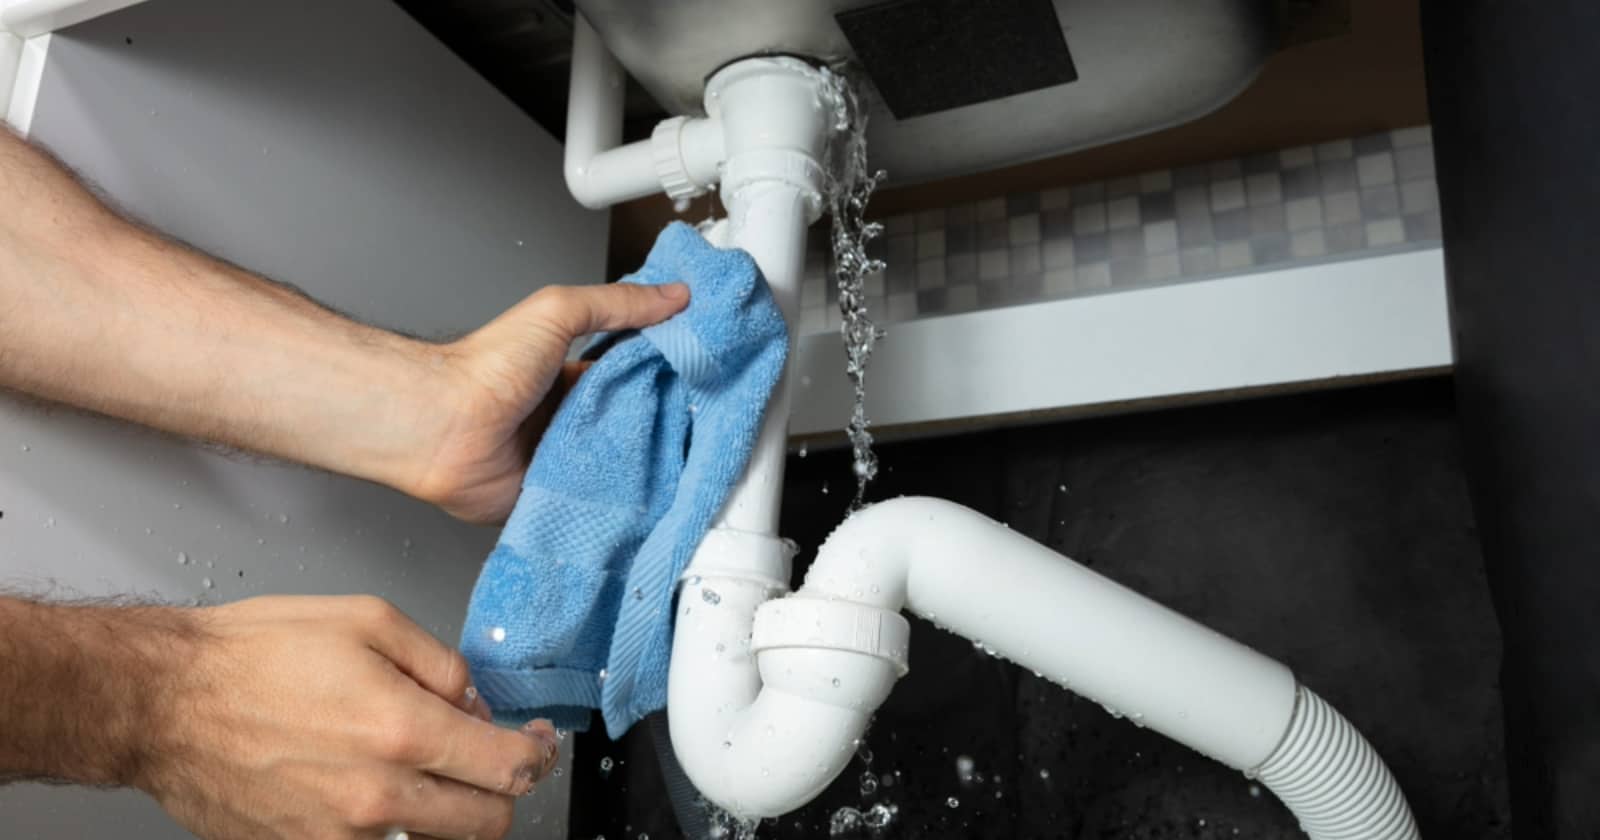
6. Colored paper towels
We always recommend using a colored paper towel or shop rags when wiping fittings to check for leaks. If you have any leaks on your fittings, the water will make a much more noticeable mark on a colored paper towel than on a white one.

7. Small wire brush
This tool is necessary if you remove an old fitting that has threads and you are going to reuse it. Simply use the wire brush to clean the threaded fitting and remove any old pipe sealant or tape. This will ensure a clean thread before reapplying new sealant and tape, which is necessary for a tight fit.
8. Miscellaneous tools
As with any plumbing project or repair, the more you mess with the more work you’ll end up doing. Try keeping things simple and only replace and repair what absolutely needs to be fixed.
If you’re starting a plumbing project from scratch, keep the number of fittings and connections as minimal as possible and do the work right and tight from the start. It is a pain in the butt to have to come back and repair things later, and a slow leak left undetected can cause quite a bit of damage.
Hopefully adding these small, lightweight tools and supplies to your RV toolbox will help make your next plumbing project or repair go a little more smoothly.


Flair it makes fittings and shut-offs for pex style pipe and does not require special tools to facilitate.
2 thumbs up for having a headlamp! Has been one of the most used and useful gadgets in the toolbox for hubby. When something goes haywire in an RV it’s Murphy’s Law that it is always in a dark, just out of reach spot needing two hands for the repair while maintaining a pretzel body position and no way to hold a flashlight! Highly recommend this very cheap little tool!
Although it might sound good to have Pex fittings and tools to prep it with, in all my time rv’ing all I’ve had to do is tighten some of the fittings to stop leaks. In those cases a small set of channel locks worked well. The teflon tape and plumbers grease came in handy as well. If you’re compelled to keep fittings on board I’d suggest the Shark Bite ones that have already been mentioned.