
An RV Bathroom Remodel For Under $125? Yes, It’s Possible
It’s no secret that RV bathrooms are tiny. When space is at a premium, there’s no need to devote extra square footage to a room where let’s face it, you’ll be spending a very small amount of time in.
But does that mean it needs to be ugly? I have seen so many RVs with hideous bathrooms. Usually, they’re decorated in a dull décor, white walls, and beige countertops. Or they’re over the top with patterned wallpaper embellished by a border of swans and topped off with a pink sink.
Is it really too much to ask to design an RV bathroom with a simple, clean, and modern look?
Since the RV manufacturers don’t seem to want to help me out, I decided to take matters into my own hands. Here’s the story of my most recent bathroom remodel.
Before we begin, I have a confession to make. This is actually our second go-round renovating our RV bathroom.
We have a 1999 Airstream Safari that we bought used and have lived in full-time for the past four years. Before we moved in, the bathroom got a pretty big remodel. We replaced the countertop, the sink, the faucet, the floor, the backsplash, and the toilet. We also painted over the gold leaf-patterned wallpaper (who thought that was a good idea?) and installed some much-needed towel hooks.
In this photo, you can see the original bathroom on the right and the first remodel on the left.
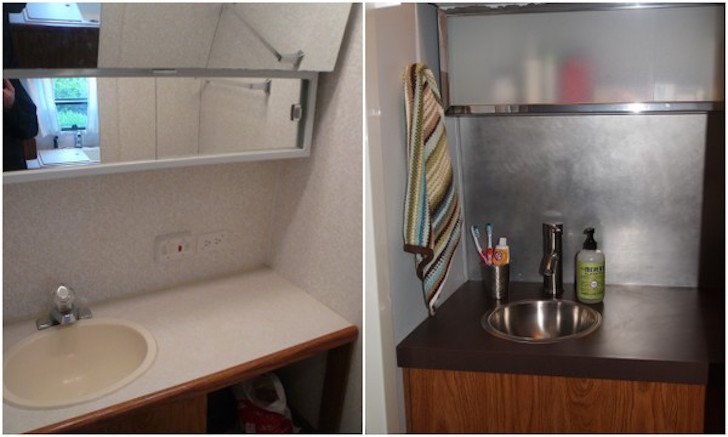
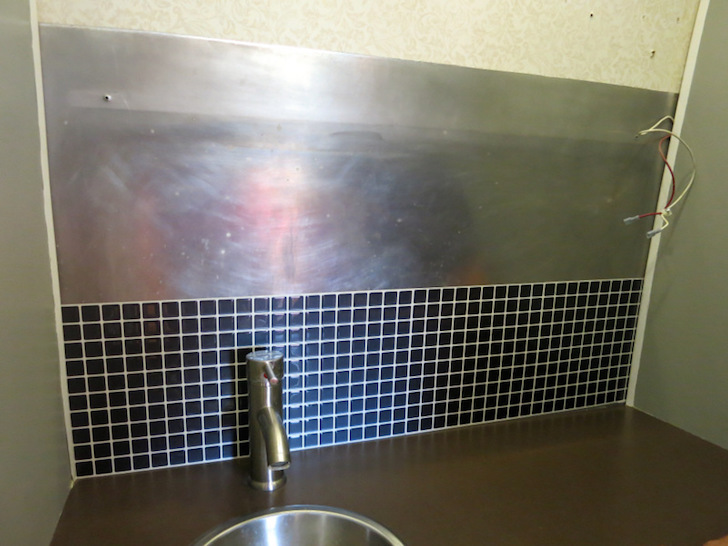
Everything has held up very well except for the backsplash. In an effort to copy the look of more modern Airstreams, we installed a sheet of aluminum behind the sink.
It looked great for a few months. Then the raw aluminum began to tarnish and develop water spots that no amount of cleaning would remove. After seemingly trying everything, we decided the best course of action was to simply cover it up with a new backsplash. While we were at it, I figured why not add a fresh coat of paint and some new accessories?
So yes, this is the story of my bathroom remodel for under $125, but it’s also the story of a bathroom remodel after a bathroom renovation. Hopefully, this will be the last chapter in the story of my tiny RV bathroom.
Step 1: New paint
Materials:
- 1 quart Behr Premium zero VOC paint in Eggshell finish: about $13.00
- Small roller and tray: about $7.00
- Paintbrush: about $3.00
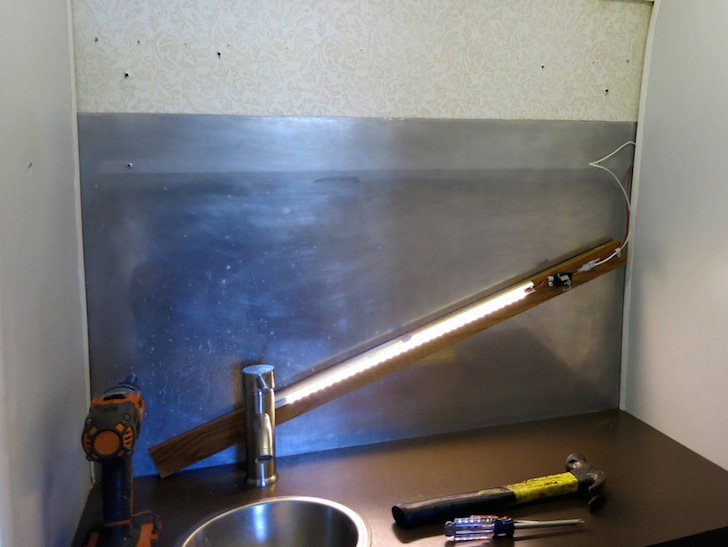
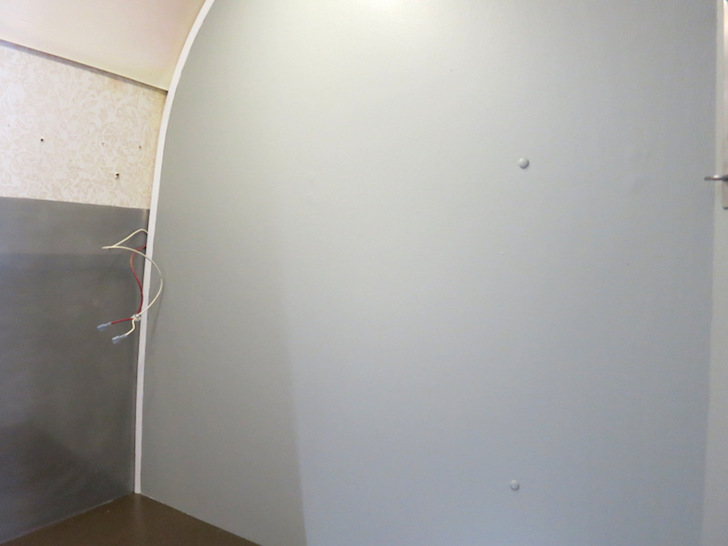
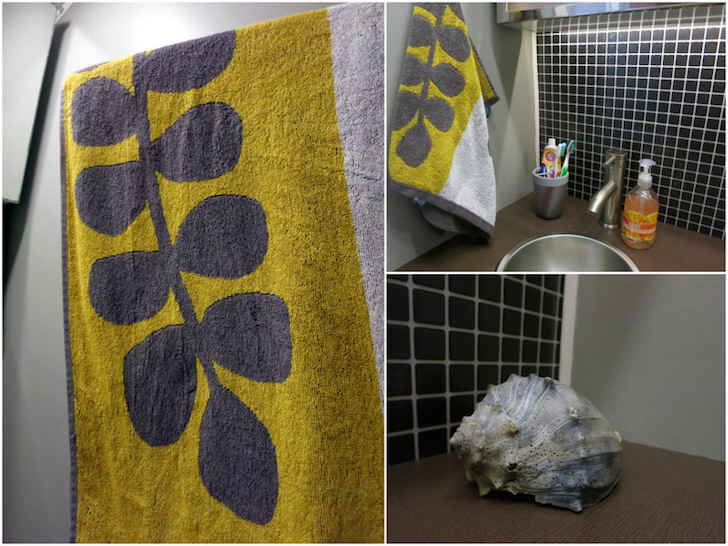
We prepped the bathroom by taking down the two upper cabinets and removing the towel racks. In this photo, you can see the lovely gold patterned wallpaper behind the removed cabinet. The bathroom was originally covered with this pattern!
The wall space in the bathroom is minimal, but there were lots of edges and surfaces to cut around. I didn’t bother taping off anything, but I did spend extra time making sure I didn’t get paint on the counter, ceiling, or white molding around the edge of the backsplash.
It took about an hour to paint the first coat. By the time I was done, the first wall was dry and I was able to go back and give it a quick second coat.
Step 2: New backsplash
Materials:
- 5-8 peel-and-stick backsplash tiles: About $46
- Straight edge & utility knife: $6
Peel-and-stick tiles are a great choice for an RV. Not only are they easy and mess-free to install, but they’re extremely lightweight.
I had seen other RVs with peel and stick tiles and knew that I liked the look. From a distance they are reminiscent of glass tiles, only they require no mortar and no grout. They only add a little extra weight, and there’s no need to worry about breakage as the RV shifts while driving down the road.
The installation of the tiles couldn’t have been simpler. Since we were starting with a clean, flat surface there was no need to prep the existing backsplash any further.
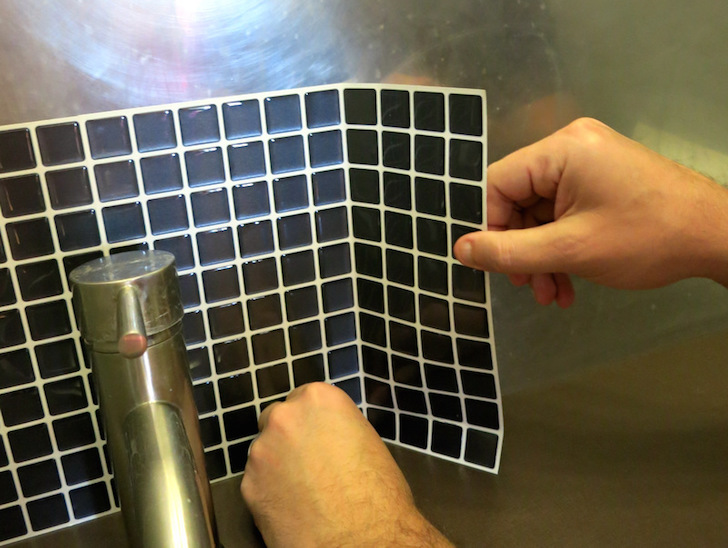
We lined the first tile up with the wall and counter and slowly peeled off the back paper while pressing on the front to make sure it adhered properly.
Each tile has a white “grout line” border. The manufacturer’s instructions say to overlap the border between tiles.
This proved to be fairly easy, and before we knew it we had reached the end of the first row.
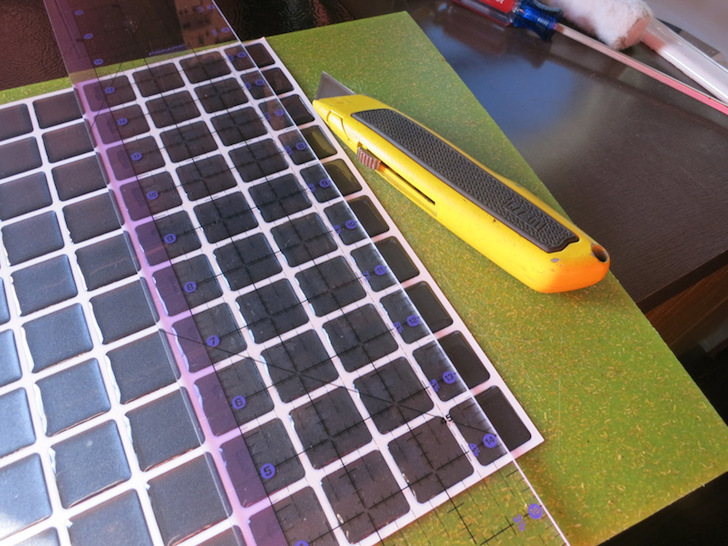
We had to cut one tile at the end of the row to make it fit. We simply measured the amount to be cut off, marked the tile, lined up the mark with a straight edge, and cut the tile with a utility knife. It couldn’t have been simpler.
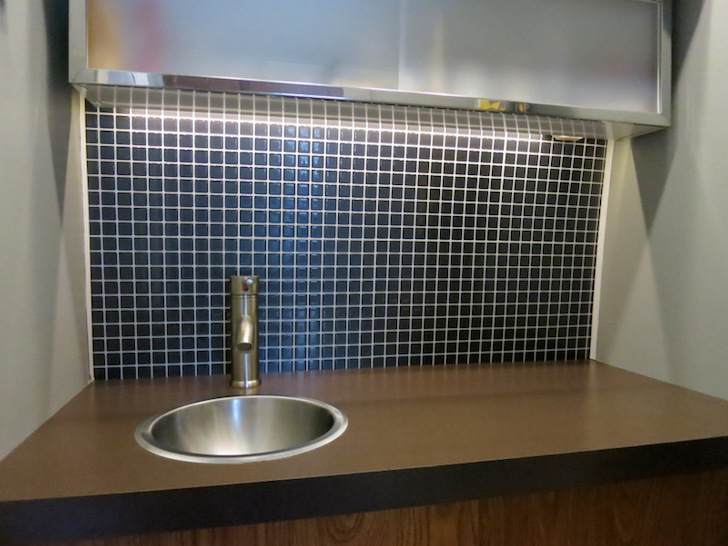
The second level proved no more difficult from the first, and soon we had the entire backsplash finished.
Step 3: Accessories
Materials:
- New towels: Varies
- Toothbrush holder: $7.00
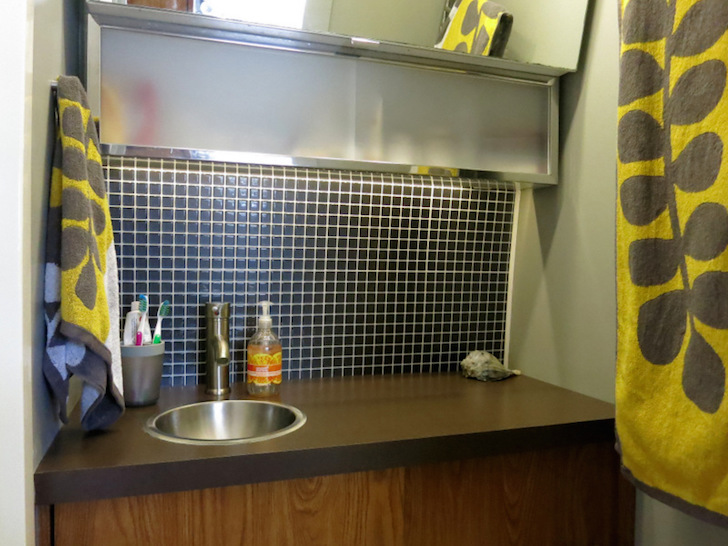
To complete the look, I purchased some new towels and a toothbrush holder. I found towels with a grey background to match the walls and an attractive yellow pattern to add a pop of color.
Finally, I placed a giant sea shell that we recently found on the beach in the corner of the counter for decoration.
Total cost for the project: About $122 (or less, if you already own some of the tools)
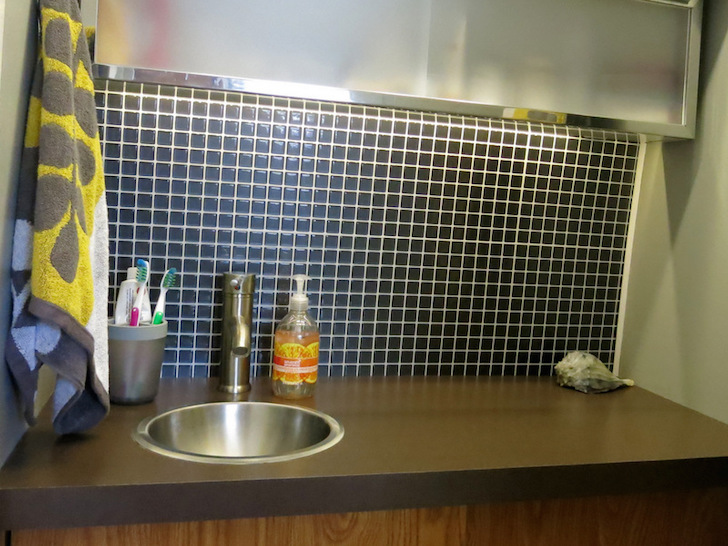
So far, the stick-on backsplash has been holding up very nicely, and I’m thrilled by how easy it is to wipe clean. I love my new bathroom!
For more RV bathroom tips, check out these articles:


Thomas, have you tried Krylon (or some other brand) spray paint for plastics? It is suppose to bond to plastics which would keep it from rubbing off, I would think. Of course the prep work would be extensive for the toilet (I would think). But if you do the sink and it performs to your liking then do the toilet and maybe the tub. Just an idea I have been toying with as my toilet and sink have yellowed also. I hope this suggestion is helpful.
I had similarly upgraded the bathroom in my tiny 1982 Winnebago Warrior, which I live in full time now. I’m slowly restoring or remodeling the entire interior. The problem I’m having is that the bath, not to mention the kitchen, has early-80’s plastic-chic style in pale yellow. The small corner bath sink is a molded unit sitting on the top of a vanity cabinet with it’s plastic door. It shows staining from soap and whatever over the years, making it’s dull yellow finish almost grey in spots. The Aqua Magic IV toilet is similarly discolored, outside and in. I’ve tried 409, Mr. Clean, bleach, even CLR to get rid of the stains to no avail. So my question is if, in your RV’ing experience, you’ve ever run across a product that will coat or paint these items (oh yes, the shower pan too)? Something that will bond with the plastic rather than be easily rubbed off with use. Any ideas are good ideas… except buy a new sink and toilet, as my social security income won’t stretch that far!