
RV’s come in all shapes and sizes. What you end up with for storage space is not always a perfect fit for what you need to store. That simple fact is why folks turn to modifications and remodeling to make their stuff fit like a glove into an imperfectly designed RV interior.
Maybe the dinette is in the wrong place, the light switch is on the wrong wall, or you purchased a family keyboard piano and have no place to store it.
Our friends over at Boyinks4Adventure had this exact dilemma. After buying his family a brand new piano keyboard for Christmas, Michael Boyink was faced with that awkward situation when your shiny new toy does not have anywhere to be stored. Chances are this has happened to you at least once.
So, the Boyink’s decided to remove one of the bunk beds after his two children no longer had a need for it. His solution was to create a two layered shelf that could still be used for storage. It would also have a compartment where the keyboard would easily slide in for safe keeping when not in use.
RV Bunk Conversion
Here’s what the unused bunkbed looked like before the modification. Because the bunk had only a single-layered bottom, the Boyink’s would have to create a second horizontal piece to support the keyboard underneath the bunk rack.
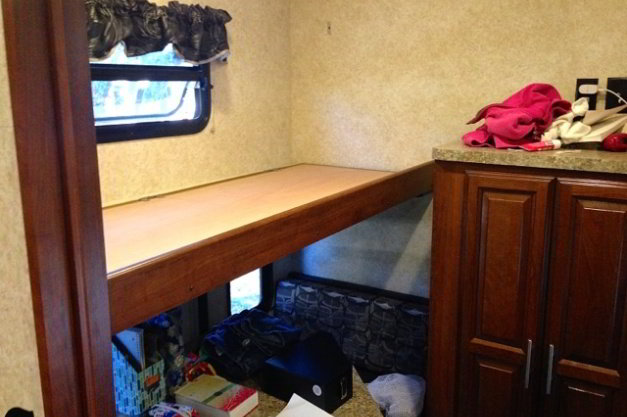
RV Bunk Shelf: Work in Progress
A cabinet maker had quoted him $500 for a unit designed with tall cabinets with doors at either end and shelves inside. It would have been beautiful, but between the cost and last-minute timeline it just wouldn’t have worked out.
After Michael’s attempts at finding someone to make it for him failed, he decided to take matters into his own hands.
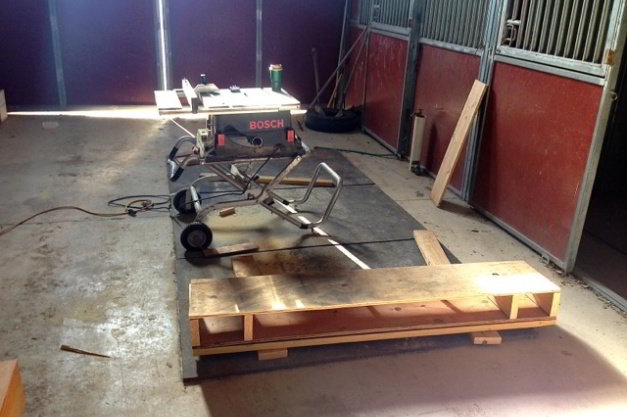
Using a table saw and some other readily available power tools, fabricating the new storage area in his RV was a straight-forward task. The additional supports and plywood base even added to the weight capacity of the original bunk rack.
[asa]B000EDQQJM[/asa]
Using the removed bunk and some wood from a scrap pile, he created a shelf that offered three cubby holes – two on either end and one large one in the middle to house the keyboard. He covered the shelf in carpet and then attached some small hooks on the front so that the keyboard could easily be barricaded off during transit.
Completed RV Bunk Shelf With Keyboard Storage
Once the wood pieces were cut and fitted, Michael covered the entire unit in low-pile carpeting he bought at Home Depot to make the remodel look like it belonged there in the first place!

You may not have a keyboard piano to store but certainly you may have bunk beds that remain unused. If that is the case then you may want to consider this as a starting point for something that suits you! Adding a second horizontal piece under an already existing shelf might make for a great place to store a cat box or to slide in some articles of clothing.
Do you any ideas on how to use vacant space in your RV? Please share them with us in the comments below!


Mike,
Thanks for the clarification. You did a great job, and added a lot of functionality to a simple bed rack. Look forward to your future projects!
Actually I covered the entire unit in low-pile carpeting I bought at Home Depot – I didn’t use any stain. I’m not a great woodworker..;)
The $500 quote was from a cabinet maker, for a unit designed with tall cabinets with doors at either end and shelves inside. It would have been beautiful, but between the cost and last-minute timeline this worked out OK.
Thanks Carol! You’ll be getting an email with new posts as they’re published. Glad to have you as a reader 🙂
I read many articles from facebook looking forward to receiving the newsletter, I’ve already started using your ideas in my RV.